
1. Introduction
Thank you for choosing the Generic 1L Electric Heated Lunch Box. This portable food warmer is designed to provide you with warm meals on the go, whether you are in the office, car, or truck. Please read this manual carefully before using the product to ensure safe and optimal performance. Keep this manual for future reference.
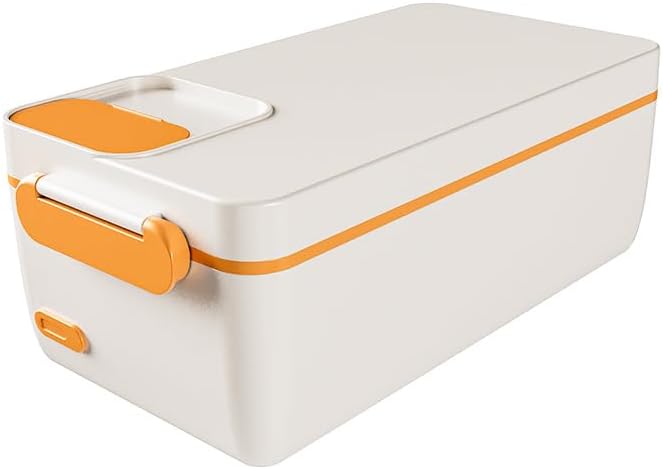
Figure 1.1: The Generic 1L Electric Heated Lunch Box. This image displays the compact and modern design of the lunch box, featuring a white body with orange accents on the lid and handle.
2. Safety Instructions
To prevent injury or damage, always follow these basic safety precautions:
- Do not immerse the main heating unit in water or other liquids.
- Ensure the power cord is UL safety certified and compatible with the power source (12V for car, 24V for truck, 110V for home/office).
- Keep out of reach of children.
- Do not use if the power cord or plug is damaged.
- Always unplug the device when not in use and before cleaning.
- Do not block the ventilation openings during operation.
- Only use the provided components and accessories.
- Do not heat empty.
- Avoid touching hot surfaces during and immediately after heating.
3. Package Contents
Verify that all items are present in your package:
- 1x Electric Heated Lunch Box (Main Unit)
- 1x 1-Liter Stainless Steel Inner Container with Sealed Lid
- 1x 0.45-Liter Vegetable/Salad Box
- 1x Insulated Double-Compartment Lunch Bag with Removable/Adjustable Shoulder Strap
- 1x UL Safety Certified Power Cord (for 110V AC)
- 1x Car/Truck Power Cord (for 12V DC / 24V DC)
- 1x User Manual
4. Setup and Preparation
- Initial Cleaning: Before first use, wash the stainless steel inner container, its lid, and the vegetable/salad box with warm soapy water. Rinse thoroughly and dry. The main heating unit should only be wiped clean with a damp cloth.
- Food Placement: Place your prepared food into the 1-liter stainless steel inner container. If using, place salads or cold items in the 0.45-liter vegetable/salad box. Ensure the sealed lid is securely fastened on the stainless steel container to prevent leaks.
- Assembly: Place the filled stainless steel container and the vegetable/salad box into the main electric lunch box unit. Close the outer lid securely, ensuring the silicone ring provides a tight seal.

Figure 4.1: The lunch box with its internal stainless steel container filled with food. This image shows the main unit open, revealing the inner container with a variety of cooked foods, ready for heating. The orange and white color scheme is visible.
5. Operating Instructions
5.1. Heating Your Meal
- Connect Power:
- For home/office use: Connect the 110V AC power cord to the lunch box and then to a standard wall outlet.
- For car/truck use: Connect the 12V DC (car) or 24V DC (truck) power cord to the lunch box and then to the vehicle's power socket.
- Start Heating: The lunch box features a 40W thermostatic heating element. Once connected, the heating process will begin automatically. Some models may have a single button for activation; refer to the specific controls on your unit.
- Heating Time: Heating time varies depending on the food type, quantity, and initial temperature. Generally, it takes approximately 20-30 minutes to warm a meal to an optimal temperature. The advanced heating system is designed to warm food without requiring a long pre-plug-in wait.
- Real-time Battery Reminder (if applicable): Some models include a real-time battery reminder feature, allowing you to monitor the power status.

Figure 5.1: The lunch box displaying a real-time battery reminder. This image highlights the digital display on the lunch box, indicating battery status, and suggests the convenience of heating meals without immediate power connection.

Figure 5.2: A purple variant of the electric lunch box demonstrating the "one click heating" feature. The image shows the internal stainless steel tray filled with food, emphasizing the ease of use and the 304 stainless steel construction.
5.2. Using the Insulated Lunch Bag
The included double-compartment insulated lunch bag is designed for portability and temperature retention:
- Place the electric lunch box in the main insulated compartment to keep your food warm or cool.
- Use the separate insulated top compartment for additional food items or snacks.
- The liner of the bag is smooth and easy to clean.
- Utilize the removable and adjustable shoulder strap for convenient carrying.

Figure 5.3: The electric lunch box in an outdoor picnic setting. This image illustrates the portability of the device, suggesting its suitability for various environments beyond the typical office or vehicle, and highlights its silent and quick heating capabilities.
6. Cleaning and Maintenance
Proper cleaning and maintenance will extend the life of your electric lunch box:
- Main Unit: Always unplug the lunch box before cleaning. Wipe the exterior of the main heating unit with a damp cloth. Do not rinse under water or immerse in liquids.
- Inner Containers: The stainless steel inner container, its lid, and the vegetable/salad box are dishwasher safe for easy cleaning. Alternatively, wash them with warm soapy water and rinse thoroughly.
- Leak-Proof Seal: The thick silicone ring on the lid helps prevent leaks. Periodically check the silicone ring for any damage or wear and ensure it is properly seated before each use.
- Storage: Store the lunch box in a cool, dry place when not in use.
7. Troubleshooting
| Problem | Possible Cause | Solution |
|---|---|---|
| Lunch box is not heating. |
|
|
| Food is not warm enough. |
|
|
| Leakage from the lunch box. |
|
|
8. Specifications
- Model: 1L Electric Heated Lunch Box
- Brand: Generic
- Capacity: 1 Liter (stainless steel inner container)
- Power: 40W
- Voltage: 110V AC (home/office), 12V DC (car), 24V DC (truck)
- Material: Food-grade PP, 304 Stainless Steel
- Dimensions: Approximately 9 x 7 x 2.7 inches (Package Dimensions)
- Weight: Approximately 1.8 pounds
- Special Features: Thermostatic heating, Leak-proof design, Insulated lunch bag, Real-time battery reminder (on some models)
9. Warranty and Support
This product is manufactured by minerfixes. For warranty information and customer support, please refer to the retailer or manufacturer's website where the product was purchased. Keep your purchase receipt as proof of purchase.
For technical assistance or inquiries, please contact your point of purchase or visit the manufacturer's official support channels.