1. Introduction
The SmallRig CH3 Video Fluid Head is a compact and portable solution designed for smooth and precise camera movements. Weighing only 271g (0.6lb) and supporting a maximum load of 3kg (6.6lb), it is ideal for DSLRs, mirrorless cameras, and small camcorders. This manual provides detailed instructions for the proper setup, operation, and maintenance of your CH3 Video Fluid Head.

Figure 1: Main view of the SmallRig CH3 Video Fluid Head.
2. What's in the Box
- Video Head × 1
- Allen Wrench × 2
- Guarantee Card × 1

Figure 2: Contents included in the SmallRig CH3 package.
3. Features
- Compact and Portable: Weighs only 271g (0.6lb) with a maximum load capacity of 3kg (6.6lb). Its dimensions are 240mm*55mm*85mm, making it highly portable for various shooting scenarios.
- Pan and Tilt Adjustment: Features fixed damping for smooth operation. The head offers a +90°/-70° tilt range and a full 360° swivel for multi-angle video shooting.
- Quick Release Plate: Equipped with an Arca-Swiss compatible quick release plate. This plate supports switching mounting directions and is compatible with camera cages and L-brackets, allowing for rapid transitions between handheld and tripod setups.
- Removable Telescopic Handle: The handle is detachable and can be installed on either the left or right side, as well as on the front or back, enhancing storage convenience and portability.
- Wide Compatibility: The quick-release plate features a 1/4"-20 screw for direct camera or cage mounting. The base has a 3/8" threaded hole for compatibility with most tripods and monopods. An additional anti-deflection 1/4"-20 threaded hole supports accessories like magic arms.

Figure 3: The CH3 head is compact and supports up to 3kg (6.6lb).

Figure 4: Stepless adjustment allows for smooth 360° pan and +90°/-70° tilt.
4. Setup
4.1 Mounting the Video Head to a Tripod
- Ensure your tripod has a 3/8" mounting screw.
- Align the 3/8" threaded hole on the base of the CH3 Video Fluid Head with the tripod's mounting screw.
- Rotate the video head clockwise until it is securely fastened to the tripod.
4.2 Attaching the Quick Release Plate to Your Camera
- Locate the 1/4"-20 screw on the quick release plate.
- Align this screw with the tripod mounting hole on the bottom of your camera or camera cage.
- Use one of the provided Allen wrenches to tighten the screw securely.
4.3 Attaching the Camera to the Video Head
- Ensure the quick release clamp on the video head is open.
- Slide the quick release plate (with your camera attached) into the clamp on the video head.
- Tighten the quick release knob until the camera is firmly secured. The Arca-Swiss design ensures a stable connection.

Figure 5: The integrated Allen wrench facilitates quick adjustments for the quick release plate.
4.4 Installing the Telescopic Handle
- Identify the handle mounting port on the side of the video head.
- Insert the telescopic handle into the port.
- Tighten the handle's locking knob to secure it in place. The handle can be positioned on either side or adjusted for angle.
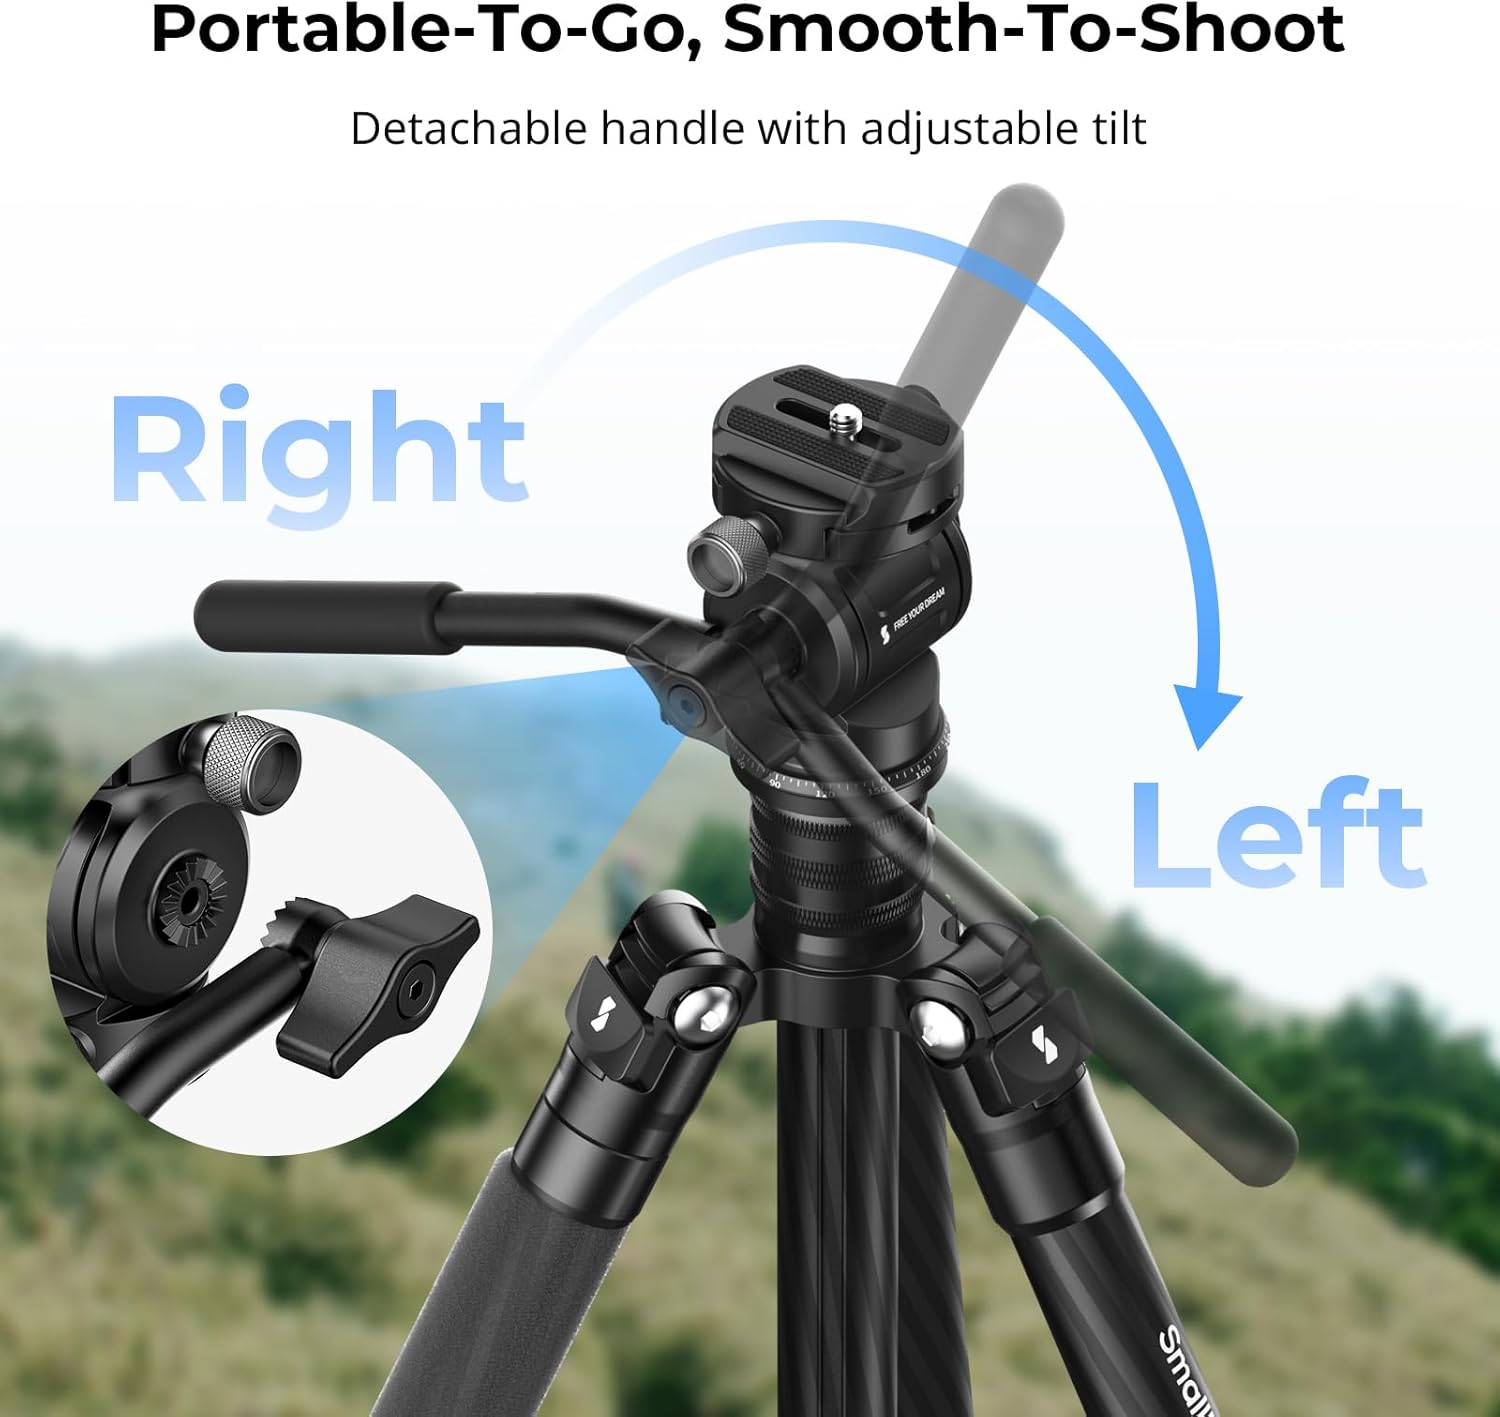
Figure 6: The detachable handle can be adjusted for optimal comfort and control.
5. Operating Instructions
5.1 Adjusting Pan Movement
The CH3 Video Fluid Head offers a 360° panoramic swivel. The fixed damping ensures smooth, controlled horizontal movements. Use the pan tension knob (if present) to fine-tune resistance or lock the head in position. The base features degree markings for precise panoramic shots.

Figure 7: The 360° panning design allows for panoramic photography.
5.2 Adjusting Tilt Movement
The fluid head allows for a tilt range of +90° to -70°. The fixed damping provides consistent resistance for smooth vertical camera movements. Use the tilt locking knob to secure the camera at your desired vertical angle.

Figure 8: Seamless damping control enables steady shots from -70° to 90° tilt.
5.3 Utilizing Accessory Mounts
The anti-deflection 1/4"-20 threaded hole on the side of the head allows for the attachment of various accessories, such as magic arms for monitors or lights. Ensure accessories are securely fastened to prevent accidental detachment.

Figure 9: The anti-deflection 1/4"-20 threaded hole supports multiple accessories.
6. Maintenance
- Cleaning: Wipe the fluid head with a soft, dry cloth after each use to remove dust and debris. Avoid using harsh chemicals or abrasive materials.
- Lubrication: The fluid damping system is factory-sealed and does not require user lubrication.
- Screw Checks: Periodically check all screws and knobs to ensure they are tight. Use the provided Allen wrenches for any adjustments to the quick release plate screw.
- Storage: Store the fluid head in a dry, cool place, away from direct sunlight and extreme temperatures.
7. Troubleshooting
- Sticky Pan/Tilt Movement: Ensure all locking knobs are fully loosened. If the issue persists, check for any obstructions or debris in the movement mechanisms. The fixed damping is designed for smooth resistance, but excessive stickiness may indicate an internal issue.
- Camera Not Secure: Verify that the quick release plate is correctly seated in the clamp and the quick release knob is fully tightened. Ensure the 1/4"-20 screw attaching the plate to your camera is also tight.
- Handle Loose: Re-tighten the locking knob on the telescopic handle. If the handle feels wobbly, ensure it is fully inserted into its mounting port.
8. Specifications
| Feature | Detail |
|---|---|
| Product Dimensions | 9.45 x 3.35 x 2.17 inches (240 x 85 x 55 mm) |
| Item Weight | 9.6 ounces (271 Grams) |
| Max Load Capacity | 3kg / 6.6lb |
| Tilt Range | +90° / -70° |
| Pan Rotation | 360° |
| Quick Release Plate | Arca-Swiss compatible with 1/4"-20 screw |
| Base Mount | 3/8" threaded hole |
| Accessory Mount | 1/4"-20 anti-deflection threaded hole |
| Manufacturer | SmallRig |
| Item Model Number | 4936 |
9. Warranty & Support
For warranty information and customer support, please refer to the included Guarantee Card. You may also visit the official SmallRig website for further assistance and product registration.


