1. Introduction
Thank you for choosing the De'Longhi FLM 6L N electric oven. This appliance is designed to provide reliable and efficient cooking performance for your home. This manual provides essential information for the safe installation, operation, and maintenance of your new 65-liter built-in oven. Please read these instructions carefully before using the appliance and keep them for future reference.
2. Safety Instructions
Always follow basic safety precautions when using electrical appliances to reduce the risk of fire, electric shock, burns, or injury.
- Electrical Safety: Ensure the oven is correctly installed by a qualified technician and connected to a properly grounded electrical outlet. Do not use adapters or extension cords.
- Hot Surfaces: The oven and its accessible parts become very hot during use. Exercise caution to avoid touching heating elements. Keep children away.
- Supervision: Never leave the oven unattended during operation.
- Cleaning: Disconnect the appliance from the power supply before cleaning or performing maintenance.
- Flammable Materials: Do not store flammable materials in or near the oven.
- Ventilation: Ensure adequate ventilation around the appliance as specified in the installation instructions.
- Damage: Do not operate the oven if it has a damaged power cord or plug, or if it is not working properly. Contact authorized service personnel.
3. Product Overview
The De'Longhi FLM 6L N is a 65-liter built-in electric oven featuring multiple cooking functions and a user-friendly control panel.
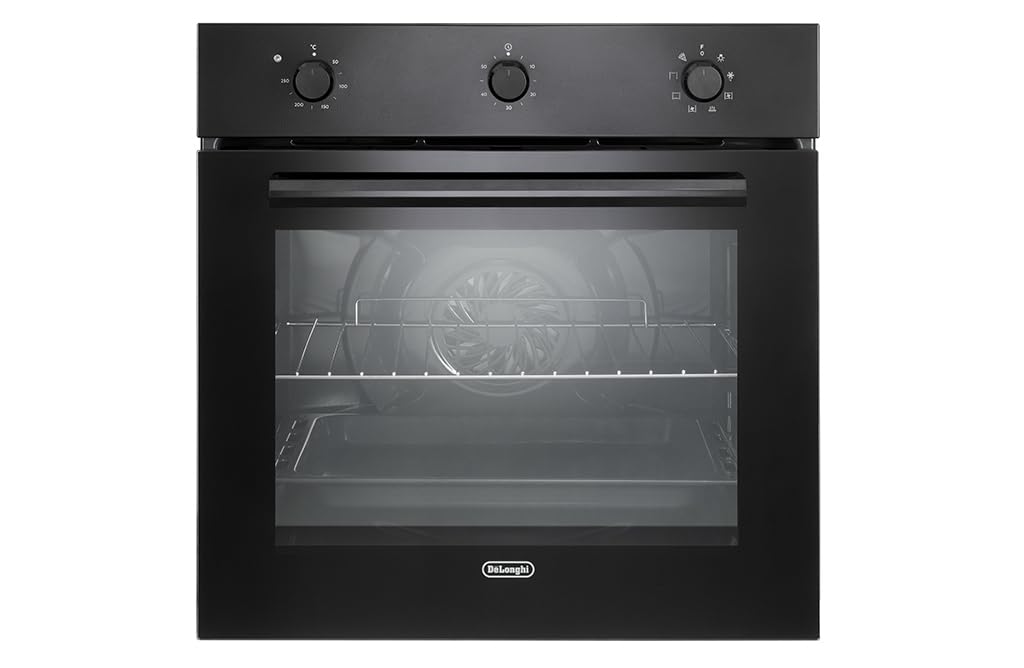
Figure 1: Front view of the De'Longhi FLM 6L N electric oven. This image shows the control panel with knobs, the oven door, and the handle.
Key Components:
- Control Knobs: Used to select cooking functions and set temperature.
- Timer: Mechanical timer for setting cooking duration (up to 60 minutes).
- Oven Cavity: The interior cooking space with a capacity of 65 liters.
- Oven Door: Features a glass panel for viewing food during cooking.
- Oven Light: An internal halogen lamp illuminates the oven cavity.
- Accessories: Includes oven racks and a baking tray (specific accessories may vary).
4. Setup and Installation
This oven is designed for built-in installation. Installation should only be performed by a qualified technician in accordance with local safety regulations and the provided installation template (not included in this manual).
4.1 Pre-Installation Checks
- Unpack the oven and check for any transport damage. Do not install a damaged appliance.
- Ensure the cabinet opening dimensions match the oven's requirements.
- Verify that the electrical supply meets the specifications listed on the appliance rating plate.
4.2 Electrical Connection
The oven must be connected to the mains electricity supply by a qualified electrician. Ensure the appliance is properly earthed. The power cord should not be trapped or bent during installation.
4.3 Mounting the Oven
- Carefully slide the oven into the prepared cabinet opening.
- Secure the oven to the cabinet using the screws provided, typically through holes in the oven frame.
- Ensure the oven is level and stable.
5. Operating Instructions
5.1 First Use
- Before first use, remove all packaging materials and accessories from the oven cavity.
- Clean the interior of the oven with a damp cloth and mild detergent.
- Heat the empty oven at maximum temperature for approximately 30 minutes to burn off any manufacturing residues. Ensure the kitchen is well-ventilated during this process.
5.2 Setting the Timer
The oven features a mechanical timer with a maximum setting of 60 minutes. To set the timer, rotate the timer knob clockwise to the desired cooking duration. The oven will switch off automatically when the set time has elapsed, and an audible signal will sound.
5.3 Selecting Cooking Functions
The FLM 6L N is a multi-function oven. Rotate the function selector knob to choose your desired cooking mode. Common functions include:
- Conventional Cooking: Heat from top and bottom elements. Ideal for baking cakes, pastries, and roasting meats.
- Forced Convection (Fan-Assisted): Heat distributed evenly by a fan. Suitable for cooking multiple dishes simultaneously on different levels, and for faster cooking.
- Grill: Intense heat from the top element for grilling and browning.
- Oven Light: Activates the internal halogen lamp to illuminate the oven cavity without heating.
5.4 Setting Temperature
After selecting a cooking function, rotate the temperature control knob to set the desired temperature. The oven will begin to heat up to the selected temperature.
6. Maintenance and Cleaning
Regular cleaning and maintenance will ensure the longevity and optimal performance of your oven. Always disconnect the oven from the power supply before cleaning.
6.1 General Cleaning
- Clean the interior and exterior surfaces with a soft cloth and warm soapy water. Avoid abrasive cleaners, scourers, or harsh chemicals that can damage surfaces.
- For stubborn stains, use a specialized oven cleaner, following the product's instructions carefully. Ensure adequate ventilation.
- Clean oven racks and trays separately in warm soapy water.
6.2 Replacing the Oven Light
The oven light is a halogen lamp. To replace it:
- Ensure the oven is cool and disconnected from the power supply.
- Unscrew the protective glass cover of the lamp.
- Carefully remove the old halogen bulb.
- Insert a new halogen bulb of the same type and wattage (refer to specifications for details). Avoid touching the new bulb directly with bare hands; use a cloth.
- Screw the protective glass cover back into place.
7. Troubleshooting
Before contacting customer service, please check the following common issues and solutions:
| Problem | Possible Cause | Solution |
|---|---|---|
| Oven does not heat up. | No power supply; timer not set; function/temperature not selected. | Check power connection and circuit breaker. Ensure timer is set and function/temperature knobs are correctly positioned. |
| Oven light not working. | Bulb is faulty or loose. | Replace the oven light bulb (refer to Section 6.2). |
| Uneven cooking. | Incorrect temperature or cooking function; overloaded oven; improper placement of food. | Adjust temperature/function. Avoid overcrowding the oven. Use appropriate oven rack positions. |
| Excessive smoke during cooking. | Food spills or grease residue in the oven. | Clean the oven thoroughly before use. Use baking trays to catch drips. |
8. Specifications
Technical specifications for the De'Longhi FLM 6L N electric oven:
| Brand | De'Longhi |
| Model Number | FLM6LN |
| Type | Electric Oven, Multifunction |
| Installation Type | Built-in |
| Total Oven Capacity | 65 Liters |
| Color | Black |
| Control Type | Knob |
| Timer | Mechanical, up to 60 minutes |
| Energy Efficiency Class | A |
| Energy Consumption (Conventional) | 0.78 kWh |
| Energy Consumption (Forced Convection) | 0.98 kWh |
| Lamp Type | Halogen |
| Manufacturer | Elba Italy SpA |
| ASIN | B0DKJKLCZT |

Figure 2: Energy efficiency label indicating Class A for the De'Longhi FLM 6L N oven.
9. Warranty and Support
This product comes with a manufacturer's warranty. Please refer to the separate warranty document provided with your purchase for detailed terms and conditions, including warranty period and coverage.
For technical assistance, spare parts, or service inquiries, please contact De'Longhi customer support. You can typically find contact information on the De'Longhi official website or in the warranty documentation.
De'Longhi Official Website: www.delonghi.com


