1. Introduction
Thank you for choosing the Dystler Vanity Makeup Desk. This manual provides detailed instructions for assembly, operation, maintenance, and troubleshooting to ensure you get the most out of your new vanity. Please read this manual thoroughly before assembly and use, and retain it for future reference.
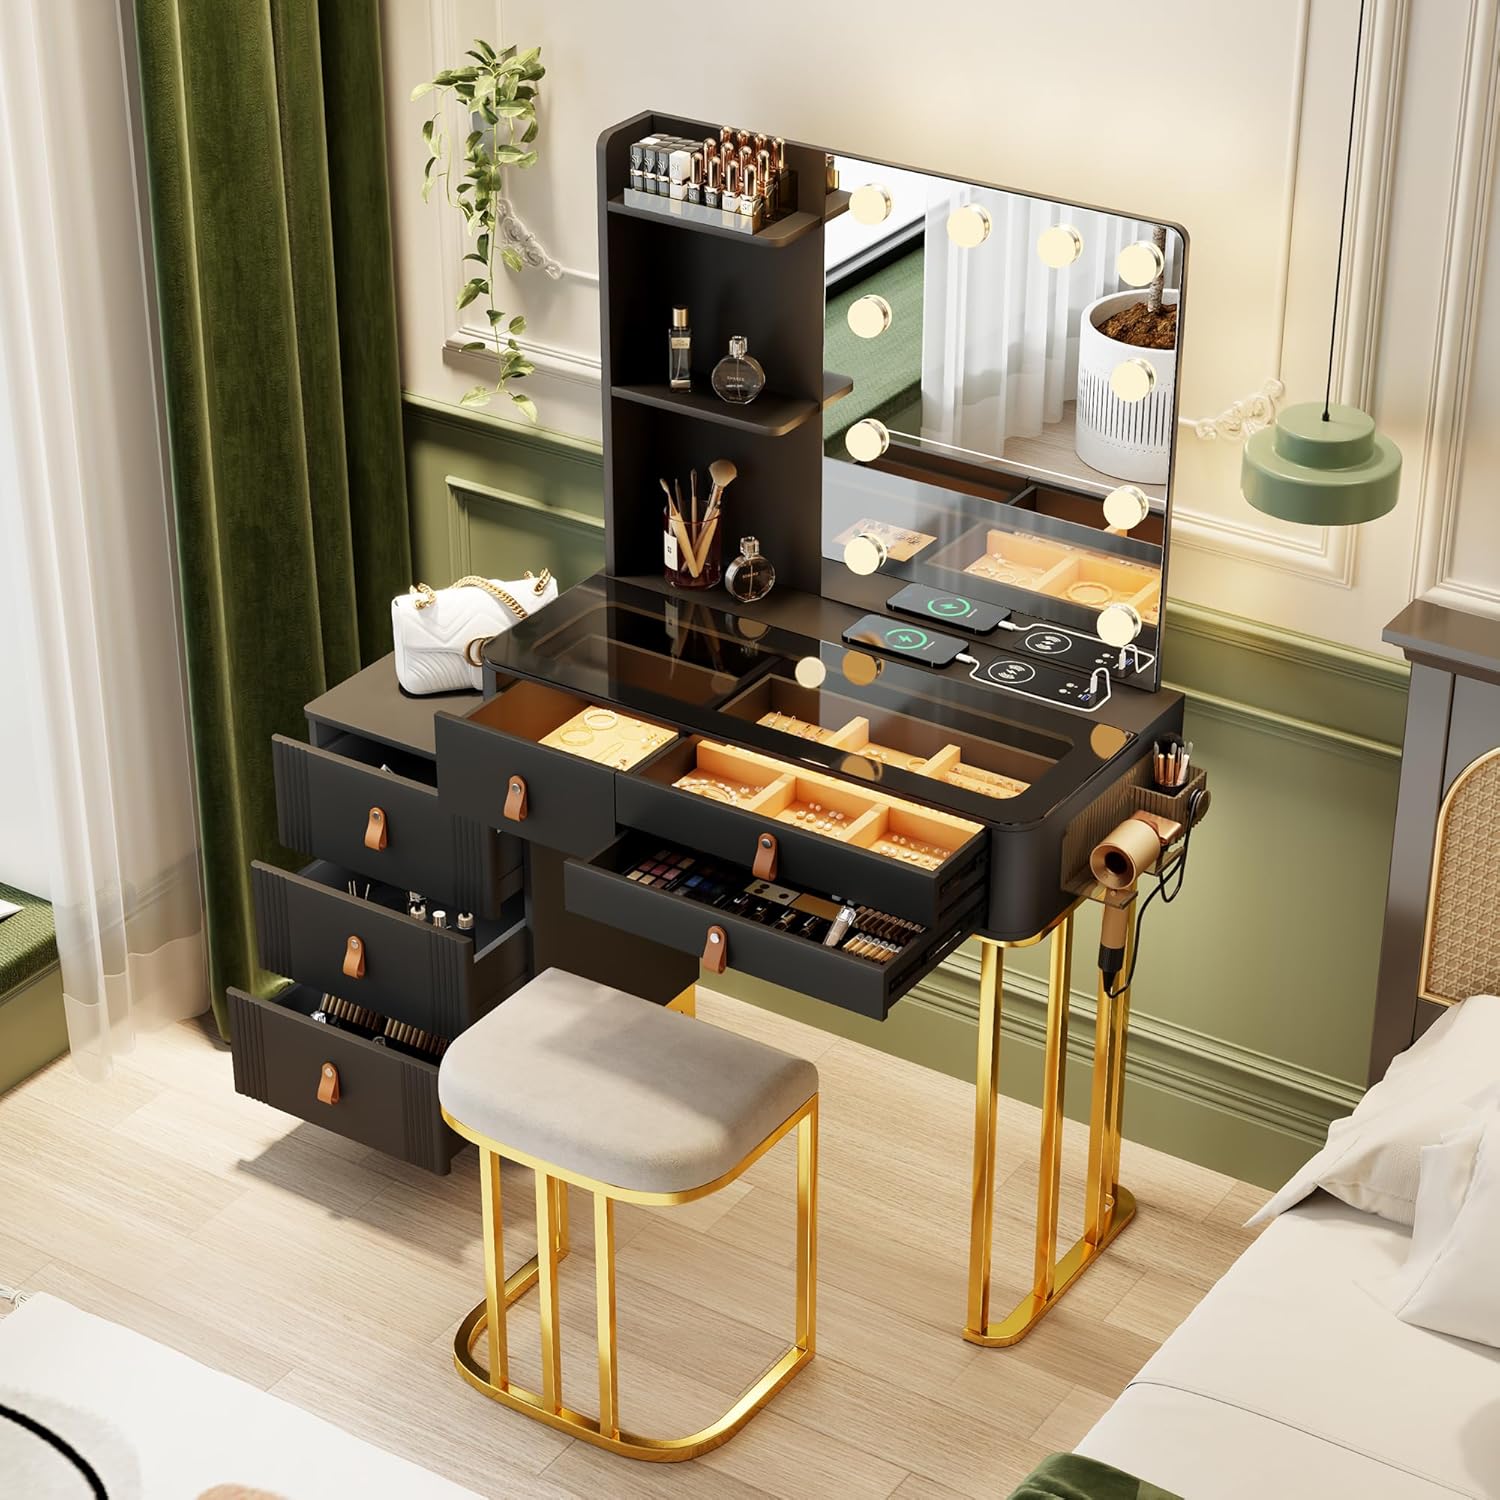
Image 1.1: Fully assembled Dystler Vanity Makeup Desk in a room setting, showcasing its sleek black design, illuminated mirror, and storage features.
2. Safety Information
Please observe the following safety precautions to prevent injury or damage to the product:
- Ensure all parts are present and undamaged before assembly. Do not proceed with assembly if any parts are missing or broken.
- Assemble the vanity on a soft, clean surface to prevent scratches.
- Do not overtighten screws during assembly to avoid damaging the material.
- Keep small parts and packaging materials away from children and pets.
- Do not place excessively heavy items on the vanity or in the drawers.
- Avoid direct contact of liquids with electrical components (lights, charging station).
- For stability, ensure the vanity is placed on a flat, level surface.
3. Package Contents
Please verify that all components listed below are included in your package:
- Vanity Desk Frame (Engineered Wood)
- Mirror with Integrated LED Lights
- Stool (if included in your model)
- Drawers and Jewelry Cabinets
- Tempered Glass Desktop
- Assembly Hardware (screws, connectors, tools)
- Power Adapter for Lights and Charging Station
- Instruction Manual
4. Setup and Assembly
Follow these step-by-step instructions for proper assembly. It is recommended to have two people for certain steps.
- Unpack and Identify Parts: Carefully remove all components from the packaging. Lay them out on a soft, clean surface to prevent scratches. Refer to the included parts list to identify each piece.
- Assemble the Base Frame: Connect the main desk frame components using the provided hardware. Ensure all connections are secure but do not fully tighten until the entire frame is assembled.
- Install Drawers and Cabinets: Insert the drawer slides into the designated slots on the desk frame. Assemble the drawers and slide them into place. The storage cabinet can be installed on either the left or right side of the main desk, depending on your preference.
- Attach the Mirror: Securely attach the mirror unit to the main desk frame. Ensure the mirror is stable and properly aligned.
- Place the Tempered Glass Top: Carefully place the tempered glass desktop onto the vanity. This provides a durable and scratch-resistant surface.
- Connect Power: Plug the power adapter into the designated port on the vanity and then into a wall outlet.
- Final Tightening: Once all components are in place and aligned, carefully tighten all screws and fasteners to ensure the vanity is stable and secure.

Image 4.1: The Dystler Vanity Makeup Desk showing the reversible storage cabinet, which can be positioned on either the left or right side of the main desk.
5. Operating Instructions
5.1. Hollywood Lighting System
The vanity is equipped with 10 dimmable LED bulbs offering three light modes for optimal makeup application.
- Power On/Off: Locate the touch switch on the mirror. Tap once to turn the lights on or off.
- Change Color Mode: With the lights on, tap the touch switch repeatedly to cycle through the three color modes: Warm Light, Natural Light, and Cold Light.
- Adjust Brightness: To dim or brighten the lights, press and hold the touch switch. The brightness will adjust smoothly from 0% to 100%. Release when the desired brightness is achieved.

Image 5.1: Visual representation of the three lighting modes (Cold, Natural, Warm) and the brightness adjustment feature of the vanity mirror.
5.2. Smart Human Sensor Lighting
The vanity mirror features motion-activated LED lights for hands-free convenience.
- Automatic Activation: The lights will automatically turn on when you approach the vanity (within approximately 2 meters) and turn off when you leave.
- Energy Saving: This feature ensures lights are only active when needed, conserving energy.
5.3. Wireless Charging & USB/Type-C Ports
The vanity includes a built-in wireless charging pad and USB/Type-C ports for convenient device charging.
- Wireless Charging: Place your Qi-compatible device directly on the wireless charging pad located on the glass desktop. Ensure the device is centered for optimal charging.
- USB & Type-C Ports: Use the integrated USB and Type-C ports to charge other electronic devices with appropriate cables.

Image 5.2: Close-up of the vanity's smart module, highlighting the wireless charging pad and the USB and Type-C charging ports.
5.4. Smart Storage & Organization
The vanity features multiple storage options to keep your items organized and dust-free.
- Drawers: Utilize the four large drawers for makeup, skincare products, and other accessories.
- Jewelry Cabinets: The two dedicated jewelry cabinets are designed to hold and protect your jewelry.
- Anti-Scratch Lining: The interior lining of the drawers and cabinets helps protect your items from scratches.

Image 5.3: The vanity's visibility drawers and specialized jewelry organizers, designed for easy storage and retrieval of items.
6. Maintenance
To keep your Dystler Vanity Makeup Desk in optimal condition, follow these maintenance guidelines:
- Cleaning the Surface: Wipe the tempered glass desktop and engineered wood surfaces with a soft, damp cloth. Avoid abrasive cleaners or harsh chemicals that could damage the finish.
- Mirror Care: Clean the mirror with a glass cleaner and a lint-free cloth. Do not spray cleaner directly onto the mirror, especially near the light bulbs or electrical components.
- Drawer Maintenance: Periodically check drawer slides for smooth operation. If they become stiff, a small amount of silicone lubricant can be applied.
- Electrical Components: Ensure all electrical connections are secure. Do not attempt to repair or modify the lighting or charging systems yourself. Contact customer support if issues arise.
7. Troubleshooting
If you encounter any issues with your vanity, refer to the following common problems and solutions:
| Problem | Possible Cause | Solution |
|---|---|---|
| Lights not turning on. | Power adapter not connected; loose connection; faulty bulb. | Check if the power adapter is securely plugged into the vanity and the wall outlet. Ensure the touch switch is activated. If a bulb is faulty, contact customer support for replacement. |
| Wireless charging not working. | Device not Qi-compatible; device not properly aligned; foreign objects on pad. | Ensure your device supports Qi wireless charging. Reposition the device on the charging pad to ensure proper alignment. Remove any metal objects or thick cases from the charging area. |
| Drawers are stiff or difficult to open/close. | Overloaded drawer; debris in slides; misaligned slides. | Reduce the weight in the drawer. Check for and remove any debris in the drawer slides. If slides are misaligned, gently adjust them or re-assemble the drawer. |
| Vanity feels unstable. | Uneven floor; loose assembly hardware. | Ensure the vanity is on a flat, level surface. Check and tighten all assembly screws and fasteners. |
If the problem persists after trying these solutions, please contact Dystler customer support.
8. Specifications

Image 8.1: Detailed product information graphic, including key dimensions and material highlights.
| Feature | Detail |
|---|---|
| Brand | Dystler |
| Model Number | LY-85016 |
| Product Dimensions | 15.75"D x 31.5"W x 54"H |
| Item Weight | 100.3 pounds |
| Frame Material | Engineered Wood |
| Furniture Finish | Toughened Glass Tabletop |
| Lighting | 10 Dimmable LED Bulbs (Warm/White/Natural modes) |
| Charging Features | Wireless Charger, USB Port, Type-C Port |
| Special Features | Smart Human Sensor Lighting, Reversible Storage Cabinet |
| Assembly Required | Yes |
| UPC | 730177568873 |
9. Warranty and Support
Dystler provides customer support for any issues or inquiries regarding your vanity makeup desk.
- Warranty: Please refer to your purchase documentation for specific warranty details.
- Customer Support: For assistance with assembly, missing parts, or troubleshooting, please click the "contact seller" option on the platform where you purchased the product.
- Returns: This product is eligible for 30-day easy returns.


