
1. Introduction
This manual provides essential information for the safe and effective operation, setup, maintenance, and troubleshooting of your Menegotti MMR1300 Rotary Hammer Breaker. Please read all instructions carefully before using the tool to ensure proper function and to prevent injury or damage. Keep this manual for future reference.
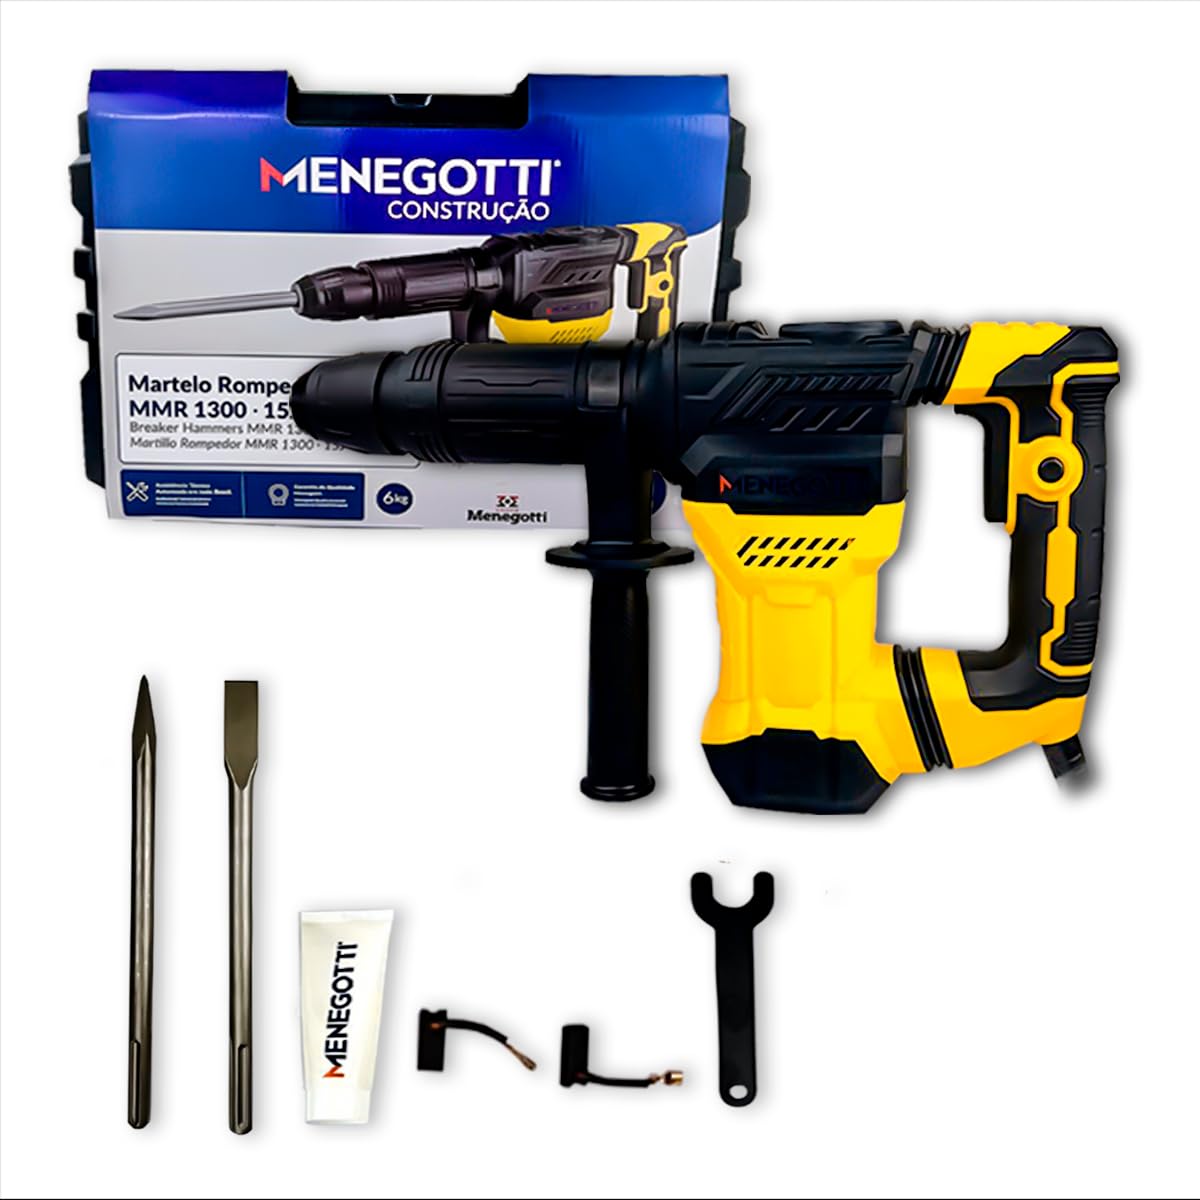
Figure 1: Menegotti MMR1300 Rotary Hammer Breaker. This image shows the overall design of the hammer breaker, highlighting its robust construction and ergonomic handles.
2. Safety Instructions
Always follow basic safety precautions to reduce the risk of fire, electric shock, and personal injury.
- Personal Protective Equipment: Always wear safety glasses, hearing protection, and heavy-duty gloves when operating the tool. A dust mask is recommended for dusty environments.
- Work Area: Keep the work area clean and well-lit. Cluttered or dark areas invite accidents. Ensure proper ventilation.
- Electrical Safety: Do not expose power tools to rain or wet conditions. Avoid body contact with earthed or grounded surfaces. Do not abuse the cord.
- Tool Operation: Do not force the tool. Use the correct tool for your application. Disconnect the plug from the power source before making any adjustments, changing accessories, or storing power tools.
- Stability: Maintain proper footing and balance at all times.
- Vibration Reduction: The tool features a vibration reduction system. However, prolonged use can still cause discomfort. Take regular breaks.
3. Package Contents
Verify that all items listed below are present in the package:
- 1x Menegotti MMR1300 Rotary Hammer Breaker
- 1x SDS MAX Pointed Chisel (18x320 mm)
- 1x SDS MAX Flat Chisel (25x320 mm)
- 1x Two-pin Wrench
- 2x Carbon Brushes
- 1x Lubrication Tube
- 1x Carrying Case
- 1x User Manual (this document)
4. Setup
4.1. Attaching the Auxiliary Handle
The auxiliary handle provides additional control and stability. Loosen the handle clamp, position the handle to your desired angle, and tighten the clamp securely.
4.2. Installing SDS MAX Accessories
The MMR1300 features an SDS MAX chuck for quick and secure accessory changes.
- Clean the shank of the chisel or bit.
- Apply a small amount of grease from the lubrication tube to the shank.
- Insert the accessory into the chuck until it clicks into place. Pull on the accessory to ensure it is securely locked.
- To remove, pull back the chuck collar and pull out the accessory.

Figure 2: SDS MAX Chuck. This image illustrates the SDS MAX chuck mechanism, designed for quick and secure accessory changes, ensuring efficiency and durability.
5. Operating Instructions
5.1. Power Connection
Ensure the tool is connected to a 127V power supply. The MMR1300 operates on a 60Hz single-phase motor.
5.2. Starting and Stopping the Tool
To start the tool, press the dynamic trigger. To stop, release the trigger. The tool is equipped with a safety lock for continuous operation.

Figure 3: Dynamic Trigger and Safety Lock. This image highlights the dynamic trigger for precise power control and the safety lock mechanism for enhanced control during use.
5.3. Demolition Applications
The Menegotti MMR1300 is designed for heavy-duty demolition tasks.
- Concrete Demolition: Use appropriate chisels for breaking concrete slabs, foundations, or walls.
- Tile Removal: Flat chisels are effective for removing floor or wall tiles.
- Masonry Work: Suitable for breaking bricks, blocks, and other masonry materials.
- Excavations: Can be used for light excavation work in hard soil or compacted ground.

Figure 4: Demolition Applications. This image demonstrates the MMR1300 being used for concrete demolition, illustrating its primary applications including concrete demolition, tile removal, masonry work, and excavations.
Apply steady, firm pressure. Allow the tool's impact mechanism to do the work. Do not lean excessively on the tool, as this can reduce efficiency and increase user fatigue.
6. Maintenance
Regular maintenance ensures the longevity and optimal performance of your tool.
6.1. Cleaning
After each use, clean the tool thoroughly. Remove dust and debris from the ventilation openings. Do not use water or chemical cleaners.

Figure 5: Air Outlet for Cooling. This image shows the air outlet designed to dissipate heat and maintain the hammer breaker at an ideal temperature, ensuring durability and performance during continuous operation.
6.2. Lubrication
Periodically lubricate the SDS MAX chuck and the accessory shanks as described in the setup section.
6.3. Carbon Brush Replacement
The carbon brushes are wear parts and need to be replaced when worn. Access the carbon brush holders using a screwdriver. Replace both brushes at the same time. Refer to the included spare brushes.

Figure 6: Carbon Brush Access. This image indicates the location for carbon brush replacement, facilitating quick maintenance during intense work.
6.4. Storage
Store the tool in its carrying case in a dry, secure place, out of reach of children.
7. Troubleshooting
| Problem | Possible Cause | Solution |
|---|---|---|
| Tool does not start | No power supply Worn carbon brushes Faulty power cord | Check power connection and outlet Replace carbon brushes Inspect and replace power cord if damaged (by qualified personnel) |
| Reduced impact force | Worn accessory Insufficient lubrication Internal wear | Replace chisel/bit Lubricate chuck and accessory shank Contact service center |
| Excessive vibration | Damaged accessory Internal component issue | Replace accessory Contact service center |
| Overheating | Blocked ventilation Prolonged heavy use | Clean ventilation openings Allow tool to cool down; reduce load |
8. Specifications
| Feature | Specification |
|---|---|
| Model | MMR1300 |
| Brand | Menegotti |
| Voltage | 127 V |
| Power | 1300 W |
| Impact Force | 15 Joules |
| Impact Frequency | 3,900 ipm |
| Weight | 6 kg (5755 Grams) |
| Material | Reinforced Metallic Body |
| Chuck Type | SDS MAX |
| Dimensions (L x W x H) | 47 x 12 x 32 cm |
| Special Features | High durability, Ergonomic handle, Vibration reduction system |

Figure 7: Product Dimensions. This image illustrates the key dimensions of the hammer breaker, showing a length of approximately 43cm and a height of 24cm.

Figure 8: Motor and Impact Mechanism. This image provides an internal view, highlighting the 1300W motor and the 15 Joules impact energy, indicating high impact frequency and a 6 kg weight.
9. Warranty and Support
9.1. Warranty Information
This Menegotti MMR1300 Rotary Hammer Breaker comes with a 6-month factory warranty against manufacturing defects from the date of purchase. Please retain your proof of purchase for warranty claims.

Figure 9: 6-Month Factory Warranty. This image displays a seal indicating a 6-month quality guarantee from the factory.
9.2. Customer Support
For technical assistance, spare parts, or warranty claims, please contact your authorized Menegotti dealer or service center. Do not attempt to repair the tool yourself, as this may void the warranty and pose safety risks.