
EcoSolLi 3KW-WiFi
EcoSolLi 3000W 24V Pure Sine Wave Solar Inverter with 60A MPPT Controller User Manual
Model: 3KW-WiFi | Brand: EcoSolLi
1. Introduction
This manual provides essential information for the safe and efficient operation of your EcoSolLi 3000W 24V Pure Sine Wave Solar Inverter with a built-in 60A MPPT Controller. This device is designed to convert 24V DC power from batteries and solar panels into 110V/120V AC power, suitable for various applications including homes, RVs, and off-grid systems. Please read this manual thoroughly before installation and use to ensure proper functionality and safety.
2. Safety Instructions
Adherence to these safety guidelines is crucial to prevent personal injury and damage to the inverter or connected equipment.
- Qualified Personnel: Installation and maintenance should only be performed by qualified personnel familiar with electrical systems and safety standards.
- Ventilation: Ensure adequate ventilation around the inverter to prevent overheating. Do not block ventilation openings.
- Environment: Install the inverter in a dry, cool, and dust-free environment. Avoid direct sunlight, moisture, and corrosive substances.
- Grounding: The inverter must be properly grounded to prevent electric shock.
- Battery Safety: Work with batteries carefully. Wear protective eyewear. Do not short-circuit battery terminals. Ensure correct battery voltage (24V) and polarity.
- Disconnect Power: Always disconnect all power sources (AC input, solar panels, batteries) before performing any wiring or maintenance.
- Load Capacity: Do not exceed the inverter's rated output power of 3000W.
- Emergency: In case of smoke, unusual odors, or abnormal operation, immediately disconnect all power sources and contact technical support.
3. Product Overview
The EcoSolLi 3000W Solar Inverter is a hybrid unit combining an inverter, solar charger, and battery charger. It features a pure sine wave output for sensitive electronics and a 60A MPPT controller for efficient solar energy harvesting.
3.1 Main Unit and Components
The inverter unit includes an LCD display for real-time data and settings, LED indicators, and various connection ports.
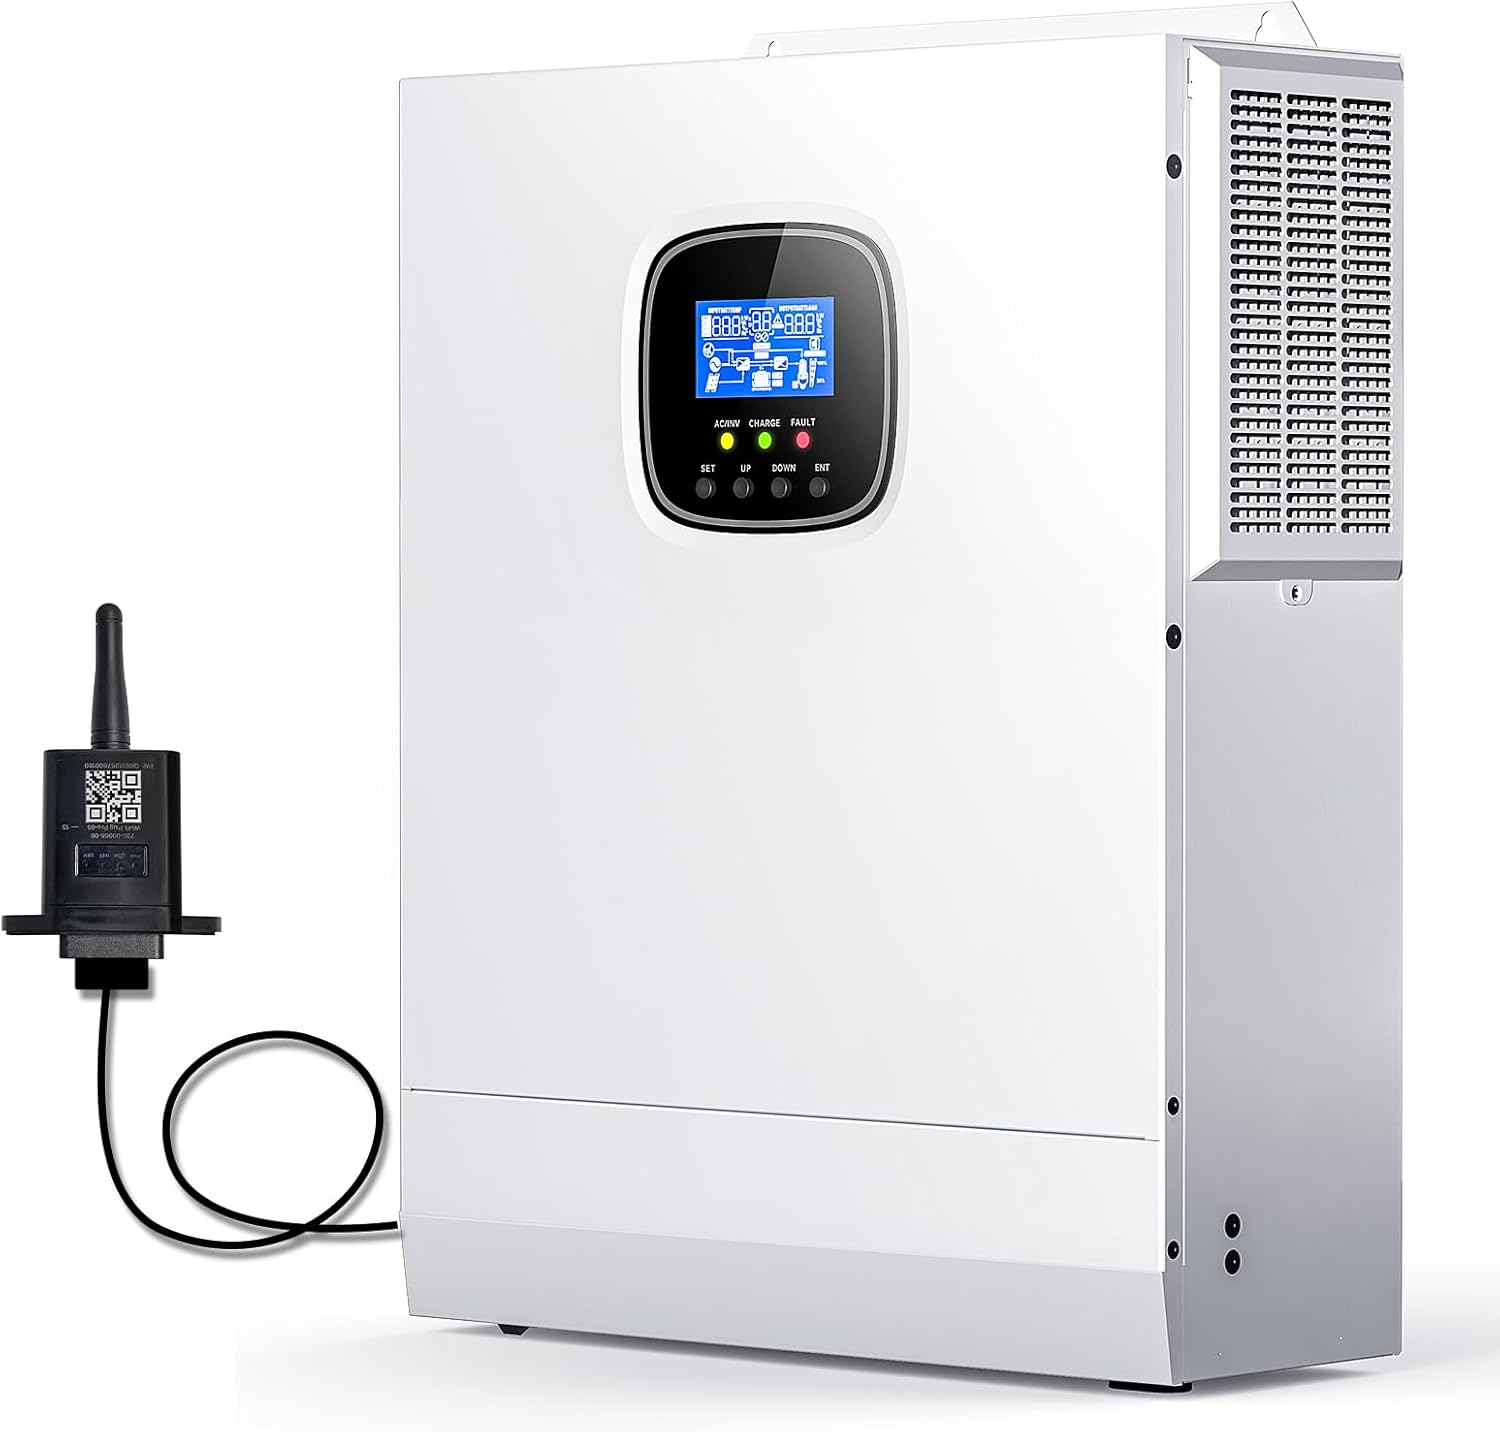
Figure 3.1: Front view of the EcoSolLi 3000W Solar Inverter with attached WiFi module.
3.2 Key Features
- Pure Sine Wave Output: Ensures compatibility and safety for all types of electronic loads.
- Integrated 60A MPPT Controller: Maximizes solar power harvest with up to 99% efficiency.
- Flexible Charging Modes: Supports Solar Only, Mains Priority, Solar Priority, and Mains & Solar hybrid charging.
- Dual Output Modes: Mains Bypass and Inverter Output.
- LCD Display & LED Indicators: Provides real-time system data and status.
- WiFi Port: Enables remote monitoring via a dedicated application.
- Comprehensive Protection: Includes safeguards against short circuits, over/under voltage, overloads, reverse polarity, over-temperature, and overcharge.

Figure 3.2: High-definition LCD display for viewing real-time data and setting parameters.
4. Setup and Installation
4.1 Unpacking and Inspection
Upon receiving the inverter, carefully unpack it and inspect for any shipping damage. Report any damage to your supplier immediately. Ensure all components listed in the packing list are present.
4.2 Mounting the Inverter
Choose a suitable location for mounting the inverter. It should be:
- Indoors, protected from direct sunlight, rain, and moisture.
- Well-ventilated to allow for heat dissipation. Maintain at least 20 cm (8 inches) clearance from other objects.
- Mounted vertically on a solid surface capable of supporting its weight.
- Away from flammable materials and corrosive gases.
4.3 Wiring Connections
All wiring must comply with local and national electrical codes. Use appropriate wire gauges for all connections. Refer to the connection diagram below for proper wiring sequence.

Figure 4.1: Detailed connection diagram for the inverter.
- Battery Connection: Connect the 24V battery bank to the BAT+ and BAT- terminals. Ensure correct polarity. The inverter is compatible with 24V Lithium, Lead-Acid (Sealed, AGM, Gel, Flooded) batteries.
- Solar Panel Connection: Connect your solar panels to the PV+ and PV- terminals. Observe the maximum PV open circuit voltage of 100Vdc and MPPT voltage range of 30-85Vdc. Max PV input power is 1600W.
- AC Input Connection: Connect the mains power or a generator to the AC IN terminals. Input voltage range is 90-140Vac. Max AC charging current is 0-63A.
- AC Output Connection: Connect your home loads to the AC OUT terminals. The inverter provides 3000W of AC output power.
- WiFi Module Installation: Insert the provided WiFi module into the designated port for remote monitoring capabilities.
4.4 Battery Compatibility
The inverter supports various 24V battery types, including:
- Lithium Batteries
- Lead-Acid Batteries (Sealed, AGM, Gel, Flooded)
The inverter features an activation function for dormant lithium batteries and utility photovoltaic access to trigger battery activation.

Figure 4.2: Inverter compatibility with multiple battery types.
5. Operating Instructions
5.1 Powering On/Off
- Power On: Ensure all connections are secure. Turn on the battery breaker first, then the solar panel breaker (if applicable), and finally the AC input breaker (if applicable). Switch the inverter's power button to 'ON'.
- Power Off: Reverse the power-on sequence. First, switch the inverter's power button to 'OFF'. Then, disconnect the AC input, followed by the solar panels, and finally the battery bank.
5.2 LCD Display and LED Indicators
The LCD screen provides real-time operational data and allows for parameter adjustments. Three LED indicators (Charge, Fault, AC) provide quick status updates.
- Charge LED: Indicates battery charging status.
- Fault LED: Illuminates in case of system errors or malfunctions.
- AC LED: Indicates AC input/output status.
5.3 Charging Modes
The inverter offers four selectable charging modes:
- Solar Only: Prioritizes solar power for charging.
- Mains Priority: Prioritizes utility grid power for charging.
- Solar Priority: Uses solar power first, then supplements with mains power if solar is insufficient.
- Mains & Solar Hybrid Charging: Combines both mains and solar power for charging.
5.4 Output Modes
The inverter supports two output modes:
- Mains Bypass: AC loads are powered directly by the utility grid.
- Inverter Output: AC loads are powered by the inverter, drawing energy from batteries or solar.
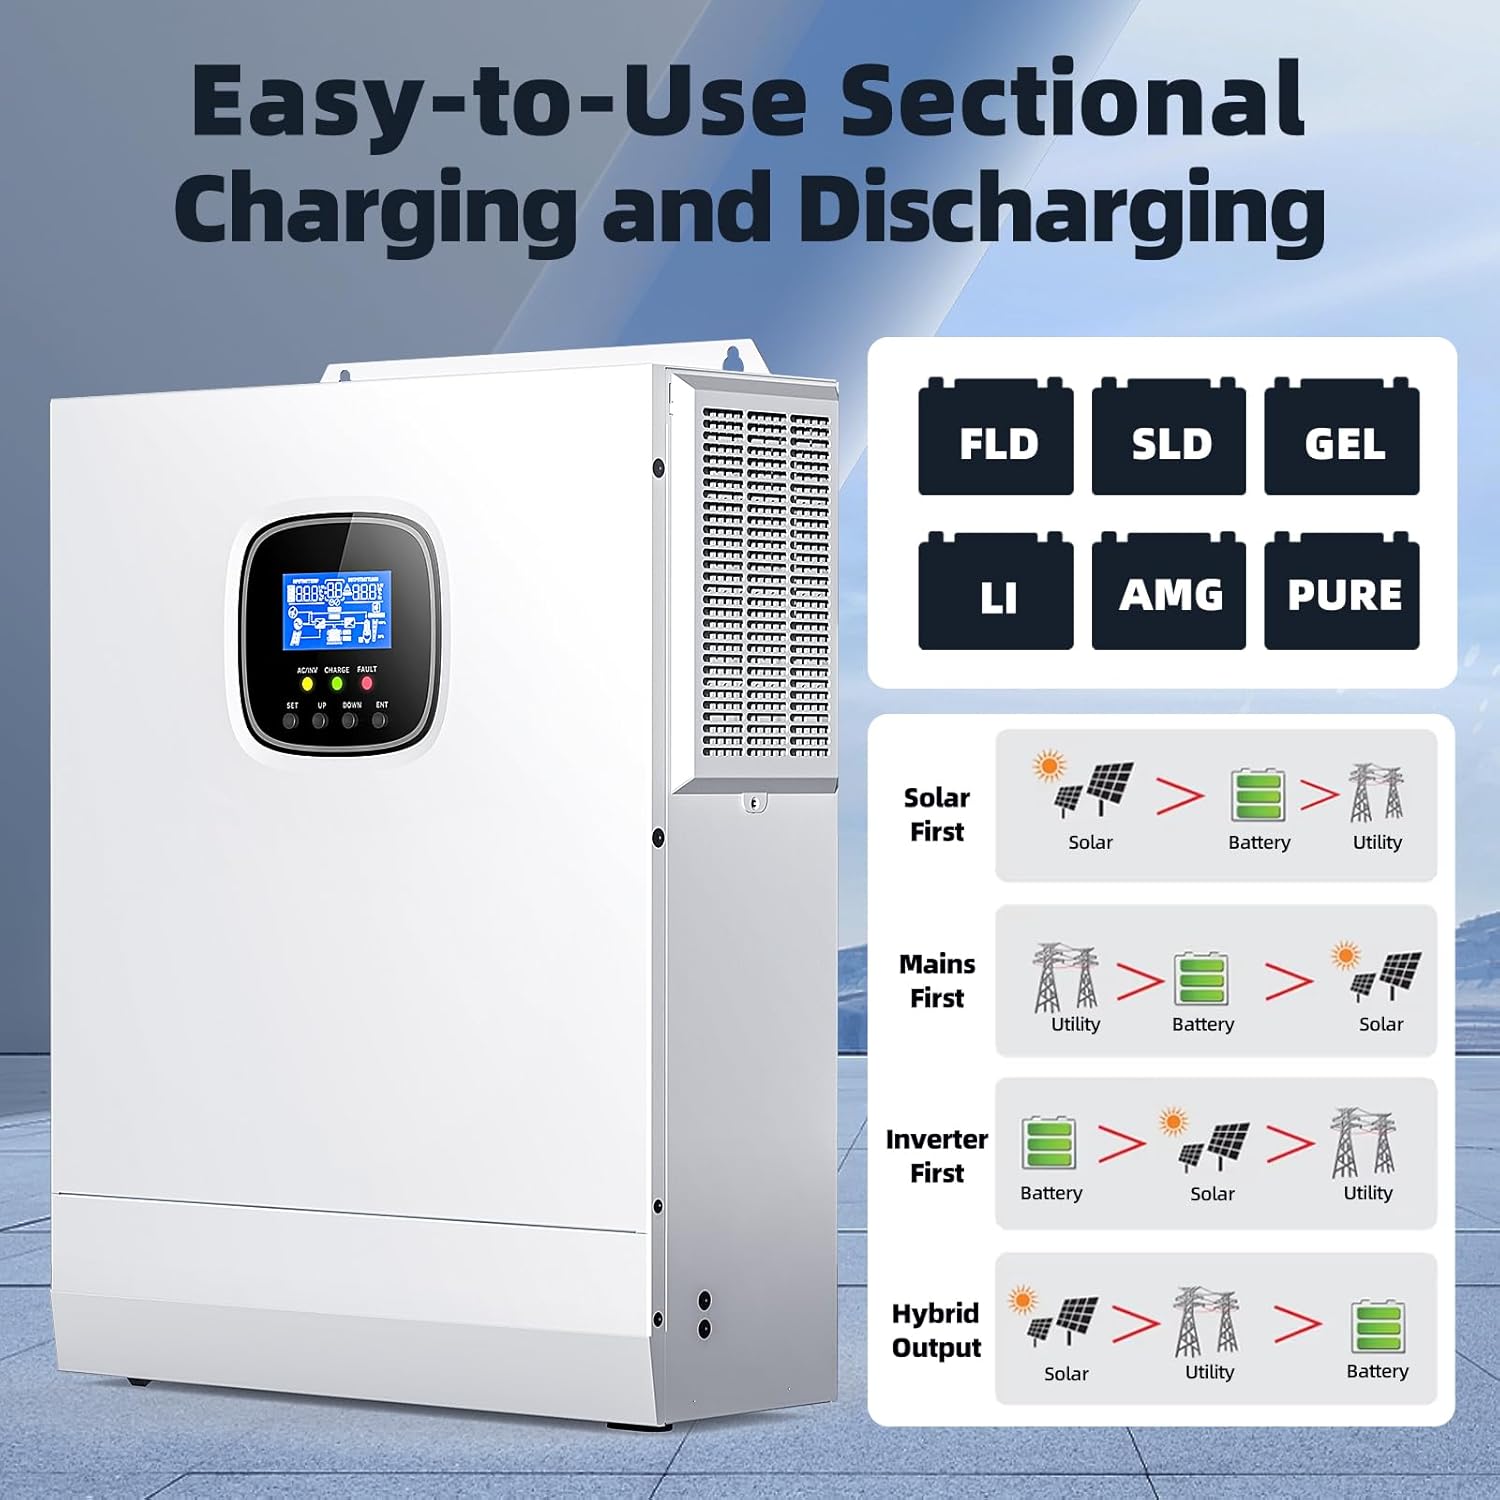
Figure 5.1: Overview of charging and discharging modes.
5.5 ECO Mode
The ECO mode is a power-saving feature designed to reduce no-load consumption. When enabled, if the load connected to the inverter is less than 50W, the inverter output will be delayed for 3 minutes and then automatically switch off. To resume output, press the enclosure switch to "OFF" and then back to "ON".
5.6 WiFi Monitoring
The integrated WiFi port allows for remote monitoring of the inverter's performance via a smartphone application. Please refer to the separate WiFi module instructions for app download and setup. Note: Some users have reported challenges with app availability or functionality in certain regions.
6. Maintenance
Regular maintenance ensures the longevity and optimal performance of your inverter.
- Periodic Inspection: Regularly check all wiring connections for tightness and signs of corrosion. Inspect the inverter casing for any physical damage.
- Cleaning: Keep the inverter clean and free of dust. The unit features a dust-proof cover and dual intelligent cooling fans. Periodically clean the ventilation openings and fan blades to ensure efficient heat dissipation. Use a soft, dry cloth for cleaning. Do not use liquid cleaners.
- Battery Health: Monitor your battery bank's health and charge levels. Follow the battery manufacturer's maintenance guidelines.

Figure 6.1: Intelligent design features for enhanced durability and cooling.
7. Troubleshooting
This section provides guidance for common issues. For complex problems, contact technical support.
| Problem | Possible Cause | Solution |
|---|---|---|
| Inverter not powering on | No battery connection, low battery voltage, power switch off. | Check battery connections and voltage. Ensure inverter switch is ON. |
| No AC output | Overload, short circuit, battery low, AC output breaker tripped. | Reduce load. Check for short circuits. Recharge battery. Reset AC output breaker. |
| Fault LED illuminated | System error (e.g., over-voltage, under-voltage, over-temperature). | Check LCD for specific error code. Address the underlying issue (e.g., improve ventilation for over-temperature). |
| Poor solar charging | Shaded panels, incorrect panel wiring, MPPT controller issue. | Ensure panels are unshaded. Verify solar panel connections and voltage. |
| WiFi monitoring not working | WiFi module not connected, app not installed, network issues, app region restrictions. | Ensure module is properly inserted. Install the correct app. Check local network. Contact support if app issues persist. |
The inverter is equipped with comprehensive protection features to safeguard against various electrical faults:
- Short Circuit Safeguard
- Overcurrent Defense
- Overvoltage Protection
- Undervoltage Prevention
- Overload Shield
- Reverse Charging Prevention
- Over-Temperature Protection
- Overcharge Prevention
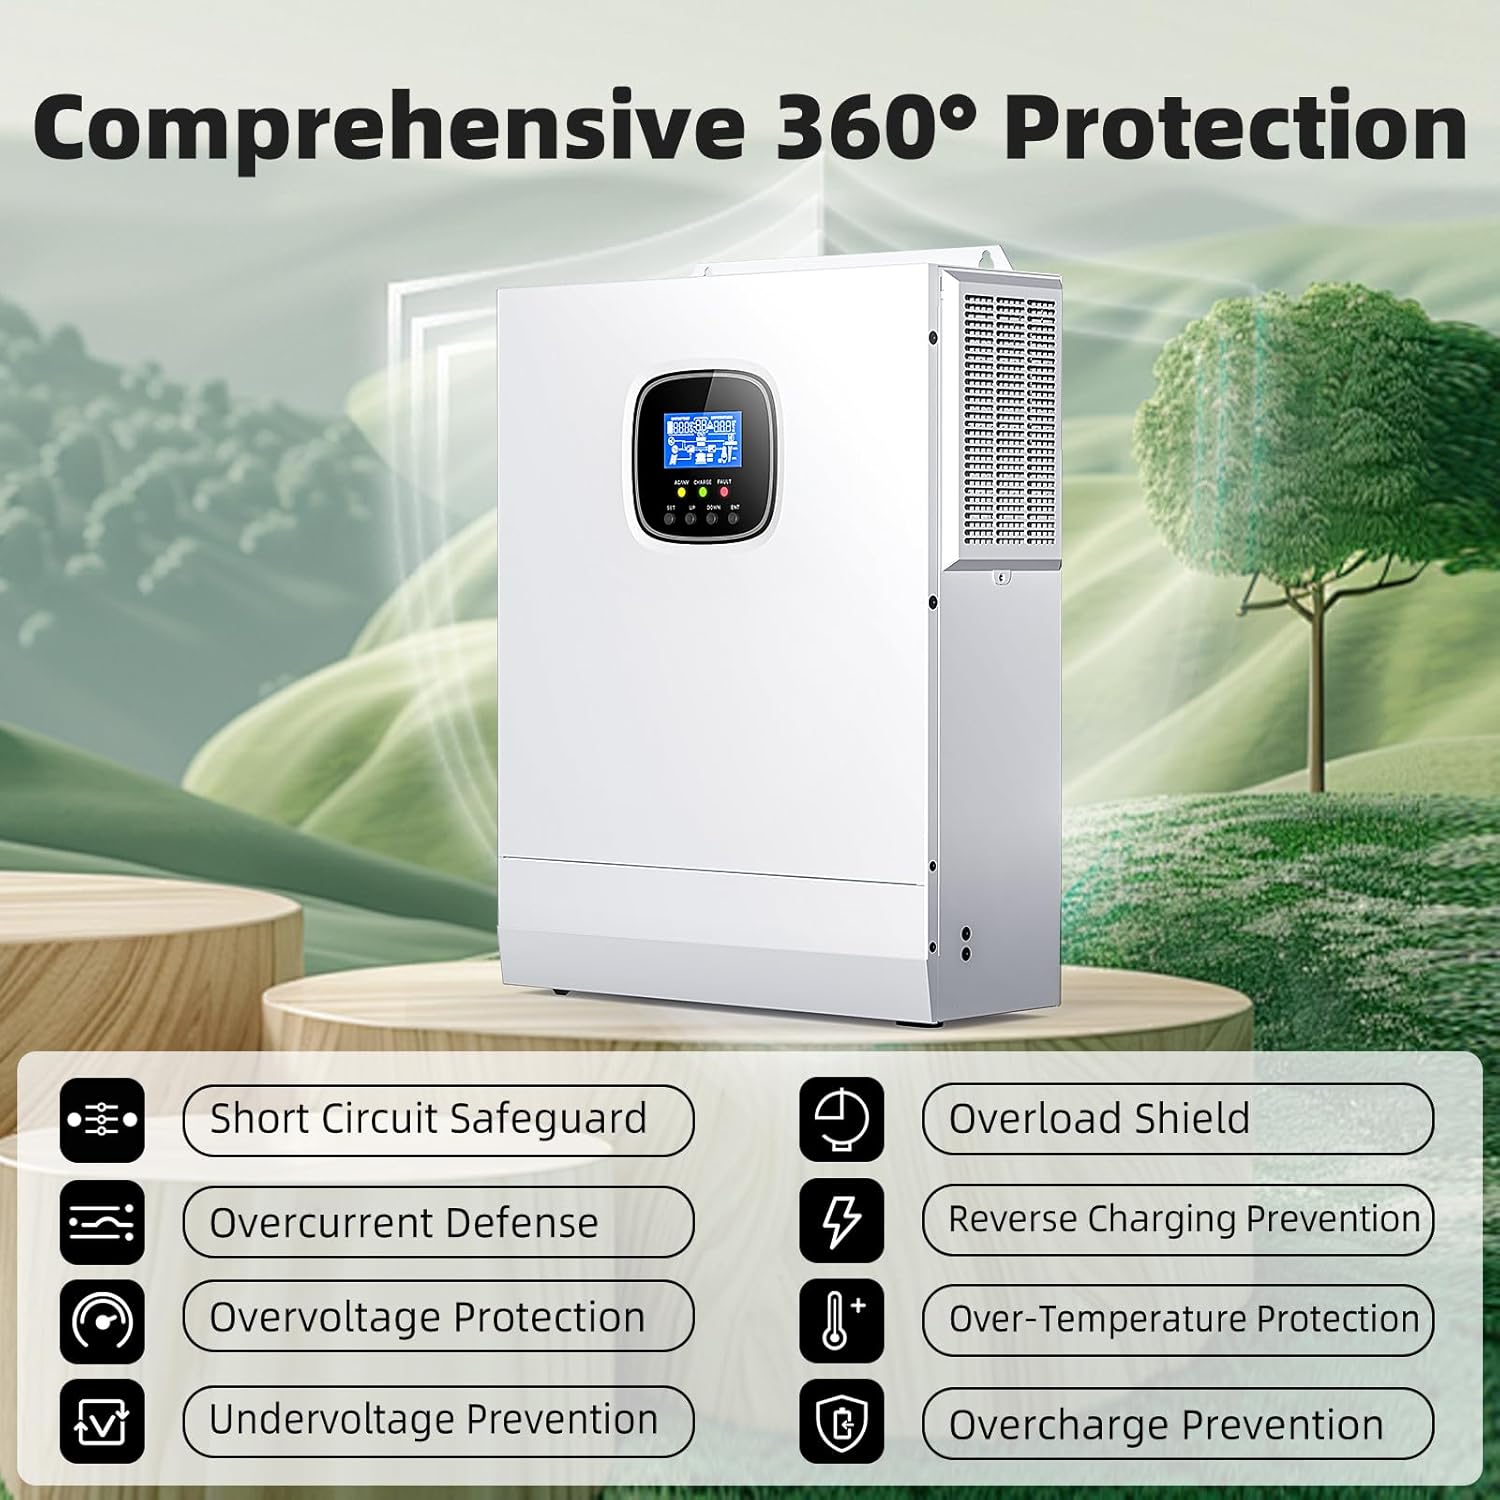
Figure 7.1: Comprehensive protection features.
8. Specifications
Key technical specifications for the EcoSolLi 3000W Solar Inverter:
| Feature | Specification |
|---|---|
| Model Name | 3000W Solar Inverter with WiFi Module (3KW-WiFi) |
| Output Power | 3000 Watts |
| Input Voltage (DC) | 24 Volts |
| Output Voltage (AC) | 110V-120V (auto-adapting 50Hz/60Hz) |
| MPPT Controller | Built-in 60A |
| Max PV Open Circuit Voltage | 100Vdc |
| MPPT Voltage Range | 30-85Vdc |
| Max PV Input Power | 1600W |
| Max PV Input Current | 40A |
| Max AC Charging Current | 0-63A |
| AC Input Voltage Range | 90-140Vac |
| Battery Compatibility | 24V Lead-Acid (Sealed, AGM, Gel, Flooded) and Lithium batteries |
| Item Weight | 18 pounds |
| Package Dimensions | 17 x 14 x 7 inches |
9. Warranty and Support
EcoSolLi is committed to customer satisfaction. This product comes with lifetime technical support. If you encounter any issues or have questions regarding the installation, operation, or maintenance of your inverter, please contact EcoSolLi customer service for assistance.
Ask a question about this manual
Ask about setup, troubleshooting, compatibility, parts, safety, or missing instructions. Manuals+ will review the question and use this page’s manual context to help answer it.