
1. Introduction
This manual provides essential information for the correct installation, operation, and maintenance of your new Candy CIP 3E7L0W fully integrated dishwasher. Please read these instructions carefully before using the appliance to ensure safe and efficient operation. Keep this manual for future reference.
The Candy Rapido' dishwasher is designed for efficiency and capacity, featuring a range of rapid cycles and a spacious MAXI-TUB to accommodate larger dishes within standard dimensions.
2. Important Safety Information
Always follow basic safety precautions when using electrical appliances to reduce the risk of fire, electric shock, and injury to persons.
- Installation: Ensure the dishwasher is correctly installed by a qualified technician according to the provided installation instructions and local regulations.
- Electrical Safety: Do not operate the dishwasher if the power cord is damaged. Ensure the appliance is properly grounded.
- Water Safety: Do not allow children to play with or in the dishwasher. Always supervise children near the appliance.
- Detergents: Use only detergents and rinse aids specifically designed for automatic dishwashers. Keep these products out of reach of children.
- Sharp Objects: Load sharp items (knives, forks) with the handles up to prevent injury.
- Hot Surfaces: The heating element and interior surfaces can be hot immediately after a wash cycle. Allow time for cooling before unloading.
- Maintenance: Disconnect the appliance from the power supply before performing any cleaning or maintenance.
3. Setup and Installation
3.1 Unpacking
Carefully remove all packaging materials. Inspect the dishwasher for any damage during transit. Report any damage immediately to your retailer.
3.2 Positioning
The dishwasher is designed for fully integrated installation. Ensure the cabinet opening meets the required dimensions for a snug fit. The appliance should be level to ensure proper operation and drainage.

Image 1: Side view of the dishwasher, partially pulled out from a cabinet, illustrating its built-in nature and internal components.
3.3 Electrical and Water Connections
All electrical and plumbing connections must be performed by a qualified professional in accordance with local codes and regulations. Ensure the water inlet and drain hoses are securely connected and free from kinks.

Image 2: Technical drawing showing various dimensions and installation requirements for the dishwasher, including width, depth, and height specifications.
4. Operating Instructions
4.1 Control Panel Overview
The dishwasher features an intuitive LED display and touch controls for easy program selection and operation.
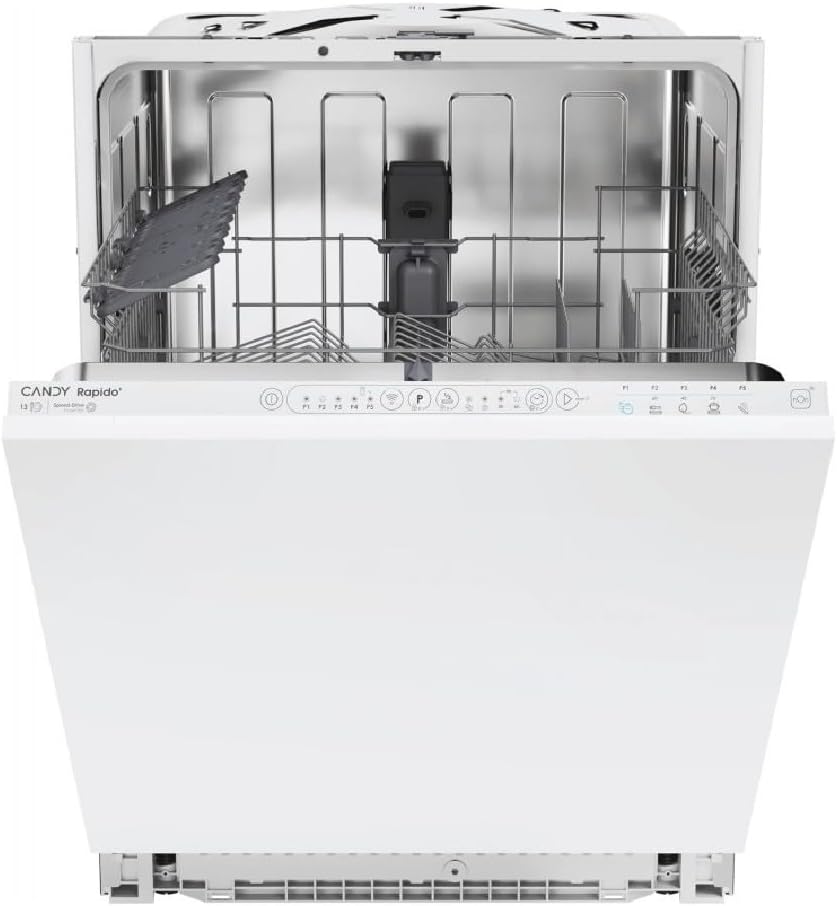
Image 3: Front view of the fully integrated dishwasher with the door open, showing the control panel with touch buttons and LED display.
4.2 Loading the Dishwasher
For optimal cleaning results, load dishes correctly. Scrape off large food particles before loading. Avoid overcrowding to allow water and detergent to reach all surfaces.

Image 4: Interior view of the dishwasher loaded with various dishes, glasses, and cutlery, demonstrating proper loading technique.

Image 5: Interior view of the empty dishwasher, showing the upper and lower racks, and the central spray arm.
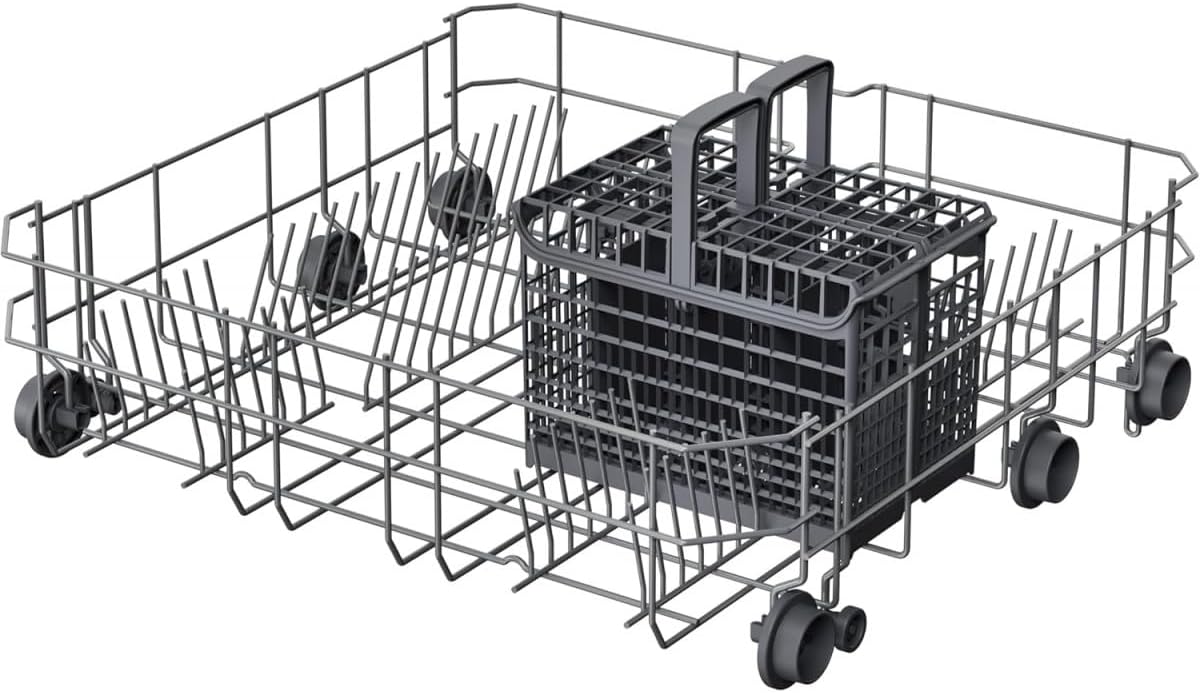
Image 6: Close-up view of the lower dishwasher rack with a removable cutlery basket, designed for efficient organization of utensils.
4.3 Adding Detergent and Rinse Aid
Open the detergent dispenser and add the recommended amount of dishwasher detergent. Fill the rinse aid dispenser as needed; the indicator light will signal when it's low.
4.4 Selecting a Wash Program
Use the control panel to select the desired wash program. The dishwasher offers a variety of cycles, including rapid options, to suit different cleaning needs.
4.5 Starting a Wash Cycle
Close the dishwasher door firmly. Press the Start button to begin the selected wash cycle.
4.6 Interrupting/Cancelling a Cycle
To interrupt a cycle, carefully open the door. To cancel, press and hold the Start/Cancel button for a few seconds. The dishwasher will drain any remaining water.
5. Maintenance and Care
5.1 Cleaning the Filters
Regularly clean the filter system located at the bottom of the dishwasher tub. Remove the coarse filter, fine filter, and microfilter, rinse them under running water, and remove any food debris. Reassemble correctly.
5.2 Cleaning the Spray Arms
Check the spray arm nozzles for blockages. If necessary, remove the spray arms and clear any debris from the holes using a thin wire.
5.3 Exterior Cleaning
Wipe the exterior surfaces of the dishwasher with a soft, damp cloth. Avoid abrasive cleaners or solvents.
6. Troubleshooting
Before contacting customer service, refer to the following table for common issues and their solutions.
| Problem | Possible Cause | Solution |
|---|---|---|
| Dishwasher does not start | Power supply issue, door not closed properly, program not selected. | Check power connection, ensure door is latched, select a program and press Start. |
| Poor cleaning results | Improper loading, clogged spray arms, insufficient detergent, dirty filters. | Reload dishes correctly, clean spray arms, add more detergent, clean filters. |
| Water not draining | Clogged drain hose or filter, drain pump malfunction. | Check and clear drain hose and filters. If problem persists, contact service. |
| Excessive noise | Dishes interfering with spray arms, foreign object in pump, improper leveling. | Rearrange dishes, check for obstructions, ensure dishwasher is level. |
7. Technical Specifications
| Feature | Specification |
|---|---|
| Model Name | CIP 3E7L0W |
| Brand | Candy |
| Installation Type | Fully Integrated (Built-in) |
| Place Settings | 13 |
| Energy Efficiency Class | E |
| Noise Emission Class | C |
| Noise Level | 47 dB |
| Water Consumption per Cycle | 10.9 Liters |
| Energy Consumption per 100 Cycles | 93 kWh |
| Display Type | LED |
| Controls Type | Touch |
| Material | Stainless Steel |
| Product Dimensions (W x D x H) | 598 mm x 550 mm x 898 mm |
| Product Weight | 30 Kilograms |
| Included Components | User manual, Cutlery basket, Dispenser, Adapter, Drain hose, Inlet hose |
8. Warranty and Support
This product is covered by the standard manufacturer's warranty. For specific details regarding your warranty period and terms, please refer to the documentation provided with your purchase or contact Candy customer support.
For returns or issues with defective/damaged products purchased through Amazon, please refer to Amazon's return policy. Generally, products can be returned within 30 days of receipt if you change your mind. For defective or damaged products, specific assistance pages are available on Amazon's website.
For technical assistance or spare parts, please contact Candy customer service. Contact details can typically be found on the manufacturer's official website or in the warranty card.


