
JeaTone 82-2M723P225C-2
JeaTone Wi-Fi Video Intercom System User Manual
Model: 82-2M723P225C-2
Introduction
Thank you for choosing the JeaTone Wi-Fi Video Intercom System. This manual provides detailed instructions for the installation, operation, and maintenance of your new intercom system. Please read this manual thoroughly before installation and use to ensure proper function and safety. This system is designed to enhance the security and convenience of your home with features such as a 1080P doorbell camera, 7-inch touchscreen monitor, mobile app integration, RFID access, and motion detection.
Safety Information
To prevent damage to the product or injury to yourself or others, please observe the following safety precautions:
- Ensure all power is disconnected before installation or maintenance.
- Installation should be performed by qualified personnel if you are unsure about electrical wiring.
- Do not expose the outdoor unit to extreme temperatures or direct water immersion. The outdoor unit has an IP65 rating for weather resistance, but proper installation is crucial.
- Use only the power adapters and cables provided or recommended by JeaTone.
- Keep the product away from sources of strong electromagnetic interference.
- Do not attempt to disassemble or repair the unit yourself. Contact customer support for assistance.
Package Contents
Please check the package for the following items:
- 2 x 7-inch Indoor Touchscreen Monitors
- 1 x 1080P Outdoor Doorbell Camera Unit
- Power Adapters
- Mounting Brackets and Screws
- RFID Cards/Key Fobs (quantity may vary, typically 8-10)
- Connection Cables
- User Manual (this document)

Image: Overview of the JeaTone Wi-Fi Video Intercom System components, showing two indoor monitors, the outdoor doorbell camera, and RFID key fobs.
Product Overview
The JeaTone Wi-Fi Video Intercom System provides a secure and convenient way to manage access to your property. It consists of an outdoor doorbell camera and indoor touchscreen monitors.
Outdoor Doorbell Camera Unit
- 1080P HD Camera: Provides clear video footage of visitors.
- Wide-Angle Lens: Offers a broad view of the area in front of your door.
- Night Vision: Infrared LEDs ensure visibility even in low-light conditions.
- Motion Detection: Triggers recording and notifications upon detecting movement.
- RFID Reader: Allows secure entry using RFID cards.
- IP65 Weatherproof: Designed to withstand outdoor elements.
Indoor Touchscreen Monitor
- 7-inch Touchscreen: Intuitive interface for viewing, communication, and system control.
- Wi-Fi Connectivity: Connects to your home network for mobile app integration.
- Two-Way Audio: Communicate with visitors at your door.
- Door Unlock Function: Remotely unlock electronic door locks.
- Micro SD Card Slot: For local storage of video recordings and snapshots.

Image: The 7-inch indoor touchscreen monitor, showing its display and side controls.

Image: The outdoor doorbell camera unit, highlighting its camera, speaker, microphone, and call buttons.
Installation Guide
1. Wiring Diagram
Refer to the following diagram for proper wiring connections between the outdoor unit, indoor monitors, and power sources. Ensure all connections are secure before applying power.

Image: Wiring diagram illustrating the connections for the two indoor monitors and the outdoor doorbell camera.
Key Connections:
- Outdoor Unit to Indoor Monitor: Use the provided 2-wire cable for video, audio, and power transmission.
- Indoor Monitor to Power: Connect the power adapter to each indoor monitor.
- Electronic Lock (Optional): Connect your electronic door lock to the outdoor unit's lock control terminals (GATE1/GATE2) if using the door unlock feature.
- LAN Connection (Optional): For advanced network features, connect the indoor monitor to your router via an Ethernet cable.
2. Mounting the Outdoor Unit
Choose a suitable location near your entrance, typically at a height of 1.5 to 1.6 meters (5 to 5.3 feet) from the ground, ensuring the camera has a clear view of visitors. Use the mounting bracket as a template to drill holes and secure the unit to the wall. Ensure proper sealing to maintain IP65 weather resistance.

Image: Dimensions of the outdoor unit and its mounting bracket for installation planning.
3. Mounting the Indoor Monitor
Select an indoor location where the monitor is easily accessible and visible. Mount the bracket to the wall using screws, then securely attach the monitor to the bracket. Connect all necessary cables before finalizing the mounting.

Image: Dimensions of the indoor monitor for installation planning.
4. Power Connection
Once all wiring is complete, connect the power adapters to the indoor monitors and plug them into a standard electrical outlet. The system will power on automatically.
Operating Instructions
1. Answering a Call
When a visitor presses the doorbell button, the indoor monitor will ring and display the visitor's image. Touch the "Answer" icon on the screen to initiate two-way communication.

Image: The indoor monitor's touchscreen interface, demonstrating ease of interaction.
2. Unlocking the Door
During a call or while monitoring the outdoor unit, touch the "Unlock" icon on the indoor monitor screen to open an electronic door lock connected to the system.
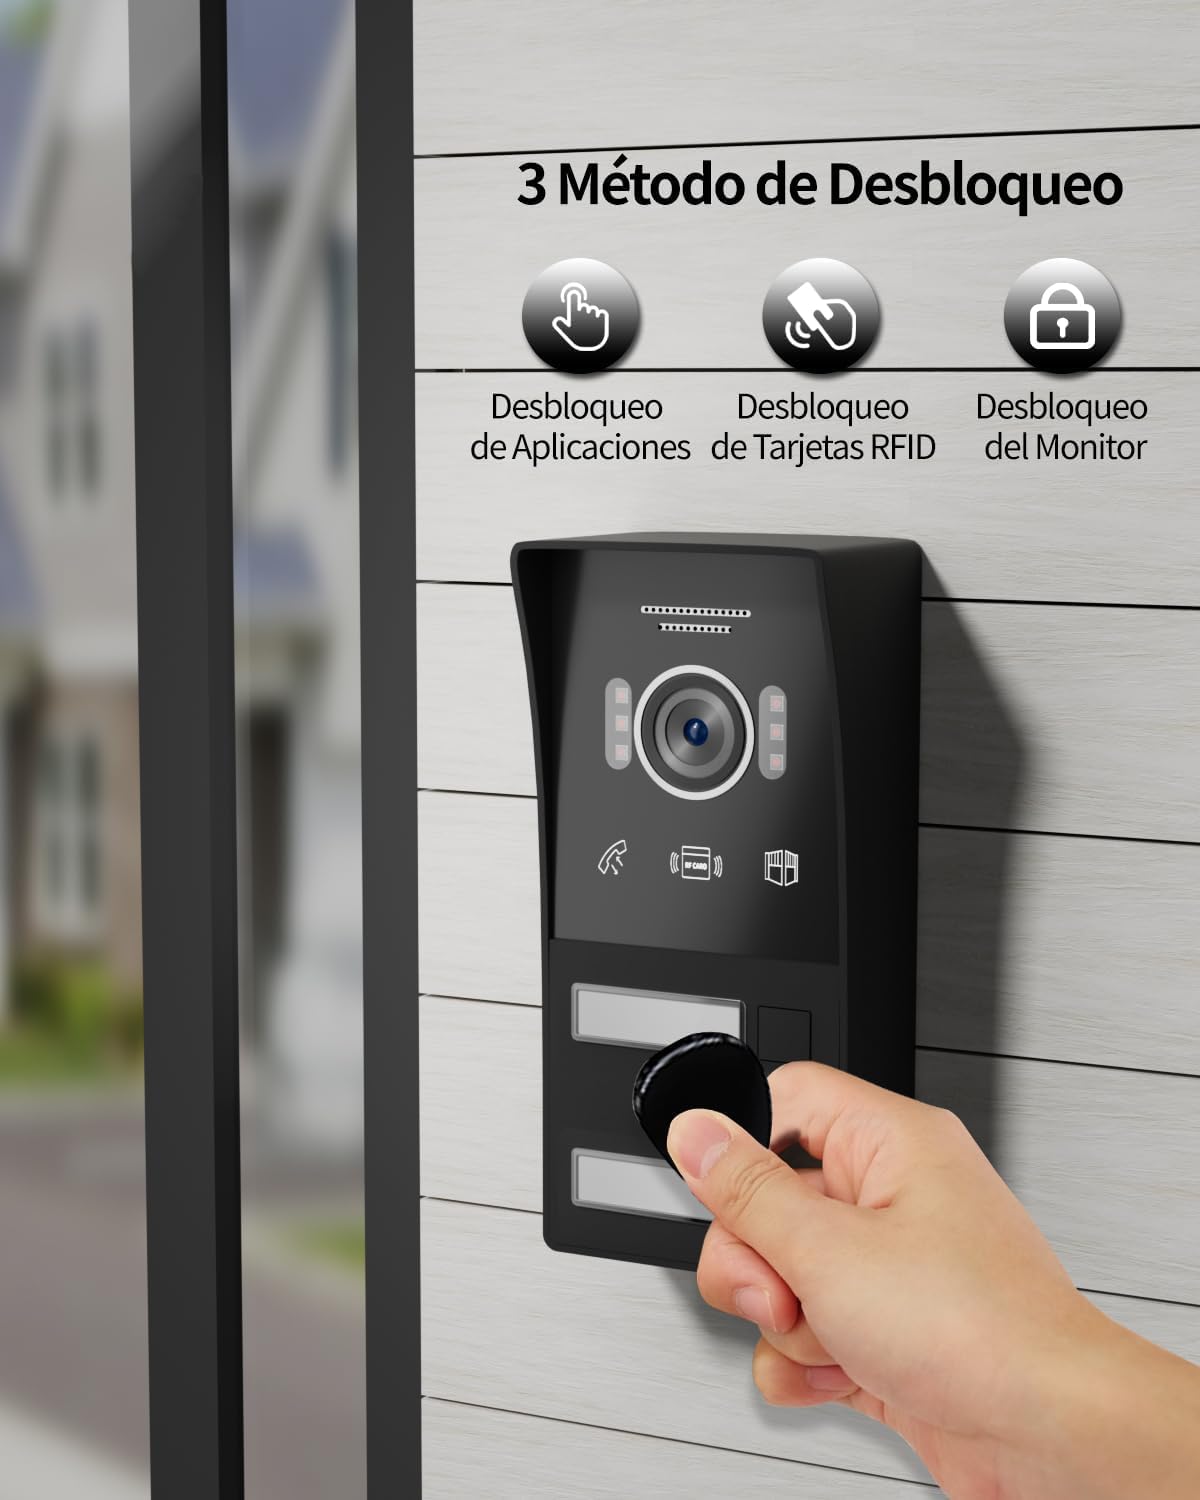
Image: A person interacting with the outdoor doorbell unit, demonstrating how visitors initiate a call.
3. RFID Card Access
To unlock the door using an RFID card, simply swipe a pre-programmed RFID card over the designated reader area on the outdoor doorbell unit. The door will unlock briefly.

Image: Illustration of the three unlocking methods: via mobile app, RFID card, and the indoor monitor.
4. Mobile App Integration (Tuya App)
Download the Tuya Smart app from your smartphone's app store. Follow the in-app instructions to connect your JeaTone intercom system to your Wi-Fi network and pair it with the app. This enables remote viewing, answering calls, and unlocking the door from anywhere.
- Remote Viewing: Access live video feed from the doorbell camera.
- Remote Communication: Speak with visitors from your smartphone.
- Remote Unlocking: Unlock the door remotely.
- Notifications: Receive instant alerts for doorbell presses and motion detection.
Image: The mobile app interface on a smartphone, demonstrating remote viewing and call functions.
5. Motion Detection and Recording
The outdoor unit features motion detection. When motion is detected, the system can automatically record video or take snapshots and send notifications to your mobile app. Ensure a Micro SD card (not included) is inserted into the indoor monitor for local storage.
Image: Visual representation of the motion detection area, indicating a 150-degree detection angle.
Image: A visual comparison demonstrating the superior clarity of 1080P resolution compared to 720P.
Maintenance
- Cleaning: Use a soft, dry cloth to clean the indoor monitor screen and outdoor unit lens. Avoid abrasive cleaners or solvents.
- Firmware Updates: Periodically check the JeaTone website or the Tuya app for available firmware updates to ensure optimal performance and security.
- Cable Inspection: Regularly inspect all cables for signs of wear or damage. Replace damaged cables immediately.
- SD Card Management: If using a Micro SD card, periodically review and delete old recordings to free up space.
Troubleshooting
| Problem | Possible Cause | Solution |
|---|---|---|
| No image on indoor monitor. | Power not connected; loose wiring; faulty outdoor unit. | Check power supply to monitor; verify all wiring connections; contact support if unit is faulty. |
| No sound during communication. | Microphone/speaker issues; loose wiring. | Check wiring; ensure volume is not muted on monitor; restart system. |
| Door unlock not working. | Incorrect wiring to electronic lock; lock power issue; RFID card not programmed. | Verify lock wiring and power supply; ensure RFID cards are correctly programmed. |
| Mobile app not receiving notifications. | No Wi-Fi connection; app permissions not granted; incorrect app settings. | Check Wi-Fi connection on monitor; ensure app has notification permissions; review app settings for alerts. |
| Poor video quality. | Dirty camera lens; poor lighting; cable interference. | Clean camera lens; ensure adequate lighting; check cable quality and connections. |
Specifications
| Brand | JeaTone |
| Model Number | 82-2M723P225C-2 |
| Indoor Monitor Screen Size | 7 inches |
| Video Recording Resolution | 1080p |
| Connectivity Protocol | Wi-Fi |
| Outdoor Unit IP Rating | IP65 |
| Usage Environment | Outdoor (doorbell), Indoor (monitor) |
| Mounting Type | Door/Wall Mount |
| Product Dimensions (Outdoor Unit) | 146mm x 70mm x 29mm (approx.) |
| Product Dimensions (Indoor Monitor) | 190mm x 123mm x 20mm (approx.) |
| Components Included | 2 Monitors + 1 Doorbell Unit |
Warranty and Support
JeaTone products are designed for reliability and performance. For warranty information and technical support, please refer to the warranty card included with your product or visit the official JeaTone website. If you encounter any issues that cannot be resolved using the troubleshooting guide, please contact our customer service team for assistance.
Online Resources: For additional support, FAQs, and the latest firmware updates, please visit the JeaTone Official Website.
Related documents82-2M723P225C-2

Ask a question about this manual
Ask about setup, troubleshooting, compatibility, parts, safety, or missing instructions. Manuals+ will review the question and use this page’s manual context to help answer it.