
Hatteker HT 626
HATTEKER HT-626 Professional 15-in-1 Grooming Kit User Manual
Model: HT-626
1. Product Overview
The HATTEKER HT-626 15-in-1 Professional Grooming Kit is a versatile personal care device designed for comprehensive face, hair, and body grooming. This kit provides a complete solution for various trimming and shaving needs, featuring multiple interchangeable heads and adjustable guide combs for precise styling.

Figure 1: The HATTEKER HT-626 grooming kit showcasing its five interchangeable trimmer heads.
2. Package Contents
Upon unpacking, please ensure all the following items are present in your HATTEKER HT-626 grooming kit:
- Main Trimmer Unit
- Hair Clipper Head
- Detail Trimmer Head
- Precision Trimmer Head
- Design Trimmer Head
- Nose Trimmer Head
- Beard Shaver Head
- Body Shaver Head
- Zero Gapped Blade
- 7 Cutting Guide Combs (various lengths)
- USB Charging Cable
- Cleaning Brush
- Oil Bottle
- Storage Base
- Travel Pouch
3. Setup and Assembly
3.1 Initial Charging
Before first use, fully charge the trimmer. Connect the USB charging cable to the trimmer and a suitable USB power adapter. The LED display will indicate charging status. A full charge takes approximately 1.5 hours and provides up to 80 minutes of runtime.

Figure 2: The trimmer unit charging on its storage base via USB, with the digital display indicating charge level.
3.2 Attaching and Removing Heads/Combs
To change trimmer heads or attach guide combs, follow these steps:
- Removing a Head: Gently push the current trimmer head upwards from the main unit until it detaches.
- Attaching a Head: Align the desired trimmer head with the main unit and press it down firmly until it clicks into place.
- Attaching a Guide Comb: Slide the guide comb onto the trimmer head until it securely locks. Ensure it is properly seated to prevent accidental detachment during use.
- Removing a Guide Comb: Gently lift the comb from the back and slide it off the trimmer head.

Figure 3: Visual instructions for attaching and removing trimmer heads and guide combs.
4. Operating Instructions
4.1 General Operation
Press the ON/OFF switch to power on the trimmer. The LED display will show the current power level. Select the appropriate trimmer head and guide comb for your desired grooming task. For best results, always trim against the direction of hair growth.

Figure 4: Examples of the multi-functional uses of the grooming kit, including different trimming styles.
4.2 Adjustable Cutting Lengths
The kit includes 8 attachment guides for various hair cutting lengths: 3mm, 6mm, 9mm, 12mm, 15mm, 30mm, 60mm, and 90mm. Choose the comb that corresponds to your desired hair length.
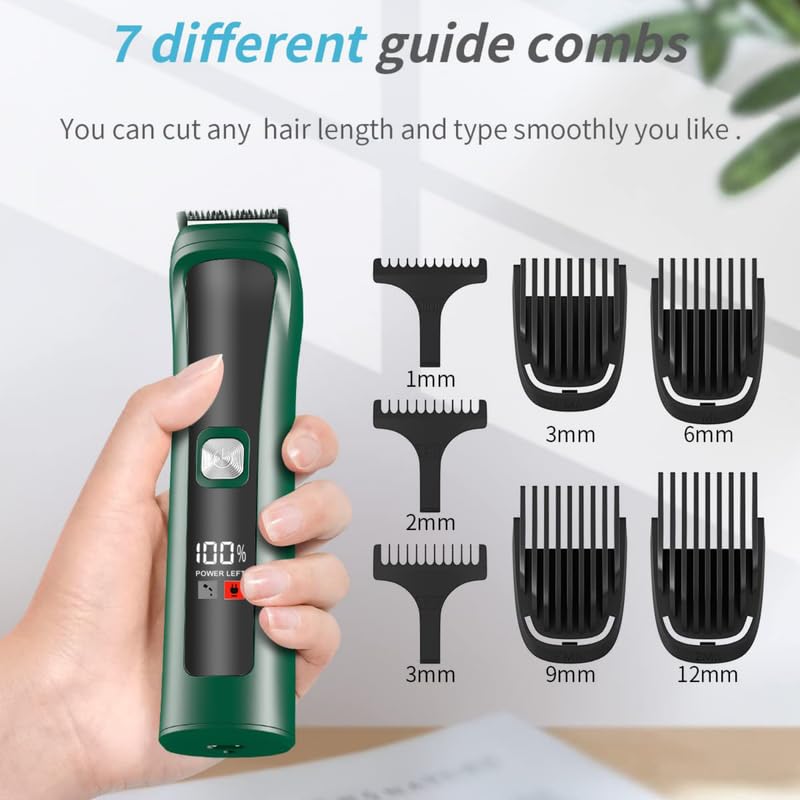
Figure 5: The trimmer unit with a selection of guide combs for adjusting cutting lengths.
5. Maintenance
5.1 Cleaning the Blades
The trimmer heads are 100% waterproof (IPX5 rated) for easy cleaning. After each use, remove the trimmer head and rinse the blades under running water. Use the provided cleaning brush to remove any trapped hairs. Ensure the blades are dry before reattaching or storing.

Figure 6: Detached trimmer blade being rinsed under water for hygienic cleaning.
5.2 Oiling the Blades
Regularly apply a small drop of the included oil to the blades to maintain optimal performance and longevity. The LED display may show an 'Oiled Reminder' icon when oiling is recommended.
6. Troubleshooting
- Trimmer not turning on: Ensure the battery is fully charged. If the issue persists, contact customer support.
- Reduced cutting performance: Clean the blades thoroughly and apply oil. Ensure the correct guide comb is securely attached.
- Unusual noise during operation: Check for any hair trapped in the blades or head. Clean and oil the blades. If the noise continues, discontinue use and contact support.
7. Specifications
| Feature | Detail |
|---|---|
| Model Number | HT 626 |
| Power Source | Battery Powered (Lithium-Ion) |
| Blade Material | Stainless Steel |
| Charging Time | 1.5 Hours |
| Run Time | Up to 80 minutes |
| Waterproof Rating | IPX5 |
| Noise Level | Below 60 dB |
| Product Dimensions | 22 x 14.3 x 4.5 cm |
| Item Weight | 500 g |
8. Warranty and Support
The HATTEKER HT-626 Grooming Kit comes with a 24-month quality warranty. For any product-related issues, questions, or support, please contact Hatteker customer service. Our team aims to respond within 24 hours to provide a satisfactory resolution.
For further information, please visit the product detail page on Amazon.in.
Related documentsHT 626


Ask a question about this manual
Ask about setup, troubleshooting, compatibility, parts, safety, or missing instructions. Manuals+ will review the question and use this page’s manual context to help answer it.