
1. Introduction
This manual provides instructions for the installation, operation, and maintenance of your Ladomi 16" Laptop Screen Extender (Model S11). This device is designed to expand your laptop's display capabilities, offering a triple-screen setup for enhanced productivity. It features 1200P FHD resolution, a 16:10 aspect ratio, and a rotatable screen design for flexible viewing.

Image: The Ladomi 16" Laptop Screen Extender in a triple-screen configuration, showcasing its design and display quality.
2. What's in the Box
Verify that all components are present in the package:
- Laptop screen extender *1
- USB C to USB C Cable (60 cm) *2
- USB C Cable with USB A Adapter (90 cm) *1
- HDMI to Mini HDMI Cable (90 cm) *1
- Carrying Bag *1
- User Manual *1 (This document)

Image: Contents of the Ladomi 16" Laptop Screen Extender package.
3. Compatibility
3.1 Laptop Size and Operating System
The Ladomi screen extender is compatible with laptops ranging from 12 inches to 18.5 inches in screen size. It supports various operating systems:
- MacOS (M1/M2/M3 Pro or Max chips)
- Windows
- Dex
- Chrome OS
- Surface (excluding ARM chip models)
- Android
- Nintendo Switch
- Xbox
- PS4
Important Note:
- This screen extender is not compatible with MacBook Air models equipped with M1/M2/M3 chips.
- It is not compatible with Microsoft Surface Series (ARM chip) or Chromebook (ARM chip) models.

Image: Visual guide for checking laptop compatibility, including supported OS and size range, and specific exclusions.
3.2 Port Requirements
To ensure proper functionality, your laptop must have the necessary ports:
- Option 1: Two full-feature USB-C ports.
- Option 2: One full-feature USB-C port and one HDMI port, along with a USB-A port for power.
A full-feature USB-C port supports both video output and power delivery. Look for symbols like those indicating Thunderbolt 3 or Thunderbolt 4, or a USB-C symbol with a display icon or 'SS' (SuperSpeed) with a 'D' (DisplayPort) or lightning bolt.

Image: Guide to identifying full-feature USB-C ports on your computer.
If you are unsure about your laptop's port capabilities, consult your laptop's manual or manufacturer's website.
3.3 Incompatible Devices
The following specific laptop models have been identified as incompatible:
- MacBook: Pro 14" M3 2023/13" M2 2022/13" M1 2020/15" 13" 2015/15"13" 2014/MacBook Air 13"15" M3 2024/15" M2 2023/13" M2 2022/13" M1 2020/13" 2011"13" 2015
- HP Essential: 17-cp3047nr/15-fc0047nr, 15.6"/15t-fd000, 15.6"/14-dg0020nr, 14"/14-ep0097nr/14-em0047nr, 14"/14z-0m000, 14"/14t-ep000, 14"/z50/ 255 15.6HP Essentialinch G9 Notebook/ 17t-cn200,173"/ 17z-cp200, 17.3"/15z-fc000, 15.6"/ 17t-cn300,17.3"/ 17z-cp300, 17.3"
- DELL: Inspiron 15 AMD 15.6"/ Inspiron 3000 3520 15.6"/ Inspiron 3511 /Inspiron 15 12th Gen Intel
- Lenovo: Flagship Chromebook / IdeaPad 1 15.6"/Essential IdeaPad 15.6"/ V-Series V15 /Slim 3 Chromebook / Idea Pad 3i Chromebook 15.6"
- Samsung: Book4 15.6"/Book3 15.6"/Book2 15.6"/Book2 Pro 360 15.6" 13.3"/Book Pro 360 5G 13. 3"/Book Pro 360 13.3"

Image: Detailed list of incompatible laptop models.
4. Setup Instructions
The Ladomi screen extender is designed for plug-and-play operation, requiring no driver installation.
4.1 Physical Placement
- Place your laptop on a stable, flat surface.
- Unfold the unique adjustable stand of the screen extender. This stand is designed to hold the laptop and screens in place for stability.
- Position the screen extender behind your laptop, ensuring it is centered and stable. The extender is designed for desktop placement.

Image: The screen extender positioned with a laptop, illustrating its desktop placement and adjustable stand.
4.2 Connection Methods
Choose the appropriate connection method based on your laptop's available ports:
Method 1: Two Full-Feature USB-C Ports
- Connect one USB-C to USB-C cable from your laptop's first full-feature USB-C port to the left screen's USB-C input.
- Connect the second USB-C to USB-C cable from your laptop's second full-feature USB-C port to the right screen's USB-C input.
This method provides both video signal and power to each screen.

Image: Connection diagram for laptops with two full-feature USB-C ports.
Method 2: One Full-Feature USB-C Port, One HDMI Port, and One USB-A Port
- Connect one USB-C to USB-C cable from your laptop's full-feature USB-C port to the left screen's USB-C input. This provides video and power to the left screen.
- Connect the HDMI to Mini HDMI cable from your laptop's HDMI port to the right screen's Mini HDMI input. This provides video to the right screen.
- Connect the USB-C cable with USB-A adapter from your laptop's USB-A port to the right screen's USB-C input for power.
Ensure all connections are secure. The screens should automatically detect the signal and power on.

Image: Connection diagram for laptops with one full-feature USB-C port, one HDMI port, and one USB-A port.
5. Operating Instructions
5.1 Initial Display Configuration
After connecting the screens, your operating system should automatically detect them. You may need to adjust display settings:
- Windows: Right-click on the desktop, select "Display settings." You can arrange the displays, change resolution, and set display mode (Extend, Duplicate, etc.).
- MacOS: Go to "System Settings" > "Displays." You can arrange displays, adjust resolution, and set display mode.
It is recommended to use "Extend" mode for multitasking, allowing you to have different content on each screen.

Image: The screen extender facilitating a multi-screen workflow for increased productivity.
5.2 Screen Rotation and Orientation
The left and right screens of the extender can be rotated 360° backward. When a screen is rotated, its image orientation will automatically reorient, eliminating the need for manual adjustment in system settings.
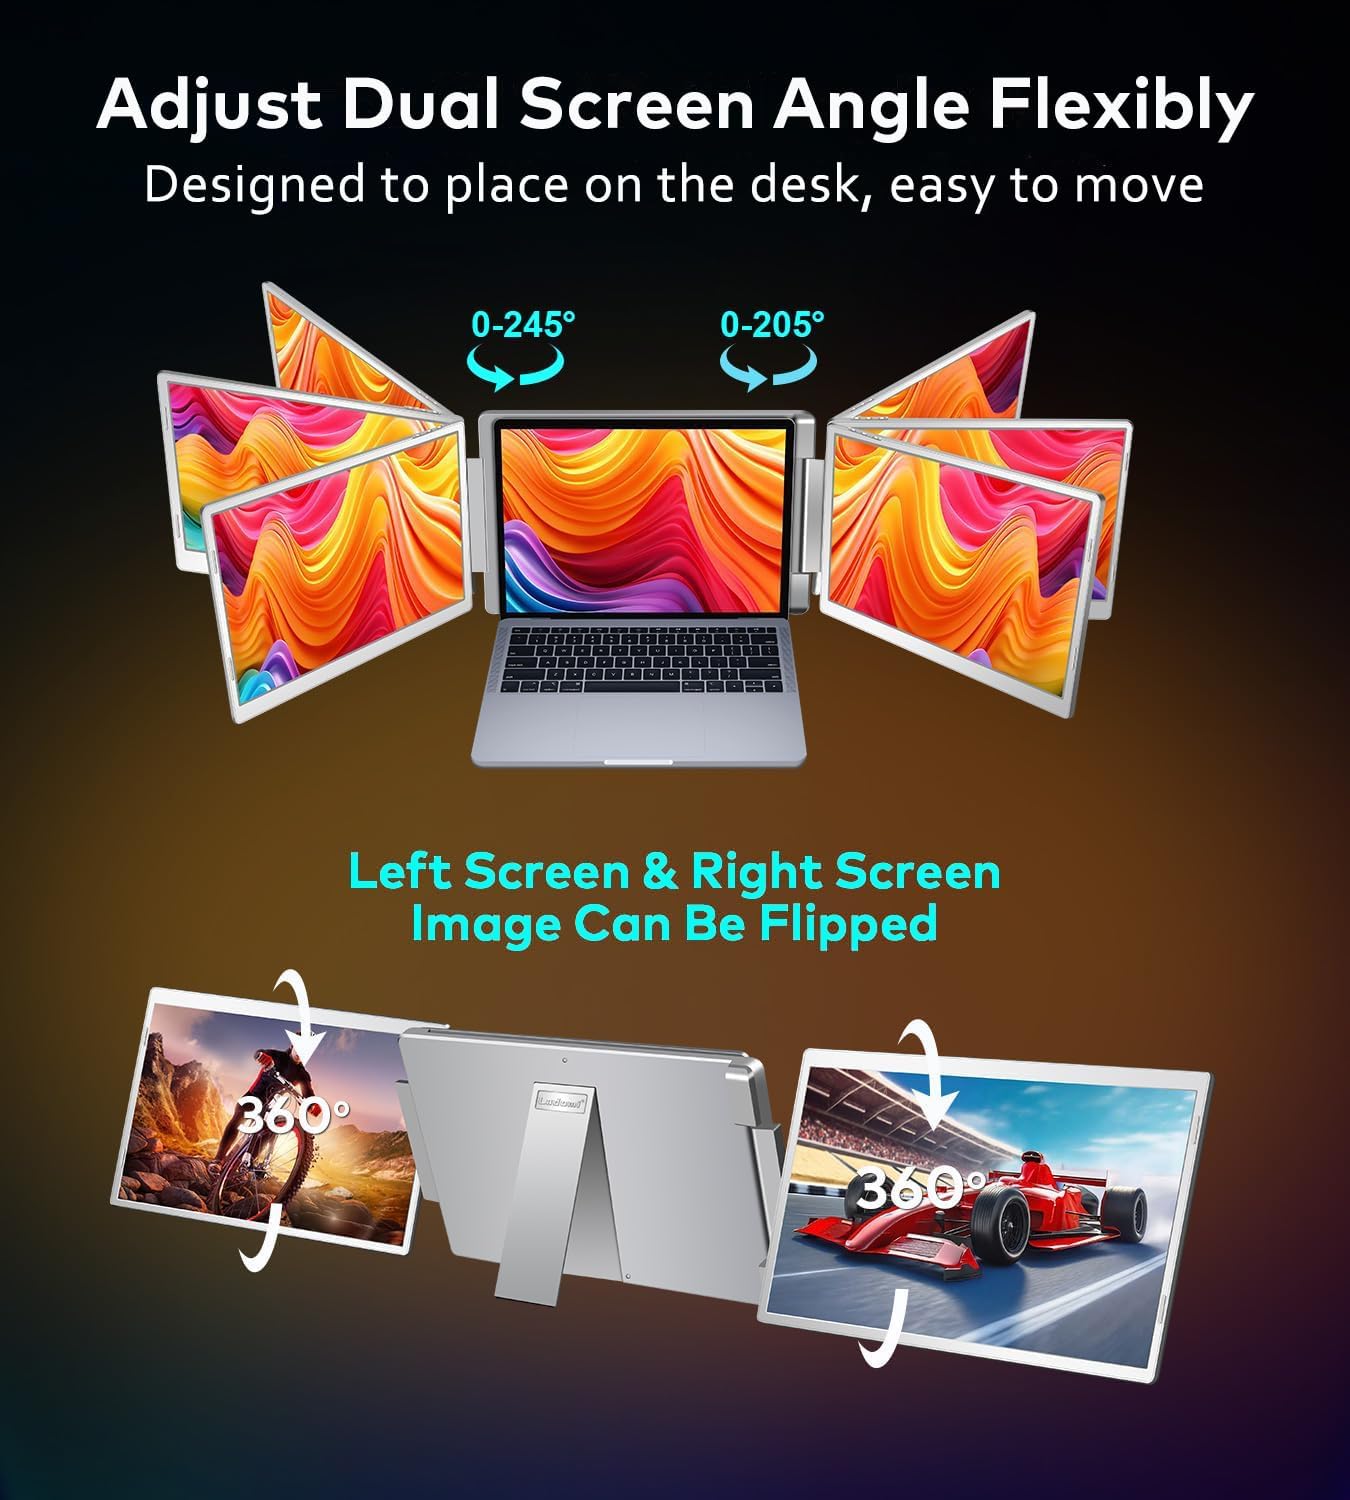
Image: Illustration of the 360° rotatable screen design and automatic image orientation adjustment.
5.3 On-Screen Display (OSD) Controls
Each screen has control buttons for adjusting display parameters:
- Menu Button: Accesses the OSD menu for advanced settings.
- Brightness + Button: Increases screen brightness.
- Brightness - Button: Decreases screen brightness.
Through the OSD menu, you can adjust brightness, contrast, backlight, and color temperature to suit your preferences and reduce eye fatigue.

Image: Location and function of the OSD control buttons on the screen extender.
6. Maintenance
To ensure the longevity and optimal performance of your Ladomi screen extender, follow these maintenance guidelines:
- Cleaning: Use a soft, lint-free cloth to gently wipe the screen surfaces. For stubborn smudges, slightly dampen the cloth with water or a screen-safe cleaning solution. Avoid harsh chemicals, abrasive materials, or direct spraying onto the screen.
- Storage: When not in use, especially during travel, store the screen extender in the provided carrying bag to protect it from dust, scratches, and impacts.
- Handling: Handle the device with care. Avoid dropping it or subjecting it to excessive force, which could damage the screens or internal components.
- Environment: Operate and store the extender in a clean, dry environment, away from extreme temperatures, direct sunlight, and high humidity.
7. Troubleshooting
If you encounter issues with your Ladomi screen extender, refer to the following common problems and solutions:
7.1 No Display / Black Screen
- Check Connections: Ensure all USB-C and HDMI cables are securely connected to both the laptop and the screen extender.
- Power Supply: Verify that the screens are receiving adequate power. If using USB-A for power, ensure the USB-A port on your laptop is functional.
- Laptop Compatibility: Confirm your laptop meets the compatibility requirements (refer to Section 3). Ensure your USB-C ports are full-feature (support video output).
- Display Settings: Check your laptop's display settings. Ensure the display mode is set to "Extend" or "Duplicate" and that the external monitors are detected and enabled.
- Restart Devices: Disconnect the extender, restart your laptop, then reconnect the extender.
7.2 Incorrect Display Resolution or Aspect Ratio
- Adjust Display Settings: Go to your laptop's display settings and manually set the resolution for the external screens to 1920x1200 pixels.
- Graphics Driver: Ensure your laptop's graphics drivers are up to date.
7.3 Screen Flickering or Instability
- Cable Quality: Ensure you are using the provided cables, which are designed for optimal performance. Try swapping cables if you have spares.
- Power Source: Insufficient power can cause flickering. Ensure your laptop is adequately powered, especially if it's also powering the screens.
- Interference: Keep the cables away from strong electromagnetic interference sources.
7.4 Screen Orientation Issues
- The screens feature automatic image reorientation upon physical rotation. If the orientation is incorrect, try rotating the screen fully back and forth to trigger the automatic adjustment.
- If issues persist, check your laptop's display settings for manual orientation adjustments.
8. Specifications
| Feature | Detail |
|---|---|
| Product Dimensions | 9.69 x 15.31 x 1.56 inches |
| Item Weight | 7.93 pounds |
| Item Model Number | S11 |
| Standing Screen Display Size | 16 Inches |
| Resolution | 1920 x 1200 Pixels (FHD 1200P) |
| Aspect Ratio | 16:10 |
| Image Brightness | 300 nits |
| Contrast Ratio | 1000:1 |
| Screen Surface Description | Glossy |
| Voltage | 5 Volts |
| Total USB Ports | 4 (on the extender unit) |
| Manufacturer | Shenzhen E-Tech Digital Technology Co.,Ltd. |
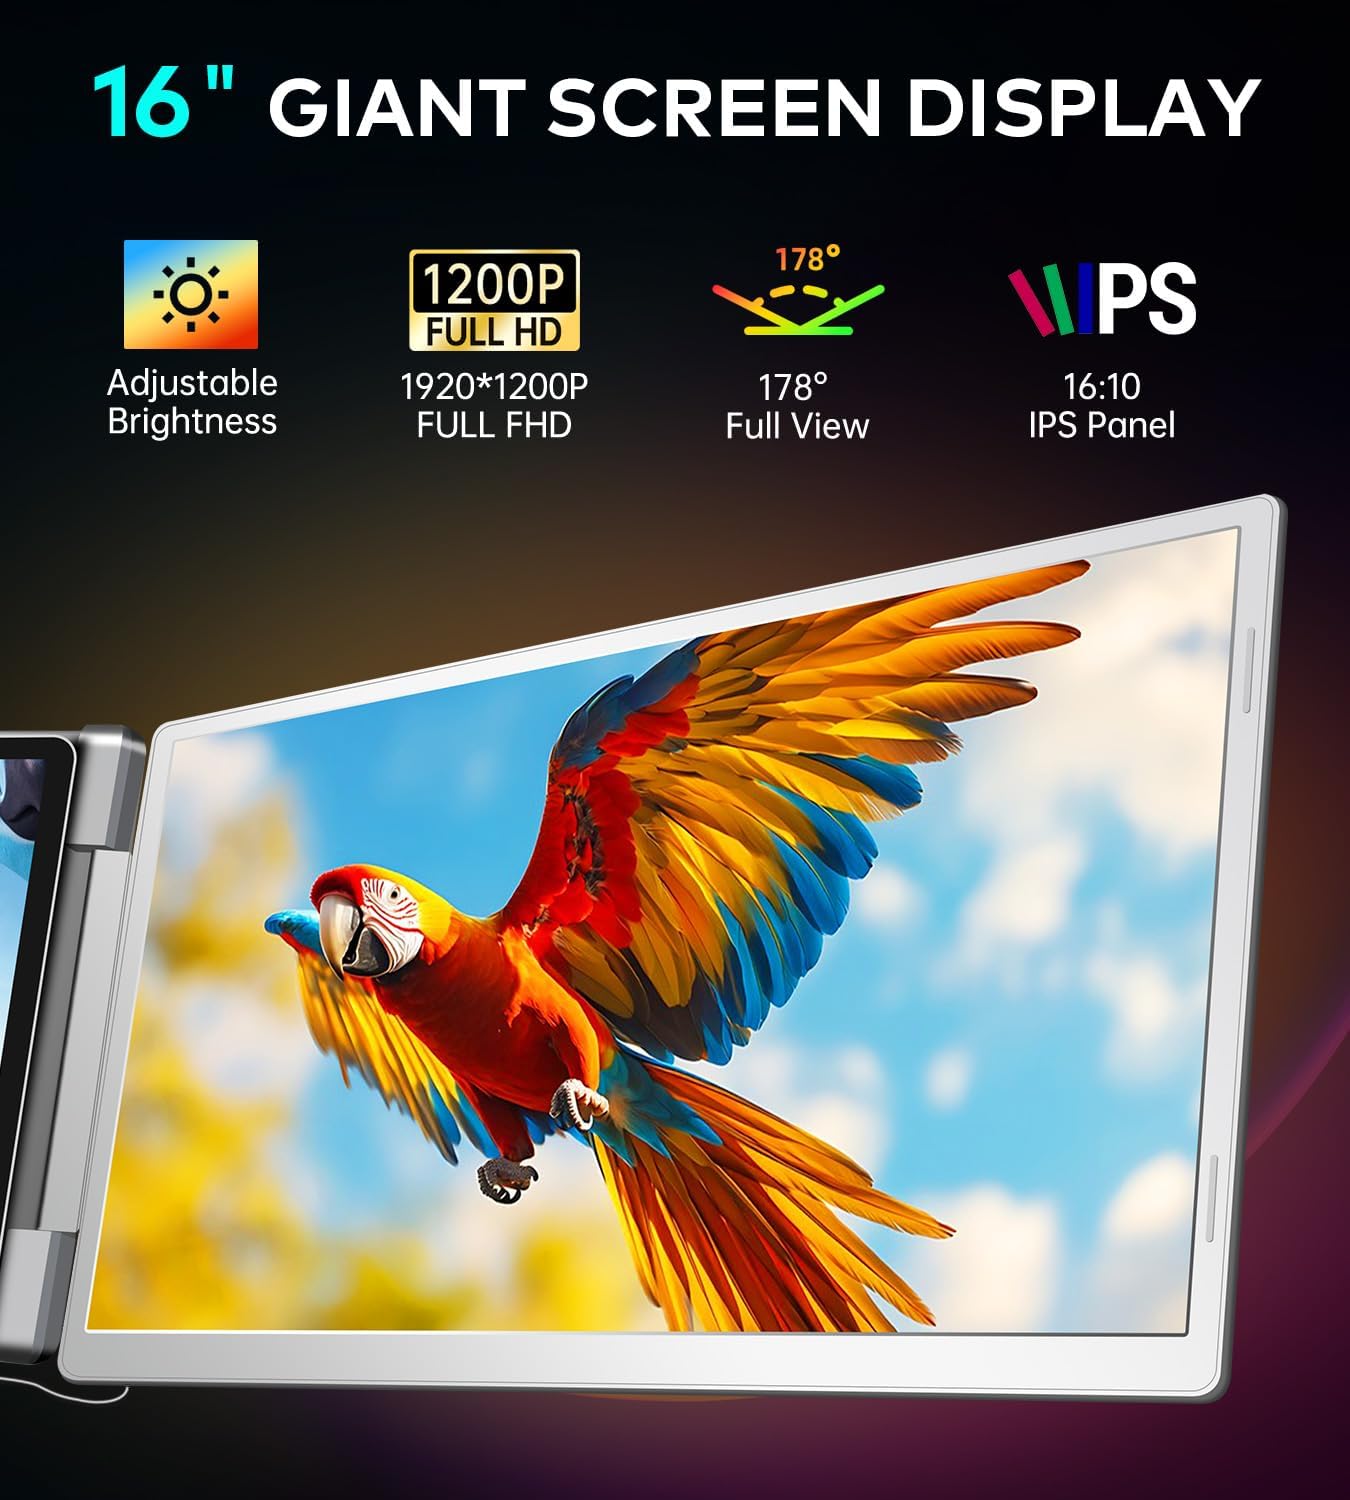
Image: Key display specifications of the Ladomi screen extender.
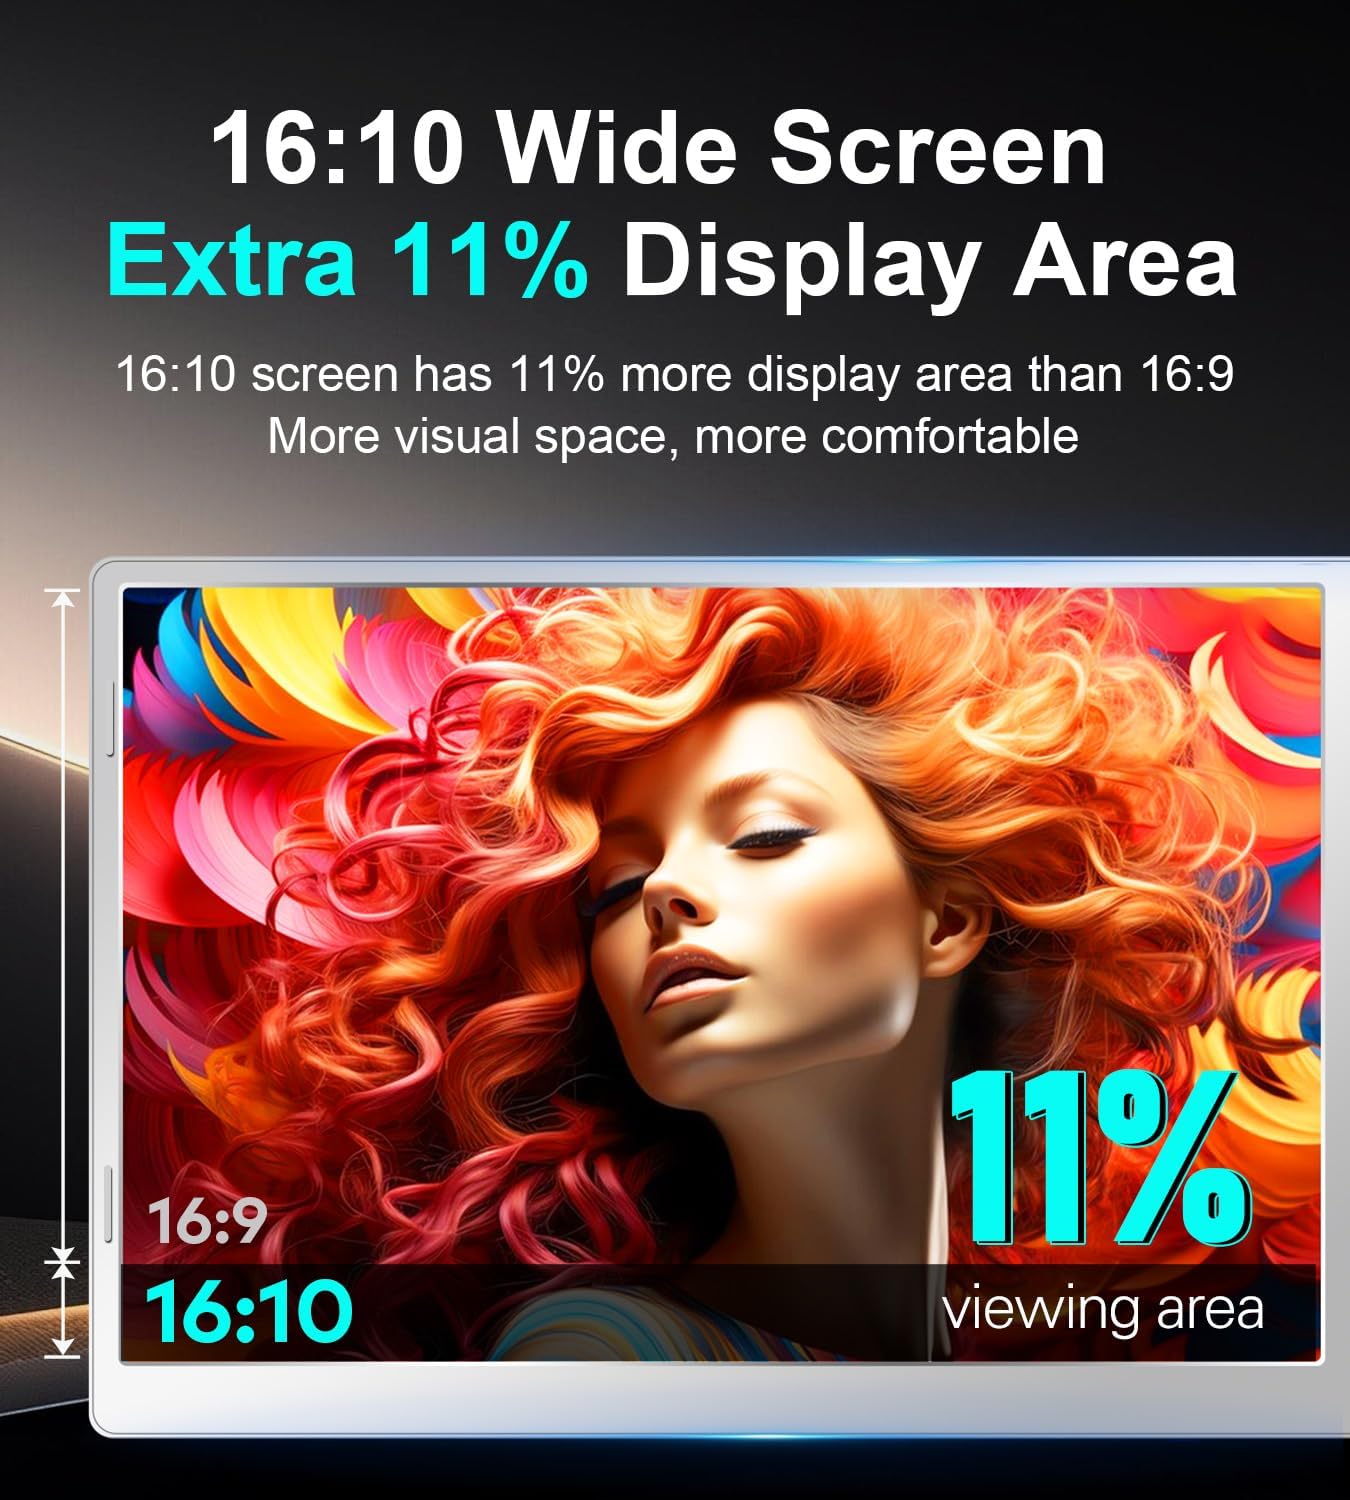
Image: Comparison of 16:9 and 16:10 aspect ratios, illustrating the increased viewing area of the 16:10 screen.
9. Warranty and Support
For warranty information, technical support, or customer service inquiries, please refer to the contact details provided with your purchase documentation or visit the official Ladomi website. Please retain your proof of purchase for warranty claims.


