
1. Introduction
Thank you for choosing the Fanttik E1 Ultra Mini Electric Screwdriver. This precision tool is designed for intricate repair tasks on various electronic devices. Its compact design, versatile bit set, and precise torque control make it an essential tool for professionals and enthusiasts alike. Please read this manual thoroughly before use to ensure proper operation and maintenance.

Image: The Fanttik E1 Ultra Mini Electric Screwdriver, its cylindrical storage case, and the organized set of precision bits.
2. Package Contents
The Fanttik E1 Ultra package includes the following items:
- Electric Precision Screwdriver (1)
- Magnetic Storage Box (1)
- 50x Screwdriver Bits (various types)
- Tweezer (1)
- Pry Bar (1)
- USB-C Charging Cable (1)
- User Manual (1)

Image: A comprehensive view of all items included in the Fanttik E1 Ultra package, neatly arranged.
3. Product Features
RevoStor Magnetic Storage
The E1 Ultra features an upgraded internal rotating storage chamber. This push-to-release design allows for convenient and quick access to the precision repair bits, minimizing clutter and optimizing space.
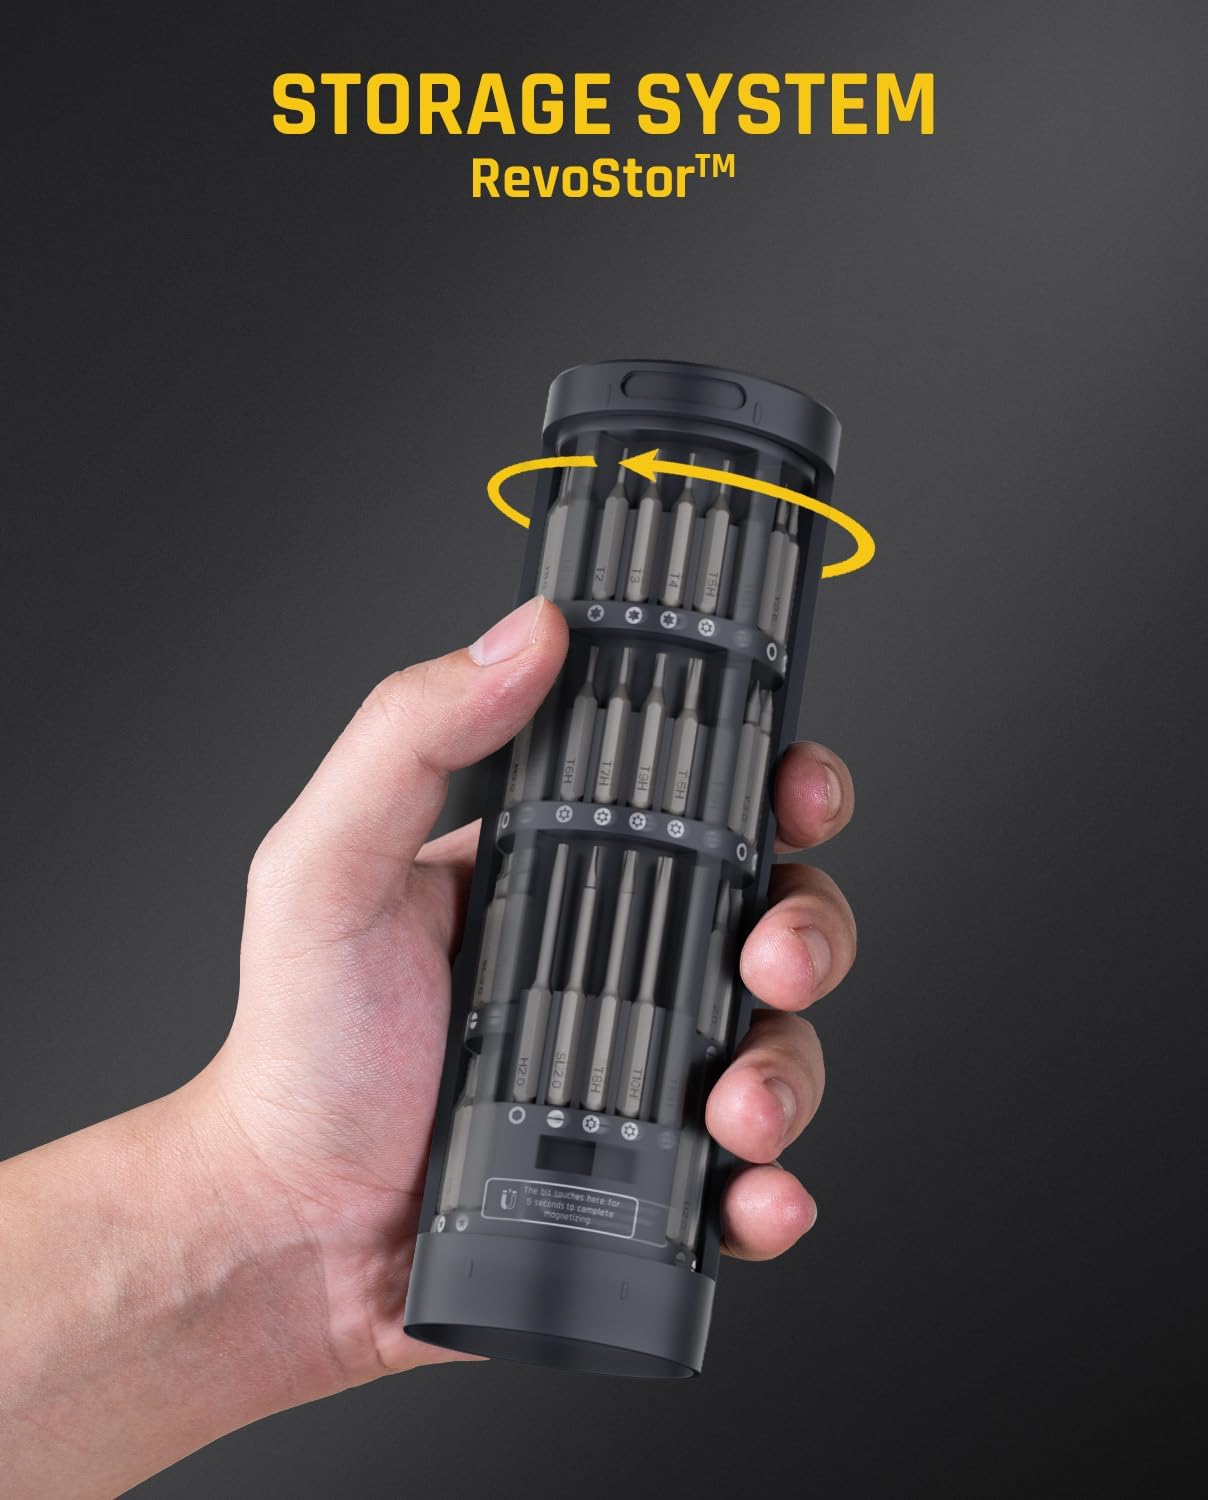
Image: A hand holding the E1 Ultra case, illustrating the innovative RevoStor rotating magnetic bit storage system.
Specialized Precision Bit Set
Equipped with a set of 12 different types, totaling 50 high-quality S2 tool steel bits (60 HRC hardness). These magnetized bits ensure a firm grip on screws. The kit also includes a tweezer and a pry bar for delicate disassembly. Compatible with smartphones, laptops, cameras, drones, glasses, and hard drives.
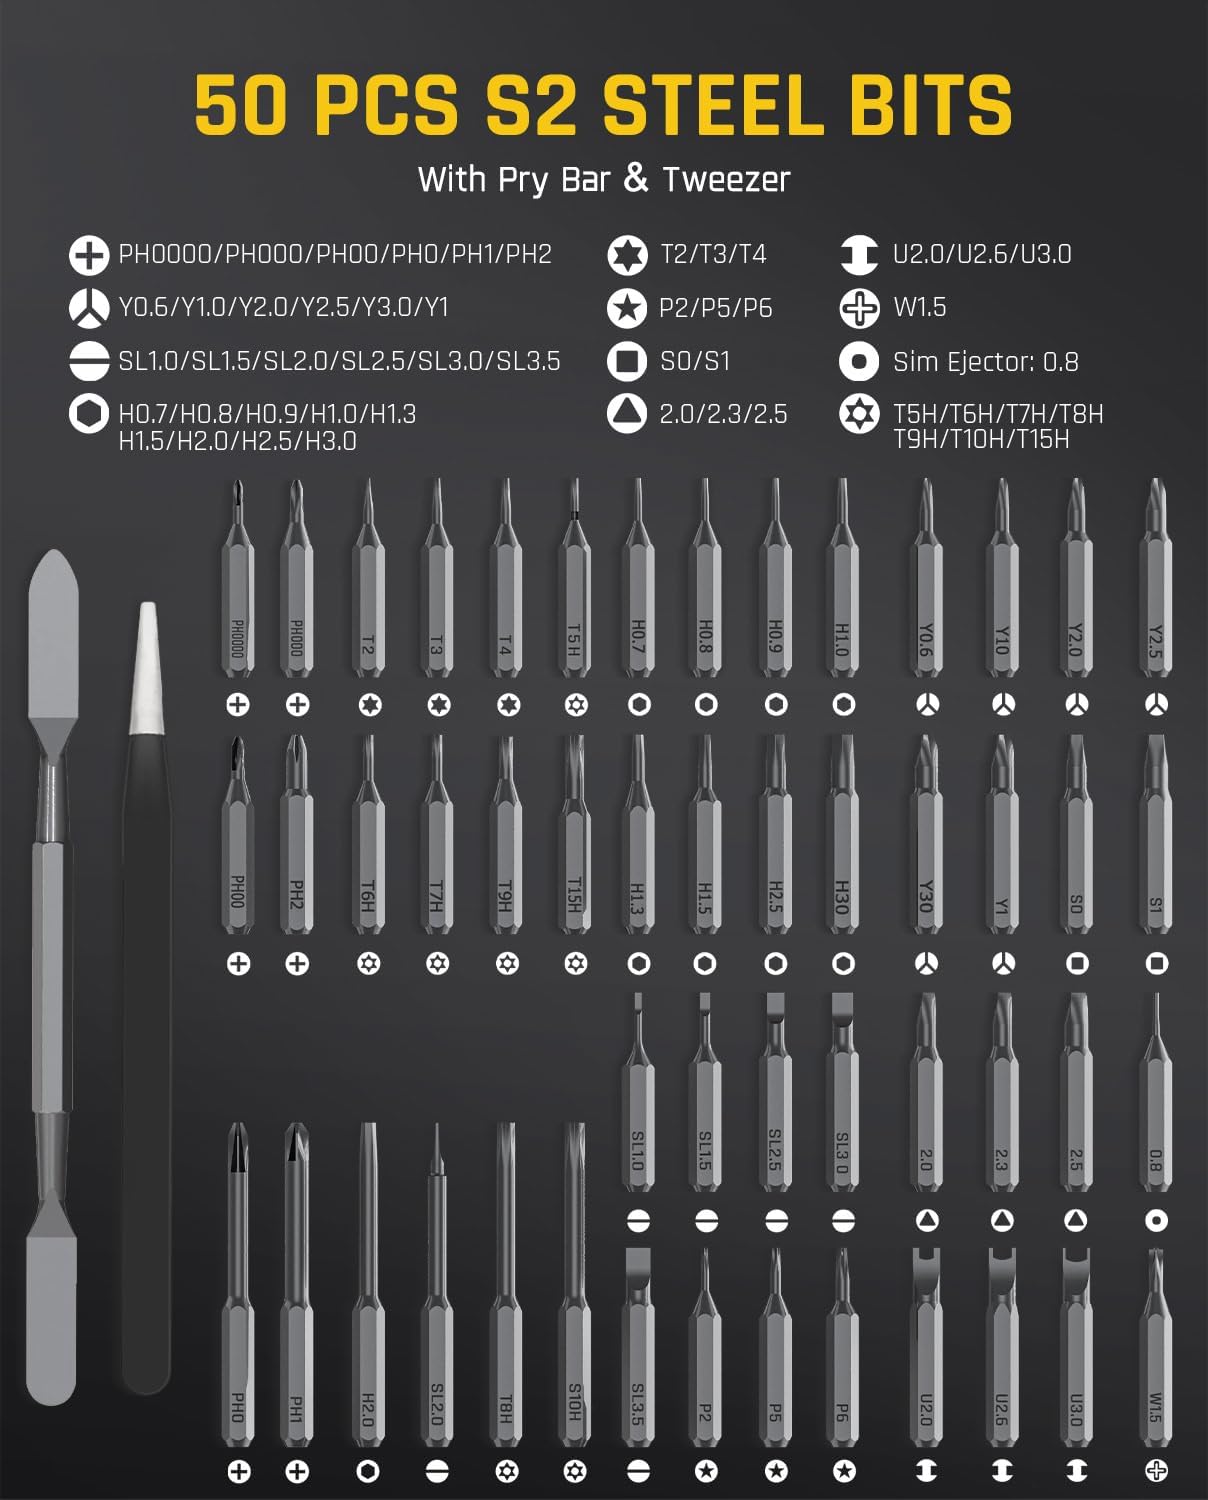
Image: A close-up of the comprehensive 50-piece S2 steel bit set, along with the included pry bar and tweezer.
Precise Torque Control
The screwdriver features a powerful 200 RPM NeoPulse motor with adjustable torque settings: low torque at 0.05 N·m, high torque at 0.2 N·m, and a manual mode with a maximum torque of 3 N·m. This range is tailored for precision screws in electronic devices.
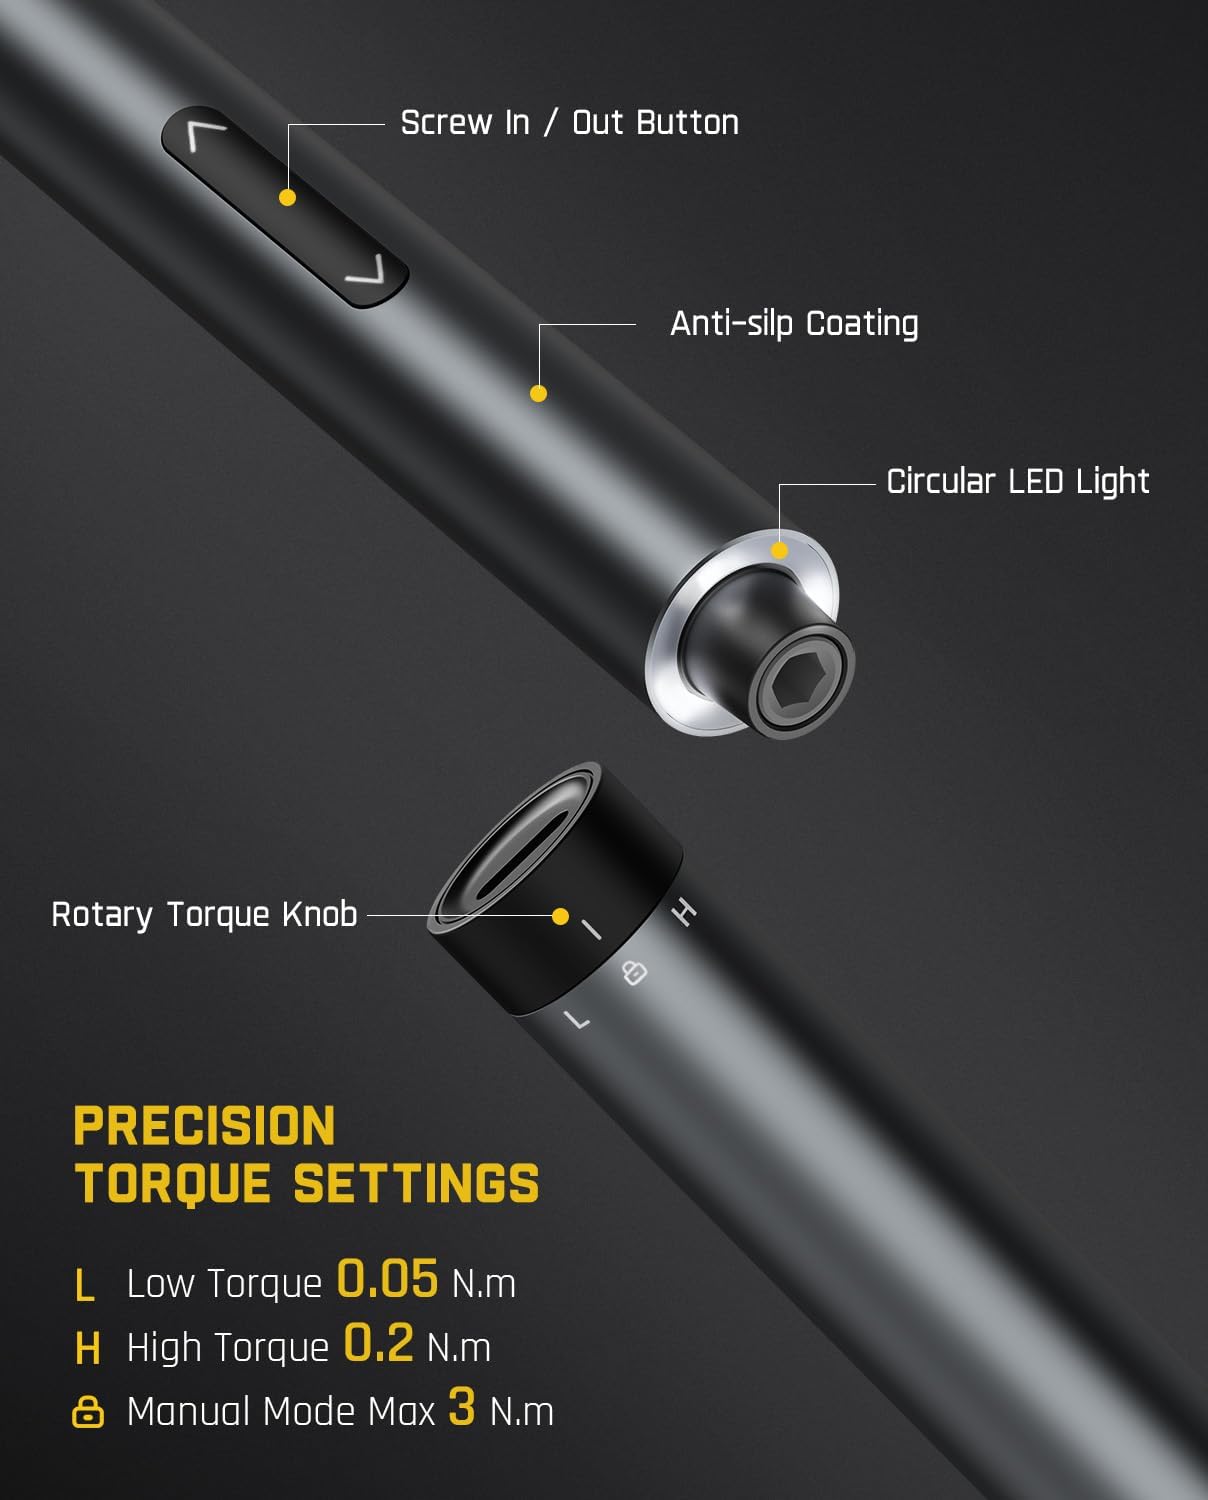
Image: A detailed view of the screwdriver's body, highlighting the control buttons, LED light, and the rotary knob for selecting torque settings.
TYPE-C Charging & Battery
Equipped with a built-in 350 mAh rechargeable lithium battery, capable of tightening over 400 M2.5x5mm screws on a single charge. It includes a USB to Type-C charging cable. An LED battery indicator informs you of the battery status.

Image: An internal diagram illustrating the NeoPulse motor and battery specifications, including capacity and performance metrics.
LED Ring Light
Four circular LED lights are strategically positioned at the front to illuminate your work environment effectively. Encased in a translucent ring-shaped shield, these lights provide bright and clear illumination, enhancing overall visibility during precision tasks.

Image: A close-up view of the screwdriver's tip, demonstrating the integrated circular LED light in action.
4. Setup
Charging the Screwdriver
- Connect the provided USB to Type-C charging cable to the charging port on the screwdriver.
- Plug the other end of the cable into a compatible USB power source (e.g., computer, wall adapter).
- The LED battery indicator next to the charging port will show the charging status. Charge until fully indicated.
Installing and Removing Bits
- To install a bit, select the desired bit from the magnetic storage chamber.
- Insert the bit firmly into the magnetic chuck at the tip of the screwdriver. The magnetic design will hold it securely.
- To remove a bit, simply pull it out from the chuck.
Unboxing and Initial Setup Video
Video: An official unboxing video demonstrating the initial setup and components of the Fanttik E1 Ultra Precision Electric Screwdriver.
5. Operating Instructions
Powering On/Off and Direction Control
- The screwdriver is activated by pressing the 'Screw In' or 'Screw Out' buttons.
- Press the forward-pointing arrow button to tighten screws.
- Press the backward-pointing arrow button to loosen screws.
Adjusting Torque Settings
Rotate the torque knob located at the end of the screwdriver to select the desired mode:
- L (Low Torque): 0.05 N·m, suitable for very delicate components.
- H (High Torque): 0.2 N·m, for general precision tasks.
- Manual Mode: Max 3 N·m. For stubborn or rusty screws, it is advised to loosen them manually before activating the electric mode.
Typical Applications
The Fanttik E1 Ultra is ideal for precision repair of various electronic devices:
- Smartphones
- Laptops and Computer Motherboards
- Cameras and Lenses
- Drones
- Watches and Glasses
- Keyboards
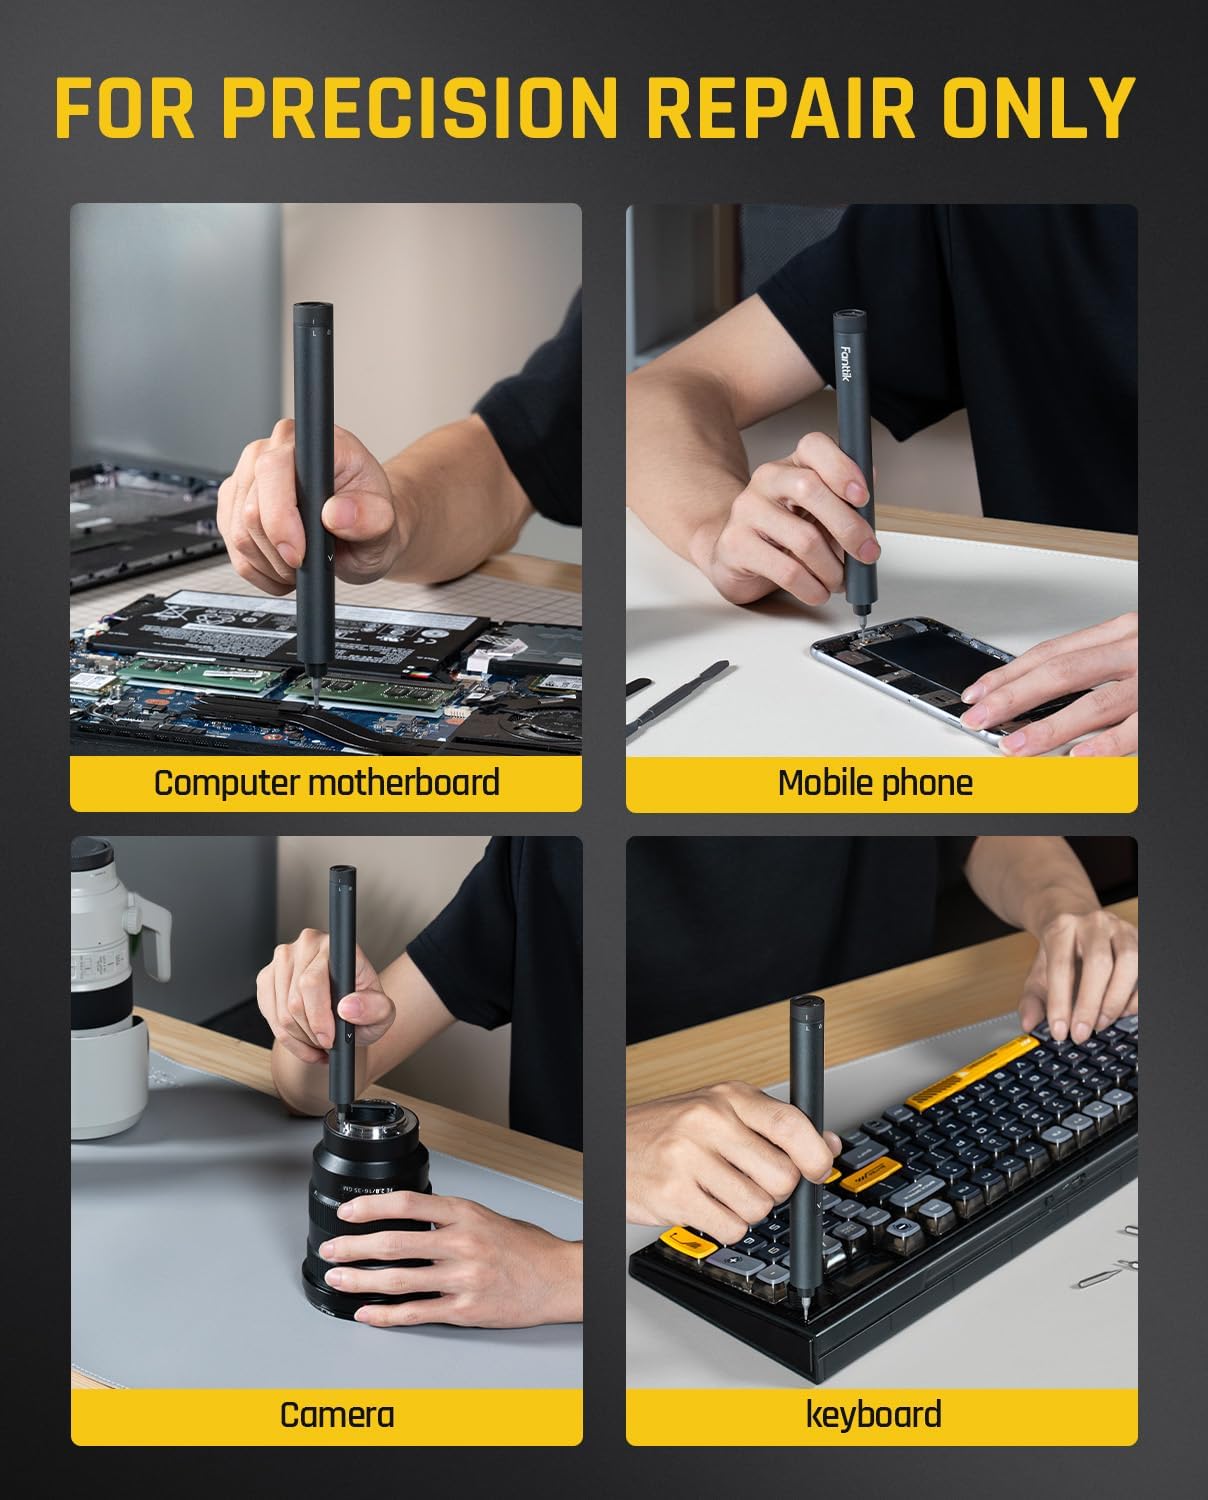
Image: Examples of the E1 Ultra in use for precision repairs on various electronic devices.

Image: The screwdriver being used to work on a mobile phone, highlighting its precision for small components.
6. Maintenance
- Cleaning: Wipe the screwdriver and bits with a soft, dry cloth after each use to remove dust and debris. Do not use liquid cleaners or solvents.
- Bit Care: Ensure bits are clean and free of residue before storing them in the magnetic chamber. This prevents corrosion and maintains their magnetic properties.
- Battery Care: To prolong battery life, avoid fully discharging the battery frequently. Charge the device regularly, even if not in constant use. Store in a cool, dry place.
- Storage: Always store the screwdriver and bits in their designated magnetic storage case to prevent loss and damage.
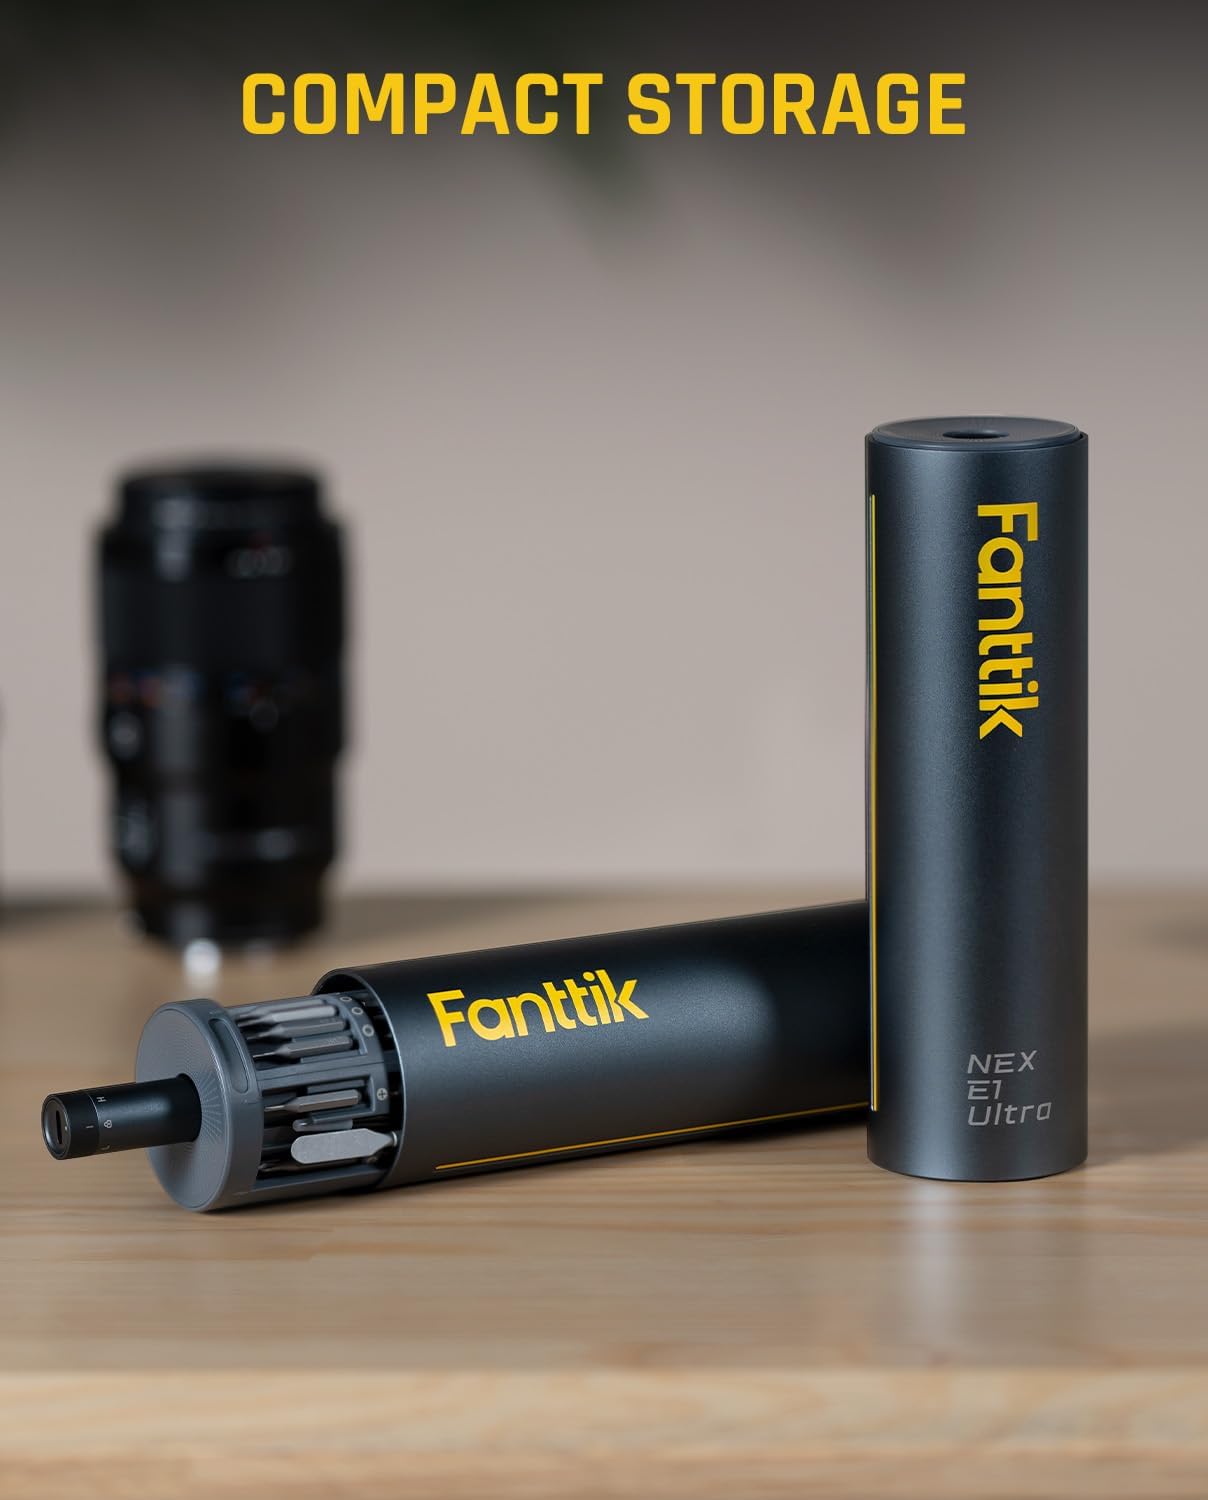
Image: The Fanttik E1 Ultra screwdriver and its case, illustrating proper storage and organization.
7. Troubleshooting
- Screwdriver not turning on: Ensure the battery is charged. Connect to a Type-C charger and check the LED indicator.
- Screwdriver not loosening/tightening screws:
- Verify the correct bit size and type is being used for the screw.
- For stubborn or rusty screws, switch to Manual Mode and apply manual force to initially loosen the screw before engaging the electric motor.
- Ensure the bit is fully inserted into the chuck.
- Bits falling out of storage: The magnetic storage is designed for secure retention. Ensure the case is closed properly. Avoid strong impacts or shaking the case upside down vigorously.
- LED light not working: Check battery level. If the issue persists after charging, contact customer support.
8. Specifications
| Feature | Detail |
|---|---|
| Brand | Fanttik |
| Model Number | E1 Ultra |
| Speed | 200 RPM |
| Product Dimensions | 2.23"L x 2.23"W x 7.52"H |
| Voltage | 3.7 Volts (DC) |
| Item Weight | 1.33 Milligrams |
| Battery Cell Composition | Lithium |
| UPC | 671891926825 |
| Special Features | LED Light, RevoStor |

Image: Visual representation of the product dimensions for both the screwdriver and its storage case.
9. Warranty and Support
Fanttik products are designed for durability and performance. For specific warranty information, please refer to the warranty card included in your product packaging or visit the official Fanttik website. For technical support, troubleshooting assistance, or to inquire about replacement parts, please contact Fanttik customer service through their official channels.
Online Support: www.fanttik.com


