
Roxicosly CR1009Ultra
Roxicosly 12000mAh Emergency Radio
Instruction Manual for Model CR1009Ultra
Product Overview
The Roxicosly 12000mAh Emergency Radio (Model CR1009Ultra) is a versatile and essential tool for emergency preparedness, outdoor adventures, and daily use. It integrates multiple functionalities including a powerful radio receiver, various charging methods, and emergency lighting, all within a compact and portable design.
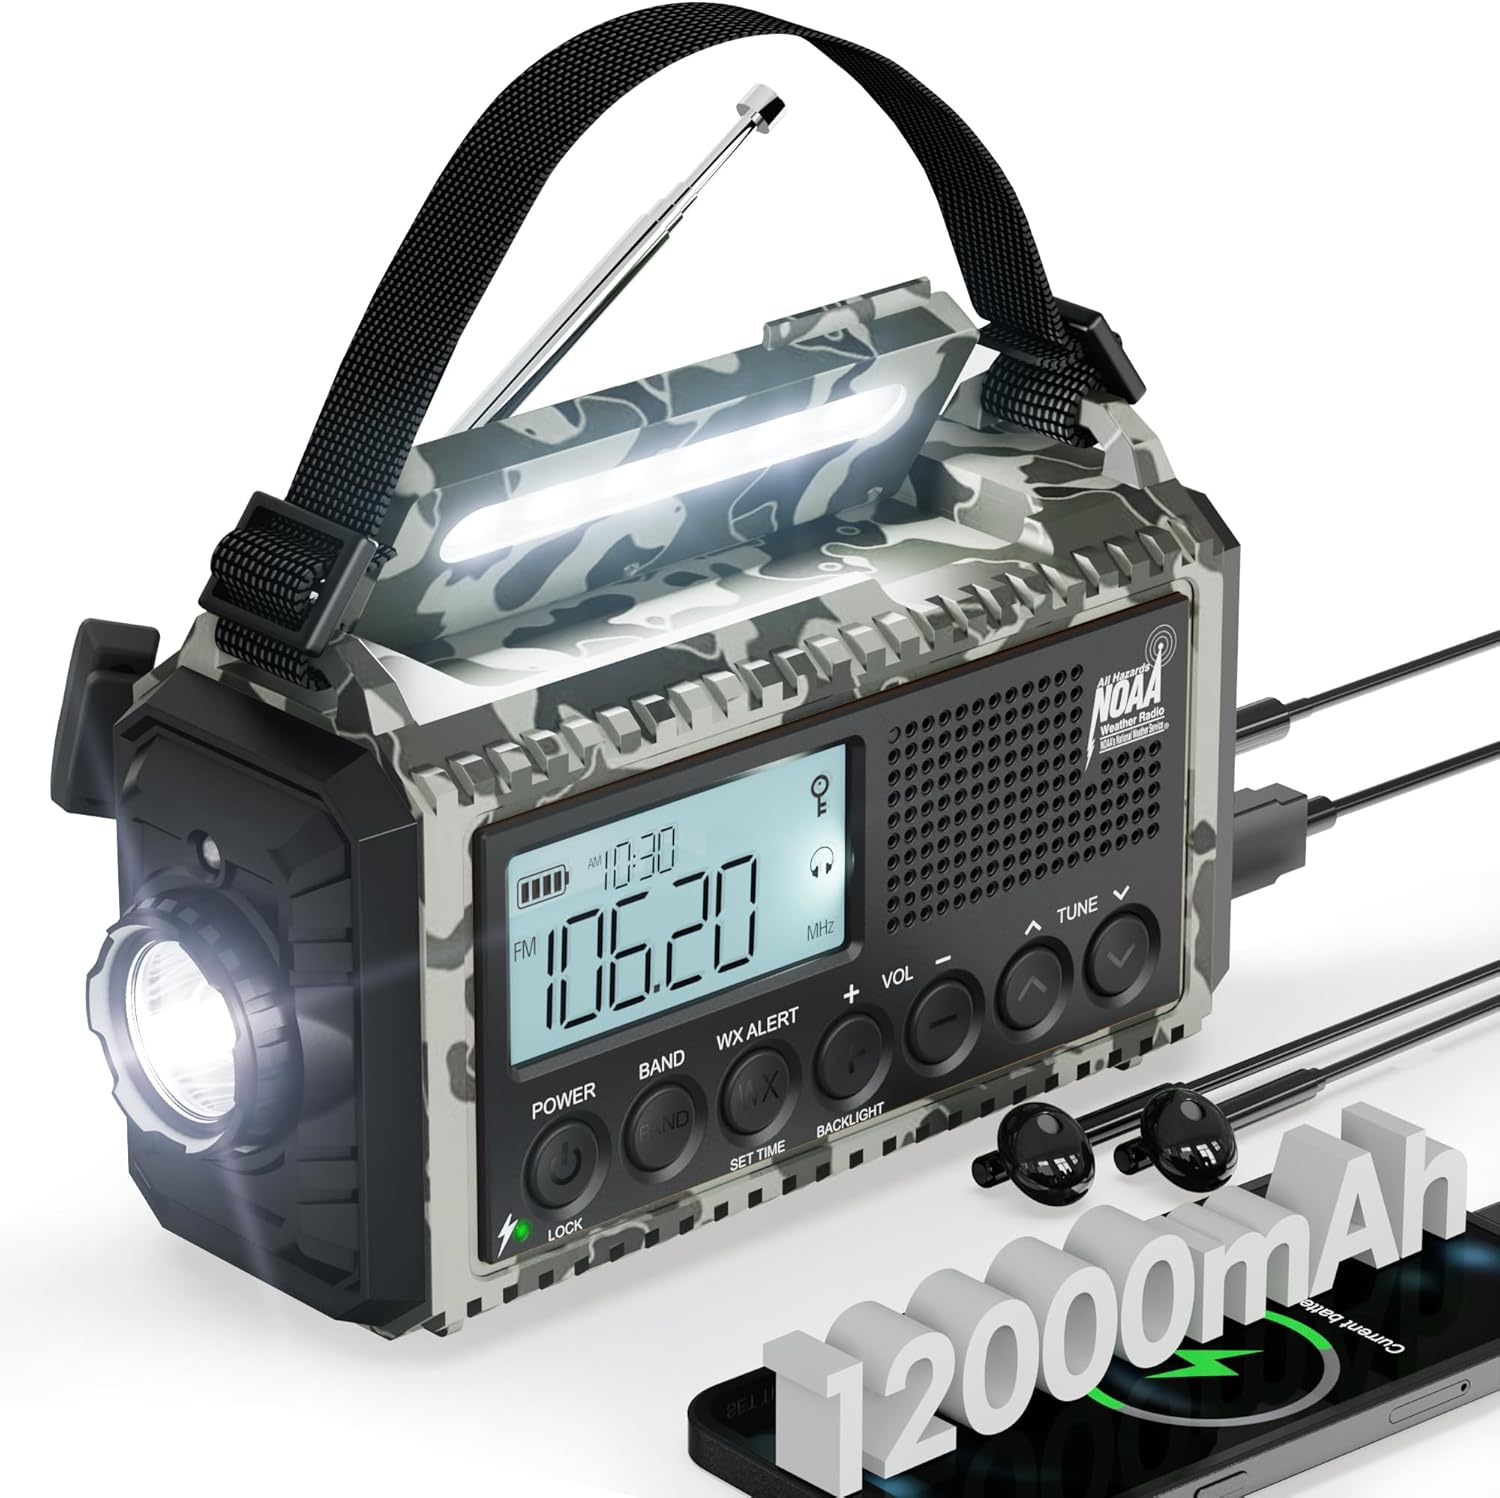
Figure 1: Front view of the Roxicosly 12000mAh Emergency Radio.
Key features include a large capacity 12000mAh rechargeable battery, AM/FM/Shortwave and 7-channel NOAA weather alerts, a bright flashlight, a reading lamp, an SOS alarm, and a USB charging port for external devices. Its robust design and multiple power options ensure reliability in various situations.
Features
- 12000mAh Rechargeable Battery: Provides extended power for long-lasting use and reliable performance.
- Multiple Power Options: Can be powered via built-in rechargeable battery, Type-C charging cable, solar panel, hand-crank, or 3 AAA batteries (not included).
- Automatic NOAA Weather Alerts: Scans and accesses all 7 NOAA weather channels for critical weather event warnings.
- AM/FM/Shortwave Radio: Access to a wide range of radio stations for news and entertainment.
- Versatile Lighting: Features a reading lamp (120/150LM) and a flashlight (120/250LM) with adjustable brightness.
- LCD Display: Large screen clearly displays battery status, radio bands, and time.
- SOS Alarm: Activates a loud siren and flashing red light for emergency signaling.
- USB Charging Port: Allows charging of external devices like smartphones.
- 3.5mm Headphone Jack: For private listening.
- Portable Design: Compact and lightweight with an attached lanyard for easy carrying.

Figure 2: Overview of the radio's multifunctional capabilities.
Setup
- Unpacking: Carefully remove the radio and all accessories from the packaging. Retain packaging for future storage or transport.
- Initial Charge: Before first use, it is recommended to fully charge the built-in 12000mAh battery using the provided Type-C USB charging cable. Connect the cable to a standard USB power adapter (not included) and the radio's Type-C input port. The LCD display will indicate charging status.
- AAA Battery Installation (Optional): For an additional power source, open the battery compartment on the back of the radio and insert 3 AAA batteries (not included), ensuring correct polarity.
- Antenna Extension: Extend the telescopic antenna fully for optimal radio reception.
- Attach Lanyard: Secure the included lanyard to the designated attachment point for convenient carrying.
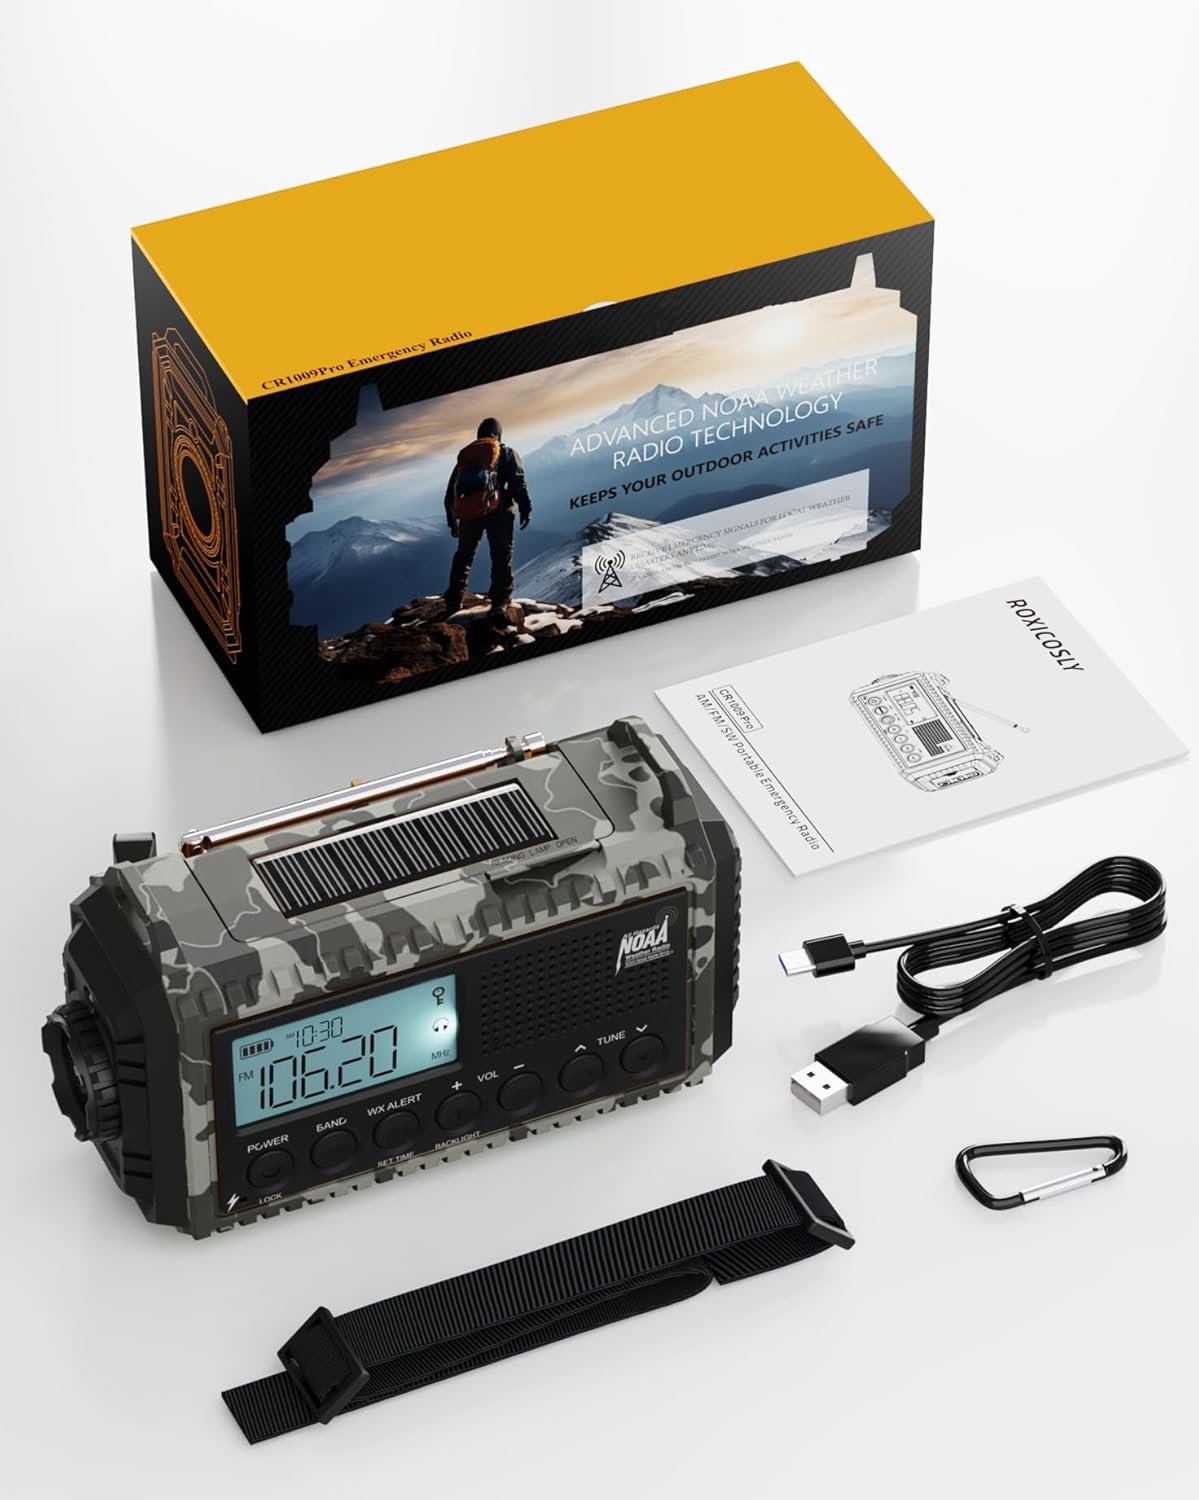
Figure 3: Package contents of the radio.
Operating Instructions
Powering On/Off
Press the POWER button to turn the radio on or off. The LCD display will illuminate.
Radio Functions (AM/FM/SW/NOAA)
- Band Selection: Press the BAND button to cycle through AM, FM, SW (Shortwave), and WX (NOAA Weather) bands.
- Tuning: Use the TUNE + and TUNE - buttons to manually adjust the frequency. For automatic scanning, press and hold the TUNE + or TUNE - button.
- Volume Control: Adjust the volume using the VOL + and VOL - buttons.
- NOAA Weather Alert: In WX mode, the radio automatically scans and locks onto the strongest NOAA weather channel. The WX ALERT feature will activate an alarm and flashing light if a severe weather alert is broadcast.
- Headphone Use: Insert 3.5mm headphones into the headphone jack for private listening.

Figure 4: Receiving NOAA weather alerts.

Figure 5: Using the 3.5mm headphone jack.
Lighting Functions (Flashlight & Reading Lamp)
- Flashlight: Press the dedicated flashlight button (usually on the side or front) to turn on the flashlight. Press again to cycle through brightness levels (if applicable) or turn off.
- Reading Lamp: Lift the reading lamp panel (located on top) and press its dedicated button to turn it on. Press again to cycle through brightness levels or turn off.

Figure 6: Flashlight in use.

Figure 7: Reading lamp in use.
SOS Alarm
In an emergency, press and hold the SOS button to activate a loud siren and a flashing red light. This feature is designed to attract attention and signal for help. Press the SOS button again to deactivate.

Figure 8: Activating the SOS alarm.
USB Charging Port (Power Bank Function)
Connect your smartphone or other USB-powered devices to the radio's USB output port using your device's charging cable. The radio's internal 12000mAh battery will act as a power bank to charge your device.

Figure 9: Using the radio as a power bank.
Powering Options
The Roxicosly Emergency Radio offers five distinct ways to ensure it always has power:
- Built-in 12000mAh Rechargeable Battery: The primary power source, charged via Type-C USB, solar, or hand crank.
- Type-C USB Charging: For fast and convenient charging from a wall adapter, power bank, or computer.
- Solar Panel Charging: Place the radio in direct sunlight to charge the internal battery. This is ideal for maintaining charge or slow charging in outdoor environments.
- Hand-Crank Dynamo: Rotate the hand crank clockwise or counter-clockwise to generate power manually. This is crucial for emergency situations when other power sources are unavailable.
- 3 AAA Batteries (Not Included): Provides an alternative power source. Ensure correct polarity when inserting.

Figure 10: The five versatile power options.

Figure 11: Solar power charging.

Figure 12: Hand crank for manual charging.

Figure 13: AAA battery compartment.
Maintenance
- Cleaning: Wipe the radio with a soft, damp cloth. Do not use harsh chemicals or abrasive cleaners.
- Storage: Store the radio in a cool, dry place away from direct sunlight and extreme temperatures. If storing for extended periods, ensure the battery is partially charged (around 50%) and recharge every 3-6 months to maintain battery health.
- Battery Care: Avoid fully discharging the built-in battery frequently. For optimal battery life, charge it regularly.
- Water Resistance: The radio is designed for outdoor use but is not fully waterproof. Avoid submerging it in water or exposing it to heavy rain.
Troubleshooting
| Problem | Possible Cause | Solution |
|---|---|---|
| Radio does not turn on. | Battery is fully discharged. | Charge the radio using Type-C USB, solar, or hand crank. |
| Poor radio reception. | Antenna not fully extended; weak signal area. | Fully extend the telescopic antenna. Try repositioning the radio for better signal. |
| Flashlight/Reading lamp not working. | Battery low; light function not activated correctly. | Charge the radio. Ensure you are pressing the correct button for the light function. |
| Cannot charge external devices via USB. | Radio battery is too low; incorrect cable. | Ensure the radio's internal battery has sufficient charge. Use a compatible USB cable for your device. |
| SOS alarm does not activate. | Button not pressed long enough. | Press and hold the SOS button for a few seconds until the alarm activates. |
Specifications
| Feature | Detail |
|---|---|
| Model Number | CR1009Ultra |
| Brand | Roxicosly |
| Battery Capacity | 12000mAh (Built-in rechargeable) |
| Power Sources | Built-in 12000mAh rechargeable battery, Type-C Charging cable, solar charging panel, hand-crank dynamo, 3 AAA batteries (not included) |
| Radio Bands Supported | AM (520-1710 KHz), FM (87-108 MHz), Shortwave (2.3-22 MHz), 7 NOAA Weather Channels (162.400MHz, 162.425MHz, 162.450MHz, 162.475MHz, 162.50MHz, 162.525MHz, 162.55MHz) |
| Flashlight Brightness | 120LM / 250LM (2 adjustable levels) |
| Reading Lamp Brightness | 120LM / 150LM (2 adjustable levels) |
| Display Type | LCD |
| Connectivity | USB (for charging external devices), 3.5mm Headphone Jack |
| Product Dimensions | 17.2 x 9.4 x 6.3 cm |
| Product Weight | 520 g |
Packing List
Upon opening your package, please verify that all the following items are included:
- Roxicosly 12000mAh Emergency Radio (Model CR1009Ultra) x 1
- USB Type-C Charging Cable x 1
- Hand Strap x 1
- Clip x 1
- User Manual x 1

Figure 14: Contents of the product package.
Warranty and Support
For warranty information and customer support, please refer to the documentation provided with your purchase or contact the seller directly. Keep your purchase receipt as proof of purchase.
Ask a question about this manual
Ask about setup, troubleshooting, compatibility, parts, safety, or missing instructions. Manuals+ will review the question and use this page’s manual context to help answer it.