
1. Product Overview
The YESWELDER FLUX-135 MINI is a versatile 135Amp 3-in-1 welding machine designed for various welding tasks. It supports Flux Core Gasless MIG, Stick, and Lift TIG welding processes. This machine is suitable for both beginners and experienced welders due to its intuitive controls and synergic features.
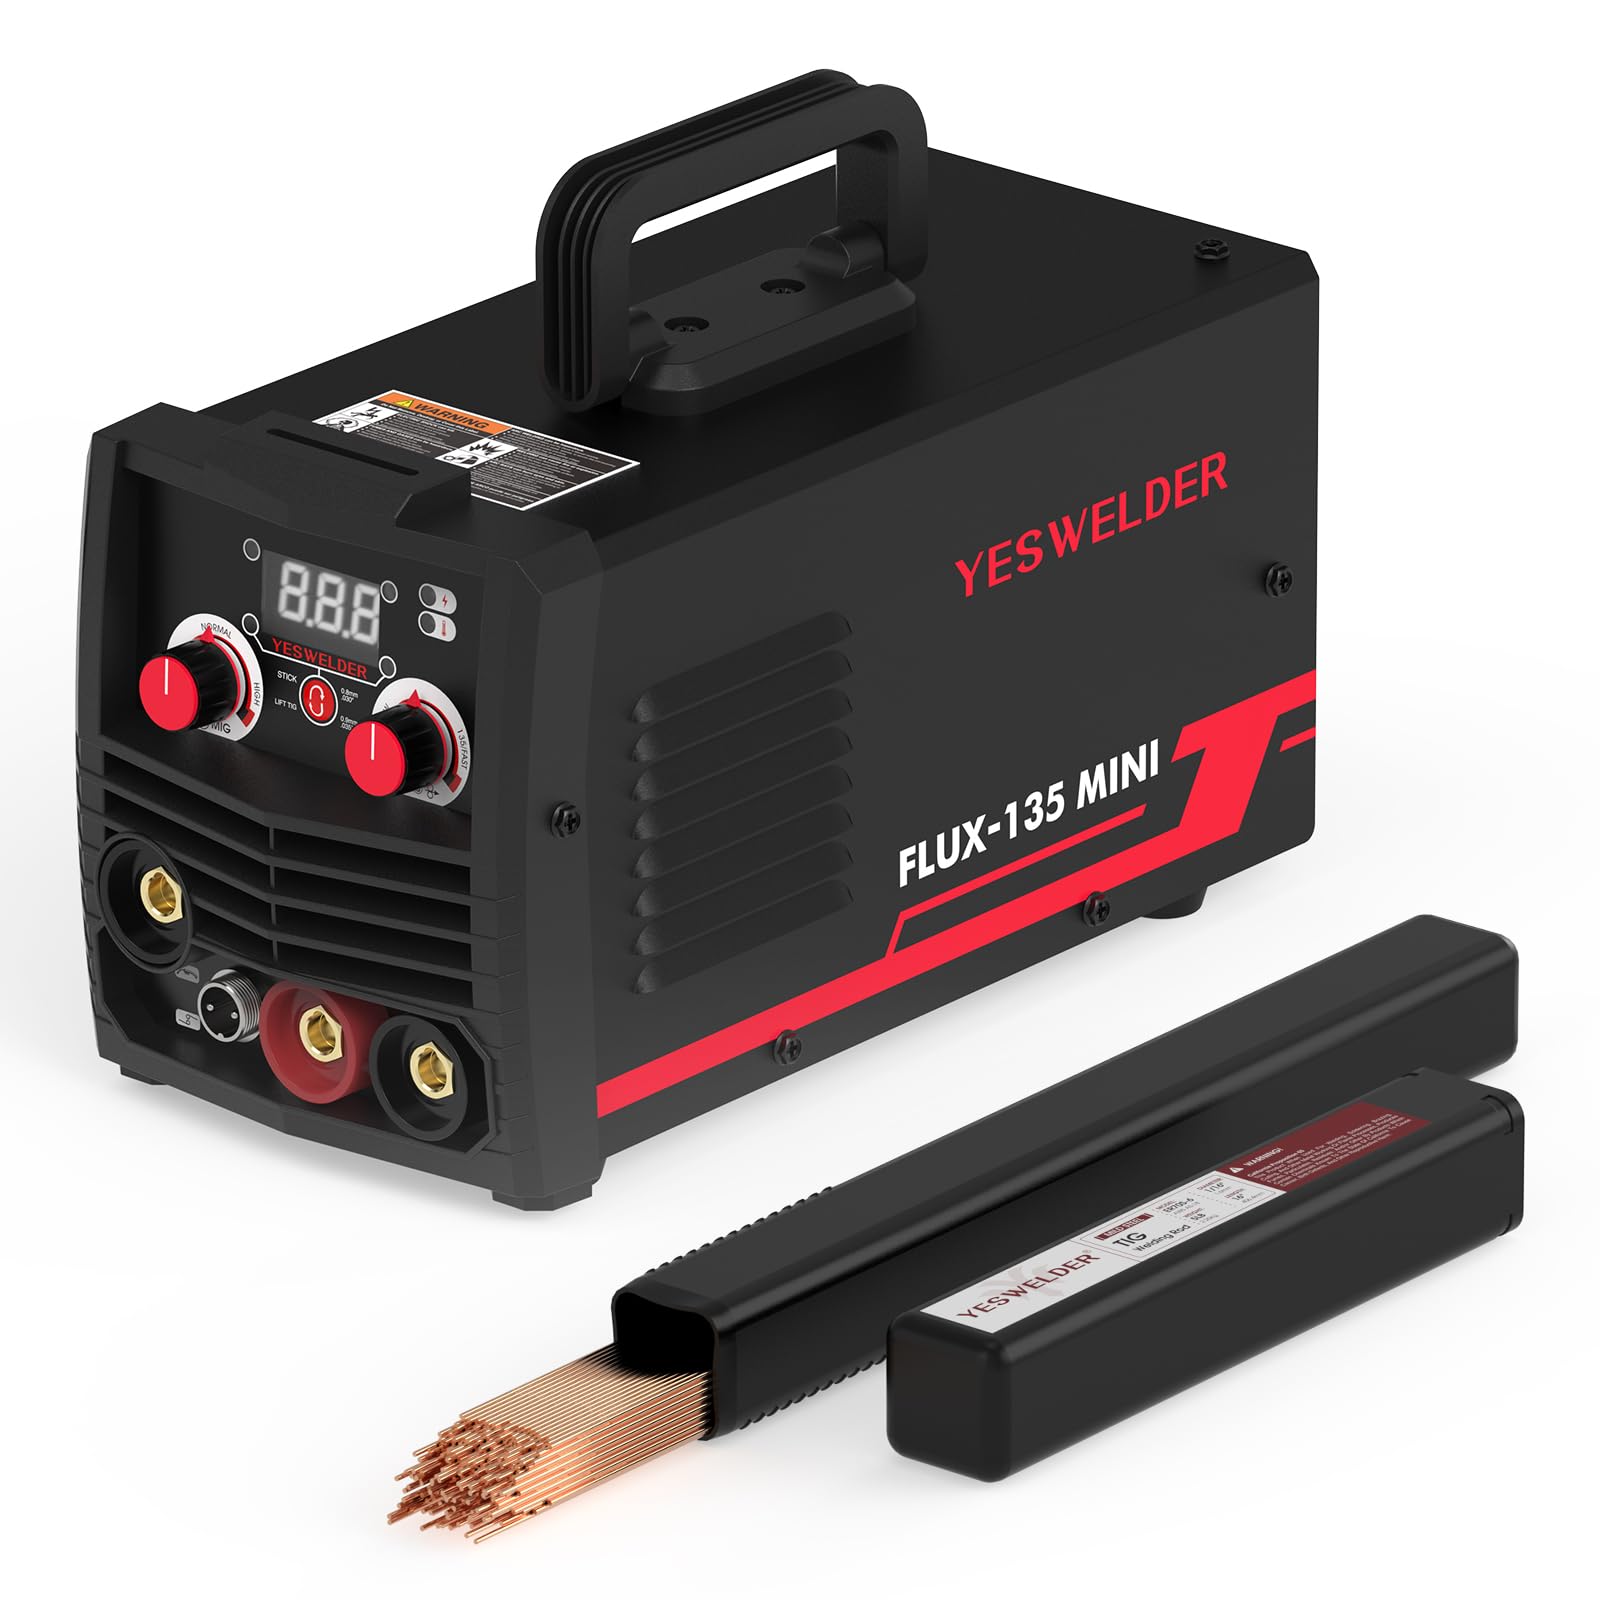
Figure 1: Front view of the YESWELDER FLUX-135 MINI welding machine.
Key Features:
- Multi-Process Capability: Supports Flux Core Gasless MIG, Stick, and Lift TIG welding.
- Synergic Control: Automatically matches recommended voltage when adjusting wire feed speed for optimized welding parameters.
- Easy Operation: Intuitive control panel for straightforward adjustment of welding modes, voltage, and current/wire feed speed.
- Compact Design: Mini size for portability and convenience.

Figure 2: The 3-in-1 multi-function welding machine illustrating Flux Cored, Lift TIG, and Stick welding capabilities.
2. Safety Information
Welding can be hazardous. Always follow safety precautions to prevent injury or damage. Read and understand all safety warnings and instructions before operating this equipment.
General Safety Precautions:
- Electric Shock: Can kill. Do not touch live electrical parts. Wear dry welding gloves and protective clothing. Ensure the welding machine is properly grounded.
- Fumes and Gases: Can be hazardous to your health. Keep your head out of the fumes. Use ventilation or exhaust to remove fumes from the breathing zone and general area.
- Arc Rays: Can burn eyes and skin. Wear a welding helmet with a proper shade filter and protective clothing.
- Fire and Explosion: Welding sparks and hot metal can cause fires. Keep flammable materials away from the welding area. Have a fire extinguisher nearby.
- Hot Parts: Can cause severe burns. Allow equipment to cool before touching.
- Noise: Excessive noise can damage hearing. Wear ear protection.
- Work Area: Keep the work area clean, dry, and free from clutter. Ensure adequate lighting.
3. Setup and Installation
3.1 Power Connection
Connect the welder to a standard 110V AC power outlet. Ensure the power source is capable of providing sufficient current for the welding operations.
3.2 Welding Wire Installation (Flux Core MIG)
- Open the wire feeder compartment.
- Place a 2LB (4-inch spool diameter) welding wire spool onto the spindle. The FLUX-135 MINI is compatible with .030"/.08mm flux cored wire.
- Thread the wire through the guide tube and into the drive roller mechanism.
- Close the drive roller tension arm and adjust the tension appropriately.
- Feed the wire through the MIG torch liner until it exits the nozzle.

Figure 3: Installation of a 2LB gasless flux cored welding wire spool.
3.3 Electrode/Torch Connections
- MIG Welding: The MIG torch is typically pre-connected. Ensure the ground clamp is securely attached to the workpiece.
- Stick Welding: Connect the electrode holder to the positive (+) terminal and the ground clamp to the negative (-) terminal for most common electrodes. Refer to electrode manufacturer specifications.
- Lift TIG Welding: An additional Lift TIG torch (not included) is required. Connect the TIG torch to the negative (-) terminal and the ground clamp to the positive (+) terminal.
4. Operating Instructions
4.1 Control Panel Overview
The FLUX-135 MINI features a simple and intuitive control panel. It includes a digital display, mode selection knob, and adjustment knobs for voltage/current and wire feed speed.

Figure 4: Detailed view of the control panel, highlighting synergic control and efficiency.
4.2 Mode Selection
Use the mode selection knob to choose between Flux MIG, Stick, or Lift TIG welding processes.
4.3 Synergic Control and Parameter Adjustment
The synergic control feature simplifies parameter setting. When operating in Flux MIG mode, adjusting the wire feed speed knob will automatically suggest the corresponding voltage for optimal welding performance. For Stick and Lift TIG modes, the knobs will adjust current (amperage).
4.4 Welding Processes
- Flux Core Gasless MIG Welding:
This mode uses flux-cored wire, eliminating the need for external shielding gas. Select Flux MIG mode, set your wire feed speed (voltage will adjust synergically), and begin welding. Ensure proper stick-out and travel speed for best results. - Stick Welding (SMAW):
Select Stick mode. Insert the appropriate electrode into the electrode holder. Adjust the current (amperage) based on the electrode type and material thickness. Maintain a consistent arc length and travel speed. - Lift TIG Welding (GTAW):
Note: Requires an additional Lift TIG torch (not included). Select Lift TIG mode. Connect the TIG torch and ground clamp as described in Section 3.3. Use ER70S-6 mild steel TIG welding rods for fabrication of mild steel. Initiate the arc by gently touching the tungsten electrode to the workpiece and then lifting it slightly. Adjust current (amperage) as needed.
Figure 5: YESWELDER ER70S-6 mild steel TIG welding rods.

Figure 6: ER70S-6 TIG welding rods available in 1/16", 3/32", and 1/8" diameters, all 16" long.

Figure 7: An operator performing Lift TIG welding.
5. Maintenance
Regular maintenance ensures the longevity and optimal performance of your welding machine.
5.1 Cleaning
- Periodically clean the exterior of the machine with a dry, soft cloth.
- Use compressed air to blow out dust and debris from the cooling vents. Ensure the machine is unplugged before cleaning.
5.2 Cable and Connection Inspection
- Regularly inspect all welding cables, torch leads, and ground clamps for signs of wear, damage, or loose connections. Replace damaged components immediately.
- Ensure all electrical connections are tight and secure.
5.3 Wire Feeder Maintenance (MIG)
- Clean the drive rollers and wire guide tubes to prevent wire feeding issues.
- Check the MIG torch liner for blockages or wear. Replace if necessary.
6. Troubleshooting
This section provides solutions to common issues you might encounter.
| Problem | Possible Cause | Solution |
|---|---|---|
| Welder does not power on | No power from outlet; Power switch off; Circuit breaker tripped | Check power outlet; Turn power switch on; Reset circuit breaker |
| No welding arc | Poor ground connection; Incorrect settings; Damaged cables | Ensure ground clamp is secure; Verify mode and parameter settings; Inspect and replace damaged cables |
| Wire feeding issues (MIG) | Incorrect drive roller tension; Kinked wire; Clogged liner; Wrong size tip | Adjust drive roller tension; Straighten wire; Clean or replace liner; Use correct contact tip size |
| Poor weld quality | Incorrect parameters; Improper technique; Contaminated material | Adjust voltage/current and wire speed; Practice welding technique; Clean workpiece thoroughly |
If you encounter issues not listed here or if the problem persists, please contact customer support.
7. Specifications
Technical specifications for the YESWELDER FLUX-135 MINI.
| Feature | Detail |
|---|---|
| Model | FLUX-135 MINI |
| Input Voltage | 110V |
| Max Amperage | 135Amp |
| Welding Processes | Flux Core Gasless MIG, Stick, Lift TIG |
| Wire Compatibility | 2LB (4" spool) Flux Cored Wire (.030"/.08mm) |
| TIG Rod Compatibility | ER70S-6 Mild Steel TIG Welding Rods |
| ASIN | B0DJVGP23K |
| Date First Available | October 11, 2024 |
8. Warranty Information
This product is covered by a manufacturer's warranty. Please refer to the warranty card included with your purchase or visit the official YESWELDER website for detailed warranty terms and conditions. Keep your proof of purchase for warranty claims.
9. Customer Support
For technical assistance, spare parts, or any inquiries regarding your YESWELDER FLUX-135 MINI, please contact YESWELDER customer support. You can typically find contact information on the official YESWELDER website or through your retailer.
Online Resources: Visit the YESWELDER Store on Amazon for product information and support.