
Important Safety Information
- Read all instructions thoroughly before using the feeder.
- This appliance is designed for household use only. Do not use outdoors.
- Do not immerse the main feeder unit in water. Electronic components are not waterproof.
- Ensure all removable parts are completely dry before reassembly to prevent damage.
- Use only 4 AA alkaline batteries. Do not mix old and new batteries, or different types of batteries.
- Keep the feeder out of reach of children and pets when not in use or during cleaning.
- The feeder features an anti-pinch sensor. Do not attempt to force the tray rotation.
- The feeder is crafted from food-grade, BPA-free ABS material.
Product Overview
The Casfuy F26-L Automatic Pet Feeder is designed to provide scheduled meals for cats and small dogs, accommodating both wet and dry food. It features four meal compartments, a programmable timer, and includes two ice packs to help keep wet food fresh.

Image: The Casfuy F26-L Automatic Pet Feeder, showcasing its compact design.
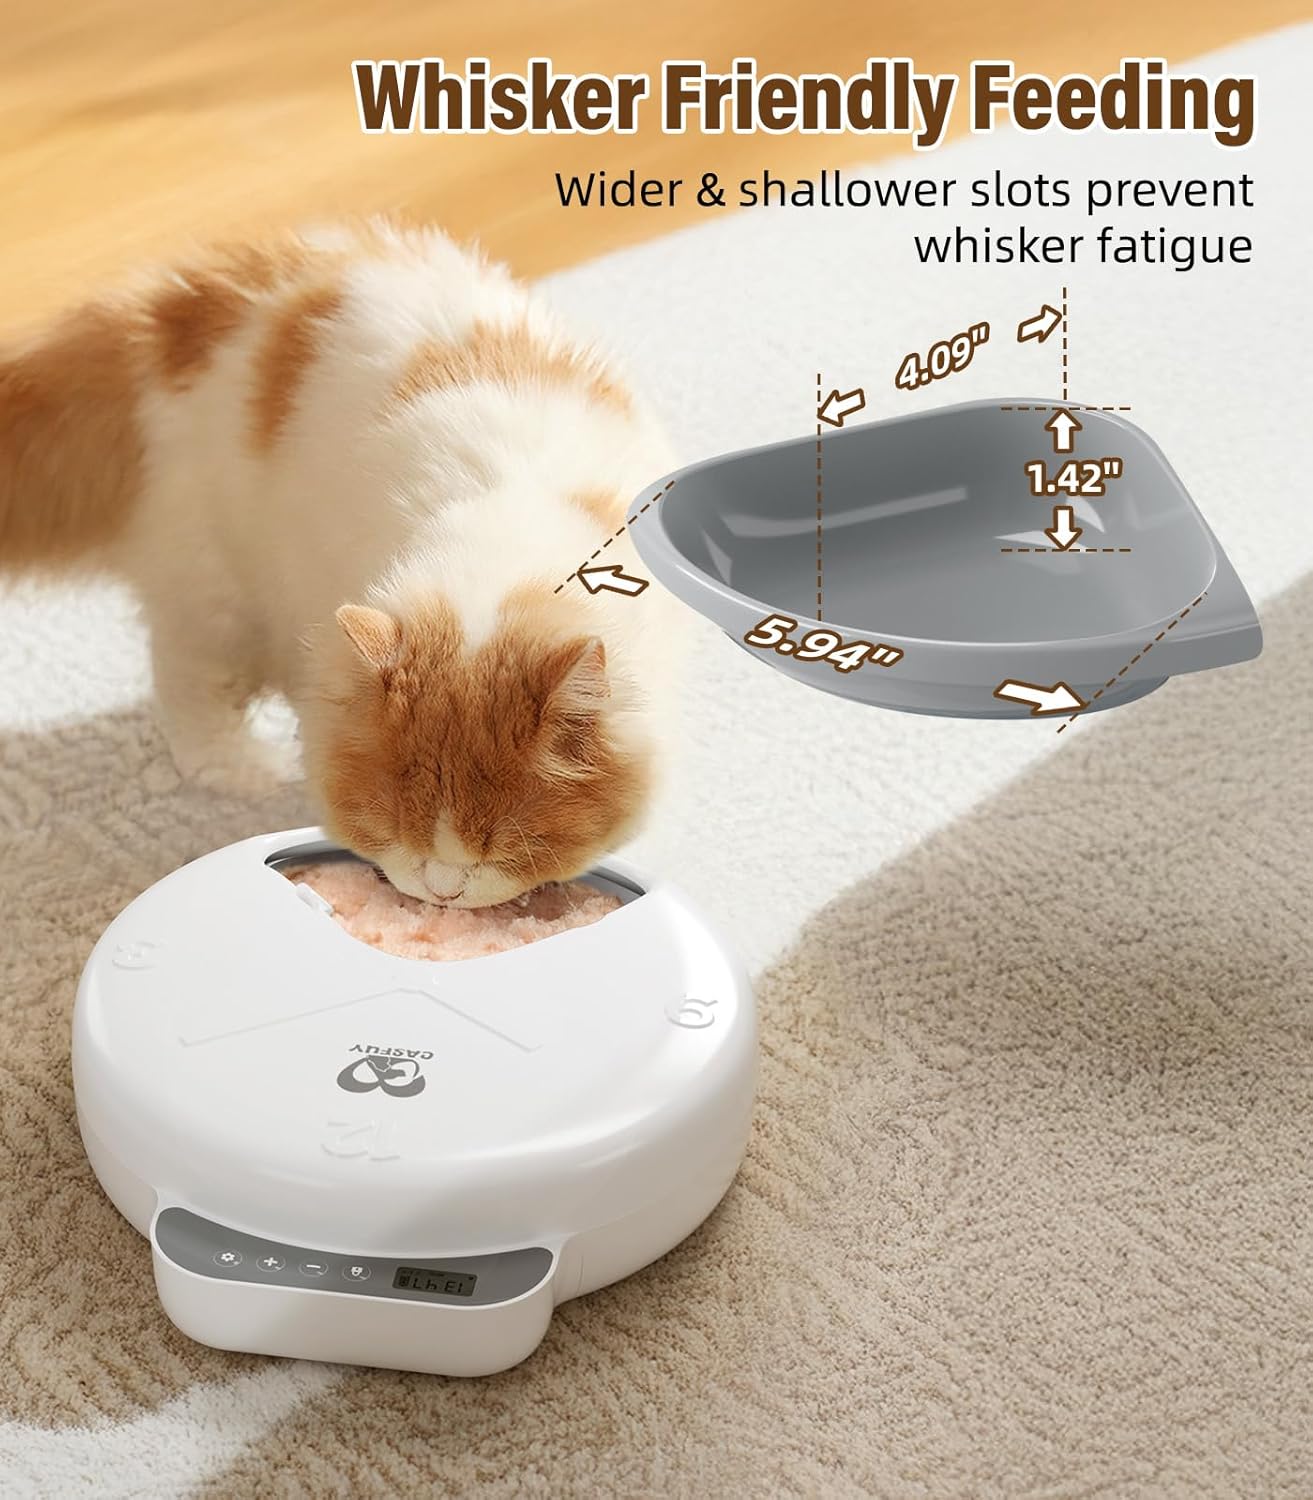
Image: A cat comfortably eating from the feeder, demonstrating the whisker-friendly design of the meal slots.
Package Contents
- 1 x Casfuy F26-L Automatic Pet Feeder Main Unit
- 1 x Removable Food Tray
- 2 x Reusable Ice Packs
- 1 x User Manual (this document)
Setup
1. Battery Installation
The feeder requires 4 AA batteries (not included). Open the battery compartment located on the bottom of the unit. Insert the batteries, ensuring correct polarity (+/-). Close the compartment securely.

Image: Step-by-step guide for battery installation and initial setup.
2. Ice Pack Preparation
For wet food, freeze the two reusable ice packs at -18°C (0°F) for a minimum of 6 hours before use. Place the frozen ice packs in the designated compartment beneath the food tray.

Image: The two reusable ice packs for keeping food fresh.
3. Placing Food
Fill the four individual compartments with your pet's desired wet or dry food. Each slot can hold up to 240ml. Wet food is recommended to be consumed within 8 hours for freshness.
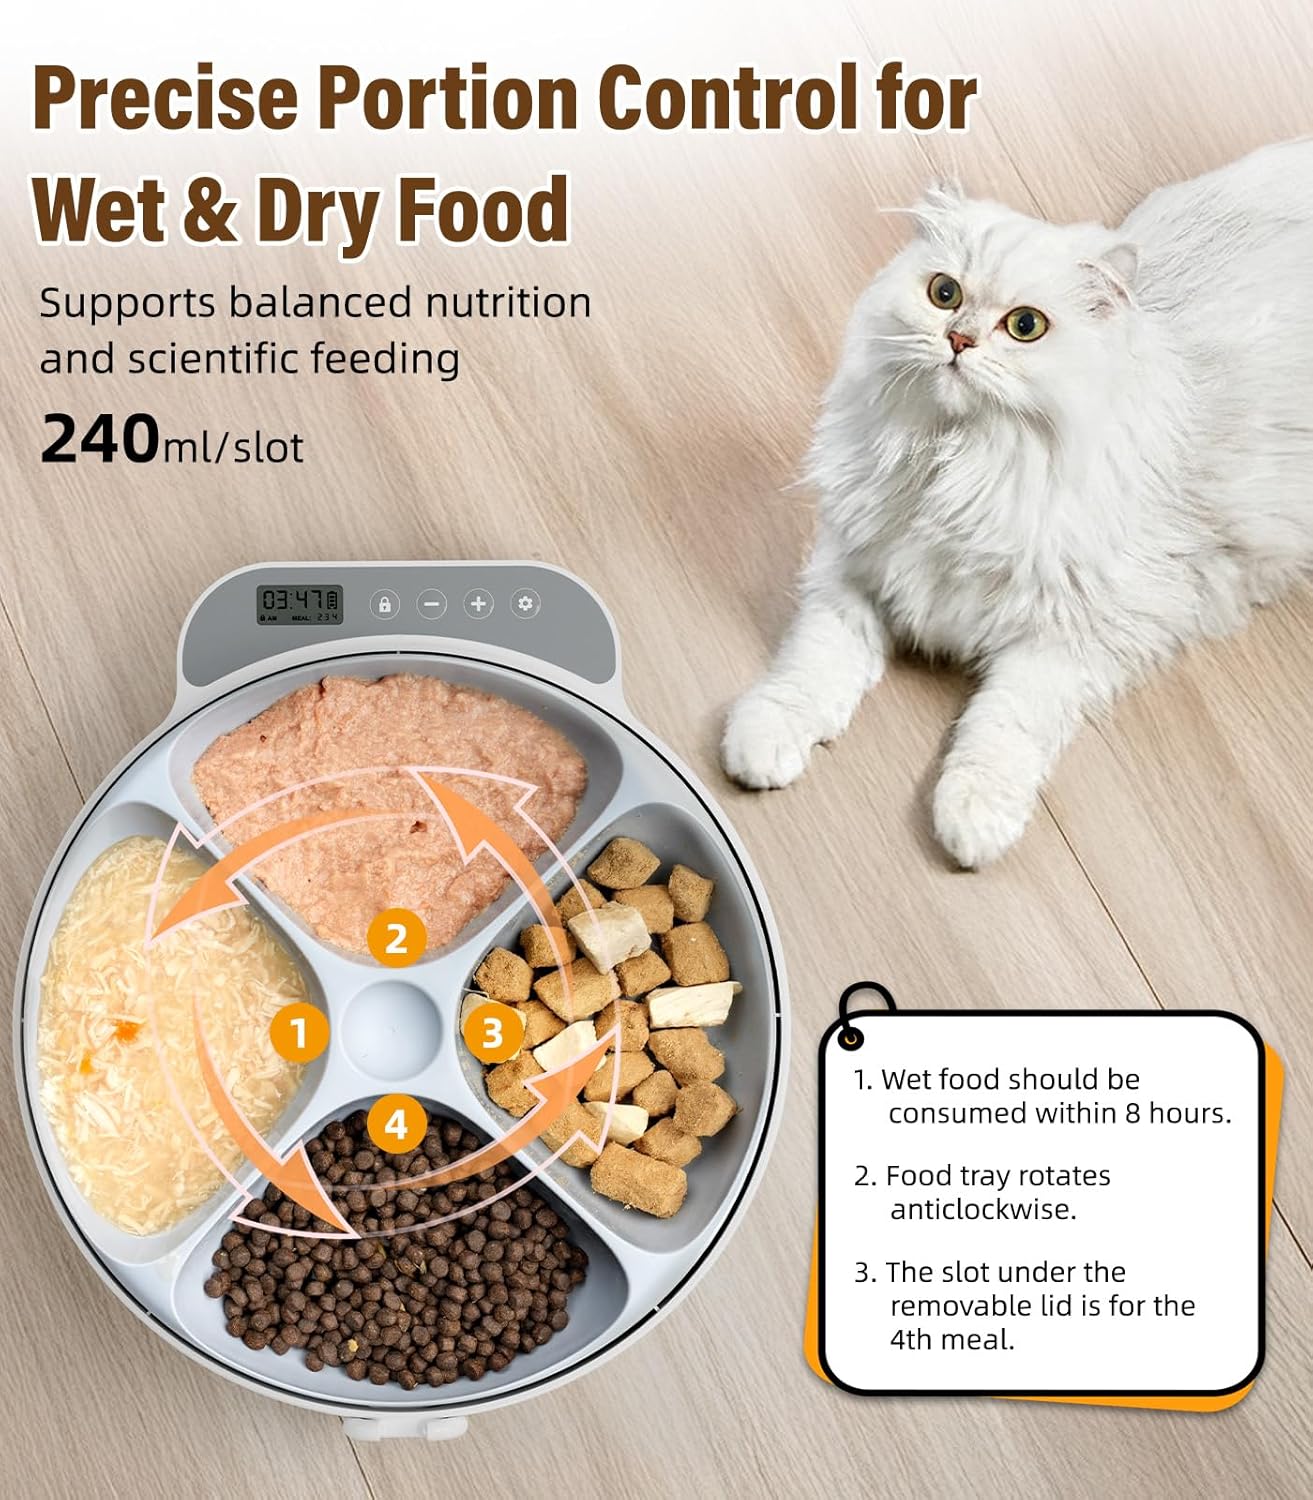
Image: Top-down view of the feeder with food in each compartment, illustrating portion control.
Operating Instructions
1. Unlocking the Feeder
Press and hold the 'Lock' button (padlock icon) for 3 seconds to unlock the control panel for programming. The lock icon will disappear from the display.
2. Setting Current Time
With the feeder unlocked, press the 'Settings' button (gear icon). Use the '+' and '-' buttons to adjust the hour and minute. Press 'Settings' again to confirm each setting. You can toggle between 12-hour (AM/PM) and 24-hour formats.

Image: Instructions for setting the current time and programming meal schedules.
3. Programming Meal Times
After setting the current time, press 'Settings' again to enter meal programming mode. The display will show 'MEAL: 1'. Use '+' and '-' to set the desired feeding time for the first meal. Press 'Settings' to confirm and move to the next meal (MEAL: 2, 3, 4). If fewer than 4 meals are needed, long-press the 'Settings' button to save and exit. The feeder will repeat the schedules daily.
4. Manual Feeding
To dispense a meal manually, press the '+' button when the feeder is unlocked. The tray will rotate to the next available meal slot.

Image: Visual guide for manual feeding and controlling the feeding beep.
5. Feeding Beep Control
To enable or disable the feeding beep, press the 'Speaker' button (speaker icon) when the feeder is unlocked. The speaker icon on the display indicates the beep is enabled.

Image: The feeder demonstrating the audible feeding alert and the option to mute it.
6. Canceling a Meal
In meal programming mode, navigate to the meal you wish to cancel. Use the '-' button to set the time to '12:00 AM' (12-hour format) or '00:00' (24-hour format). This will effectively cancel that meal slot.

Image: Instructions for canceling a meal and performing a factory reset.
7. Reset to Factory Settings
To reset the feeder to its factory default settings, press and hold the 'Settings' button and the '-' button simultaneously for 5 seconds when the feeder is unlocked.
Maintenance and Cleaning
Clean the feeder regularly to maintain hygiene, especially if you're using wet food. Remove the food tray and top lid. Wash these parts with warm, soapy water. Rinse thoroughly. Ensure all parts are completely dry before reassembling. The main feeder unit, containing electronic components, is not detachable or waterproof; wipe it with a damp cloth only. Do not immerse the main unit in water.

Image: The removable food tray and lid being washed in a sink.
Troubleshooting
1. Meal Icons Not Displaying After Programming
- The feeder does not dispense food at 12:00 AM (12-hour format) or 00:00 (24-hour format). Ensure your programmed times are not set to these values if you expect a meal.
- The meal number icon disappears once the feeding is complete and will light up again the next day when the next meal is due.
- The feeder repeats the schedules as long as it's powered on. If you program duplicate meal times, they will automatically reset to 12:00 AM/00:00.

Image: Explanation for meal icon display behavior.
2. Feeder Not Rotating or Glitching
- Check battery levels. Replace all 4 AA batteries if low.
- Ensure the food tray is correctly seated and free from obstructions.
- Verify that the control panel is unlocked during programming and locked during operation to prevent accidental changes.
- Perform a factory reset if issues persist (refer to 'Reset to Factory Settings' in Operating Instructions).
3. Paw Safe Mechanism
The feeder is equipped with an anti-pinch sensor. If a pet's paw obstructs the tray during rotation, it will halt and retract, then attempt to rotate forward again when clear. Do not interfere with this mechanism.

Image: The feeder's paw-safe mechanism in action.
Specifications
| Product Dimensions | 29.4L x 26.6W x 7.8H Centimetres (11.57" x 10.47" x 3.07") |
| Weight | 1.27 kg |
| Material | Acrylonitrile Butadiene Styrene (BPA-free) |
| Power Source | 4 x AA Batteries (not included) |
| Operation Mode | Automatic |
| Meal Capacity | 4 compartments, 240ml per slot |
| Special Feature | Whisker-friendly, shallow slots |
| Target Species | Cat, Small Dog |

Image: The feeder with its key dimensions highlighted.
Warranty Information
No specific warranty information is provided in this manual. Please refer to the retailer or manufacturer's official website for details regarding product warranty and return policies.
Customer Support
For further assistance or inquiries, please contact the retailer where the product was purchased or visit the official Casfuy website for support resources.
