
1. Important Safety Instructions
Please read all instructions carefully before operating the TianQinLang Electric Grain Mill. Failure to follow these instructions may result in injury or damage to the appliance.
- Read Manual: Always read the entire instruction manual before initial setup and use.
- Dry Materials Only: This grain mill is designed for grinding dry materials only. Do not attempt to process wet, oily, or moist ingredients, as this can damage the motor and blades.
- Overheating Prevention: To ensure the longevity of the motor, operate the machine for a maximum of 1 to 5 minutes, then allow it to rest for approximately 30 seconds before resuming operation. This prevents motor overheating.
- Automatic Safety Features: The mill is equipped with automatic power-off, overheating, and over-current protection. In case of activation, allow the unit to cool down and press the one-touch reset button if available.
- Secure Lid: Always ensure the lid is securely fastened before operating the mill. The snap-on lid design helps prevent accidental opening during use.
- Stable Placement: Place the mill on a stable, flat, and dry countertop or tabletop surface to prevent tipping during operation.
- Children and Pets: Keep the appliance out of reach of children and pets.
- Unplug When Not in Use: Always unplug the mill from the power outlet when not in use, before cleaning, or when performing maintenance.
2. Product Overview
The TianQinLang Electric Grain Mill is a versatile appliance designed for grinding various dry materials efficiently. It features a robust construction and user-friendly design.
Key Features:
- Material: Food-grade 304 Stainless Steel, Aluminum, Rubber components.
- Motor: 3600W high-efficiency all-copper motor with a speed of 30000 rpm.
- Grinding Capacity: 1000g (2.2 lbs).
- Grinding Degree: Adjustable from 50 to 300 mesh.
- Operation: 180° swing-able design for even grinding, three-layer six-blade three-dimensional blade system.
- Timer: Integrated timer for 1-5 minute operation cycles.
- Safety: Automatic power-off, overheating, and over-current protection.
- Portability: Aluminum carrying handle for easy movement.

Figure 2.1: Front view of the TianQinLang Electric Grain Mill. The mill features a stainless steel grinding bin, a control panel on the side, and a sturdy base.

Figure 2.2: Top-down view of the grinding bin, showing the three-layer, six-blade system designed for efficient and even grinding.
3. Setup
Follow these steps to set up your grain mill for first-time use.
- Unpack: Carefully remove all components from the packaging. Retain packaging for future storage or transport.
- Inspect: Check all parts for any signs of damage. If any damage is found, do not proceed with setup and contact customer support.
- Clean: Before first use, wipe down the grinding bin and blades with a damp cloth. Ensure all parts are completely dry before assembly. Refer to the "Maintenance" section for detailed cleaning instructions.
- Placement: Place the grain mill on a clean, dry, and stable countertop or tabletop. Ensure there is adequate space around the unit for ventilation and operation. The non-slip rubber feet on the base provide stability.
- Power Connection: Ensure the power switch is in the "OFF" position. Plug the power cord into a standard 110V-60Hz electrical outlet.

Figure 3.1: Bottom view of the grain mill, highlighting the non-slip rubber feet for stable placement.
4. Operating Instructions
This section details how to operate your grain mill for optimal grinding results.
- Prepare Materials: Ensure your materials are completely dry. Break larger items into smaller pieces if necessary to fit into the grinding bin.
- Load Grinding Bin: Open the lid and carefully pour the dry material into the grinding bin. Do not overfill; the maximum capacity is 1000g (2.2 lbs).
- Secure Lid: Close the lid firmly, ensuring the snap-on latches are engaged to prevent it from opening during operation.
- Set Timer: Use the timer knob on the side of the unit to set the desired grinding duration, typically between 1 to 5 minutes. The grinding degree (50-300 mesh) is influenced by grinding time. Shorter times yield coarser grinds, longer times yield finer grinds.
- Start Grinding: Press the power switch to the "ON" position. The mill will begin grinding. The 180° swing-able design allows for manual tilting during operation to ensure even grinding.
- Monitor Operation: Observe the grinding process. If the mill sounds strained or if you notice any unusual odors, immediately turn off the unit.
- Rest Period: After each grinding cycle (1-5 minutes), turn off the mill and allow it to rest for at least 30 seconds. This is crucial for motor protection and extending the appliance's lifespan.
- Unload Material: Once grinding is complete and the blades have stopped, unplug the unit. Carefully open the lid and pour out the ground material.

Figure 4.1: The grinding bin with the lid open, demonstrating how to load materials. Ensure the bin is not overfilled.
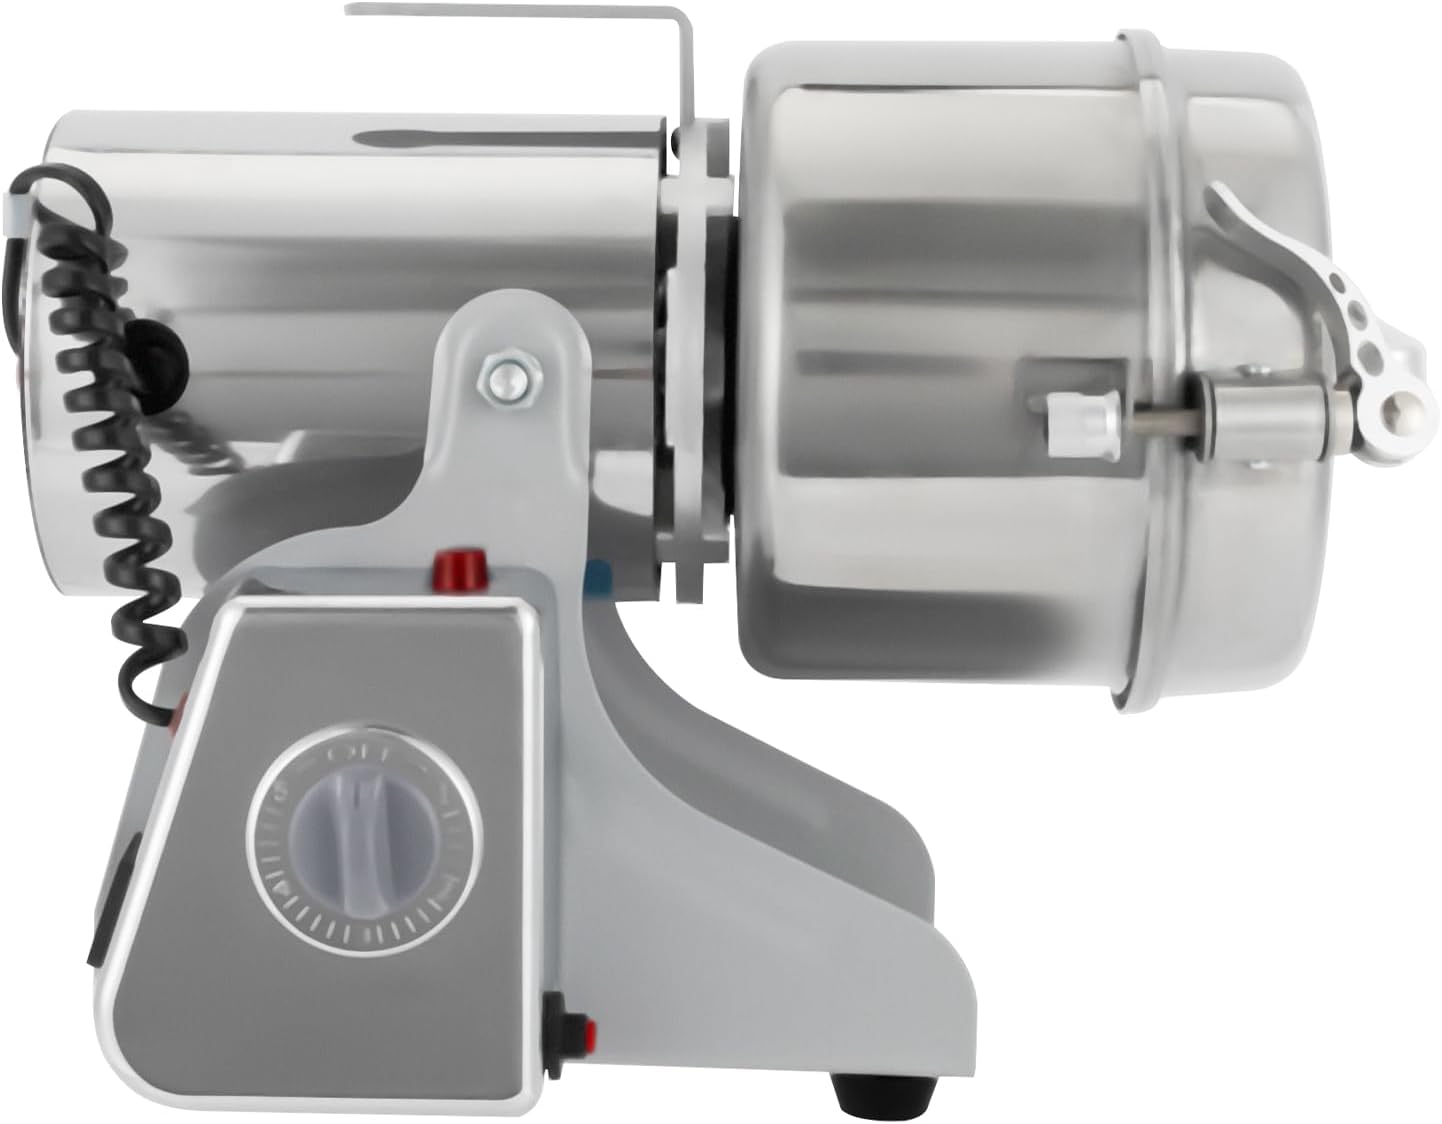
Figure 4.2: Side view of the grain mill, illustrating the timer knob and power switch for easy operation.
5. Maintenance
Regular cleaning and maintenance will ensure the optimal performance and longevity of your grain mill.
- Unplug Before Cleaning: Always ensure the mill is unplugged from the power outlet before attempting any cleaning or maintenance.
- Clean Grinding Bin: After each use, empty the grinding bin. Use the provided brush to remove any residual powder or particles.
- Wipe Down: Use a damp cloth to wipe the interior of the grinding bin and the blades. For stubborn residue, a mild detergent can be used, followed by thorough wiping with a clean, damp cloth.
- Dry Thoroughly: Ensure all parts, especially the grinding bin and blades, are completely dry before reassembling or storing the mill. Moisture can lead to rust or damage.
- Exterior Cleaning: Wipe the exterior of the mill with a soft, damp cloth. Do not immerse the main unit in water or any other liquid.
- Blade Inspection: Periodically inspect the blades for wear or damage. If blades appear dull or damaged, they can be replaced using the spare blades and socket tool provided.
- Carbon Brushes: The motor uses carbon brushes. If the motor performance degrades over time, the carbon brushes may need replacement. Refer to the included English manual for detailed instructions on replacing carbon brushes.
6. Troubleshooting
This section addresses common issues you might encounter with your grain mill.
- Mill Does Not Start:
- Ensure the power cord is securely plugged into a working outlet.
- Check if the power switch is in the "ON" position.
- Verify the lid is properly closed and latched. The mill has a safety interlock that prevents operation if the lid is not secure.
- If the mill has overheated, allow it to cool down and press the reset button if applicable.
- Grinding is Inconsistent or Too Coarse:
- Increase the grinding time. Longer durations result in finer powder.
- Ensure the material is completely dry. Moist materials will not grind effectively.
- Check the blades for wear or damage. Replace if necessary.
- Do not overfill the grinding bin. Overfilling can hinder proper blade rotation and even grinding.
- Mill Stops During Operation:
- This could be due to the overheating protection activating. Turn off the mill, unplug it, and let it cool down for at least 10 minutes before attempting to restart.
- Check for any obstructions in the grinding bin that might be jamming the blades.
- Ensure the material being ground is not wet or oily.
- Unusual Noise or Vibration:
- Turn off the mill immediately.
- Check for foreign objects in the grinding bin.
- Ensure the mill is placed on a stable, flat surface.
- Inspect blades for damage or looseness.
If you encounter issues not covered here or if troubleshooting steps do not resolve the problem, please contact customer support for assistance.
7. Specifications
Detailed technical specifications for the TianQinLang Electric Grain Mill 1000g.
| Parameter | Value |
|---|---|
| Model | 1000g |
| Material | Food-grade 304 Stainless Steel, Aluminum, Rubber |
| Color | Silver |
| Power | 3600W |
| Voltage | 110V-60HZ (US Standard) |
| Capacity | 1000g / 2.2 lbs |
| Motor Speed | 30000 rpm |
| Grinding Degree | 50-300 Mesh |
| Timing | 1-5 Minutes |
| Working Time | 5 Minutes (max per cycle) |
| Interval Time | 10 Minutes (recommended rest between cycles) |
| Base Size | 13.5 x 19 cm (5.31 x 7.48 in) |
| Grinding Bin Height (with lid) | 11.5 cm (4.53 in) |
| Grinding Bin Height (without lid) | 8 cm (3.15 in) |
| Diameter of Grinding Bin | 15 cm (5.91 in) |
| Product Dimensions (L x W x H) | 5.9"L x 5.9"W x 4.5"H (Note: This conflicts with other dimensions, likely referring to the grinding bin or a compact measurement) |
| Net Weight | 4.2 kg / 9.26 lbs |
| UPC | 757582680242 |

Figure 7.1: Dimensional diagram of the TianQinLang Electric Grain Mill, indicating key measurements.
8. Package Contents
The following items are included in your TianQinLang Electric Grain Mill package:
- 1x Grain Mill Unit
- 4x Carbon Brushes (Spare)
- 4x Carbon Brush Covers
- 1x Mesh Sieve
- 2x Long Blades (Spare)
- 2x Blade Heads (Spare)
- 2x Blades (Spare)
- 2x Dust Pads
- 4x Spare Screws
- 2x Nuts
- 1x Socket Tool
- 1x Cleaning Brush
- 2x Spare Knobs
- 1x English Manual