
1. Introduction and Overview
The Klarstein AeroDry 10L Dehumidifier is designed to maintain optimal air humidity and purity in your home. It effectively dries damp rooms and regulates humidity in various areas such as kitchens, bathrooms, or bedrooms. Equipped with an active carbon filter, it removes dust, bacteria, and unpleasant odors, ensuring clean and breathable air. This robust dehumidifier extracts up to 10 liters of moisture per day, ideal for rooms up to 15 m², with an air circulation of 135 m³ per hour. Its 2.5-liter water tank allows for extended operation, and its quiet operation at 37 dB ensures a peaceful environment.
Key features include a 24-hour timer, Intelligent and Air Purification modes, and the DrySelect function for precise humidity control. The unit uses environmentally friendly R290 refrigerant.
2. Safety Instructions
Please read all safety instructions carefully before operating the appliance. Failure to follow these instructions may result in electric shock, fire, or serious injury.
- Ensure the power supply voltage matches the rating label on the appliance.
- Do not operate the dehumidifier with a damaged power cord or plug.
- Place the appliance on a stable, level surface to prevent tipping.
- Maintain adequate clearance (at least 20 cm) around the air inlet and outlet to ensure proper airflow.
- Do not insert objects into the air vents.
- Unplug the appliance before cleaning, maintenance, or when not in use.
- Do not use the appliance in areas where flammable gases or liquids are stored.
- Keep children and pets away from the appliance during operation.
- Do not attempt to repair or modify the appliance yourself. Contact qualified service personnel.
- Empty the water tank regularly to prevent overflow.
3. Product Components
Familiarize yourself with the main parts of your Klarstein AeroDry 10L Dehumidifier:
- Control Panel: For setting modes, humidity, and timer.
- Air Outlet: Where dry air is expelled.
- Air Inlet: Where humid air is drawn in.
- Water Tank: Collects condensed water.
- Active Carbon Filter: Filters dust, bacteria, and odors.
- Power Cord: For electrical connection.
- Wheels: For easy mobility.

Image: Overall view of the Klarstein AeroDry 10L Dehumidifier, showing its sleek black design and control panel on top.

Image: Close-up of the control panel with display and buttons for power, mode, timer, and humidity settings.
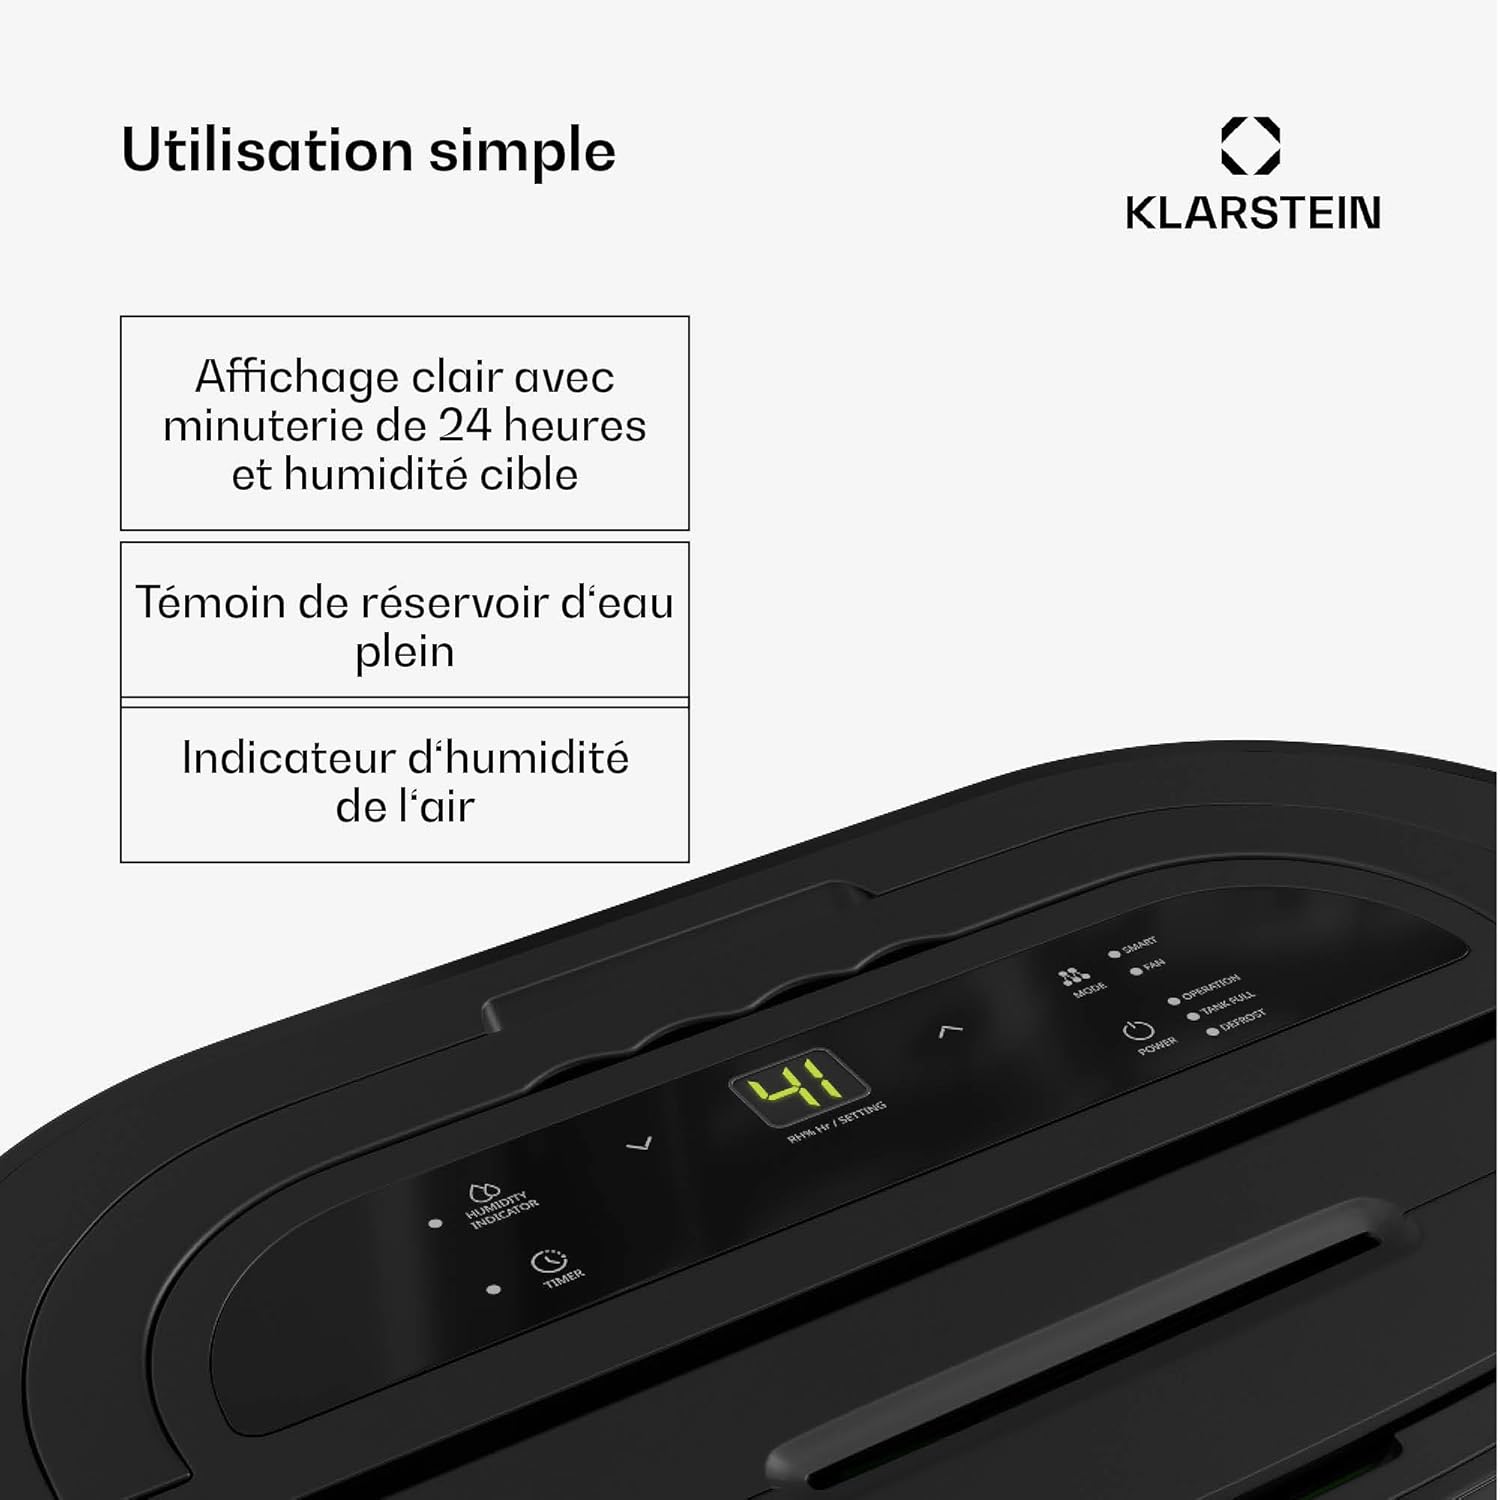
Image: The 2.5-liter water tank, shown detached from the dehumidifier for emptying.
4. Setup
- Unpacking: Carefully remove the dehumidifier from its packaging. Retain the packaging for future storage or transport.
- Placement: Place the dehumidifier on a firm, level surface. Ensure there is at least 20 cm of clear space around all sides of the unit to allow for proper air circulation. Avoid placing it near heat sources or in direct sunlight.
- Power Connection: Plug the power cord into a grounded electrical outlet. Ensure the outlet meets the power requirements specified on the appliance's rating label.
- Initial Use: For optimal performance, allow the unit to stand upright for at least 2 hours before plugging it in and turning it on, especially if it was transported horizontally.
5. Operating Instructions
Control Panel Overview
The control panel on the top of the unit allows you to manage all functions. It features a clear display and several buttons:
- Power Button: Turns the unit on or off.
- Mode Button: Cycles through available operating modes (e.g., Intelligent, Air Purification).
- Humidity Setting Buttons (Up/Down Arrows): Adjusts the target humidity level.
- Timer Button: Sets the 24-hour timer for automatic on/off.
Operating Modes
- Intelligent Mode: The dehumidifier automatically adjusts its operation based on the ambient humidity to maintain a comfortable level.
- Air Purification Mode: Activates the fan and active carbon filter to clean the air without active dehumidification.
- DrySelect Function: Allows you to set a specific target humidity level in 5% increments, ranging from 40% to 80% Relative Humidity (RH). The unit will operate until this level is reached and maintained.
Humidity Indicator
The unit features a colored indicator light that reflects the current ambient humidity:

Image: Visual representation of the colored humidity indicator: Red for high humidity, Green for pleasant humidity, Blue for low humidity.
- Red: High air humidity.
- Green: Pleasant air humidity.
- Blue: Low air humidity.
Water Tank Full and Continuous Drainage
- When the 2.5-liter water tank is full, the unit will emit an audible signal and automatically shut off to prevent overflow. Empty the tank and reinsert it to resume operation.
- For continuous operation without manual emptying, connect a drainage hose (not included) to the continuous drainage port.
6. Maintenance
Regular maintenance ensures optimal performance and longevity of your dehumidifier.
Cleaning the Exterior
- Wipe the exterior of the unit with a soft, damp cloth. Do not use abrasive cleaners or solvents.
- Ensure the air inlet and outlet grilles are free from dust and debris. Use a vacuum cleaner with a brush attachment if necessary.
Emptying and Cleaning the Water Tank
- When the water tank full indicator activates, carefully remove the water tank.
- Empty the collected water.
- Rinse the tank with clean water. For thorough cleaning, use a mild detergent and warm water, then rinse thoroughly.
- Ensure the tank is completely dry before reinserting it into the unit.
Active Carbon Filter Maintenance
- The active carbon filter helps purify the air. Check the filter regularly (e.g., monthly) for dust accumulation.
- Gently remove the filter and clean it with a soft brush or vacuum cleaner. Do not wash the active carbon filter with water.
- Replace the filter if it is heavily soiled or if you notice a decrease in air purification effectiveness.
7. Troubleshooting
If you encounter issues with your dehumidifier, refer to the following table for common problems and solutions:
| Problem | Possible Cause | Solution |
|---|---|---|
| Unit does not turn on | No power supply Power cord not properly connected Water tank full or incorrectly inserted | Check power outlet and circuit breaker Ensure power cord is securely plugged in Empty and correctly reinsert the water tank |
| No dehumidification or low efficiency | Room temperature too low Air filter clogged Air inlet/outlet blocked Target humidity set too high | Dehumidifiers are less effective below 5°C Clean or replace the air filter Clear any obstructions around the unit Lower the target humidity setting |
| Unusual noise during operation | Unit not on a level surface Internal component loose | Place the unit on a flat, stable surface Contact customer service if noise persists |
| Water leakage | Water tank not properly inserted Drainage hose (if used) improperly connected | Ensure water tank is correctly seated Check drainage hose connection for leaks |
If the problem persists after trying these solutions, please contact KLARSTEIN customer support.
8. Specifications
Technical details for the Klarstein AeroDry 10L Dehumidifier:
| Feature | Specification |
|---|---|
| Brand | KLARSTEIN |
| Model Number | DXJ9-ArDry-Deh-10LB |
| Color | Black |
| Product Dimensions (L x W x H) | 19.5 x 35 x 49 cm |
| Item Weight | 10.7 Kilograms |
| Dehumidification Capacity | 10 Liters/day |
| Water Tank Capacity | 2.5 Liters |
| Power | 165 Watts |
| Air Circulation | 135 m³/h |
| Material | Plastic, Active Carbon |
| Special Features | Active Carbon Filter, DrySelect, Ultra-quiet operation (37 dB) |
| Recommended Floor Area | Up to 15 m² |
| Refrigerant | R290 |
9. Warranty and Support
For warranty information, please refer to the documentation provided with your purchase. KLARSTEIN offers customer support for any technical assistance or inquiries regarding your AeroDry 10L Dehumidifier.
For further assistance, please visit the official KLARSTEIN website or contact their customer service directly.


