
TIMEMOON TMN-CL-00
TIMEMOON TMN-CL-00 Digital Calendar Clock User Manual
Model: TMN-CL-00
1. Introduction
The TIMEMOON Digital Calendar Clock (Model: TMN-CL-00) is a versatile 3-in-1 device designed to provide time, date, weather forecasts, and alarm functions. It features a large, easy-to-read display, making it suitable for various users, including the elderly. This manual provides detailed instructions for setting up and operating your new clock.
2. Package Contents
Please check the package for the following items:
- Digital Calendar Clock (10.1 Inch)
- 5V/2A Power Adapter
- Temperature Sensor
- Remote Control
- User Manual
- Tabletop Bracket

Figure 2.1: Package Contents
3. Product Overview
The TIMEMOON Digital Calendar Clock features a 10.1-inch IPS full-view display, offering clear visibility from any angle. It integrates network connectivity for automatic time updates and real-time weather information. The clock is designed with user-friendliness in mind, offering multiple display interfaces and alarm options.
3.1 Front View

Figure 3.1: Front View of the Clock
3.2 Rear View and Dimensions
The rear of the clock includes ports for power, USB, and the temperature sensor, along with control buttons and a hanging hole for wall mounting. A detachable bracket is provided for tabletop use.

Figure 3.2: Rear View of the Clock

Figure 3.3: Clock Dimensions
4. Setup
4.1 Power and Sensor Connection
Connect the provided 5V/2A power adapter to the clock's power input port. The clock requires continuous power to operate as it does not have a built-in battery. Connect the indoor temperature sensor to its designated port on the back of the clock.
Video 4.1: Unboxing and Connecting Power/Temperature Sensor
4.2 Network Connection
To enable weather forecasts and automatic time synchronization, connect the clock to your wireless network. Use the remote control to navigate the settings menu.
- Press the SETUP button on the remote control or the MENU button on the backside of the clock.
- Use the arrow keys to navigate to WLAN Config and press ENTER.
- Select your Wi-Fi network from the list.
- Enter your Wi-Fi password. Note that passwords are case-sensitive.
- After entering the password, navigate to OK and press ENTER to confirm.
- Allow 1-2 minutes for the clock to connect to the internet and update its information.
Video 4.2: Wi-Fi Connection Steps
5. Operating Instructions
5.1 Switching Display Modes
The clock offers three primary functional modes: Network Weather Clock, Perpetual Calendar, and Elderly Clock. You can switch between these modes by pressing the ENTER button on the remote control or the middle button on the back of the clock.
Video 5.1: Switching Between Display Modes
5.2 Setting Your City for Weather Forecasts
After connecting to Wi-Fi, you need to select your city to receive accurate weather forecasts. The clock has a database of 200,000 cities and regions worldwide.
- Press the SETUP button on the remote.
- Navigate to Positioning and city list and press ENTER.
- Select your Country/Region, State/Province, and then your City. Use the left and right arrow keys to quickly flip through pages in the city list.
- Once your city is selected, press the EXIT button to return to the main interface.
- The system will update the weather and time information for your selected city within 1-2 minutes.
Video 5.2: City Selection for Weather Forecasts
5.3 Weather Information Display
The Network Weather Clock mode displays real-time weather forecasts for the next 3-5 days, indoor and outdoor temperature and humidity, outdoor UV intensity, and wind speed. This information updates every 2 hours.
Figure 5.4: Weather Forecast Interface
5.4 Elderly Clock Mode and Alarms
This mode features a high-contrast display with extra-large, non-abbreviated fonts for time, date, and day of the week. Font colors can be adjusted to white, green, blue, or red. It includes 8 built-in alarms with corresponding icons for activities like medication, exercise, and waking up. The clock also has an hourly voice time announcement feature.
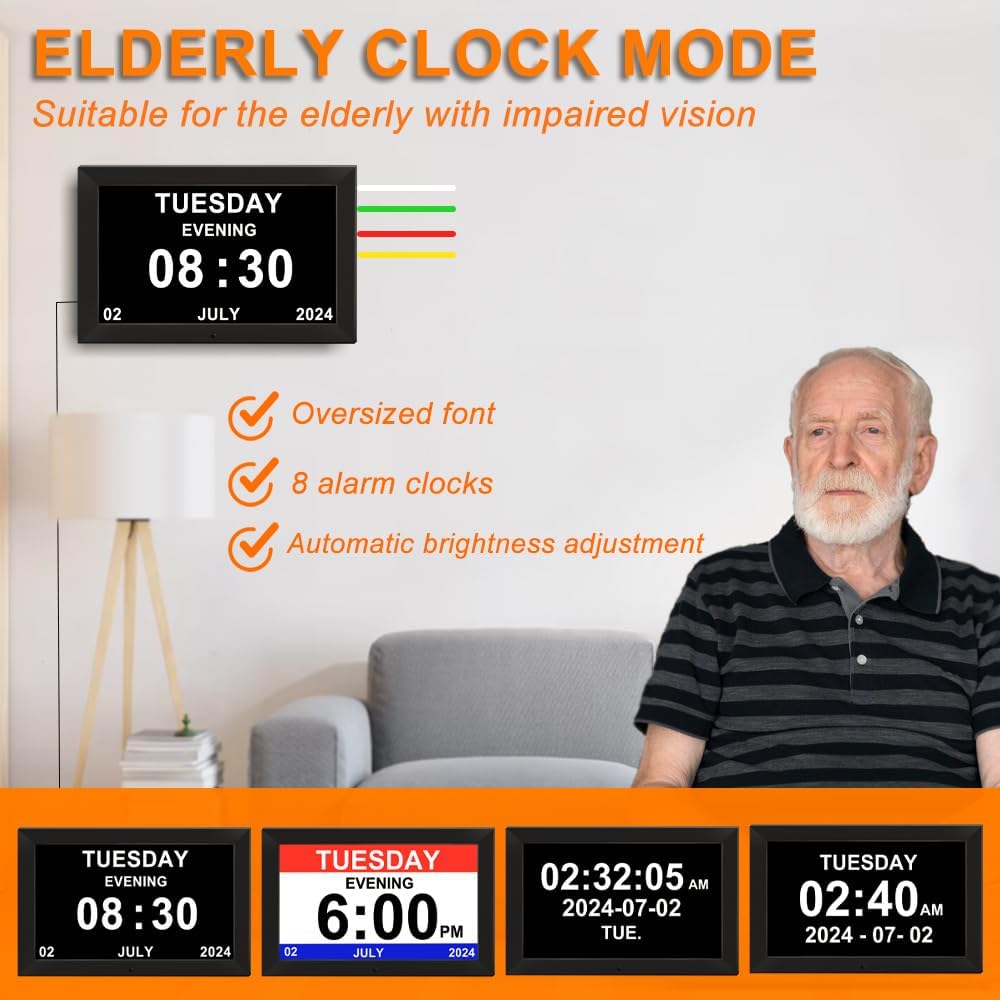
Figure 5.5: Elderly Clock Mode

Figure 5.6: 8 Alarm Options
5.5 Photo and Video Playback (USB)
The clock supports playing pictures and videos from a USB drive (up to 32GB capacity). It also features a split-screen display option where a picture carousel can be shown on the left side while calendar and weather information is displayed on the right.

Figure 5.7: Picture Calendar Interface with Photo Carousel
5.6 Automatic Brightness Adjustment
The clock features an auto-dimmable display that adjusts brightness based on ambient light conditions, ensuring comfortable viewing day and night.

Figure 5.8: Automatic Brightness Adjustment
6. Specifications
| Feature | Detail |
|---|---|
| Brand | TIMEMOON |
| Model Number | TMN-CL-00 |
| Display Type | Digital |
| Screen Size | 10.1 Inch |
| Color | Black |
| Product Dimensions | 10.3"W x 6.6"H |
| Power Source | Corded Electric (DC 5V/2A) |
| Special Features | Adjustable Brightness, Alarm, Auto Dimmable, Calendar Display, Humidity Display, Weather Forecast, Photo/Video Playback (USB) |
| Material Type | Acrylonitrile Butadiene Styrene (ABS) |
| USB Support | Up to 32GB capacity for photos and videos |
| Languages | 8 operating system languages available |
7. Troubleshooting
- Clock not turning on: Ensure the power adapter is correctly connected and plugged into a working power outlet. Verify the power adapter is 5V/2A.
- Wi-Fi connection issues: Double-check your Wi-Fi password for accuracy, paying attention to uppercase and lowercase letters. Ensure the clock is within range of your Wi-Fi router. Restarting both the clock and your router may resolve connectivity problems.
- Incorrect time or weather: Confirm the clock is successfully connected to Wi-Fi. Verify that the correct city is selected in the "Positioning and city list" settings. Allow 1-2 minutes for data synchronization after initial setup or city change.
- Display not dimming automatically: Check the auto-dimmable settings in the system menu to ensure the feature is enabled.
- USB media not playing: Ensure the USB drive is formatted correctly and contains compatible photo/video files. The maximum supported capacity is 32GB.
8. Maintenance
- Cleaning: Use a soft, dry cloth to clean the screen and exterior of the clock. Avoid using abrasive cleaners or solvents, which may damage the surface.
- Placement: Place the clock on a stable, flat surface or mount it securely on a wall. Avoid direct sunlight or extreme temperatures, which can affect performance and display longevity.
- Software Updates: Periodically check for any available software updates through the clock's system settings to ensure optimal performance and access to new features.
9. Warranty and Support
For warranty information or technical support, please refer to the documentation included with your purchase or contact TIMEMOON customer service. Keep your purchase receipt as proof of purchase for warranty claims.
Manufacturer: TIMEMOON
Ask a question about this manual
Ask about setup, troubleshooting, compatibility, parts, safety, or missing instructions. Manuals+ will review the question and use this page’s manual context to help answer it.