
Rysamton YK-M03 Black
Portable AM/FM/Shortwave Radio User Manual
Model: YK-M03 Black
Brand: Rysamton
Introduction
This manual provides comprehensive instructions for the operation and maintenance of your Rysamton Portable AM/FM/Shortwave Radio. Designed for portability and versatility, this radio features multi-band reception, a large digital display, and alarm clock functionalities. Please read this manual thoroughly before using the device to ensure proper operation and longevity.

Figure 1: Front view of the Rysamton Portable AM/FM/Shortwave Radio, showing the digital display, speaker grille, and control buttons.
Setup
1. Unboxing and Initial Inspection
Carefully remove all components from the packaging. Verify that the following items are included:
- Rysamton Portable AM/FM/Shortwave Radio
- Earphone
- Owner's Manual (this document)
Inspect the radio for any visible damage. If any components are missing or damaged, please contact customer support.
2. Battery Installation
The radio is powered by two (2) AA batteries (not included) or an optional DC 3V adapter (purchased separately).
- Locate the battery compartment cover on the back of the radio.
- Slide the cover open in the direction indicated by the arrow.
- Insert two (2) AA batteries, ensuring correct polarity (+ and -) as marked inside the compartment.
- Close the battery compartment cover securely.
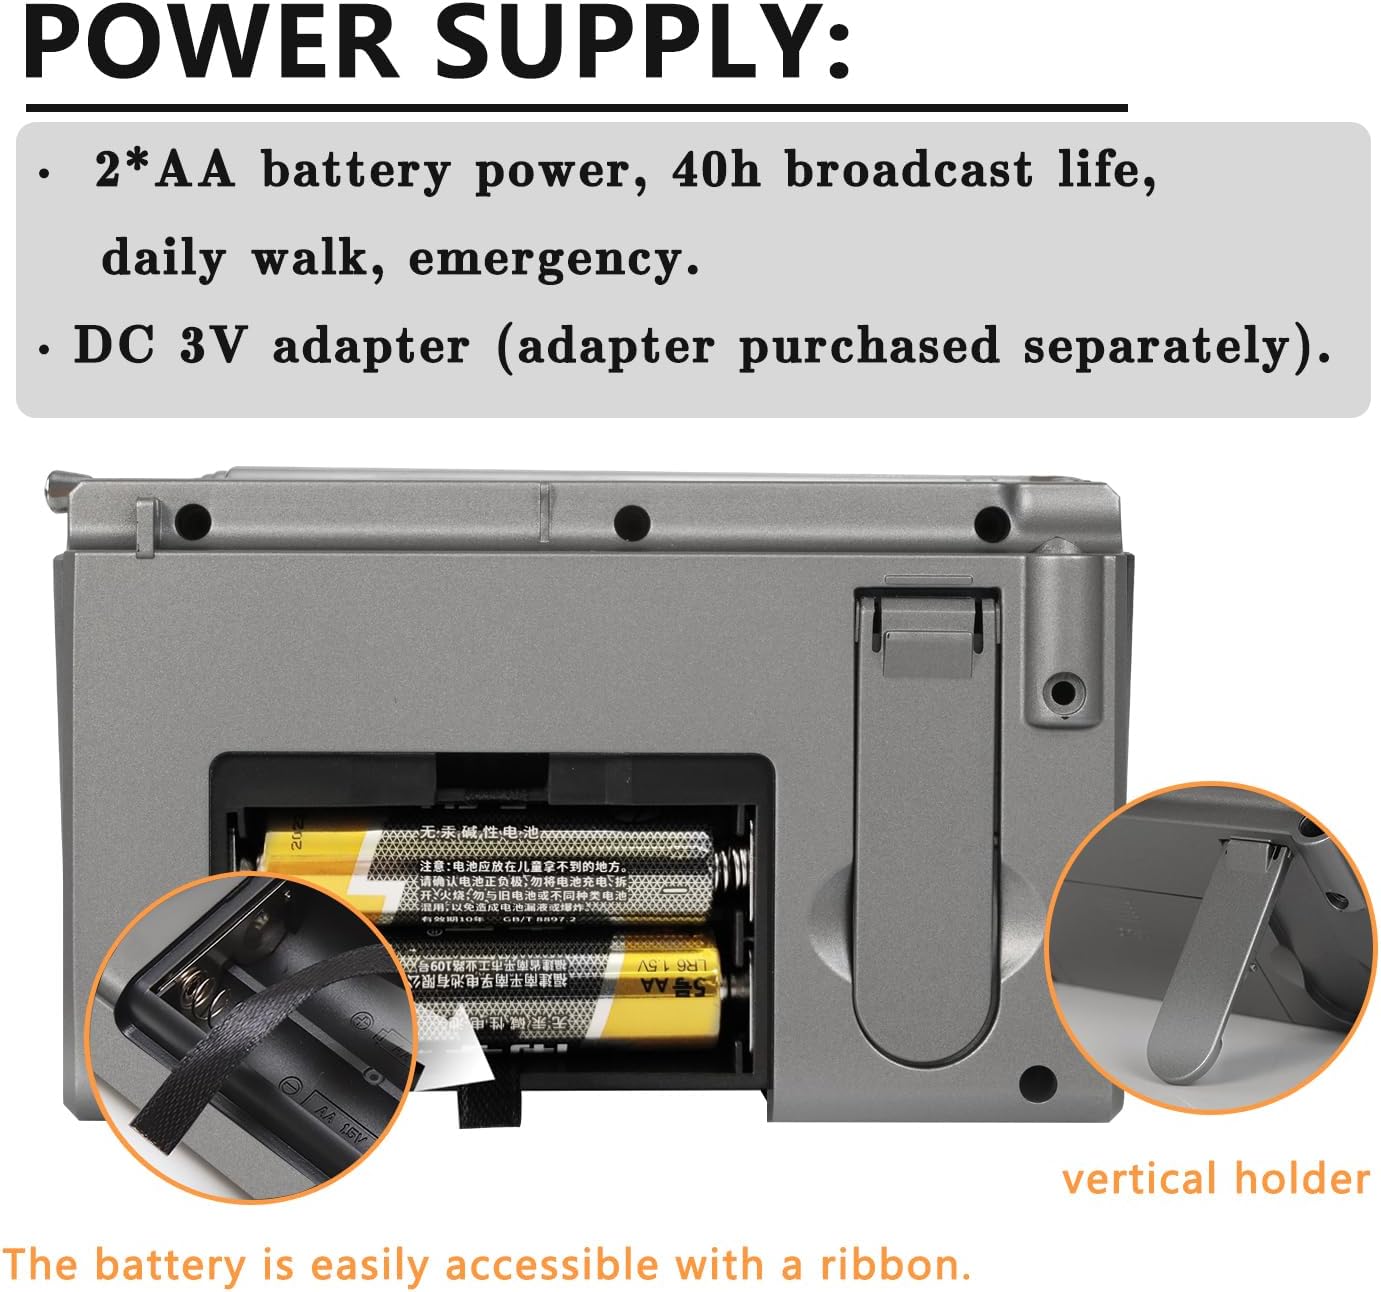
Figure 2: Battery compartment showing proper AA battery insertion. Note the ribbon for easy battery removal.
For extended use or when batteries are low, you may connect a compatible DC 3V adapter to the DC IN port on the side of the radio.
Operating Instructions
1. Power On/Off
To turn the radio ON, press the POWER button located on the top right of the radio. The digital display will illuminate. To turn the radio OFF, press the POWER button again.
2. Band Selection (AM/FM/SW)
Press the BAND button repeatedly to cycle through the available frequency bands: FM, AM, and SW (Shortwave). The selected band will be indicated on the digital display.

Figure 3: The radio displaying the Shortwave (SW) band. The antenna should be extended for optimal reception, especially for FM and SW bands.
- FM: 87 - 108 MHz
- AM: 520 - 1710 KHz (can switch between 9kHz / 10kHz step frequency for different regions)
- SW: 3.0 - 21.85 MHz
3. Tuning and Station Search
There are multiple ways to find stations:
- Manual Tuning: Use the V+ and V- buttons on the right side of the radio to manually adjust the frequency up or down.
- Automatic Scan: Long press the SCAN button (more than 2 seconds) to automatically search for and store available stations. The radio can store up to 35 stations per band.

Figure 4: Key control buttons for tuning and station management.
4. Saving and Recalling Favorite Stations
The radio allows you to save up to 3 favorite stations per band for quick access.
- To Save: Tune to your desired station. Long press one of the CH01, CH02, or CH03 buttons until the display confirms the station is saved.
- To Recall: Briefly press the corresponding CH01, CH02, or CH03 button to instantly switch to the saved station.
- Deleting Saved Stations: To delete a saved station, press the TIME/DEL button while the desired preset is active.
5. Volume Control
Adjust the volume using the V+ (Volume Up) and V- (Volume Down) buttons located on the right side of the radio.
6. Clock and Alarm Functions
The radio features a large FSTN display with backlight, making it easy to read the time.

Figure 5: The large digital display provides clear visibility of time and frequency.
- Setting Time: While the radio is off, press and hold the TIME/DEL button. Use the V+ and V- buttons to adjust hours and minutes. Press TIME/DEL again to confirm. You can switch between 12H/24H display modes.
- Setting Alarm: Press the ALARM button. The alarm icon will appear. Use V+ and V- to set the alarm time. Press ALARM again to confirm. The radio will automatically turn on at the set time.
- Sleep Timer: Press the SLEEP button repeatedly to set the sleep timer (10 to 120 minutes). The radio will automatically turn off after the set duration.

Figure 6: Alarm and Sleep Timer functions for personalized use.
7. Earphone Use
Connect the included earphone to the 3.5mm earphone jack on the side of the radio for private listening. When earphones are connected, the internal speaker will be muted.
Maintenance
- Cleaning: Use a soft, dry cloth to clean the radio's exterior. Do not use abrasive cleaners, waxes, or solvents.
- Battery Care: If the radio will not be used for an extended period, remove the batteries to prevent leakage and corrosion.
- Storage: Store the radio in a cool, dry place away from direct sunlight, extreme temperatures, and high humidity.
- Antenna Care: Handle the telescopic antenna carefully. Avoid bending or forcing it, as this can cause damage.
Troubleshooting
| Problem | Possible Cause | Solution |
|---|---|---|
| Radio does not power on. | Batteries are dead or incorrectly inserted. | Replace batteries with new ones, ensuring correct polarity. |
| Poor reception. | Antenna not extended or poor signal area. | Fully extend the telescopic antenna. Try repositioning the radio. For AM, rotate the radio for best reception. |
| Alarm does not sound. | Alarm not set or volume too low. | Ensure the alarm is set correctly and the volume is audible. |
| Display is dim or blank. | Low battery power. | Replace batteries or connect to DC adapter. |
Specifications
| Feature | Detail |
|---|---|
| Product Dimensions | 4.61 x 1.22 x 2.76 inches |
| Item Weight | 4.6 ounces (without batteries) |
| Model Number | YK-M03 Black |
| Brand | Rysamton |
| Color | Grey |
| Radio Bands Supported | AM, FM, SW |
| Power Source | 2 x AA Batteries or DC 3V Adapter (not included) |
| Display Technology | LCD with Backlight |
| Included Components | Earphone, Owner's Manual |
| Country of Origin | China |
Warranty and Support
For warranty information, technical support, or service inquiries, please refer to the contact information provided on the product packaging or visit the official Rysamton website. Keep your purchase receipt as proof of purchase for warranty claims.
Related documentsYK-M03 Black

Ask a question about this manual
Ask about setup, troubleshooting, compatibility, parts, safety, or missing instructions. Manuals+ will review the question and use this page’s manual context to help answer it.