
1. Introduction
The Astro-Energy TM-L1600M Micro-Inverter is a high-performance, single-phase solution designed for residential photovoltaic (PV) installations. It efficiently converts direct current (DC) from up to four solar panels into alternating current (AC) for your home grid. Featuring four independent Maximum Power Point Trackers (MPPTs), it optimizes energy harvest even under partial shading or varying panel orientations. This manual provides essential information for the safe installation, operation, and maintenance of your micro-inverter.
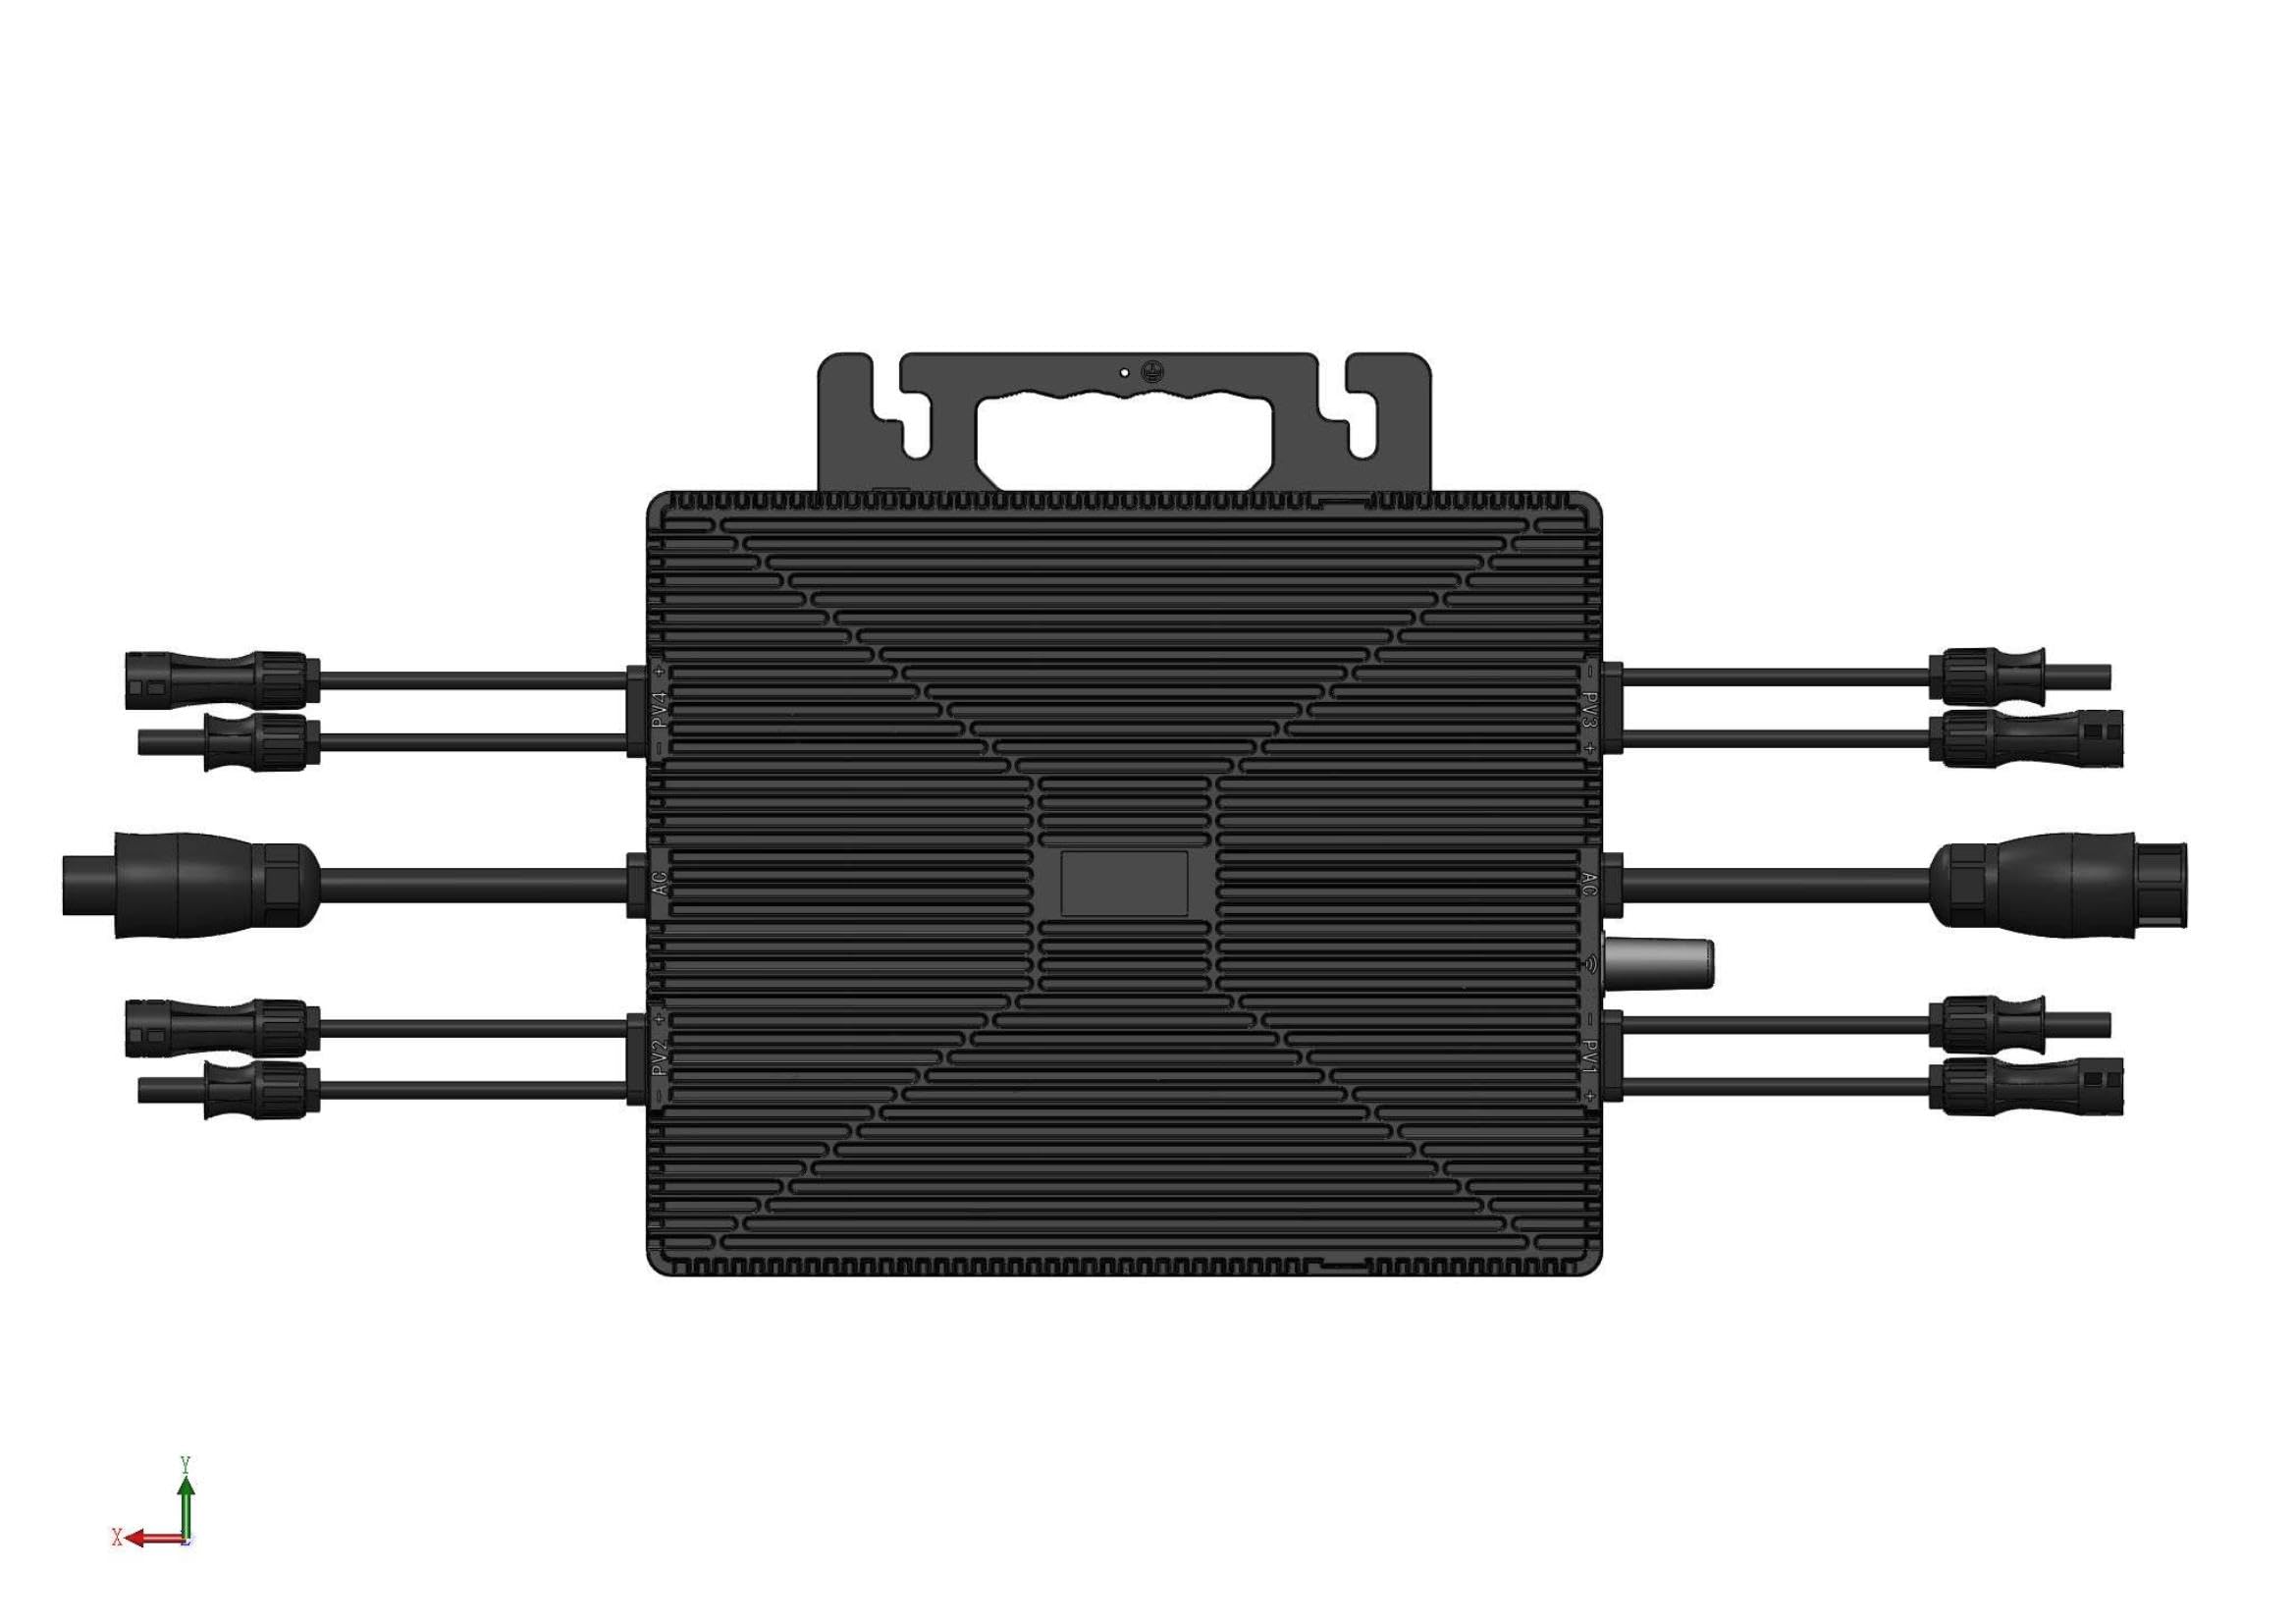
Image 1.1: Astro-Energy TM-L1600M Micro-Inverter and Solarman monitoring application.
2. Safety Instructions
Read all safety instructions carefully before installation and operation. Failure to follow these instructions may result in electric shock, fire, or serious injury.
- Qualified Personnel: Installation and maintenance must be performed by qualified electricians or trained personnel familiar with local electrical codes and safety standards.
- Disconnect Power: Always disconnect all power sources (PV array and AC grid) before performing any work on the micro-inverter.
- Grounding: Ensure the micro-inverter is properly grounded according to local electrical regulations.
- Environmental Conditions: Do not install the micro-inverter in areas with flammable materials, explosive gases, or excessive dust. The unit is IP67 rated for outdoor use, but avoid submerging it in water.
- Ventilation: Ensure adequate airflow around the micro-inverter for proper heat dissipation.
- Children: Keep children away from the installation area and the operating micro-inverter.
3. Package Contents
Verify that all components are present and undamaged upon unpacking. If any items are missing or damaged, contact your supplier immediately.
- Astro-Energy TM-L1600M Micro-Inverter
- AC Cable (5m)
- Mounting Hardware (screws, washers)
- User Manual (this document)

Image 3.1: Included 5-meter AC cable.
4. Product Features
The Astro-Energy TM-L1600M Micro-Inverter offers advanced features for efficient and reliable solar energy conversion:
- High Power Output: 1600 W/VA nominal power, adjustable from 0 to 1600 W/VA.
- Multiple MPPTs: Four independent MPPTs for connecting up to four solar panels (400-670 Wp each), maximizing energy harvest from each module.
- High Efficiency: MPPT efficiency of 99.8% and CEC efficiency of 96.5%.
- Single-Phase Output: 230V single-phase output, suitable for residential and balcony PV systems.
- Robust Design: IP67 certified for resistance against harsh weather conditions.
- Integrated Wi-Fi: 2.4 GHz Wi-Fi connectivity for seamless integration with home networks.
- Real-time Monitoring: Compatible with the Solarman cloud platform and mobile application for real-time performance monitoring and anomaly detection.
- Enhanced Safety: Features an isolated transformer with rapid shutdown capability.
- Compact and Easy Installation: Designed for reduced installation costs and simplified setup.
5. Setup and Installation
Proper installation is crucial for the safe and efficient operation of your micro-inverter. Follow these steps carefully.
5.1 Mounting the Micro-Inverter
- Select a suitable mounting location, typically under the solar panels or on a sturdy structure, ensuring adequate ventilation and protection from direct sunlight if possible.
- Use the provided mounting hardware to securely attach the micro-inverter to the chosen surface. Ensure the mounting is stable and can support the unit's weight (approx. 5 kg).
5.2 Connecting Solar Panels (DC Input)
The micro-inverter supports up to four solar panels. Each panel connects to an independent MPPT input.
- Connect the positive (+) and negative (-) DC output cables from each solar panel to the corresponding DC input connectors on the micro-inverter.
- Ensure all connections are secure and properly polarized. Incorrect polarity can damage the unit.
- Verify that the voltage and current of each panel are within the micro-inverter's specifications (MPPT Voltage Range: 16-60 V, Max Input Voltage: 65 V, Max Input Current: 16 A per input).

Image 5.1: Basic DC input connection diagram for four solar panels.

Image 5.2: Illustrative setup of solar panels and micro-inverters for a residential application.
5.3 Connecting to the AC Grid (AC Output)
The micro-inverter connects to your home's AC grid via the provided AC cable.
- Connect the AC output cable from the micro-inverter to a dedicated AC circuit in your electrical panel.
- Ensure the AC circuit is properly protected by a circuit breaker of appropriate rating according to local electrical codes.
- For multiple micro-inverters, they can be daisy-chained or connected to a common AC bus, ensuring total current does not exceed circuit limits.

Image 5.3: Detailed connection diagram for multiple micro-inverters, including AC grid and monitoring router.
5.4 Wi-Fi Configuration
To enable monitoring, connect the micro-inverter to your home Wi-Fi network.
- Download the Solarman Smart app from your mobile device's app store.
- Follow the in-app instructions to register an account and add your micro-inverter to the platform. This typically involves scanning a QR code on the inverter or entering its serial number.
- Configure the Wi-Fi connection through the app, providing your network's SSID and password.
6. Operating Instructions
Once installed and connected, the micro-inverter operates largely automatically.
6.1 Powering On
After all DC and AC connections are secure and verified, switch on the AC circuit breaker connected to the micro-inverter. The micro-inverter will perform a self-test and begin converting solar energy into AC power when sufficient sunlight is available.
6.2 Monitoring Performance
Use the Solarman Smart app to monitor your system's performance in real-time.
- Open the Solarman Smart app on your smartphone or tablet.
- The dashboard will display current power production, daily energy yield, historical data, and system status.
- The app allows you to track individual panel performance and identify any anomalies.
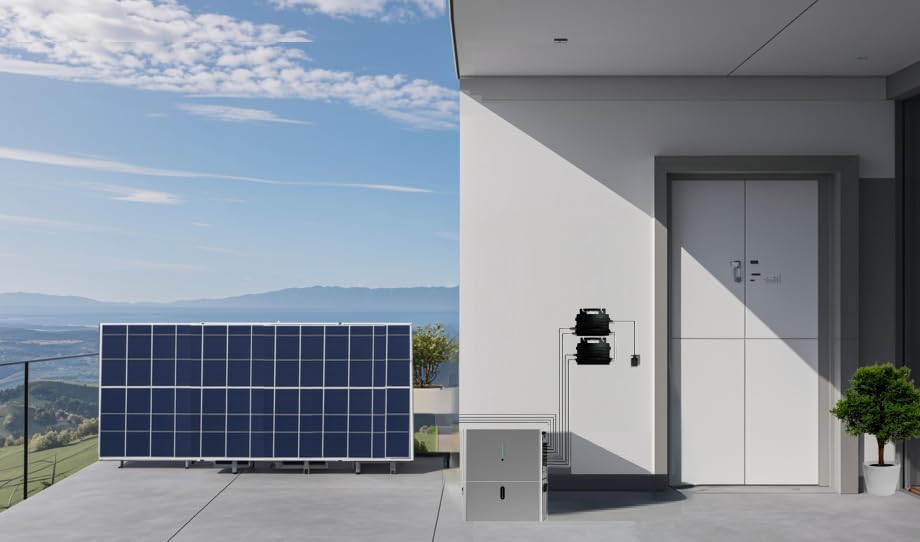
Image 6.1: Solarman app dashboard for real-time system monitoring.
6.3 Powering Off
To shut down the system, first disconnect the AC power by switching off the circuit breaker. Then, disconnect the DC input from the solar panels. Allow a few minutes for internal capacitors to discharge before handling the unit.
7. Maintenance
The Astro-Energy TM-L1600M Micro-Inverter requires minimal maintenance to ensure optimal performance and longevity.
- Regular Inspection: Periodically inspect the micro-inverter and all cables for any signs of damage, corrosion, or loose connections.
- Cleaning: If necessary, gently clean the exterior of the micro-inverter with a soft, damp cloth. Do not use abrasive cleaners or solvents. Ensure the unit is powered off before cleaning.
- Ventilation: Ensure that the cooling fins are free from dust, debris, or obstructions to maintain proper heat dissipation.
- Software Updates: Keep the Solarman app updated to the latest version for optimal monitoring features and potential firmware updates for the inverter.
8. Troubleshooting
This section addresses common issues you might encounter with your micro-inverter. For problems not listed here, contact technical support.
| Problem | Possible Cause | Solution |
|---|---|---|
| No power output | No sunlight; AC breaker off; DC connections loose/incorrect; Inverter fault. | Check for sufficient sunlight. Verify AC breaker is ON. Inspect DC connections. Check Solarman app for error codes. |
| Low power production | Partial shading; Dirty solar panels; Panel degradation; Inverter operating outside optimal range. | Check for shading. Clean solar panels. Monitor individual panel performance via Solarman app. |
| Wi-Fi connection lost | Router issue; Incorrect Wi-Fi password; Inverter too far from router. | Restart router. Reconfigure Wi-Fi in Solarman app. Ensure strong Wi-Fi signal at inverter location. |
| Inverter LED indicator off/red | No power; Fault condition. | Check AC and DC power. Refer to Solarman app for specific error codes. Contact support if fault persists. |
9. Specifications
Technical specifications for the Astro-Energy TM-L1600M Micro-Inverter:

Image 9.1: Astro-Energy TM-L1600M Micro-Inverter.
| Parameter | Value |
|---|---|
| Model Number | TM-L1600M |
| Power Type | Single-phase (230 V) |
| Number of MPPTs | 4 independent |
| Connectable Modules | 4 (up to 670 Wp per module) |
| Rated Power | 1600 W/VA |
| MPPT Voltage Range | 16-60 V |
| Maximum Input Voltage | 65 V |
| Start-up Voltage | 22 V |
| Maximum Input Current | 4 × 16 A |
| Maximum Short-Circuit Current | 4 × 25 A |
| Output Frequency | 50 Hz |
| MPPT Efficiency | 99.8 % |
| CEC Efficiency | 96.5 % |
| Communication | 2.4 GHz Wi-Fi |
| Dimensions (L x W x H) | 52 x 47 x 5 cm |
| Weight | 5 kg |
| IP Rating | IP67 |
10. Warranty and Support
The Astro-Energy TM-L1600M Micro-Inverter comes with a standard 10-year warranty, covering defects in materials and workmanship under normal use and service conditions.
For technical assistance, warranty claims, or any questions regarding your micro-inverter, please contact your authorized dealer or Astro-Energy customer support. Ensure you have your product model number (TM-L1600M) and purchase information available when contacting support.


