
1. Introduction
Thank you for choosing the Xflyee 16.5" Digital Clock. This large display clock features a remote control, 6-color night light, dual alarms, temperature display, and automatic Daylight Saving Time (DST) adjustment. This manual provides detailed instructions to help you set up and operate your new clock effectively.
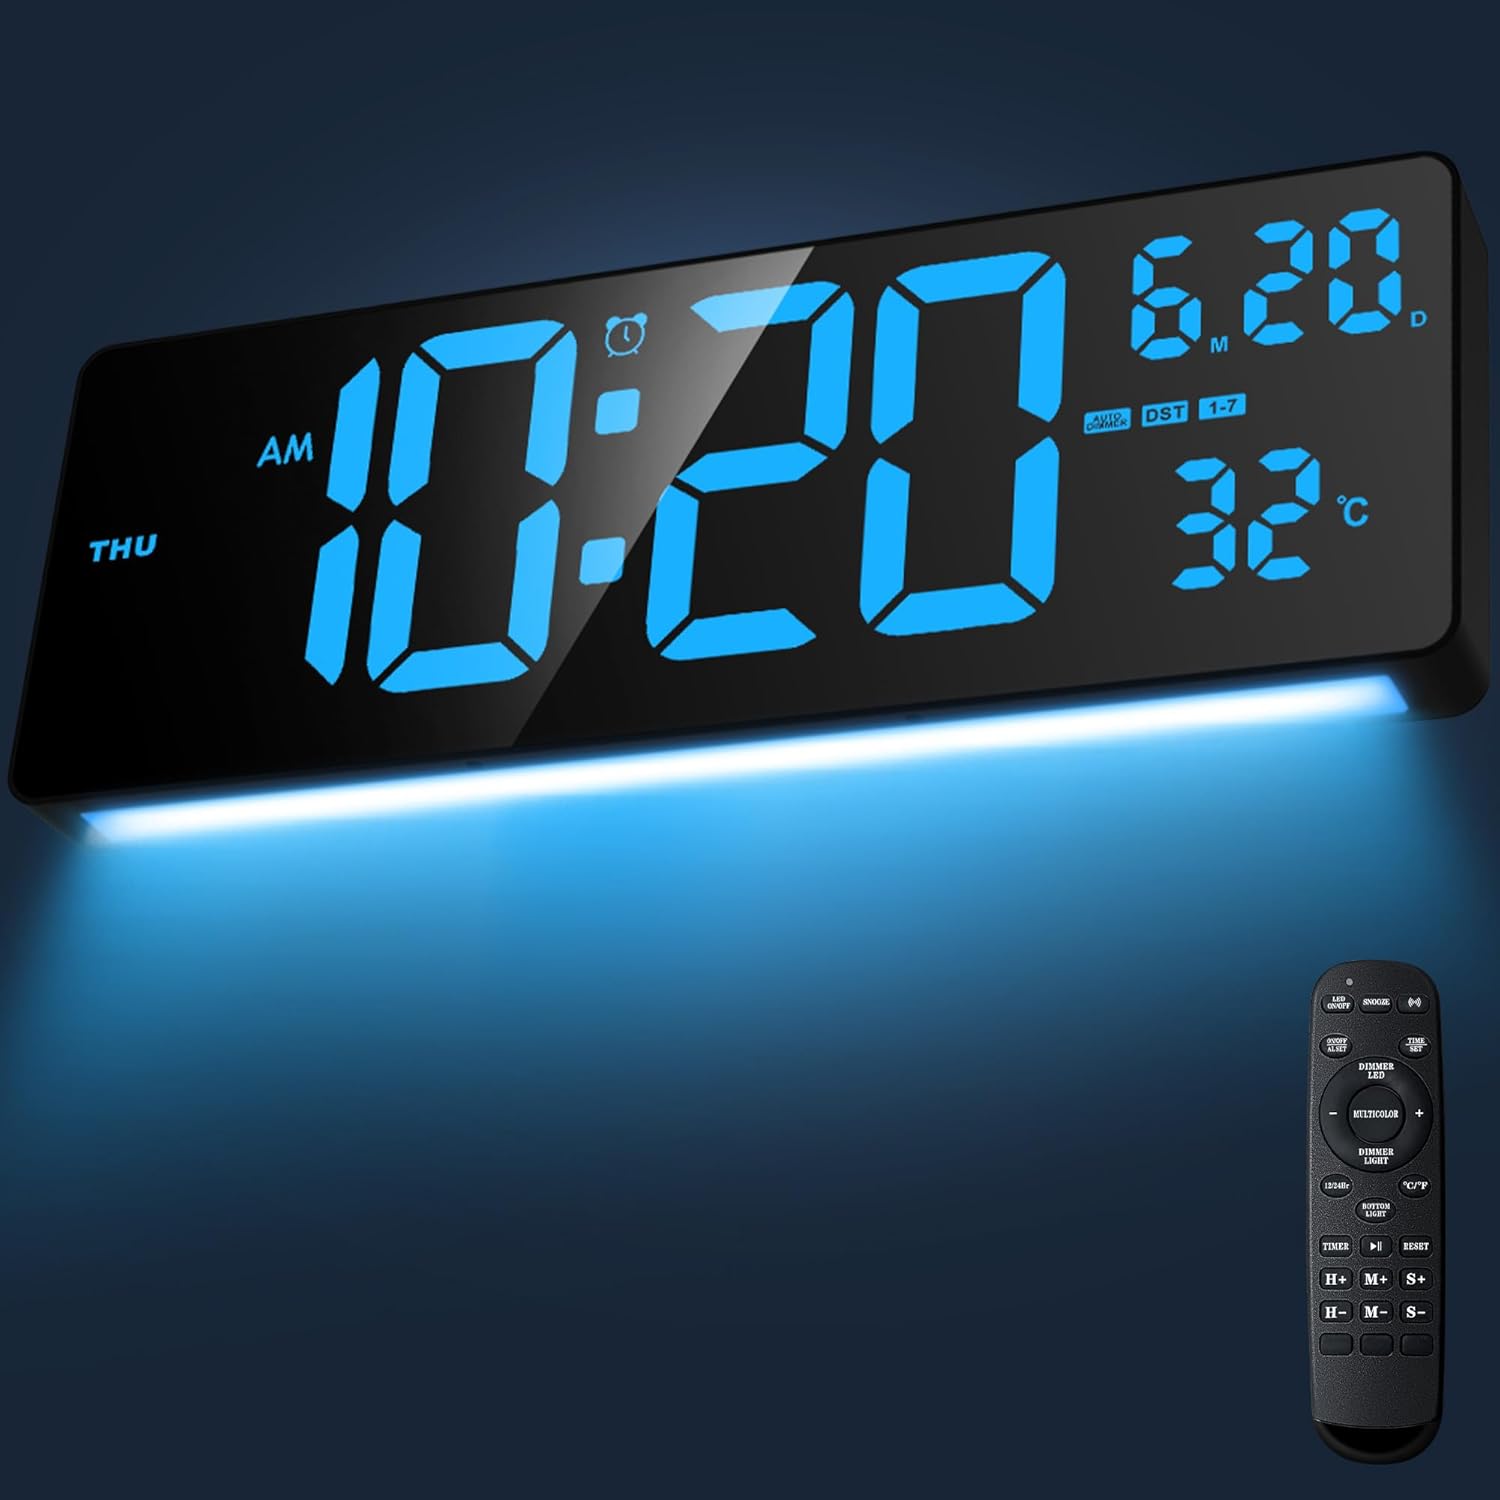
Image 1.1: Xflyee 16.5" Digital Clock and Remote Control.
This image shows the Xflyee 16.5-inch digital clock with its large, clear display showing the time, date, day of the week, and temperature. Below the clock, an ice blue night light illuminates the surface. To the right, the included remote control is visible, highlighting the convenience of adjusting settings from a distance.
Key Features:
- Large 16.5-inch LED Display: Features oversized 9.8-inch time digits for clear visibility.
- 6-Color Night Light: Offers 4 solid colors and 2 dynamic options with adjustable brightness (0-100%).
- Remote Control: Conveniently adjust settings from a distance.
- Dual Alarms: Set two independent alarms for different schedules.
- Automatic DST: Automatically updates for Daylight Saving Time.
- Temperature Display: Shows indoor temperature.
- Brightness Adjustment: Includes 4 manual levels and an auto-dimming function via a built-in light sensor.
- Wall-Mounted or Tabletop Use: Flexible placement options.
- Memory Battery: Preserves settings during power outages (requires 4 AAA batteries, included).
2. Package Contents
Please check the package for the following items:
- Xflyee 16.5" Digital Clock
- Remote Control
- 5V/2A Power Adapter
- 9.8-foot USB Power Cable
- Memory Batteries (4 AAA batteries)
- Hook Wall Stickers
- Wall Screws
- Measuring Rod (for installation)
- User Manual (this document)

Image 2.1: Accessory Kit.
This image displays all components included in the Xflyee digital clock package. It shows the main clock unit, the power adapter and its long cable, the remote control, two memory batteries, wall mounting hardware (hook wall stickers and screws), and a measuring rod for precise installation.
3. Product Overview
3.1 Clock Display
The large LED display shows the time, date, day of the week, and indoor temperature. Indicators for AM/PM, alarm status, and DST are also present.

Image 3.1: Clock Display and Dimensions.
This image illustrates the large display of the Xflyee digital clock, highlighting its 16.5-inch size and the 9.8-inch height of the time digits. It also provides physical dimensions of the clock (15.7 inches wide, 5.7 inches high) and shows the remote control in use, emphasizing its role in simple operation.
3.2 Remote Control
The remote control allows for easy adjustment of all clock settings, including time, alarms, brightness, and night light colors. Ensure the remote has working batteries (not specified if included for remote, but AAA for memory are).
4. Setup
4.1 Power Connection
- Connect the provided 9.8-foot USB power cable to the clock's power input port.
- Plug the 5V/2A power adapter into a standard electrical outlet.
- Connect the USB cable to the power adapter. The clock display will illuminate.
Note: This digital clock operates solely via the power adapter. It does not run on batteries for primary power.
4.2 Memory Battery Installation
The clock includes a built-in memory battery system to retain settings during power outages. Install the 4 AAA batteries (included) into the designated battery compartment on the back of the clock.
4.3 Placement Options
The Xflyee Digital Clock offers versatile placement:
- Wall-Mounted: Use the integrated hang holes on the back of the clock. Utilize the provided hook wall stickers, wall screws, and measuring rod for secure installation.
- Tabletop Placement: Extend the pull-out stand located on the back of the clock to place it on a desk, nightstand, or shelf.
5. Operating Instructions
All primary functions are controlled via the included remote control.
5.1 Setting Time and Date
- Press the SET button on the remote control.
- Use the UP and DOWN arrows to adjust the hour, then press SET to confirm.
- Repeat for minutes, year, month, and day.
- Press SET again to exit the setting mode.
5.2 Night Light Control
The clock features a 6-color night light with adjustable brightness.

Image 5.1: 6-Color Night Light Options.
This image showcases the six available night light color options for the Xflyee digital clock. Each panel displays the clock with a distinct underglow: red, green, yellow, ice blue, a lighter blue, and a dynamic multi-color gradient, demonstrating the customizable ambiance feature.
- Press the COLOR LIGHT button on the remote to cycle through the 6 color options (4 solid, 2 dynamic).
- Use the LIGHT+ and LIGHT- buttons to adjust the night light brightness from 0% to 100%.
5.3 Display Brightness Adjustment
The main display brightness can be adjusted manually or automatically.

Image 5.2: Display Brightness Levels.
This image illustrates the four adjustable brightness levels (LV.1 to LV.4) for the main clock display, along with an 'OFF' state. It highlights both the manual brightness control via the remote and the automatic dimming function, which adjusts brightness based on ambient light conditions.
- Manual Adjustment: Press the BRIGHTNESS button on the remote to cycle through 4 levels (LV.1 to LV.4) or turn the display off.
- Auto-Dimming: The built-in light sensor chip automatically adjusts the display brightness based on ambient light conditions. This feature ensures comfortable viewing at all times.
5.4 Setting Alarms
The clock supports two independent alarms.

Image 5.3: Two Alarm Modes.
This image depicts a person waking up, with the Xflyee digital clock prominently displayed on a nightstand, showing an alarm set for 8:00 AM. It also illustrates the two alarm modes: one for weekdays (Monday-Friday) and another for the full week (Monday-Sunday), emphasizing the clock's dual alarm functionality.
- Press the ALARM 1 or ALARM 2 button on the remote.
- Use the UP and DOWN arrows to set the desired alarm time.
- Press the respective ALARM button again to confirm and activate the alarm.
- To deactivate an alarm, press its corresponding ALARM button until the alarm indicator disappears from the display.
- The clock also features a snooze function. When an alarm sounds, press any button on the remote (except OFF) to activate snooze.
5.5 Daylight Saving Time (DST)
The clock automatically adjusts for Daylight Saving Time.

Image 5.4: Automatic DST Adjustment.
This image demonstrates the automatic Daylight Saving Time (DST) feature of the Xflyee digital clock. The main clock shows the current time, while two smaller analog clock graphics visually explain "Spring Forward" (+1 hour) and "Fall Back" (-1 hour), indicating that the clock accurately converts time during these seasonal changes without manual intervention.
The clock will automatically update at the start and end of Daylight Saving Time, eliminating the need for manual adjustment. Ensure the DST feature is enabled (refer to remote control buttons for a dedicated DST button or setting within the time setup).
5.6 Temperature Display
The clock displays the indoor temperature. The unit (Celsius/Fahrenheit) can typically be toggled using a dedicated button on the remote or during time setup.

Image 5.5: Indoor Temperature Display.
This image shows the Xflyee digital clock displaying the indoor temperature alongside the time, mounted on a wall in a living room setting. A magnified section highlights the temperature reading, indicating its clear visibility and function in monitoring the room's climate.
5.7 Timer Function
The clock includes both count-up and countdown timer functions.

Image 5.6: Multi-functional Timer Clock.
This image illustrates the versatile timer functions of the Xflyee digital clock. The left panel shows the clock acting as a count-up timer in a gym environment, displaying "0:00:00". The right panel shows it as a countdown timer in a kitchen, set to "00:29:59", demonstrating its utility in various scenarios.
- Press the TIMER button on the remote.
- Use the UP and DOWN arrows to set the desired countdown time, or press START for count-up.
- Press START/PAUSE to begin or pause the timer.
- Press RESET to clear the timer.
6. Maintenance
- Cleaning: Wipe the clock's surface with a soft, dry cloth. Do not use abrasive cleaners or solvents.
- Power: Ensure the clock is always connected to a stable 5V/2A power source.
- Battery Replacement: Replace the 4 AAA memory batteries annually or if settings are not retained during power outages.
7. Troubleshooting
| Problem | Possible Cause | Solution |
|---|---|---|
| Clock display is off. | No power or power adapter issue. | Check if the power adapter is securely plugged into the wall outlet and the clock. Ensure the outlet is functional. |
| Remote control not working. | Remote batteries are dead or incorrectly inserted. Obstruction between remote and clock. | Replace remote batteries. Ensure there is a clear line of sight to the clock's sensor. |
| Settings are lost after power outage. | Memory batteries are dead or not installed. | Install or replace the 4 AAA memory batteries in the clock's battery compartment. |
| Time is incorrect. | Time not set correctly or DST issue. | Manually set the time using the remote control. Verify DST settings if applicable. |
| Night light not changing colors/brightness. | Incorrect remote button pressed or remote issue. | Ensure you are pressing the correct "COLOR LIGHT" or "LIGHT+/-" buttons. Check remote functionality. |
8. Specifications
- Brand: Xflyee
- Model Number: 3016
- Display Type: Digital LED
- Size: 16.5 inches (15"W x 5.5"H)
- Color: Ice Blue (display color)
- Material: Plastic
- Power Source: Corded Electric (5V/2A adapter)
- Memory Batteries: 4 AAA batteries (included)
- Special Features: Adjustable Brightness, 6-Color Night Light, Dual Alarms, Automatic DST, Temperature Display, Remote Control, Timer (Count Up/Down)
- Mounting Type: Wall-Mounted / Desktop Placement
- Indoor/Outdoor Usage: Indoor
- Item Weight: 2.27 pounds
9. Warranty and Support
The Xflyee Digital Clock comes with a Lifetime Warranty.
For technical support, warranty claims, or any questions regarding your product, please contact Xflyee customer service through the retailer's platform or visit the official Xflyee store page for contact information.
Xflyee Store: https://www.amazon.com/stores/Xflyee/page/9DFC62F1-3B3B-4ACE-A0F8-628D3A91A24E