
ELEGOO EU-EHJ-3DL-MPV3
Contents
ELEGOO Mercury Plus V3.0 Wash and Cure Station User Manual
Model: EU-EHJ-3DL-MPV3
1. Introduction
The ELEGOO Mercury Plus V3.0 is an advanced wash and cure station designed for post-processing resin 3D prints. It integrates both washing and UV curing functions into a single unit, streamlining the workflow for resin 3D printing enthusiasts and professionals. This manual provides comprehensive instructions for the safe and effective operation, maintenance, and troubleshooting of your Mercury Plus V3.0 station.
Key features include a large 7.5L cleaning capacity, dual cleaning options (basket and suspension), powerful 360° UV curing, an intuitive touch panel, and an anti-UV protective cover for enhanced safety.

Image 1: The Mercury Plus V3.0 station highlighting its main features: 2-in-1 Wash & Cure, Large Capacity, Dual Cleaning Option, 360° Curing, Easy to Use, and Anti-UV Cover.
2. Safety Information
Please read all safety warnings and instructions carefully before using the ELEGOO Mercury Plus V3.0. Failure to follow these instructions may result in electric shock, fire, or serious injury.
- UV Light Exposure: The curing station uses powerful UV light. Never look directly at the UV light source when the machine is operating. The anti-UV cover is designed to block 99.9% of UV rays; ensure it is properly in place during curing. A micro-switch will stop the curing process if the cover is removed.
- Resin Handling: Liquid resin can be irritating to skin and eyes. Always wear appropriate personal protective equipment (PPE), including gloves and safety glasses, when handling resin or cleaning the station. Work in a well-ventilated area.
- Flammable Liquids: Isopropyl alcohol (IPA) or other cleaning solutions used for washing are often flammable. Keep the station away from open flames, heat sources, and sparks. Ensure adequate ventilation.
- Electrical Safety: Only use the provided power adapter. Do not operate the machine with wet hands or in wet conditions. Disconnect power before performing any maintenance or cleaning.
- Children and Pets: Keep the device out of reach of children and pets.
- Disposal: Dispose of waste resin and cleaning solutions according to local regulations. Do not pour liquid resin or contaminated cleaning solution down the drain.
3. Package Contents
Verify that all components are present in the package:
- ELEGOO Mercury Plus V3.0 Wash and Cure Station Unit
- Wash Bucket (7.5L capacity)
- Washing Basket
- Curing Platform / Turntable
- Build Plate Holder / Suspension Bracket
- Power Adapter
- Hex Wrench
- User Manual (this document)
- Other small accessories (e.g., screws, washer)

Image 2: Overview of the ELEGOO Mercury Plus V3.0 package contents, including the main unit, wash bucket, washing basket, build plate holder, power adapter, and small tools.
4. Setup
Follow these steps for the initial setup of your Mercury Plus V3.0 station:
- Unpacking: Carefully remove all components from the packaging. Inspect for any damage during transit.
- Placement: Place the station on a stable, level surface in a well-ventilated area, away from direct sunlight and heat sources.
- Power Connection: Connect the power adapter to the DC input port on the back of the station, then plug it into a suitable power outlet.
- Wash Bucket Preparation:
- Fill the wash bucket with your preferred cleaning solution (e.g., Isopropyl Alcohol, Ethanol). Do not exceed the MAX fill line. The bucket has a generous 7.5L capacity.
- Ensure the wash bucket is securely placed on the washing platform of the main unit.
- Curing Platform: For curing, place the transparent curing turntable on the main unit's platform. Ensure it sits flat and can rotate freely.

Image 3: The ELEGOO Mercury Plus V3.0 main unit alongside its large 7.5L wash bucket, ready for setup.
5. Operating Instructions
5.1 Control Panel Overview
The intuitive touch panel allows for easy operation and monitoring of settings and remaining times.
- Power Button: Turns the unit on/off.
- Mode Button: Switches between Wash and Cure modes.
- Time Adjustment Buttons (+/-): Adjusts the washing or curing time (up to 30 minutes).
- Start/Pause Button: Starts or pauses the current operation.
- Display Screen: Shows the current mode and remaining time.
5.2 Washing Mode
The Mercury Plus V3.0 offers two cleaning options for optimal results:
- Basket Cleaning Mode:
- Remove the printed model from the build plate.
- Place the model into the washing basket.
- Place the washing basket into the wash bucket filled with cleaning solution.
- Place the wash bucket onto the station's washing platform.
- Select "Wash" mode using the Mode button.
- Adjust the washing time using the +/- buttons (recommended 2-5 minutes for most prints).
- Press the Start button to begin washing.
Maximum cleaning size for basket mode: 230mm (L) x 135mm (W) x 260mm (H).
- Suspension Cleaning Mode (with Build Plate):
- Secure the build plate with the printed model onto the suspension bracket.
- Lower the build plate and bracket into the wash bucket, ensuring the model is fully submerged in the cleaning solution.
- Place the wash bucket onto the station's washing platform.
- Select "Wash" mode using the Mode button.
- Adjust the washing time using the +/- buttons.
- Press the Start button to begin washing.
Maximum cleaning size for suspension mode: 214mm (L) x 135mm (W) x 180mm (H). Supports build plates up to 10 inches.

Image 4: Illustration of the two washing methods: basket cleaning (left) and suspension cleaning with the build plate (right), showing their respective maximum dimensions.
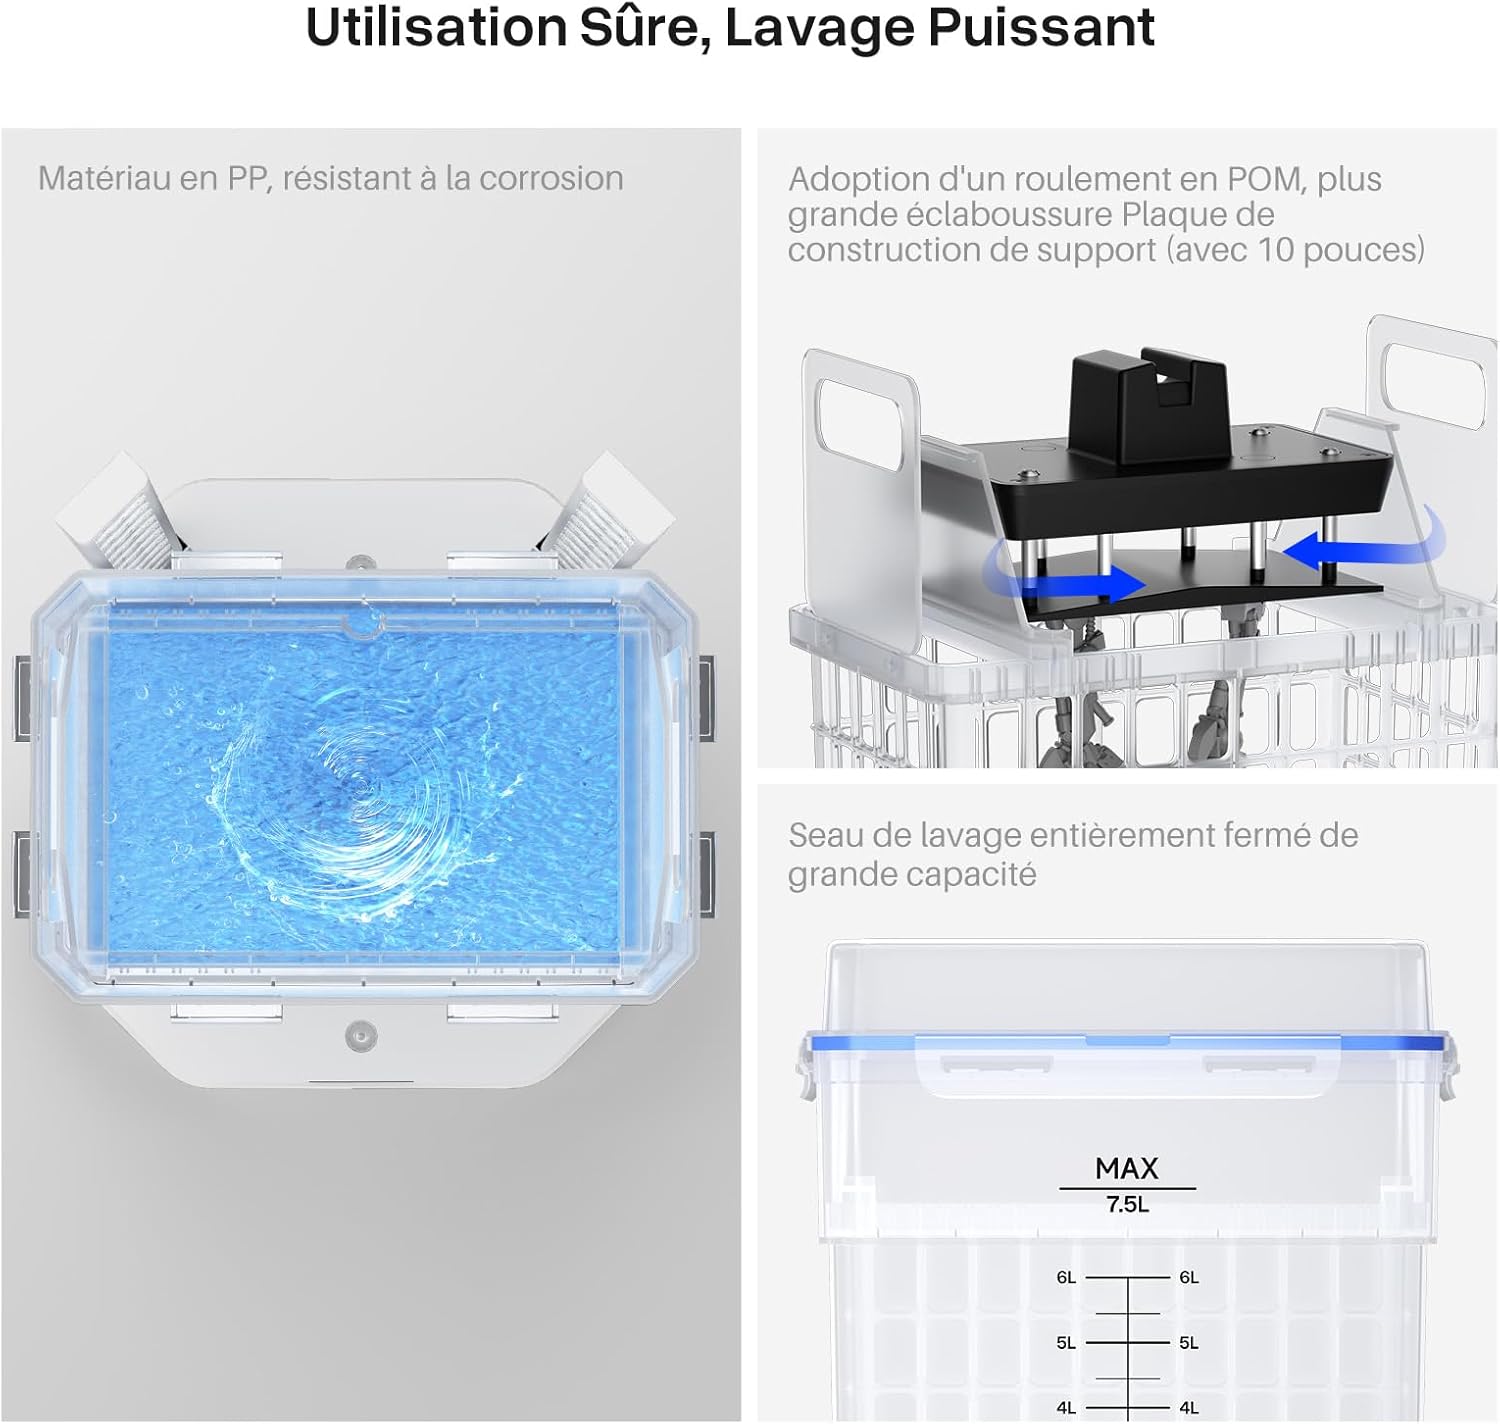
Image 5: Close-up view of the PP material wash bucket, the improved POM bearing for better agitation, and the large capacity sealed design.
5.3 Curing Mode
After washing, ensure your model is dry before proceeding to curing. The 360° curing system ensures uniform post-curing.
- Remove the wash bucket from the station.
- Place the transparent curing turntable onto the station's platform.
- Place your washed and dried resin model onto the center of the turntable.
- Close the anti-UV protective cover securely.
- Select "Cure" mode using the Mode button.
- Adjust the curing time using the +/- buttons (recommended 2-10 minutes depending on resin type and model size).
- Press the Start button to begin curing. The turntable will rotate, and the UV lights will activate.
- Once curing is complete, the machine will beep. Open the cover and remove your fully cured model.
Maximum curing size: Ø250mm x 290mm (H).

Image 6: Depiction of the powerful 360° curing function, showing the UV lamp beads and the rotating platform ensuring comprehensive curing.

Image 7: The yellow anti-UV cover effectively blocking 99.9% of UV light during the curing process, ensuring user safety.

Image 8: Visual comparison demonstrating the improved properties and finish of a resin model after undergoing the wash and cure process.
6. Maintenance
Proper maintenance ensures the longevity and optimal performance of your Mercury Plus V3.0 station.
- Cleaning the Wash Bucket:
- After several uses, the cleaning solution may become cloudy with resin particles. Filter the solution to remove cured resin debris.
- Periodically clean the inside of the wash bucket with fresh cleaning solution and a soft cloth.
- Cleaning the Unit: Wipe down the exterior of the station with a soft, dry cloth. Avoid using abrasive cleaners or solvents that could damage the plastic.
- UV Lamp Maintenance: The UV lamps are designed for long life. If you notice a decrease in curing effectiveness, ensure the lamps are clean and free of resin residue.
- Storage: When not in use, store the station in a cool, dry place, away from direct sunlight. Ensure the anti-UV cover is in place.
7. Troubleshooting
| Problem | Possible Cause | Solution |
|---|---|---|
| Unit does not power on. | Power adapter not connected; power outlet issue. | Check power connections; try a different outlet. |
| Washing motor not spinning. | Wash bucket not properly seated; motor malfunction. | Ensure wash bucket is correctly placed. If issue persists, contact support. |
| UV lights not turning on during curing. | Anti-UV cover not closed; unit in wash mode; lamp failure. | Ensure cover is fully closed. Switch to Cure mode. If lamps are faulty, contact support. |
| Models are still sticky after washing/curing. | Insufficient washing time; cleaning solution saturated; insufficient curing time; model not dry before curing. | Increase wash/cure time. Replace/filter cleaning solution. Ensure model is dry before curing. |
| Turntable not rotating during curing. | Turntable not properly seated; motor malfunction. | Ensure turntable is correctly placed. If issue persists, contact support. |
8. Specifications
| Feature | Detail |
|---|---|
| Brand | ELEGOO |
| Model Number | EU-EHJ-3DL-MPV3 |
| Product Dimensions | 25P x 25W x 29H centimeters |
| Item Weight | 6.17 Kilograms |
| Voltage | 24 Volts |
| Washing Capacity | 7.5 Liters |
| Max Washing Size (Basket) | 230mm (L) x 135mm (W) x 260mm (H) |
| Max Washing Size (Suspension) | 214mm (L) x 135mm (W) x 180mm (H) |
| Max Curing Size | Ø250mm x 290mm (H) |
| UV Wavelength | 405 nm |
| Time Setting Range | 0-30 minutes |
| Country of Origin | China |
9. Warranty and Support
ELEGOO provides a standard warranty for the Mercury Plus V3.0 Wash and Cure Station. Please refer to the warranty card included in your package or visit the official ELEGOO website for detailed warranty terms and conditions.
For technical support, troubleshooting assistance, or spare parts, please contact ELEGOO customer service through their official channels. You can often find support contact information on the ELEGOO website or through the retailer where you purchased the product.
ELEGOO Official Website: www.elegoo.com
Manufacturer: ELEGOO
Ask a question about this manual
Ask about setup, troubleshooting, compatibility, parts, safety, or missing instructions. Manuals+ will review the question and use this page’s manual context to help answer it.