
ELEGOO Mercury Plus 3.0
Contents
ELEGOO Mercury Plus 3.0 Wash and Cure Station
User Manual
1. Introduction
The ELEGOO Mercury Plus 3.0 Wash and Cure Station is an integrated solution designed for post-processing resin 3D printed models. This device streamlines the cleaning and curing stages, ensuring high-quality finishes for your prints. It features an increased cleaning capacity of 7.5L and an expanded curing size, making it compatible with a wider range of models, including those from the ELEGOO Mars and Saturn series.

Image: The ELEGOO Mercury Plus 3.0 Wash and Cure Station, showcasing the main unit and the separate 7.5L cleaning bucket.
2. Safety Information
Always prioritize safety when operating the Mercury Plus 3.0. Resin materials can be hazardous if not handled correctly.
- Wear appropriate Personal Protective Equipment (PPE), including gloves and safety glasses, when handling uncured resin or cleaning solutions (e.g., Isopropyl Alcohol).
- Operate the machine in a well-ventilated area to minimize exposure to resin fumes.
- Keep the device away from direct sunlight and heat sources.
- Ensure the orange UV protection cover is properly placed during the curing process to block UV light and prevent eye exposure. The machine will automatically pause curing if the cover is lifted.
- Do not ingest resin or cleaning solutions. In case of accidental ingestion, seek immediate medical attention.
- Dispose of waste resin and contaminated cleaning solutions according to local regulations. Do not pour them down drains.
- Keep out of reach of children and pets.
3. Product Components
Verify that all components are present in the packaging:

Image: Visual representation of the items included in the ELEGOO Mercury Plus 3.0 package.
- Mercury Plus 3.0 Washing and Curing Machine (Main Unit)
- Cleaning Bucket (7.5L capacity)
- Curing Turntable
- Cleaning Basket
- Adjustable Bracket (x2)
- User Manual (this document)
- Tools (for assembly/maintenance)
- Power Adapter
4. Specifications
| Feature | Detail |
|---|---|
| Product Dimensions | 19.56 x 14.92 x 14.92 inches (49.7 x 37.9 x 37.9 cm) |
| Item Weight | 13.77 pounds (6.25 kg) |
| Cleaning Capacity | 7.5 Liters (Max cleaning size: 230 x 135 x 260 mm) |
| Curing Size | Ø250 x 290 mm (H) |
| UV Light Wavelength | 405 nm |
| Compatibility | Resin 3D printers up to 10 inches (e.g., ELEGOO Mars/Saturn series) |
| UV Protection Cover | Orange cover blocks 99.9% of UV light |
5. Setup
Follow these steps for initial setup:
- Unpack Components: Carefully remove all items from the packaging and verify against the packing list.
- Place the Unit: Position the Mercury Plus 3.0 main unit on a stable, level surface in a well-ventilated area, away from direct sunlight.
- Connect Power: Connect the power adapter to the machine and then to a suitable power outlet.
- Prepare for Washing (Optional initial setup):
- Place the cleaning bucket onto the main unit.
- Fill the cleaning bucket with an appropriate cleaning solution (e.g., Isopropyl Alcohol) up to the desired level, ensuring it covers the models to be cleaned.
- Insert the cleaning basket into the bucket.
- Prepare for Curing (Optional initial setup):
- Place the curing turntable onto the main unit.
- Ensure the orange UV protection cover is ready to be placed over the turntable during curing.
6. Operating Instructions
6.1 Cleaning Mode (Wash)
The cleaning mode effectively removes uncured resin from your 3D printed models.
- Place Cleaning Bucket: Ensure the cleaning bucket is securely placed on the main unit.
- Add Cleaning Solution: Fill the bucket with Isopropyl Alcohol (IPA) or other compatible resin cleaning solution. The bucket has a 7.5L capacity, allowing for larger models.
- Choose Cleaning Method:
- Cleaning Basket: For smaller, detached models, place them directly into the cleaning basket.
- Hanging Cleaning: For models still attached to the build plate, adjust the included brackets to hang the build plate directly into the cleaning solution. This prevents direct contact with uncured resin.
- Select Wash Mode: On the control panel, press the "Wash" button (usually indicated by a water droplet icon).
- Set Timer: Use the "+" and "-" buttons to set the desired cleaning time. Typical cleaning times range from 2-10 minutes depending on model size and resin type.
- Start Cleaning: Press the "Start/Pause" button. The powerful vortex will begin to agitate the cleaning solution, effectively removing resin. The direction of rotation may reverse periodically for thorough cleaning.
- Finish Cleaning: Once the timer completes, the machine will stop. Carefully remove the models and allow them to air dry or use compressed air.

Image: The Mercury Plus 3.0 offers a significantly larger 7.5L cleaning capacity compared to the 3.5L of Mercury Plus 2.0.
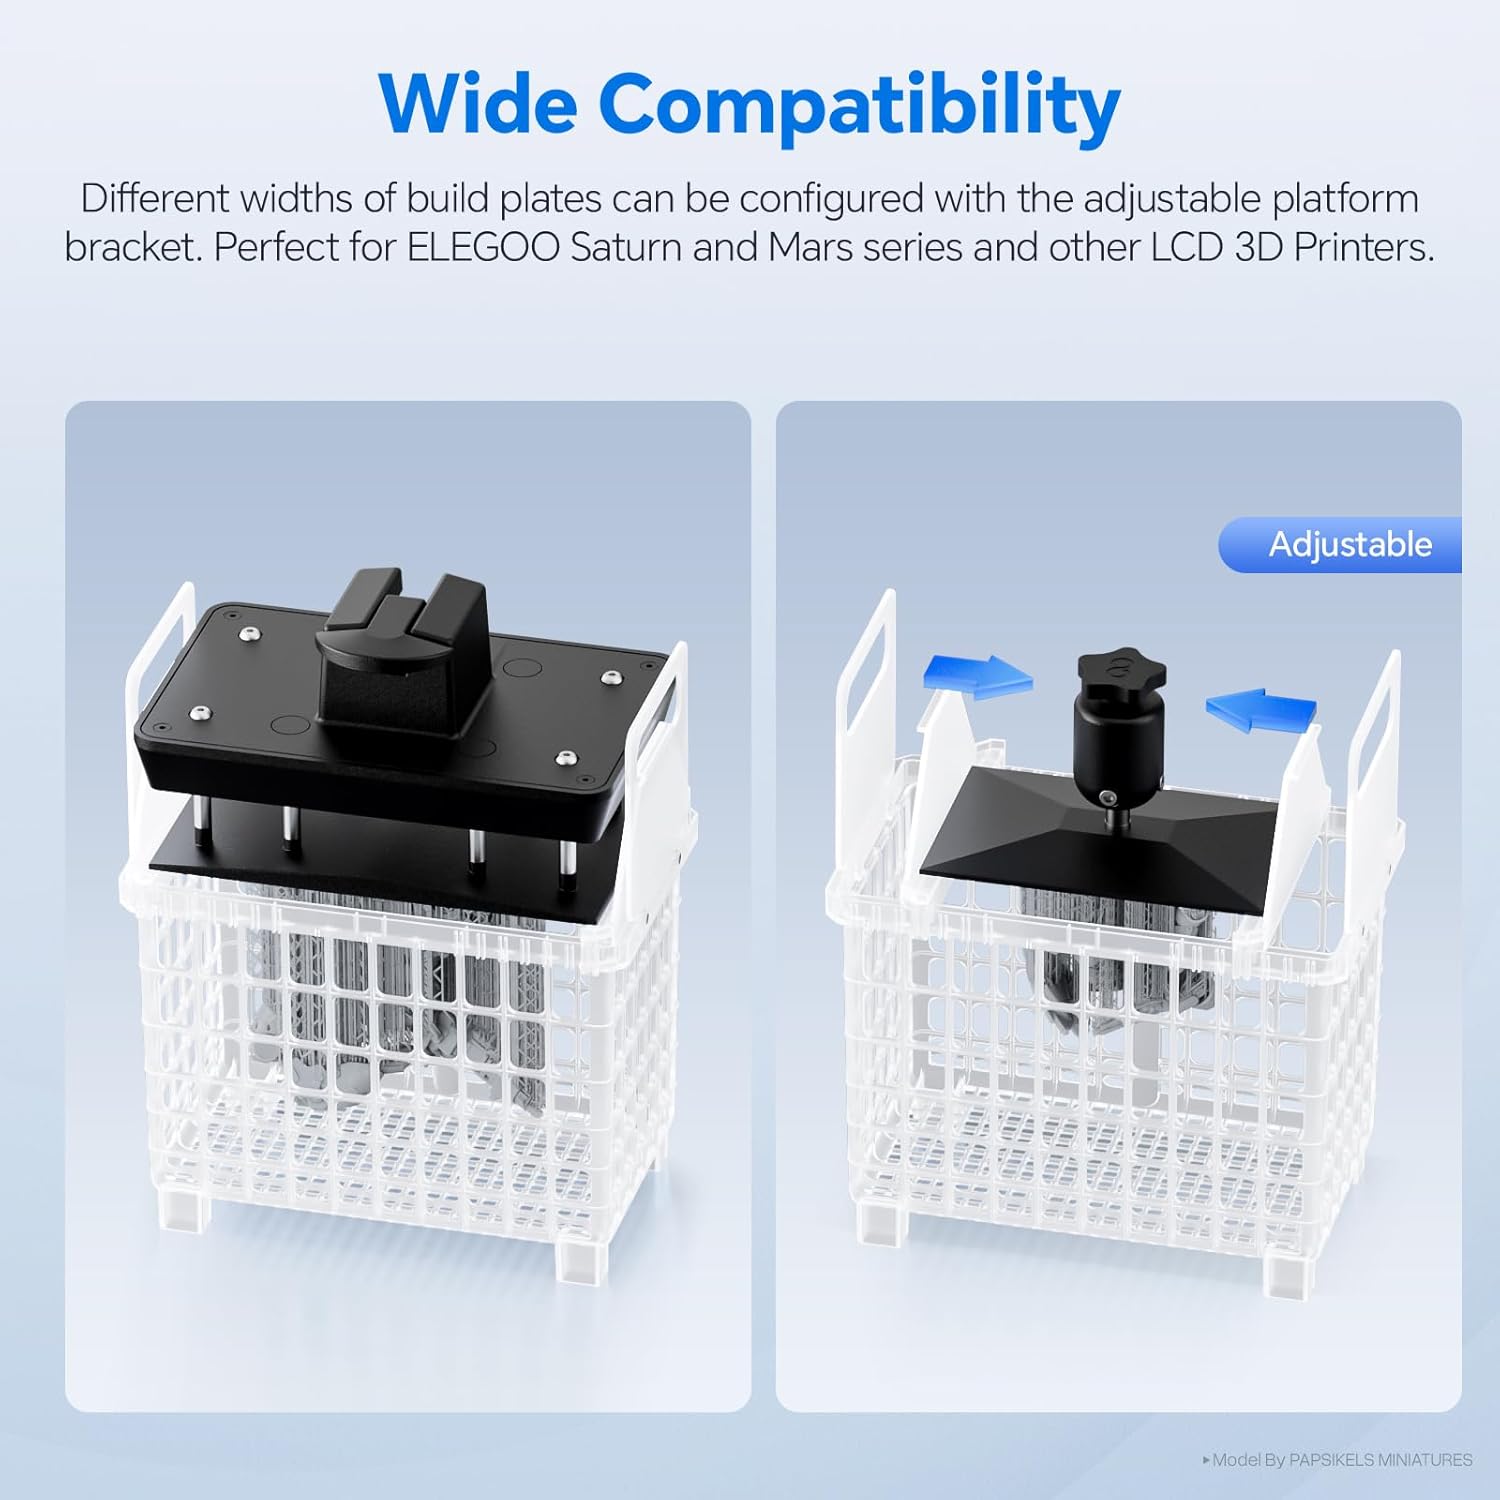
Image: The adjustable platform bracket allows for wide compatibility with various build plate sizes, including ELEGOO Saturn and Mars series.

Image: Illustration of the two cleaning modes: with the build platform attached (left) and without the platform, using the basket (right).

Image: A visual representation of the powerful vortex created by the machine for effective resin removal.
6.2 Curing Mode (Cure)
The curing mode uses UV light to fully harden your resin prints, enhancing their strength and durability.
- Remove Cleaning Bucket: Ensure the cleaning bucket is removed from the main unit.
- Place Curing Turntable: Position the curing turntable securely on the main unit.
- Place Models: Carefully place your cleaned and dried models onto the center of the curing turntable. The Mercury Plus 3.0 offers a larger curing size of Ø250 x 290mm (H).
- Cover with UV Protection: Place the orange UV protection cover over the models and the turntable. This cover blocks 99.9% of UV light for safety.
- Select Cure Mode: On the control panel, press the "Cure" button (usually indicated by a sun or UV light icon).
- Set Timer: Use the "+" and "-" buttons to set the desired curing time. Curing times vary based on resin type and model thickness, typically 2-5 minutes.
- Start Curing: Press the "Start/Pause" button. The turntable will rotate, and the UV lights (24 pcs 405 nm LEDs) will activate, providing 360° all-round curing.
- Finish Curing: The machine will stop when the timer expires. Remove the fully cured models.

Image: The Mercury Plus 3.0 boasts a 460% increase in curing size compared to Mercury Plus 2.0, accommodating larger models.

Image: The orange UV protection cover in place during the curing process, highlighting its safety feature.

Image: The 360° full curing process, showing the rotating turntable and reflective mirror design for even UV light distribution.

Image: A side-by-side comparison of a 3D printed model before and after undergoing the cleaning and curing process, demonstrating improved finish.
6.3 Control Panel
The control panel features intuitive buttons for mode selection and timer adjustment.

Image: A close-up view of the control panel, showing the mode selection and timer adjustment buttons.
- Wash Button: Activates the cleaning mode.
- Cure Button: Activates the curing mode.
- "+" Button: Increases the timer setting.
- "-" Button: Decreases the timer setting.
- Start/Pause Button: Initiates or pauses the selected operation.
7. Maintenance
Regular maintenance ensures optimal performance and longevity of your Mercury Plus 3.0.
- Cleaning the Bucket: After multiple uses, the cleaning solution may become saturated with resin. Replace the solution as needed. Clean the inside of the bucket and the magnetic stirrer with fresh IPA.
- Cleaning the Machine: Wipe down the exterior of the machine with a soft, damp cloth. Avoid using abrasive cleaners or solvents that could damage the surface.
- UV Lamp Maintenance: Keep the UV lamps and reflective surfaces clean to ensure efficient curing. Gently wipe them with a soft, lint-free cloth.
- Storage: When not in use, store the machine in a cool, dry place, away from direct sunlight. Ensure the cleaning bucket is sealed to prevent evaporation of cleaning solution. The cleaning bucket is designed with blue rubber gaskets for effective sealing.

Image: Close-up of the blue rubber gaskets on the cleaning bucket, designed for effective sealing and preventing evaporation.
8. Troubleshooting
Common issues and their potential solutions:
- Machine does not power on:
- Check if the power adapter is securely connected to both the machine and the power outlet.
- Verify the power outlet is functional.
- UV lights do not activate during curing:
- Ensure the orange UV protection cover is correctly placed. The machine has a safety interlock that prevents UV light activation if the cover is not detected.
- Confirm the machine is in "Cure" mode.
- Washing vortex is weak or not spinning:
- Check if the cleaning bucket is properly seated on the main unit.
- Ensure the magnetic stirrer at the bottom of the bucket is not obstructed.
- Verify the machine is in "Wash" mode.
- Models are not thoroughly cleaned:
- Increase the cleaning time.
- Replace the cleaning solution if it is heavily saturated with resin.
- Ensure models are fully submerged and not overcrowded in the basket.
- Models are not fully cured:
- Increase the curing time.
- Ensure the models are clean and dry before curing. Residual resin or moisture can hinder curing.
- Verify the UV lamps are clean and unobstructed.
9. Warranty and Support
For warranty information, please refer to the warranty card or documentation included with your product. For technical support, spare parts, or further assistance, please contact ELEGOO customer service through their official website or the platform where the product was purchased.
Manufacturer: ELEGOO
Ask a question about this manual
Ask about setup, troubleshooting, compatibility, parts, safety, or missing instructions. Manuals+ will review the question and use this page’s manual context to help answer it.