
CPVAN FSI-3002
CPVAN Wireless Interlinked Heat Alarm User Manual
Model: FSI-3002
Product Overview
The CPVAN Wireless Interlinked Heat Alarm (Model: FSI-3002) is designed to provide early warning of fire by detecting rapid increases in temperature. This alarm features a built-in 10-year lithium battery, eliminating the need for frequent battery changes. It is compliant with BS 5446-2:2003 standards and is suitable for placement in areas like kitchens where smoke alarms might trigger false alarms.
Key features include wireless interlinking capability, allowing up to 30 units to communicate and trigger all alarms simultaneously if one detects a hazard. This ensures comprehensive coverage throughout your home, even across multiple floors or distant rooms.

Image: The CPVAN Wireless Interlinked Heat Alarm, a compact white disc-shaped device designed for ceiling or wall mounting. It features a central test/silence button and an LED indicator.
Setup and Installation
Package Contents
Before installation, ensure all components are present:
- CPVAN Wireless Interlinked Heat Alarm unit
- Mounting bracket
- Screws and wall plugs
- User Manual (this document)
Installation Location
For optimal performance and compliance, install the heat alarm in areas where rapid temperature increases are expected, such as kitchens, garages, or boiler rooms. Avoid placing it directly above heat sources or in areas with high humidity.
The alarm can be quickly installed on any wall or ceiling without the need for complex wiring.
Mounting the Alarm
- Choose a suitable mounting location on a ceiling or wall, away from obstructions.
- Use the mounting bracket as a template to mark the drill holes.
- Drill holes and insert the wall plugs.
- Secure the mounting bracket to the ceiling/wall using the provided screws.
- Align the alarm unit with the mounting bracket and twist clockwise until it clicks securely into place.

Image: Illustrates the ease of installing the interlinked heat alarm, showing it mounted on a ceiling. It also highlights the use of a remote control for pairing, testing, and muting, avoiding the need for ladders.
Wireless Interlinking
The CPVAN heat alarms can be wirelessly linked together to create a comprehensive safety network. If one alarm detects a hazard, all linked alarms will sound, providing widespread notification. Up to 30 alarms can be interlinked.
- Ensure all alarms are powered on.
- On the first alarm, press and hold the test/mute button for approximately 3 seconds until the LED flashes rapidly. This alarm is now in pairing mode.
- Within 60 seconds, press the test/mute button on the second alarm (and subsequent alarms) once. The LED on the second alarm will flash to confirm successful pairing.
- Repeat step 3 for all additional alarms you wish to interlink.
- After linking all desired alarms, press the test/mute button on any linked alarm to test the interlinking. All linked alarms should sound.

Image: A multi-story house diagram illustrating how multiple CPVAN heat alarms can be wirelessly interlinked, with red lines connecting them to show the network. This ensures that if one alarm triggers, all others will sound, providing comprehensive coverage.
Operating the Alarm
Normal Operation
Once installed and powered on, the heat alarm continuously monitors the ambient temperature. It will enter an alarm state if it detects a rapid rise in temperature or if the temperature exceeds a pre-set threshold (e.g., 59°C for Class A sensor).
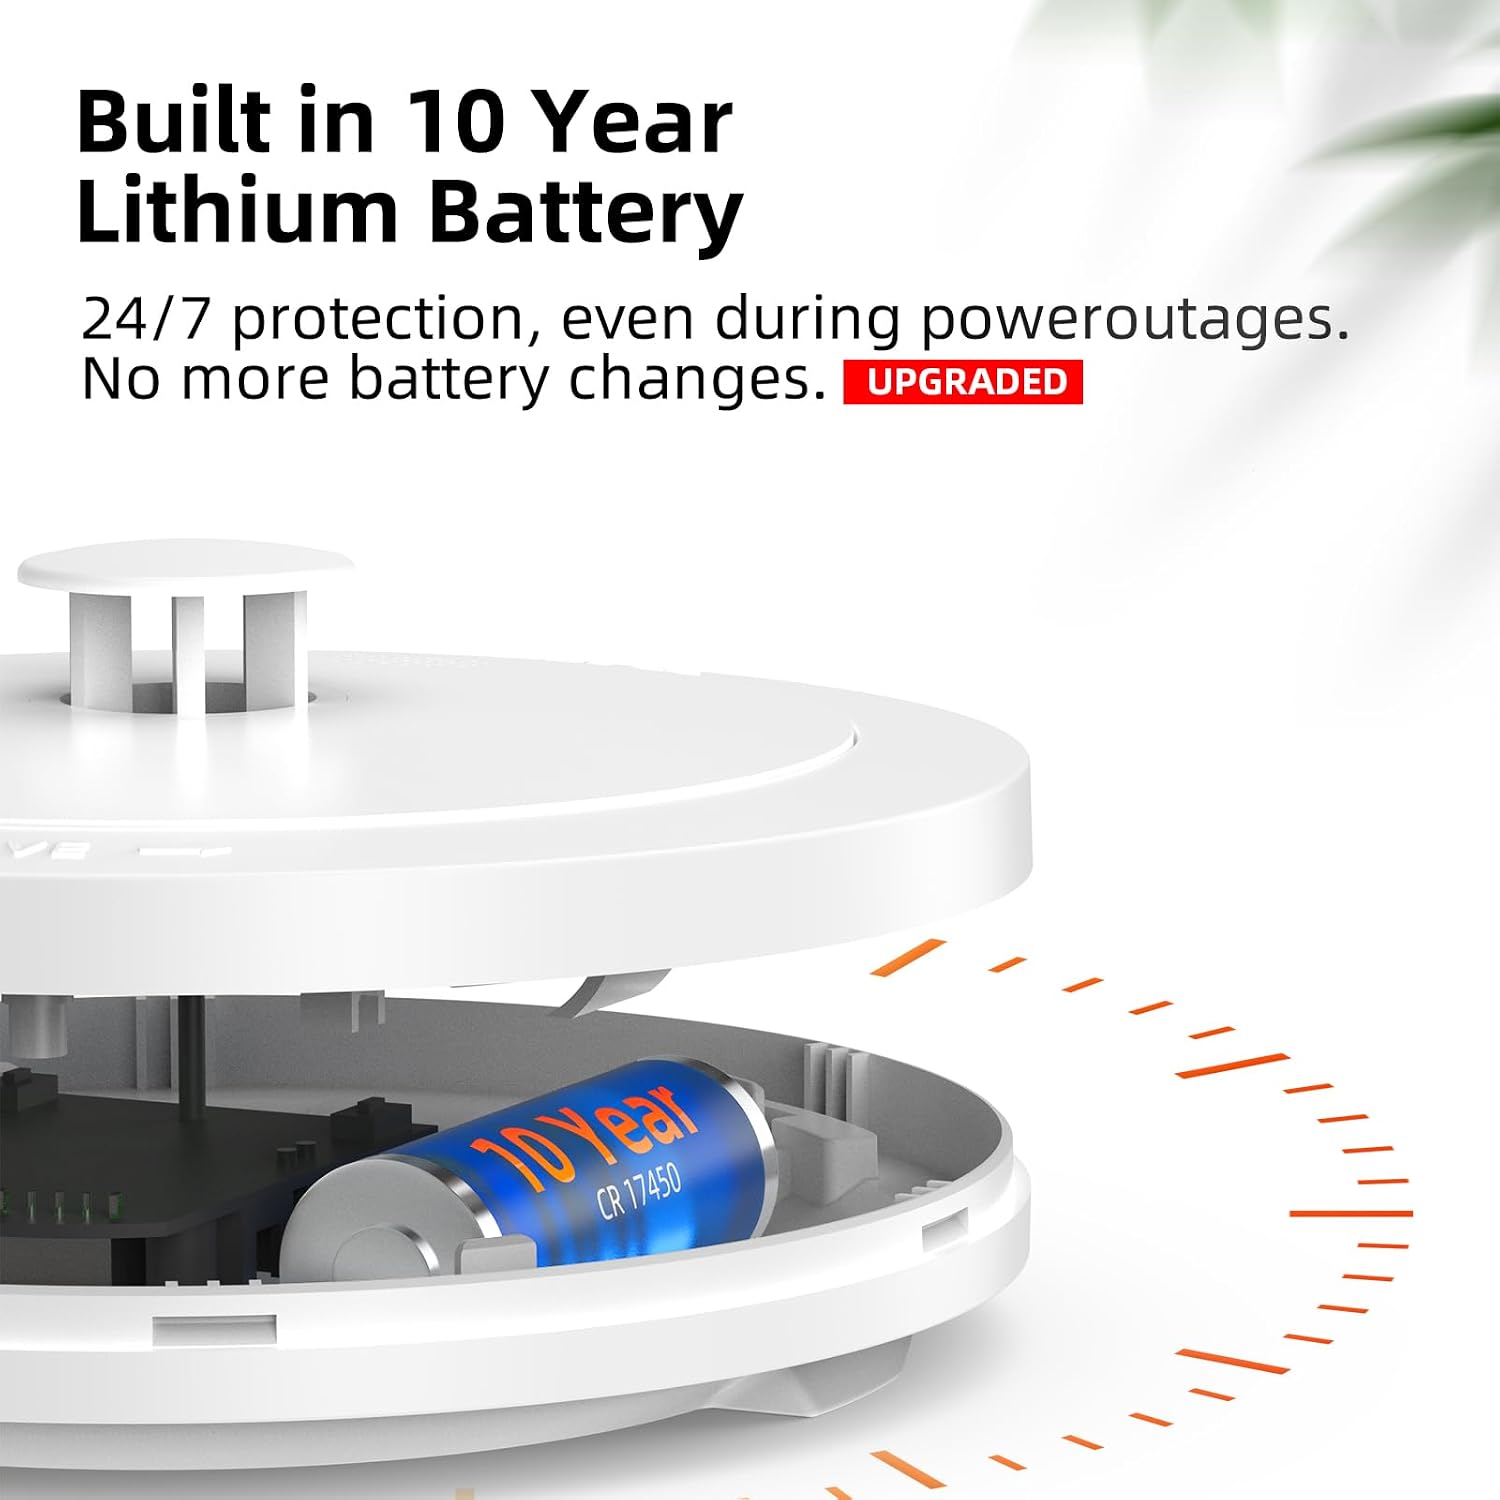
Image: A detailed diagram of the CPVAN Heat Alarm, highlighting its key components: the horn for audible alerts, the test/silence button, and the LED indicator. It also provides the alarm's dimensions (125mm diameter, 36mm height) and specifies an alarm volume of over 85dB at 3 meters.
Testing the Alarm
It is recommended to test your heat alarm weekly to ensure proper functionality.
- Press and hold the test/mute button on the alarm for a few seconds.
- The alarm will sound a loud siren (over 85 dB) and the LED will flash rapidly.
- If interlinked, all other connected alarms should also sound.
- Release the button to stop the test.
- If the alarm does not sound during the test, refer to the Troubleshooting section.
Silencing the Alarm
In the event of a non-emergency alarm (e.g., from cooking fumes if incorrectly placed), you can temporarily silence the alarm:
- Press the test/mute button once.
- The alarm will enter a temporary silence mode. It will automatically reset after a period (e.g., 10 minutes) or if the temperature continues to rise.
Maintenance
Cleaning
To ensure optimal performance, clean your heat alarm regularly:
- Gently wipe the exterior of the alarm with a soft, damp cloth.
- Do not use cleaning solvents or harsh chemicals.
- Avoid painting the alarm, as this can interfere with its sensors.
Battery Life
The CPVAN Heat Alarm is equipped with a sealed, non-replaceable 10-year lithium battery. This battery is designed to power the alarm for its entire operational lifespan, providing continuous protection without the need for battery changes.

Image: An internal view of the CPVAN Heat Alarm, highlighting the integrated 10-year lithium battery. This design ensures long-term, maintenance-free operation.
Troubleshooting
| Problem | Possible Cause | Solution |
|---|---|---|
| Alarm does not sound during test. | Alarm not properly activated or faulty unit. | Ensure the alarm is securely twisted onto its mounting bracket. If still no sound, the unit may be faulty and require replacement. |
| Interlinked alarms do not all sound. | Pairing issue or out of range. | Re-perform the wireless interlinking procedure for all units. Ensure alarms are within the 100m wireless range. |
| Alarm sounds intermittently without apparent heat. | Environmental factors or dust accumulation. | Clean the alarm as per the Maintenance section. Ensure it's not placed too close to cooking appliances or other heat sources that might cause minor temperature fluctuations. |
| LED indicator not flashing. | Alarm not powered or faulty. | Ensure the alarm is correctly installed on its base. If the issue persists, the unit may be faulty. |
Specifications
- Model: FSI-3002
- Battery Life: 10 Years (Built-in Lithium Battery)
- Alarm Volume: >85 dB at 3 meters
- Sensor Type: Thermistors (Heat Sensor)
- Activation Temperature: Sensor class A, Heat sensor 59°C (typical)
- Wireless Interlink Range: Up to 100 meters (open space)
- Maximum Interlinked Units: Up to 30
- Material: ABS (Fire-resistant)
- Certification: BS 5446-2:2003
- Dimensions: Approximately 125mm (Diameter) x 36mm (Height)
- Weight: Approximately 230g
Warranty and Support
Warranty Information
CPVAN products are manufactured to high quality standards. For specific warranty terms and conditions, please refer to the product packaging or contact CPVAN customer support. Keep your proof of purchase for warranty claims.
Customer Support
If you encounter any issues or have questions regarding your CPVAN Wireless Interlinked Heat Alarm, please contact CPVAN customer support. You can typically find contact information on the product packaging, the official CPVAN website, or through the retailer where you purchased the product.
For more information, you may visit the CPVAN Store on Amazon.
Related documentsFSI-3002


Ask a question about this manual
Ask about setup, troubleshooting, compatibility, parts, safety, or missing instructions. Manuals+ will review the question and use this page’s manual context to help answer it.