1. Introduction
Thank you for choosing the WENPZERAY Retro Portable AM/FM Vintage Radio. This device combines classic aesthetics with modern functionality, offering AM, FM, and SW radio reception, Bluetooth connectivity, and MP3 playback via USB, TF card, and AUX input. This manual provides detailed instructions for proper setup, operation, and maintenance to ensure optimal performance and longevity of your radio.
2. Product Overview
Familiarize yourself with the main components and controls of your WENPZERAY radio.

Figure 2.1: Front View of the Radio. This image displays the radio's front panel, featuring the large tuning dial, volume and power knobs, and media playback buttons.
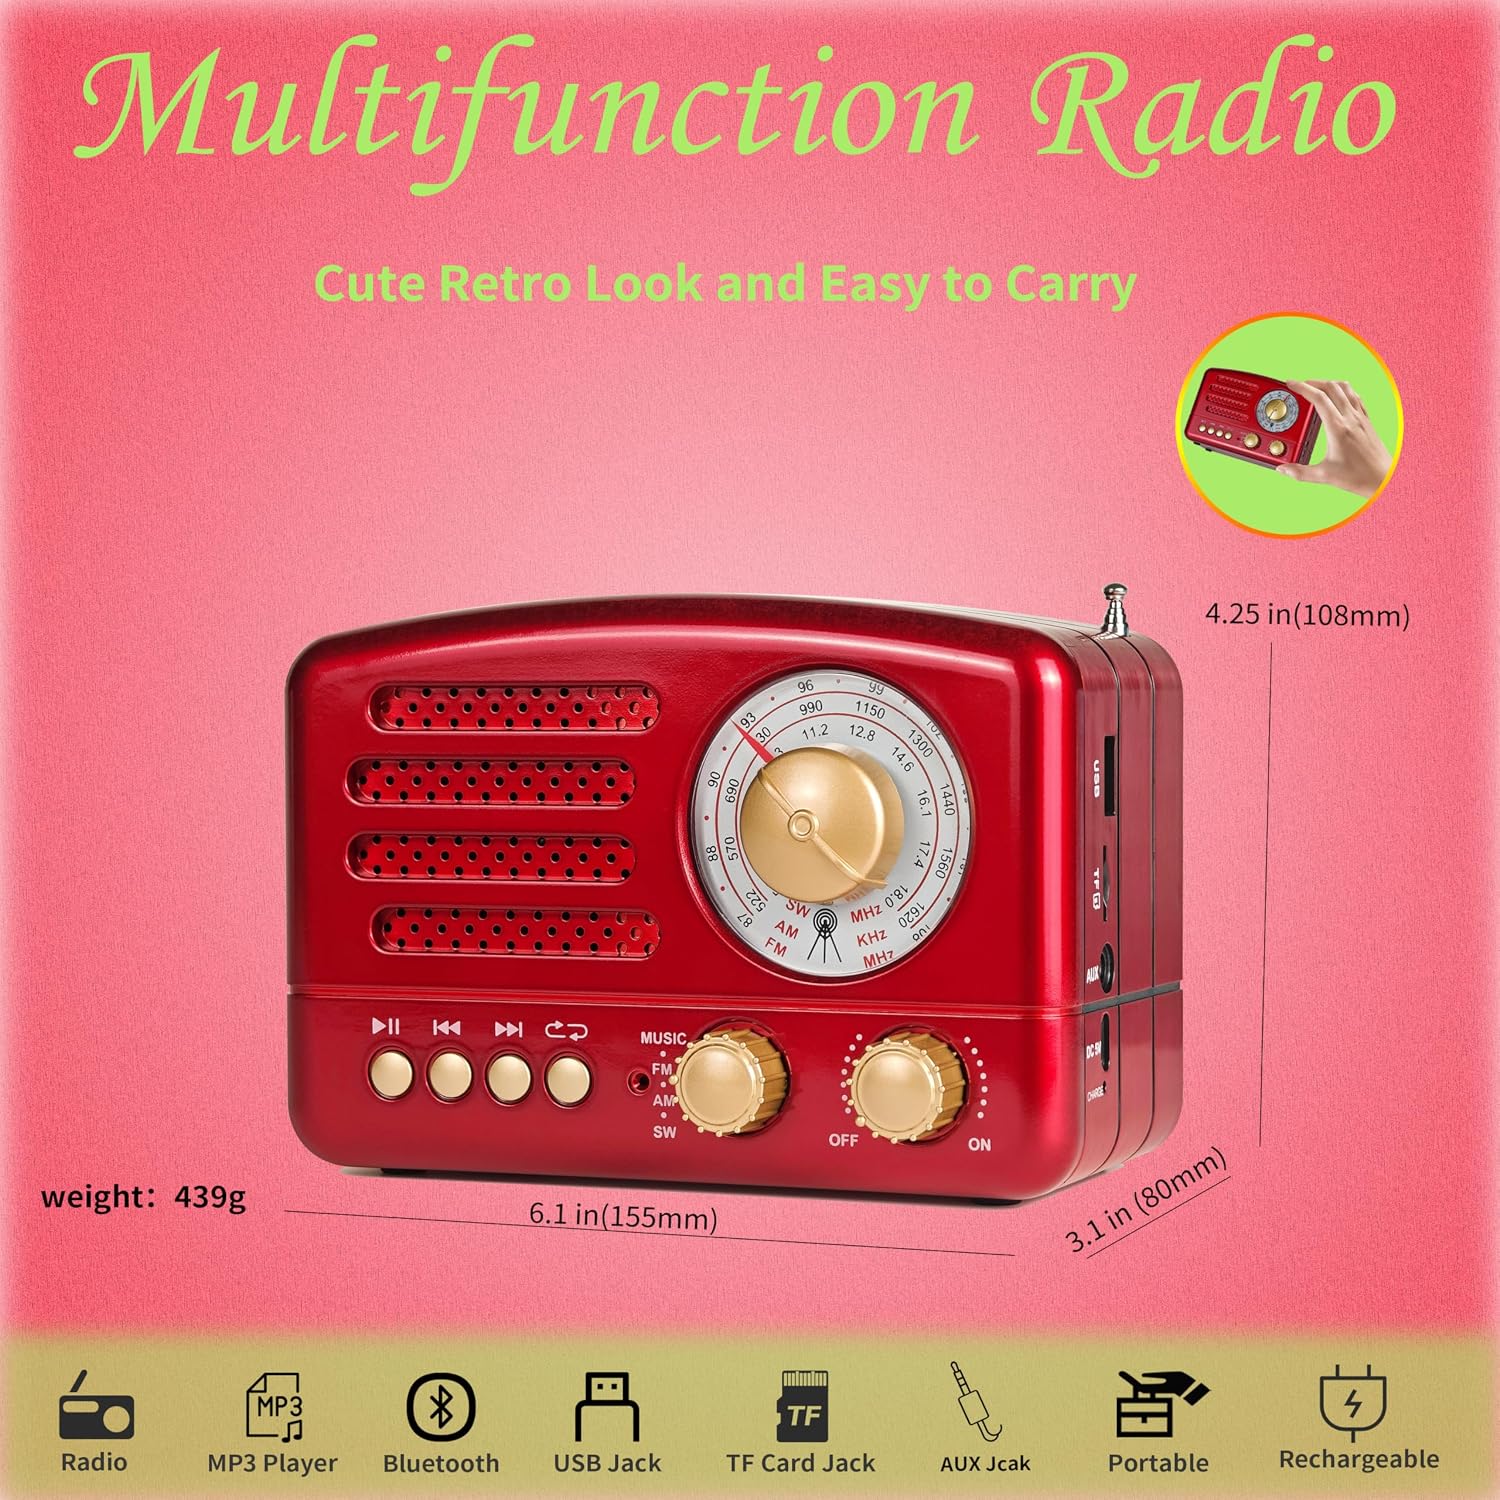
Figure 2.2: Radio Dimensions and Features. This image illustrates the compact size of the radio and highlights its various functionalities, including radio, MP3 player, Bluetooth, USB, TF card, AUX, portability, and rechargeable battery.
3. Setup
Before first use, ensure the radio is adequately charged.
3.1 Charging the Battery
The radio is equipped with a built-in rechargeable battery. Use the included Micro USB charging cable to charge the device. Connect the small end of the USB cable to the DC 5V charging jack on the radio and the other end to a compatible USB power source (e.g., computer USB port, USB wall adapter).

Figure 3.1: Charging Connection. This image shows the location of the DC 5V charging jack and the USB charging cable, indicating how to power the device.
4. Operating Instructions
4.1 Power On/Off and Volume Control
To power on the radio, rotate the rightmost knob clockwise from the "OFF" position to the "ON" position. Continue rotating clockwise to increase the volume. Rotate counter-clockwise to decrease the volume and turn off the device.
4.2 Radio Operation (AM/FM/SW)
- Select Band: Use the 'MUSIC FM AM SW' switch to select your desired radio band: FM, AM, or SW (Shortwave).
- Extend Antenna: For optimal FM and SW reception, fully extend the telescopic antenna located on the side of the radio. For AM reception, the internal antenna is typically sufficient, but repositioning the radio may improve signal.
- Tune Station: Rotate the large central tuning knob to scan for radio stations. The illuminated dial will show the frequency.

Figure 4.1: Antenna Extension for Reception. This image demonstrates the radio with its antenna extended, crucial for clear FM and SW band reception.

Figure 4.2: Illuminated Tuning Dial. This image highlights the radio's backlit tuning dial, which allows for easy station selection even in low-light environments.
Radio Broadcast Operation Video
Video 4.1: D-168 Vintage Radio Broadcast Operation. This video demonstrates the process of tuning into radio stations on the D-168 model, including adjusting the tuning knob and extending the antenna for optimal signal.
4.3 Bluetooth Mode
- Switch to Bluetooth: Set the 'MUSIC FM AM SW' switch to the 'MUSIC' position. The radio will enter Bluetooth pairing mode.
- Pairing: On your mobile device, enable Bluetooth and search for available devices. Select 'D-168' from the list to pair. A confirmation sound will indicate successful pairing.
- Playback: Once paired, you can play audio from your connected device through the radio's speaker. Use the radio's playback buttons (Play/Pause, Previous/Next) or your device's controls.

Figure 4.3: Bluetooth Speaker Functionality. This image shows the radio being used as a Bluetooth speaker, connected wirelessly to a smartphone for audio playback.
4.4 MP3 Playback (USB Disk/TF Card)
To play MP3 files, insert a USB flash drive into the USB port or a TF (MicroSD) card into the TF card slot. The radio will automatically detect and begin playing MP3 files. Use the playback buttons (Play/Pause, Previous/Next) to control your music.
4.5 AUX Input
Connect an external audio device (e.g., smartphone, MP3 player) to the radio's AUX jack using a 3.5mm audio cable (not included). The radio will automatically switch to AUX input mode. Audio from your external device will now play through the radio's speaker.
5. Maintenance
- Cleaning: Wipe the radio with a soft, dry cloth. Do not use abrasive cleaners or solvents.
- Storage: Store the radio in a cool, dry place away from direct sunlight and extreme temperatures.
- Battery Care: If not used for extended periods, charge the battery at least once every three months to maintain its lifespan.
- Avoid Water: This radio is not waterproof. Keep it away from water and high humidity.
6. Troubleshooting
| Problem | Possible Cause | Solution |
|---|---|---|
| Radio does not power on. | Battery is depleted. | Charge the radio using the provided USB cable. |
| Poor radio reception. | Antenna not extended or weak signal. | Fully extend the telescopic antenna. Try repositioning the radio for better signal. |
| No sound from speaker. | Volume too low or incorrect mode. | Increase the volume. Ensure the correct mode (FM/AM/SW, Bluetooth, MP3, AUX) is selected. |
| Bluetooth device cannot connect. | Radio not in pairing mode or device too far. | Ensure the radio is in 'MUSIC' mode. Keep the Bluetooth device within range (approx. 10 meters). Forget and re-pair the device if necessary. |
| MP3 playback issues. | Unsupported file format or corrupted media. | Ensure files are in MP3 format. Try a different USB disk or TF card. |
7. Specifications
| Feature | Detail |
|---|---|
| Product Dimensions | 6.1 x 3.15 x 4.21 inches (155 x 80 x 108 mm) |
| Item Weight | 15.4 ounces (439 g) |
| Battery | 1 Lithium Ion battery (included) |
| Tuner Technology | AM/FM/SW (3-Band) |
| Connectivity Technology | Bluetooth, USB, AUX |
| Special Features | Built-In AM Antenna, Portable, Rechargeable |
| Included Components | English User Manual, USB Charging Cable |
8. Warranty and Support
WENPZERAY products are manufactured with high-quality standards. For any issues or inquiries regarding your radio, please refer to the seller's return and support policies on the platform where the product was purchased. Keep your purchase receipt for warranty claims, if applicable.