Introduction
This manual provides detailed instructions for the installation, operation, and maintenance of your Ciro GEN 2 Cybercharger Phone Holder with Offset Perch Mount. This device is designed to securely hold and wirelessly charge Qi-enabled smartphones on motorcycles, utilizing a GEN 2 ball and socket assembly for versatile positioning.
Product Overview
Key Features:
- Compatible with iOS and Android Qi-enabled devices.
- Supports up to 15-watt wireless fast charging.
- Waterproof electronics for durability.
- Soft rubber-lined foot and arms provide stability and prevent slipping.
- Expandable from 2-3/8" to 4" wide to accommodate various phone sizes.
- Mechanical grip ensures a firm and secure hold.
- Quickly lock and release your phone with one finger.
- Simple wire harness included, connects directly to any 12V battery with an in-line fuse.
- Ball mount system allows for a broad range of placement and angle adjustment.
- Compatible only with the GEN 2 ball mounting system.
What's in the Box:
- GEN 2 Cybercharger Assembly
- Battery power harness
- GEN 2 Perch Mount Kit
- Hardware kit
- Note: Indian Pursuit models may require additional hardware.

Image: The complete Ciro GEN 2 Cybercharger Phone Holder assembly, including the phone holder unit, the perch mount, and various screws and spacers from the hardware kit.
Setup and Installation
Estimated installation time is approximately 30 minutes. No drilling is required for standard installations.
- Prepare the Mounting Location: Identify a suitable location on your motorcycle's handlebars or perch where the GEN 2 Perch Mount Kit can be securely attached. Ensure it does not obstruct controls or gauges.
- Install the Perch Mount:

Image: A close-up view of the chrome GEN 2 Perch Mount, showing its ball joint and mounting points.
Attach the perch mount to your motorcycle using the provided hardware kit. Ensure all bolts are tightened securely according to your motorcycle's specifications and the mount's instructions. The ball mount system allows for flexible positioning.
Image: Various screws, spacers, and the perch mount components laid out, indicating the hardware included for installation.
- Attach the Cybercharger Assembly: Connect the GEN 2 Cybercharger Assembly to the ball joint of the installed perch mount. Adjust the angle and orientation for optimal viewing and access. Secure the assembly firmly.
- Connect Power Harness: Route the simple wire harness from the Cybercharger to your motorcycle's 12V battery. Connect the harness directly to the battery terminals, ensuring the in-line fuse is properly installed and accessible. Verify all connections are secure and insulated to prevent short circuits.
- Test Functionality: After installation, turn on your motorcycle's ignition and place a Qi-enabled smartphone into the holder to confirm it powers on and begins charging.
Operating Instructions
- Inserting Your Phone: Gently expand the arms of the Cybercharger Phone Holder. Place your Qi-enabled smartphone into the holder, ensuring it sits flush against the charging surface. The soft rubber-lined foot and arms will provide a stable grip.
- Securing Your Phone: The mechanical grip will automatically adjust to securely hold your phone. For additional security, ensure the quick-lock mechanism (if present on your specific model) is engaged.
- Wireless Charging: Once your phone is properly seated and the motorcycle's power is on, wireless charging will begin automatically for compatible devices. The Cybercharger supports up to 15-watt fast charging.
- Removing Your Phone: To remove your phone, use one finger to quickly release the mechanical grip. The arms will expand, allowing you to safely retrieve your device.

Image: A smartphone displaying a map application, securely mounted and charging in the Ciro Cybercharger on a motorcycle's handlebars.
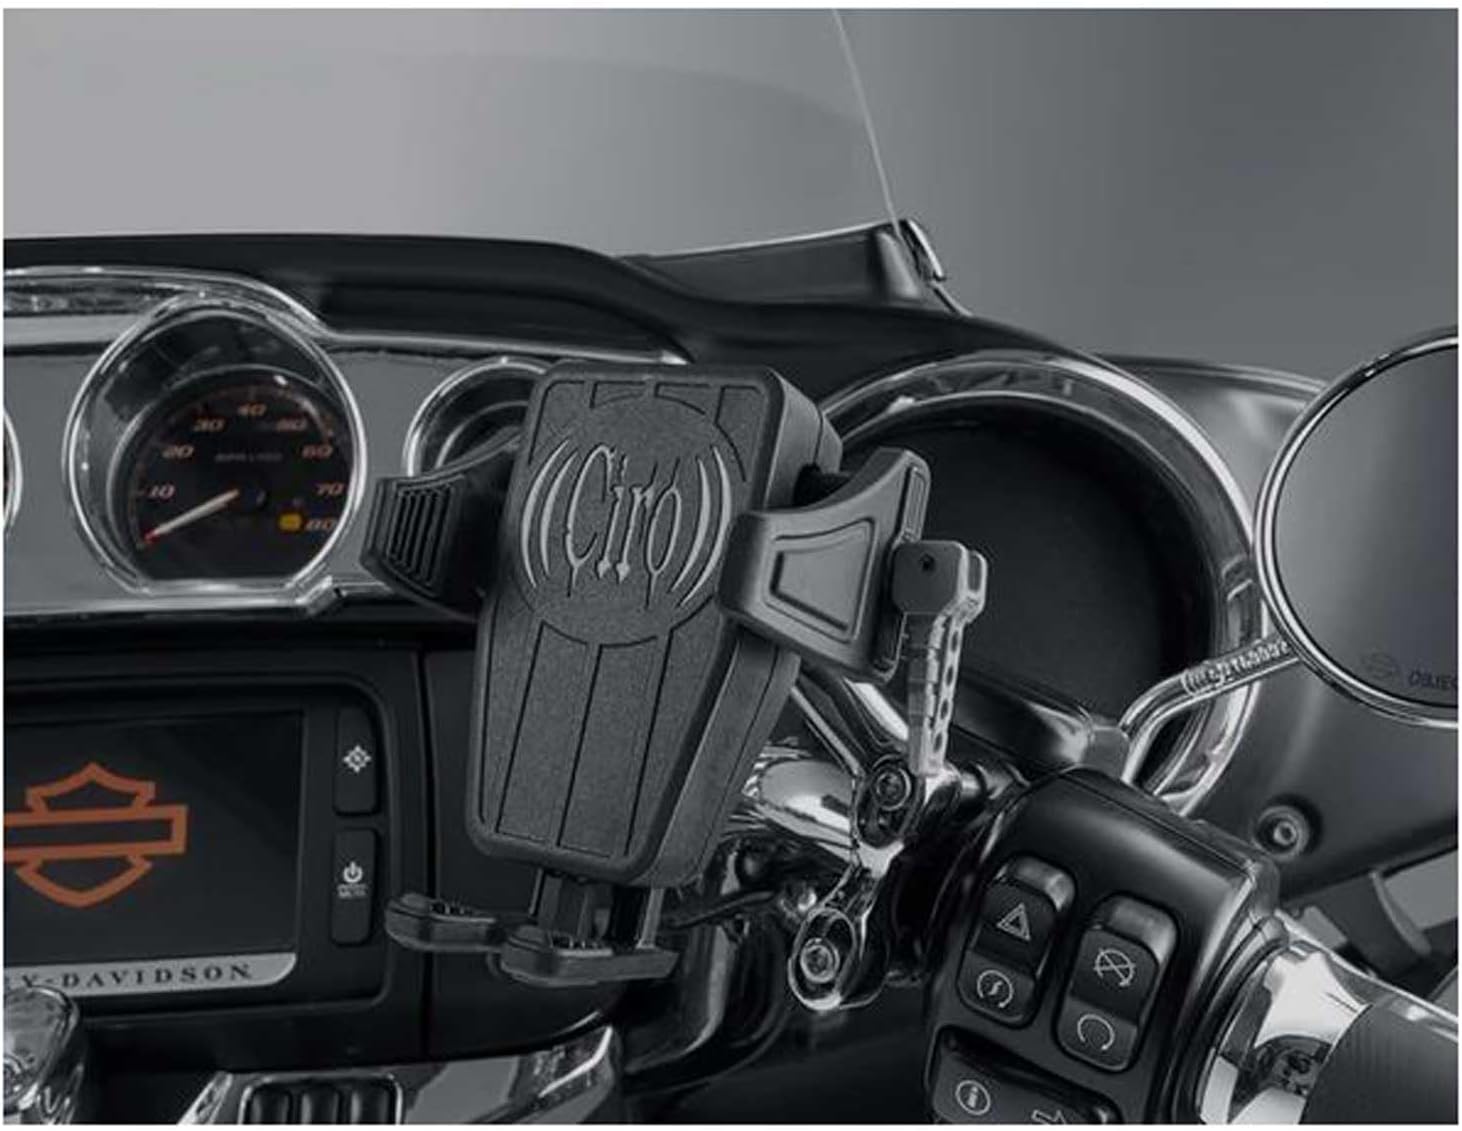
Image: The Ciro Cybercharger Phone Holder, empty and ready for a device, mounted on the handlebars of a motorcycle, showcasing its position and design.
Maintenance
The Ciro GEN 2 Cybercharger features waterproof electronics, designed for durability in various weather conditions. Regular maintenance is minimal:
- Periodically inspect all mounting hardware for tightness. Vibrations from motorcycle operation can loosen fasteners over time.
- Keep the charging surface and rubber grips clean from dust and debris to ensure optimal charging efficiency and secure phone retention. Use a soft, damp cloth for cleaning.
- Check the wiring harness for any signs of wear, fraying, or damage, especially where it connects to the battery or passes through tight spaces.
Troubleshooting
| Problem | Possible Cause | Solution |
|---|---|---|
| Phone not charging wirelessly. |
|
|
| Phone arm contacts camera button. | Specific phone models (e.g., iPhone 16 Pro Max) may have camera button placement that interferes with the holder's arm. |
|
| Battery drain when motorcycle is off. | Small parasitic draw from the charger when directly connected to the battery. |
|
| Holder feels loose or unstable. | Mounting hardware has loosened. |
|
Specifications
| Model Number: | 55310 |
| Product Dimensions: | 7.5 x 5 x 4.25 inches |
| Item Weight: | 1.05 pounds |
| Wireless Charging Output: | Up to 15 watts |
| Compatible Devices: | Qi-enabled Smartphones |
| Phone Width Compatibility: | 2-3/8" to 4" wide |
| Mounting Type: | GEN 2 ball mounting system, Offset Perch Mount |
| Special Features: | Quick Release, Waterproof Electronics, Wireless Charging |
| Power Connection: | Direct to 12V battery with in-line fuse (or switched accessory circuit) |
Warranty and Support
For warranty information or technical support, please refer to the official CIRO website or contact CIRO customer service directly. Keep your purchase receipt for warranty claims.
Manufacturer: Ciro


