
SuperVac KG0008609
SUPERVAC Oven Door Gasket User Manual
Model: KG0008609
1. Product Overview
The SUPERVAC Oven Door Gasket is a high-quality replacement part designed to restore the sealing integrity of your oven door. This gasket is crucial for preventing heat loss, ensuring consistent internal oven temperatures, and promoting energy efficiency during cooking. It is manufactured from durable, heat-resistant, and flexible silicone material, ensuring a long lifespan and reliable performance.
A worn or damaged oven door gasket can lead to significant heat escape, resulting in unevenly cooked food and increased energy consumption. Replacing the gasket with this compatible SUPERVAC product helps maintain optimal oven performance and extends the appliance's operational life.

Figure 1: Top-down view of the SUPERVAC Oven Door Gasket, showing its rectangular shape with rounded corners.
2. Compatibility
This SUPERVAC oven door gasket is specifically designed to be compatible with a wide range of Arçelik, Beko, and Altus oven models. Please verify your oven's model number against the lists below to ensure proper fit and function.
2.1. Arçelik Compatibility
Compatible Arçelik models include, but are not limited to: 9314F, 9313F, 9330HS, 9702RB, 9703RS, 9549MS, 9622I, 9555ERB, 9630MI, 9626DI, 9650DI, 9240H, 9620I, 9520B, 9656ERI, 9651EGI, 9240HDG, 9330HSDG, 9630MMI, 9620MI, 9626MDI, CK110CM, CK110K, CSS64010DW, 9622GI, 9630MGI, 9706RANT, 9705RAV, 9623MDI, 9657X, 9315S, 9315F, 9542CDB, 9314FDG, 9313FDG, 9626MYDI, 9629CDS, 9650MYDI, 9629CMS, 8531S, 8314, 8315S, 8314DG, 8313, 8540, 8431, 8315, 8440, 8431S, 9621CB, 9621CS, OUM22320X, 8541, 8550IV, 8541DG, 8550IC, 9629, 9670CTB, 9670CTS, 9542CDG, 9624MDB, 9670CTG, 9670CTK, 8315S, 8550IC, 9711RIT, 9710RB, 8541A, 9709RA, 9314F, 9619MS, 9622GI, 8315B, 8315SFS, 8531SFS, 8541GMI, 9625MDI, 8541SF, 8541SFDG, 8441, 9520B, 9240H.
2.2. Beko Compatibility
Compatible Beko models include, but are not limited to: CSF63010FWN, CSE63120DWN, CSE63120DWL, CSM63320DWN, CSM63320DWL, CSF63020DSN, CSF63020DSL, OIM23300X, OIM25300X, OIM24300B, OIM25300XL, OIM25701X, OIM25900X, OIM25901X, OIM25702X, OIM25700X, OIE25001X, OIE25000X, OIE22103X, AFM22100I, AFM22300IK, OIE22300X, AFD26300IK, AFMF25400IOKS, AFE25000I, AFM21000S, AFM22100B, AFE21000I, AFE21300S, OIE21000X, OIM21100B, CSM62121DWL, CSE62121DWL, CSE62120DWL, CSE62120DWN, CSM62320DWL, CSM62320DXL, CSM62320DWN, CSM62320DXN, CSE62120DXL, CSE62120DXN, CSM62320DW, CSM62320DS, CSF62010FWL, CSF63010FWL, CSE63120DSL, CSE63120DSN, CSM63320DSL, CSM63320DSN, CSF62020DWL, CSF62020DSL, OIE24300W, OIE21100, AFD25400IOKSL, OIE21000W, OIM27200AV, OIM21200CU, OIM25504X, OIM25502X, CSF62010FWN, CSF62020DSN, CSM61320DWL, CSM61320DWN, AFM24300SOKS, OIM22301X, OIM22505X, OIM25603X, AFM25400IOKS, AFE24300BK, OIM25501X, OIC21000B, OIM21200WU, OIE22100X, CSE64320DS, AFE2400S, FM520, FM520DG, FM320S, FM410, FE310S, FE410, FT400, FT401, FT300, FE310, FT401S, AFE21300IK, AFE24300S, QSE212X, B15, FT400DG, AFD25800IOKS, FM620I, OIC21001X, AFDF25400IOKS, FM520IC, 27200AN, AFMÇ24100SS, AFMC24101SS, AFM22101B, AFD14400SS, OIE24300, AFM25300IOK, AFE24300SK, AFE24000B, AFE21300B, QSE222X, AFM24100B, FM520A, AFE21000S, BXIF22100S, OUE22120X, FT401B, FM320SF, AFM21300I, FM520SF, FM520SFDG, FT401SFS, FE411, FSE62330GWD.
2.3. Altus Compatibility
Compatible Altus models include, but are not limited to: ALA131I, AL553G, AL553GD, ALA135I, ALA132I, ALA133B, AL554G, AL554GD, AL574G, AL564G, AL564GS, AL554GSD, AL574GT, ALA136I, ALA136B, AL555G, AL565GS, AL556G, AL555GSD, AL555GD, AL555GS, AL565G, AL575GT, AL585GTI, AL554GS, ALA137I, AL585GTB, ALA136, AL575GTD.
3. Installation Instructions
Replacing an oven door gasket is a straightforward process that can significantly improve your oven's efficiency. Follow these steps carefully for proper installation.
3.1. Safety Precautions
- Disconnect Power: Always unplug the oven from the power outlet or turn off the circuit breaker before beginning any installation or maintenance.
- Allow Cooling: Ensure the oven is completely cool to the touch before handling any parts.
- Wear Gloves: Consider wearing protective gloves to prevent cuts or scrapes from sharp edges.
3.2. Removing the Old Gasket
- Open Oven Door: Fully open the oven door to access the existing gasket.
- Locate Attachment Points: The old gasket is typically held in place by small metal clips or hooks that fit into holes around the oven frame.
- Carefully Detach: Gently pull the old gasket away from the oven frame, detaching it from each clip or hook. Start from one corner and work your way around.
- Inspect Frame: Once removed, inspect the oven frame for any debris, food particles, or residue. Clean the area thoroughly with a damp cloth if necessary, and allow it to dry completely.

Figure 2: Side view of the SUPERVAC Oven Door Gasket, highlighting its flexible silicone material and attachment points.
3.3. Installing the New Gasket
- Align New Gasket: Take the new SUPERVAC gasket and align it with the oven frame. The corners of the gasket should match the corners of the oven opening.
- Attach Clips/Hooks: Starting from one corner, carefully push the gasket's clips or hooks into the corresponding holes on the oven frame. Ensure each clip is securely seated.
- Work Around the Frame: Continue working your way around the entire oven frame, ensuring the gasket is evenly and firmly attached at all points. The gasket should sit flush against the oven opening.
- Check Fit: Once fully installed, gently press along the entire length of the gasket to ensure it is securely in place and there are no loose sections.
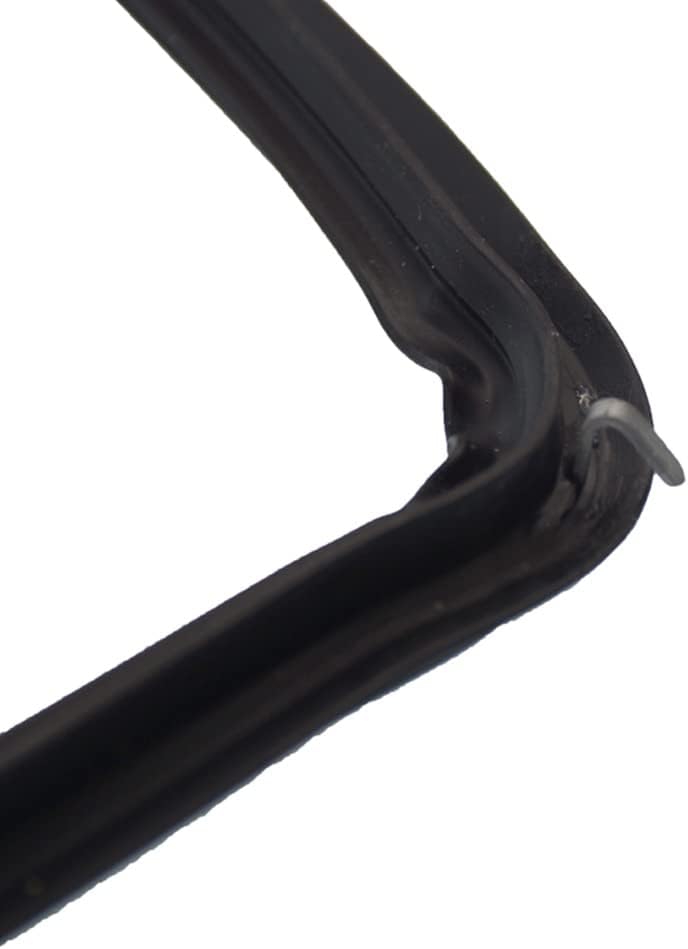
Figure 3: Close-up view of an attachment point on the SUPERVAC Oven Door Gasket, showing the metal hook designed for secure installation.
3.4. Post-Installation Check
- Close Door: Gently close the oven door. It should close smoothly and create a tight seal.
- Reconnect Power: Plug the oven back into the power outlet or turn on the circuit breaker.
- Test Seal: To test the seal, place a piece of paper between the oven door and the frame, then close the door. If you can easily pull the paper out, the seal may not be tight enough, and you should re-check the gasket installation. Repeat this test around the entire perimeter of the door.
4. Operating Considerations
Once the new gasket is installed, your oven should operate with improved heat retention and energy efficiency. No specific operating procedures are required for the gasket itself, but maintaining good oven habits will prolong its life.
- Avoid Excessive Force: Do not slam the oven door, as this can prematurely wear out or damage the gasket.
- Keep Clean: Regularly wipe down the gasket to prevent food spills or grease buildup from hardening and compromising the seal.
- Monitor for Wear: Periodically inspect the gasket for signs of wear, cracking, or hardening. Replace it if any significant damage is observed to maintain optimal oven performance.
5. Maintenance
Proper maintenance of your oven door gasket will ensure its longevity and continued effectiveness.
- Regular Cleaning: Use a soft cloth and mild detergent to clean the gasket regularly. Avoid abrasive cleaners or harsh chemicals that could damage the silicone material.
- Inspect for Damage: Before and after each use, quickly check the gasket for any visible signs of damage, such as tears, cracks, or areas where it has become brittle.
- Avoid Sharp Objects: Do not use sharp utensils or tools near the gasket, as they can easily puncture or cut the material.
6. Troubleshooting
If you experience issues after installing the new gasket, refer to the following common problems and solutions.
| Problem | Possible Cause | Solution |
|---|---|---|
| Oven door does not seal tightly. | Gasket not fully seated; incorrect gasket size; damaged gasket. | Re-check all attachment points to ensure the gasket is securely installed. Verify the gasket dimensions (32.5x43.5 cm) against your oven's requirements. Inspect for any manufacturing defects or shipping damage. |
| Heat escaping from oven door. | Improper installation; gasket not compatible; gasket damaged. | Perform the paper test (Section 3.4) to identify specific areas of heat leakage. Ensure the gasket is compatible with your specific oven model (refer to Section 2). If the gasket is damaged, it may need replacement. |
| Gasket appears loose or sagging. | Clips not fully engaged; gasket stretched. | Press firmly along the entire gasket to ensure all clips are properly engaged in their respective holes. If the gasket appears stretched or deformed, it may indicate improper handling during installation or a need for replacement. |
7. Product Specifications
| Feature | Detail |
|---|---|
| Brand | SuperVac |
| Model Number | KG0008609 |
| Product Dimensions | 32.5 x 43.5 cm (approx. 26 x 17 x 2 cm packaged) |
| Weight | 130.97 grams |
| Material | High-quality, heat-resistant silicone |
| Package Contents | 1 x Oven Door Gasket |
| Country of Origin | Turkey |
8. Warranty Information
Specific warranty details for the SUPERVAC Oven Door Gasket are typically provided at the point of purchase or within the product packaging. Please retain your proof of purchase for any warranty claims. For detailed warranty terms and conditions, refer to the information provided by the seller or manufacturer.
9. Customer Support
For further assistance, technical support, or inquiries regarding the SUPERVAC Oven Door Gasket, please contact the seller or manufacturer directly. You can often find contact information on the product packaging or through the retailer's website where the product was purchased.
Visit the SuperVac Store for more products and information.
Ask a question about this manual
Ask about setup, troubleshooting, compatibility, parts, safety, or missing instructions. Manuals+ will review the question and use this page’s manual context to help answer it.