
1. Introduction
This manual provides essential information for the safe and efficient installation, operation, and maintenance of your KAMPA Wipcool P12 Slim Drain Pump. This automatic condensate pump is designed for various applications, including HVAC systems, air conditioning units, and ice machines, offering a quiet and effective drainage solution.
2. Product Features
- Quiet Operation: Operates at approximately 19 dB, ensuring a comfortable and undisturbed environment.
- Ultra-Slim Design: Compact form factor allows for installation in confined spaces, suitable for modern HVAC setups.
- High Performance: Capable of pumping water up to 7 meters vertically with a flow rate of 12 liters per hour for efficient condensate removal.
- Easy Installation and Maintenance: User-friendly design facilitates quick connections and straightforward upkeep, including a built-in safety switch for reliable, long-term use.
3. Package Contents
Please verify that all components are present and undamaged upon unpacking.

Image 3.1: Wipcool P12 Slim Drain Pump and Reservoir Unit.
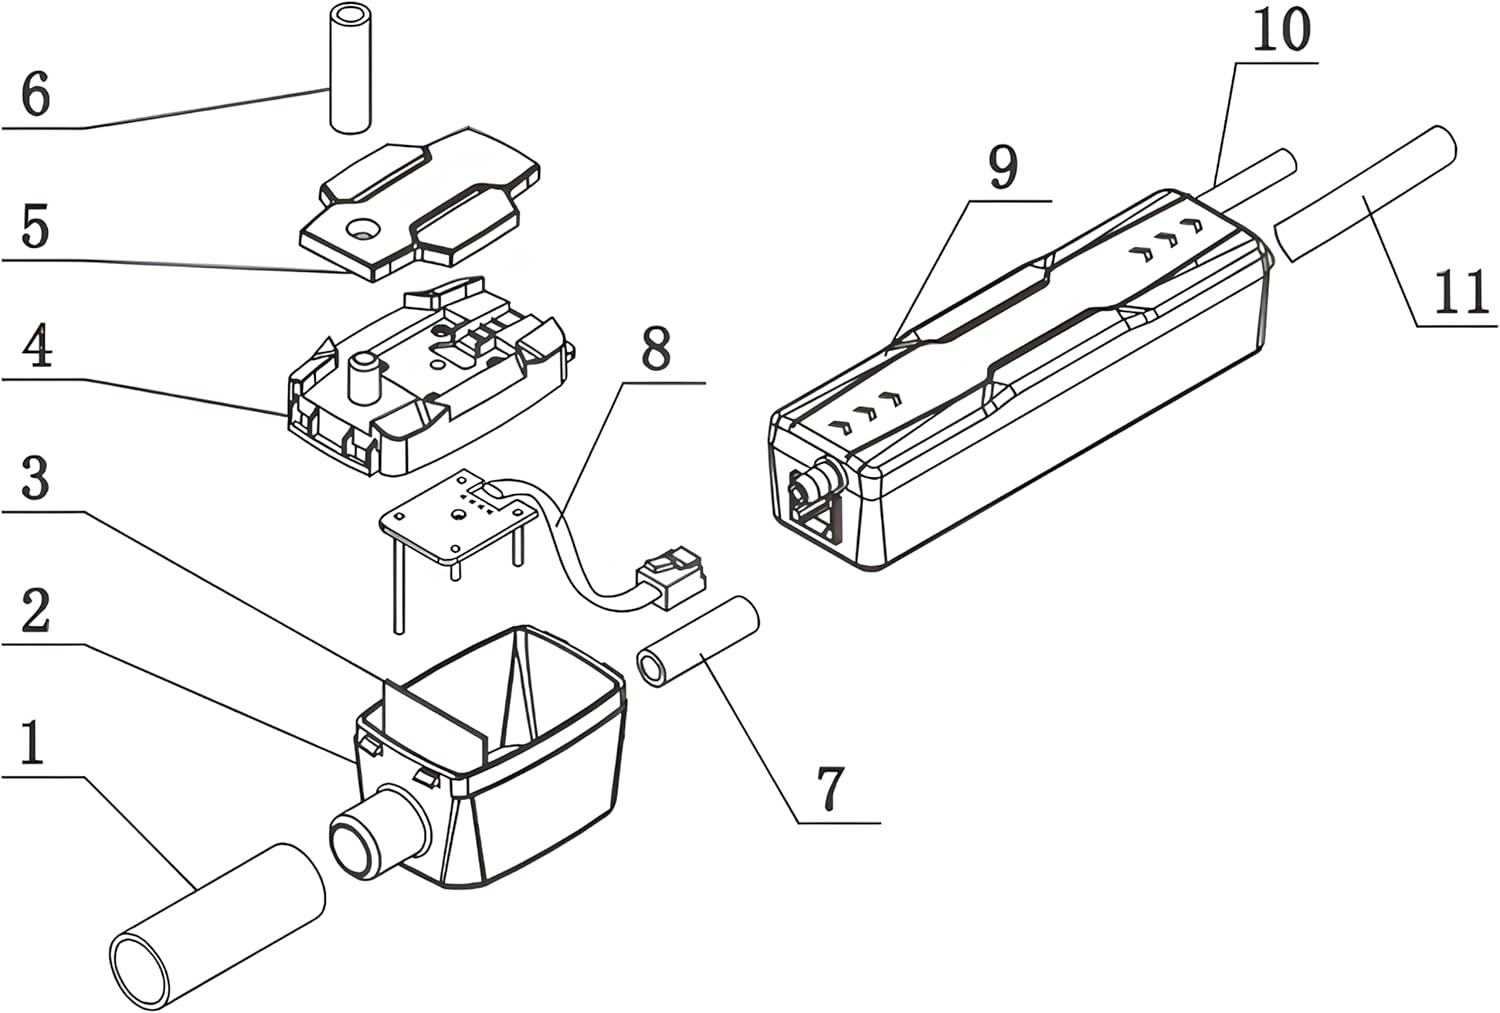
Image 3.2: Exploded view diagram of Wipcool P12 Slim Drain Pump components. This diagram illustrates the main pump unit (9), reservoir (2), inlet pipe (1), outlet pipe (7), and various internal components including the sensor (8) and mounting accessories (3, 4, 5, 6).
4. Specifications
| Attribute | Value |
|---|---|
| Brand | KAMPA |
| Model Number | WIPCOOL-P12 |
| Color | Green and Black |
| Material | Plastic |
| Power Source | Corded Electric |
| Maximum Flow Rate | 12 Liters Per Hour |
| Maximum Lifting Height | 7 Meters |
| Voltage | 230 Volts |
| Manufacturer | wipcool |
5. Safety Information
Please read and understand all safety instructions before installing or operating the pump. Failure to follow these instructions may result in electric shock, fire, or serious injury.
- Ensure the power supply matches the pump's voltage requirements.
- Do not immerse the pump or power cord in water.
- Disconnect power before performing any maintenance or installation.
- Keep children and pets away from the unit during operation.
- Install the pump in a location where it is protected from direct weather exposure.
6. Setup and Installation
The Wipcool P12 Slim Drain Pump is designed for flexible installation, including discreet placement within ceiling cavities or behind wall-mounted air conditioning units.
Video 6.1: Installation guide for a mini condensate pump. This video demonstrates the steps for mounting the pump, connecting the air conditioning outlet pipe to the pump inlet, installing the water outlet pipe, and connecting the power cord.
Installation Steps:
- Select Location: Choose a suitable location for the pump, typically to the left or right under the air conditioner, ensuring a slant distance of approximately 5.9 inches from the AC unit.
- Mount Support Panel: Mark the drilling points using the support panel as a template. Drill holes, insert expansion tubes, and secure the support panel to the wall with self-tapping screws.
- Hang Pump Unit: Carefully hang the condensate pump onto the installed support panel.
- Connect Inlet Pipe: Insert the air conditioning unit's condensate outlet pipe into the inlet of the pump. Ensure a secure connection to prevent leaks.
- Connect Outlet Pipe: Install the water outlet pipe at the designated outlet of the condensate pump. This pipe will carry the drained water to a suitable disposal point.
- Power Connection: Insert the power cord into the pump and then plug it into a compatible electrical outlet.
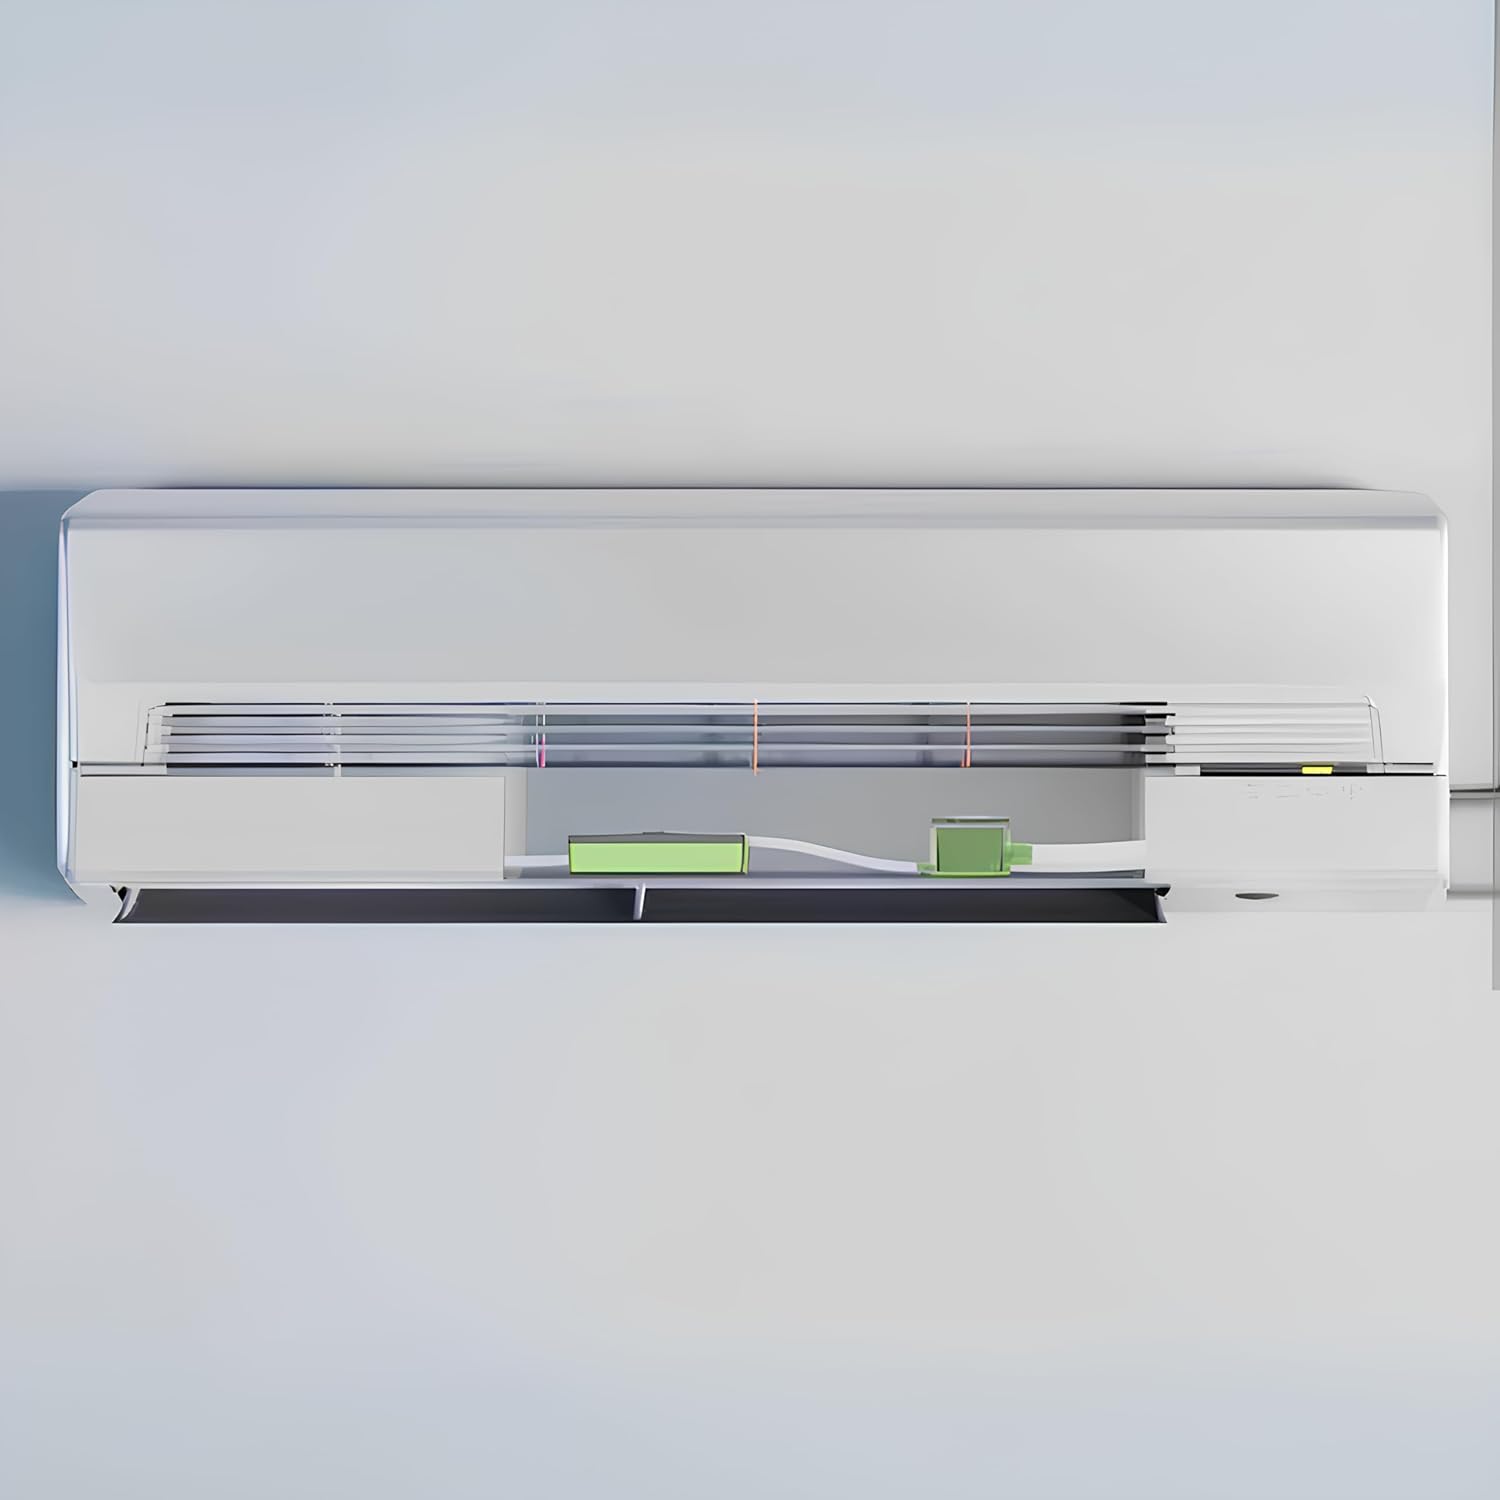
Image 6.2: Example of the Wipcool P12 Slim Drain Pump installed discreetly behind a split-system air conditioner.

Image 6.3: Example of the Wipcool P12 Slim Drain Pump installed within a ceiling cavity, demonstrating its compact design.
7. Operation
The Wipcool P12 Slim Drain Pump features intelligent automatic drainage, eliminating the need for manual intervention.
Automatic Functionality:
The pump is equipped with a built-in sensitive hall switch (float switch and probe switch) that automatically detects the water level in the reservoir. When the condensate water reaches a predetermined high level, the pump activates to discharge the water. It then stops automatically once the water level drops to a low point. This ensures continuous and efficient removal of condensate without constant monitoring.

Image 7.1: The transparent reservoir allows for visual inspection of the water level and the float switch mechanism that triggers automatic operation.
Quiet Performance:
Thanks to its advanced motor technology, the pump operates at a low noise level of approximately 19 dB, making it suitable for environments where quiet operation is essential.
8. Maintenance
Regular maintenance ensures the longevity and optimal performance of your Wipcool P12 Slim Drain Pump.
- Monthly Inspection: Check the reservoir for any accumulation of sludge or debris.
- Cleaning: If necessary, disconnect the power, remove the reservoir, and clean it with mild soap and water. Ensure the float switch moves freely.
- Pipe Check: Inspect the inlet and outlet pipes for blockages or kinks. Clear any obstructions to maintain proper flow.
- Electrical Connections: Periodically check all electrical connections for tightness and signs of wear.
9. Troubleshooting
If you encounter issues with your pump, refer to the following common troubleshooting steps:
- Pump Not Running:
- Check if the pump is properly plugged into a live power outlet.
- Ensure the float switch is not stuck in the down position. Clean the reservoir if necessary.
- Verify that the water level in the reservoir is high enough to activate the float switch.
- Pump Running Continuously:
- Check for blockages in the outlet pipe that might prevent water from being discharged.
- Inspect the float switch for debris that might be preventing it from dropping to the low-level position.
- Ensure the pump is installed correctly and not air-locked.
- Water Leaking:
- Verify all pipe connections are secure and free from damage.
- Check the reservoir for cracks or damage.
- Ensure the pump is not overflowing due to a blocked outlet pipe or insufficient pumping height.
If problems persist after attempting these steps, please contact customer support.
10. Warranty and Support
For warranty information and customer support, please refer to the documentation provided with your purchase or visit the official KAMPA website. Keep your purchase receipt as proof of purchase.