1. Introduction
The RAINPOINT Water Flow Meter is a versatile and durable device designed to accurately measure water consumption for various outdoor applications, including RV filling, garden watering, and sprinkler systems. Featuring a robust brass inlet and outlet, a 180° screen-flip function, and multiple measurement modes, this meter provides precise data to help you manage water usage efficiently.

Figure 1: RAINPOINT Water Flow Meter. This image displays the compact design of the water flow meter, highlighting its brass inlet and outlet, and the clear digital display.
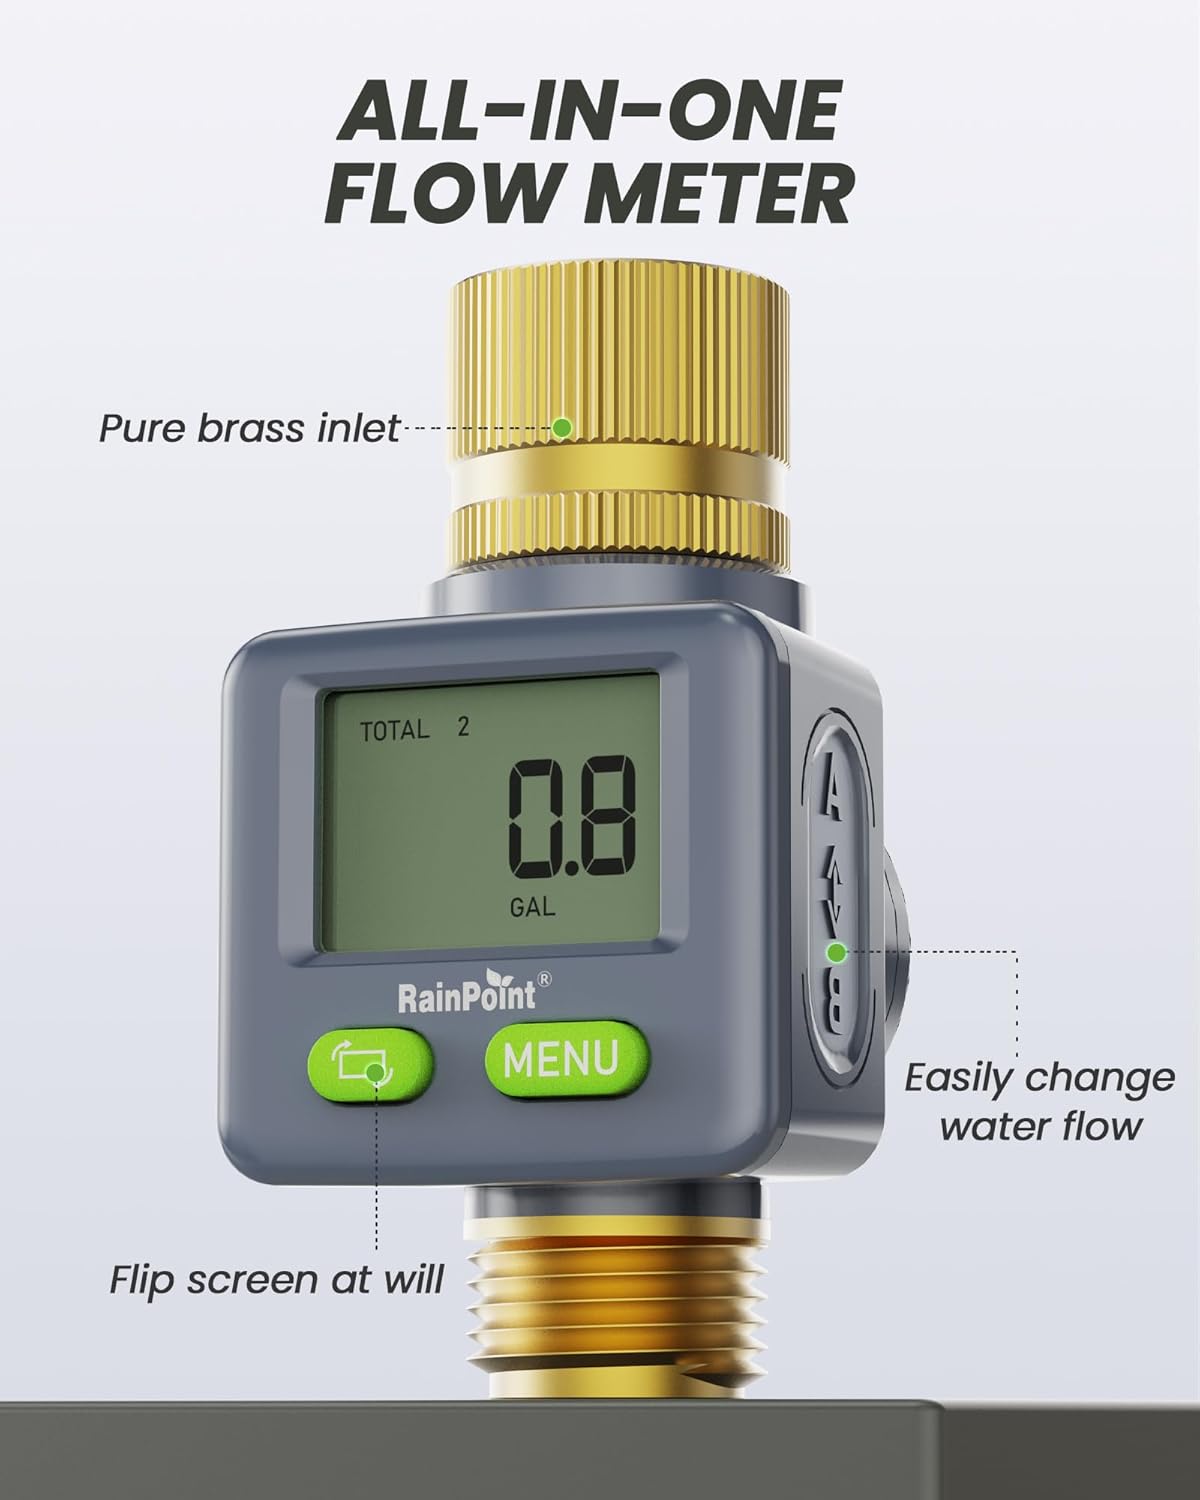
Figure 2: All-in-One Flow Meter Features. This image illustrates the key features of the meter, including the pure brass inlet, the ability to easily change water flow direction, and the screen-flip functionality.
2. Safety Information
Please read all safety instructions before using the RAINPOINT Water Flow Meter. Failure to follow these instructions may result in product damage or personal injury.
- Do not use this device with water intended for drinking unless explicitly stated by local regulations and product specifications.
- Ensure all connections are secure to prevent leaks and water damage.
- Keep the device away from extreme temperatures and direct sunlight for prolonged periods to ensure optimal performance and longevity.
- Do not attempt to disassemble or repair the device yourself. Contact customer support for assistance.
3. Setup
3.1 Battery Installation
The water flow meter requires one CR2032 button cell battery (included). To install or replace the battery:
- Locate the battery compartment cover on the back of the meter.
- Use a coin or the provided key to twist and open the cover.
- Remove any protective plastic tab from the battery if present.
- Insert the CR2032 battery with the positive (+) side facing up.
- Replace the battery compartment cover and twist to secure it. Ensure the rubber ring is properly seated for waterproofing.
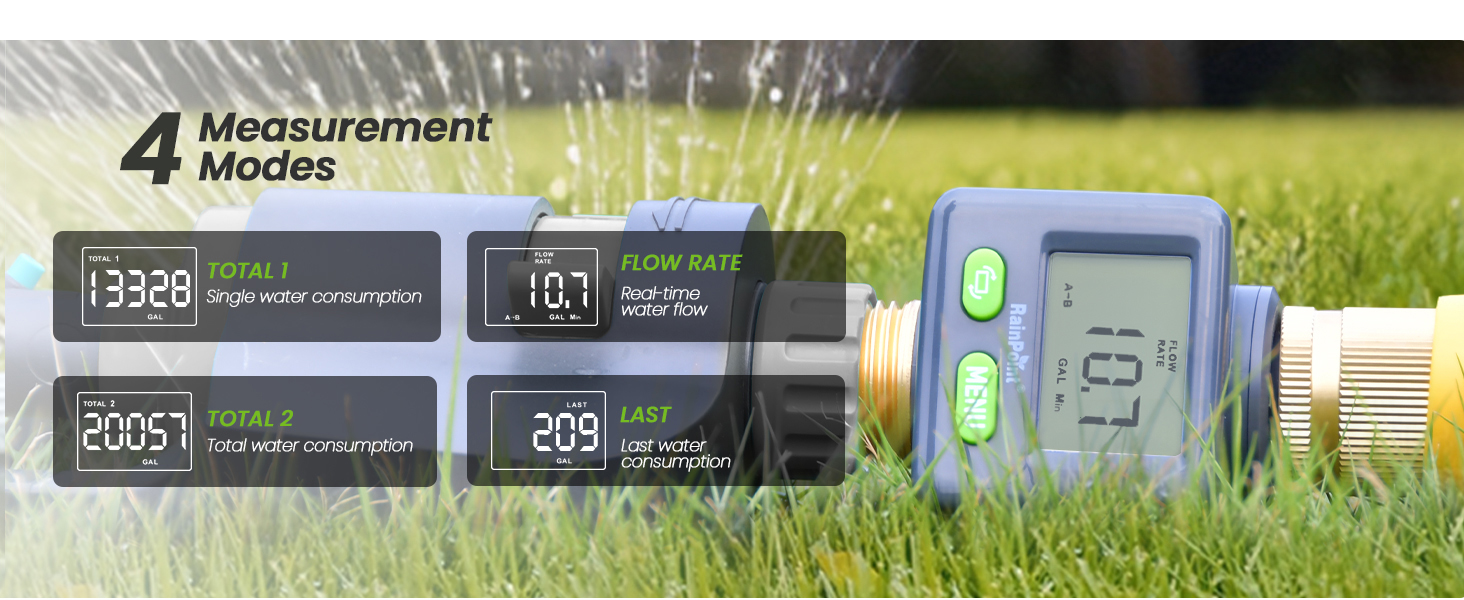
Figure 3: Battery Installation. This image shows the back of the water flow meter with the battery compartment open, illustrating how to insert the CR2032 battery and highlighting the double waterproofing feature.
3.2 Connecting the Meter
The RAINPOINT Water Flow Meter features 3/4" NH brass inlet and outlet threads for quick and secure connection to standard garden hoses, faucets, and sprinklers. It supports all-direction installation.
- Ensure the threads on your hose or faucet are clean and free of debris.
- For a leak-proof seal, apply the provided sealing tape (PTFE tape) to the threads of your hose or faucet before attaching the meter.
- Screw the meter onto your water source (faucet or hose) by hand until snug. Do not overtighten.
- Connect your watering device (hose, sprinkler, nozzle) to the outlet of the meter.
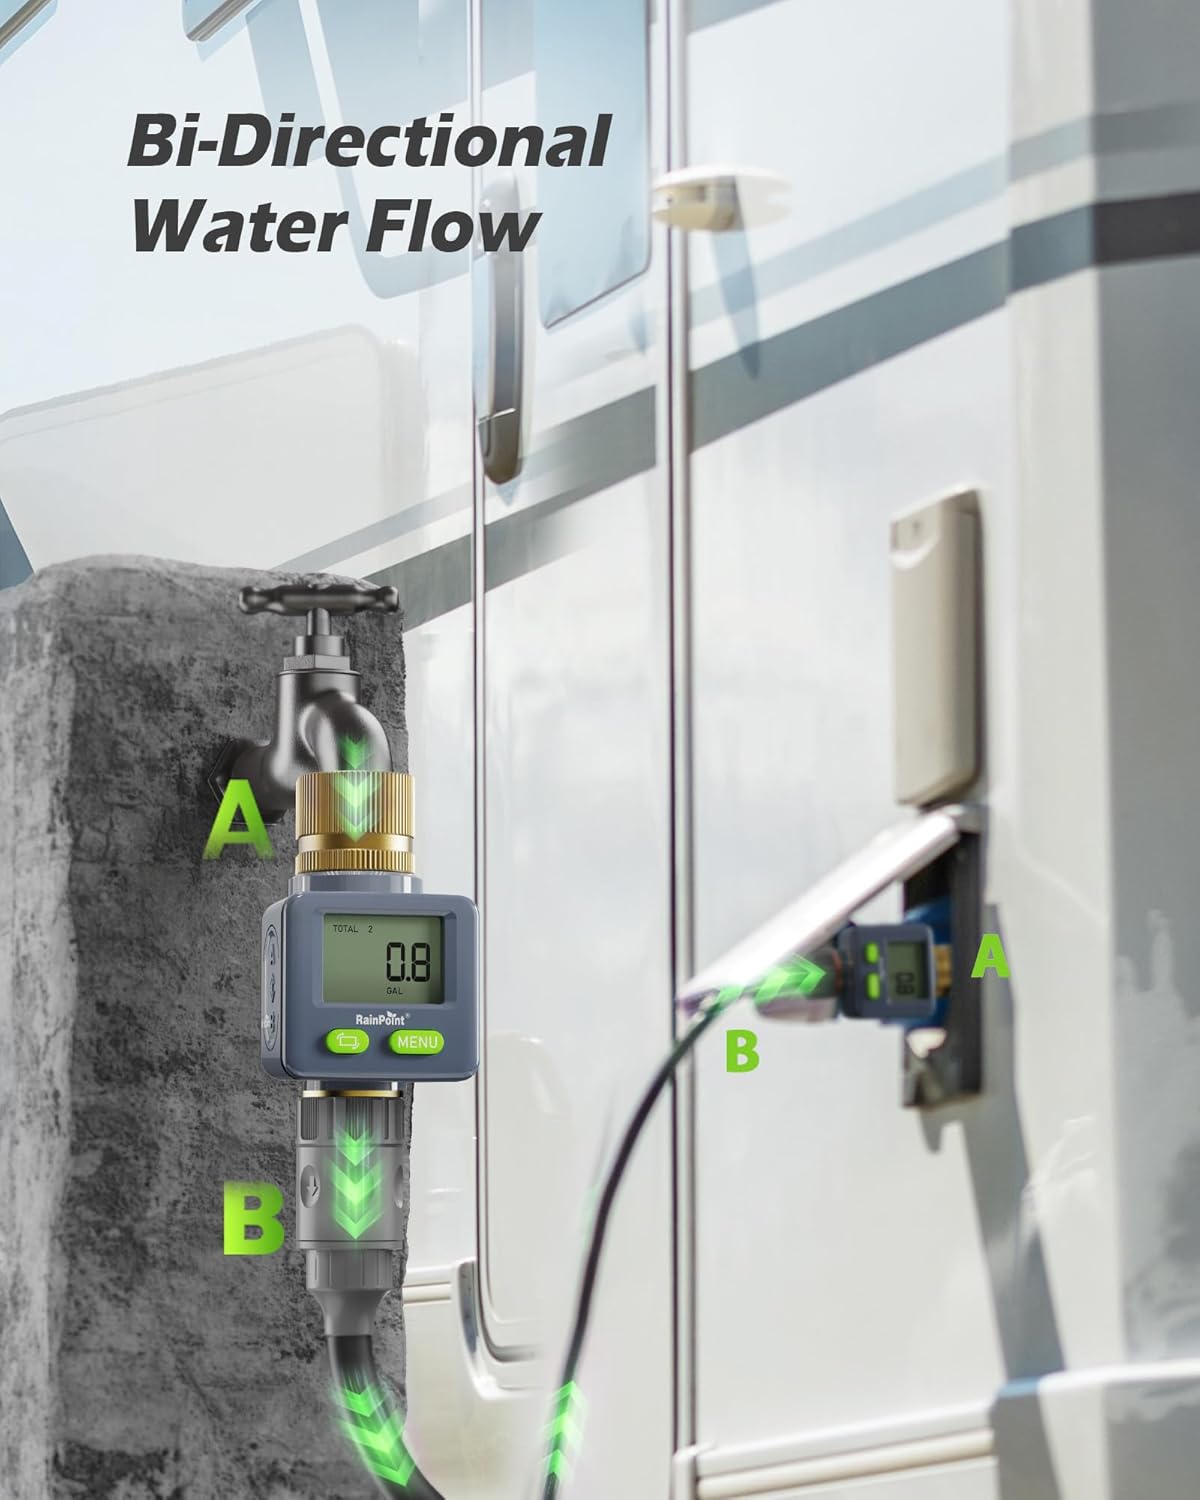
Figure 4: Bi-Directional Water Flow Installation. This image demonstrates the meter's ability to be installed in any direction, showing it connected to a faucet and also to an RV for versatile water measurement.

Figure 5: Quick Connection with Hoses. This image highlights the meter's 3/4" NH Brass Outlet, ensuring easy and quick connection to any standard hoses, faucets, or RV systems.
4. Operating Modes
The RAINPOINT Water Flow Meter features two control buttons: a green button with a circular arrow (Flip/Reset) and a green button labeled 'MENU'.
4.1 Screen Flip (180°)
Press the green button with the circular arrow (Flip/Reset) to rotate the display 180 degrees. This feature allows for easy reading regardless of the meter's orientation during installation.

Figure 6: 180° Flip Reading. This image clearly demonstrates the meter's 180-degree screen flip function, making it easy to read the display from any angle.
4.2 Changing Units (Gallon/Liter)
To switch between Gallons (GAL) and Liters (L), press and hold the 'MENU' button until the unit changes on the display.
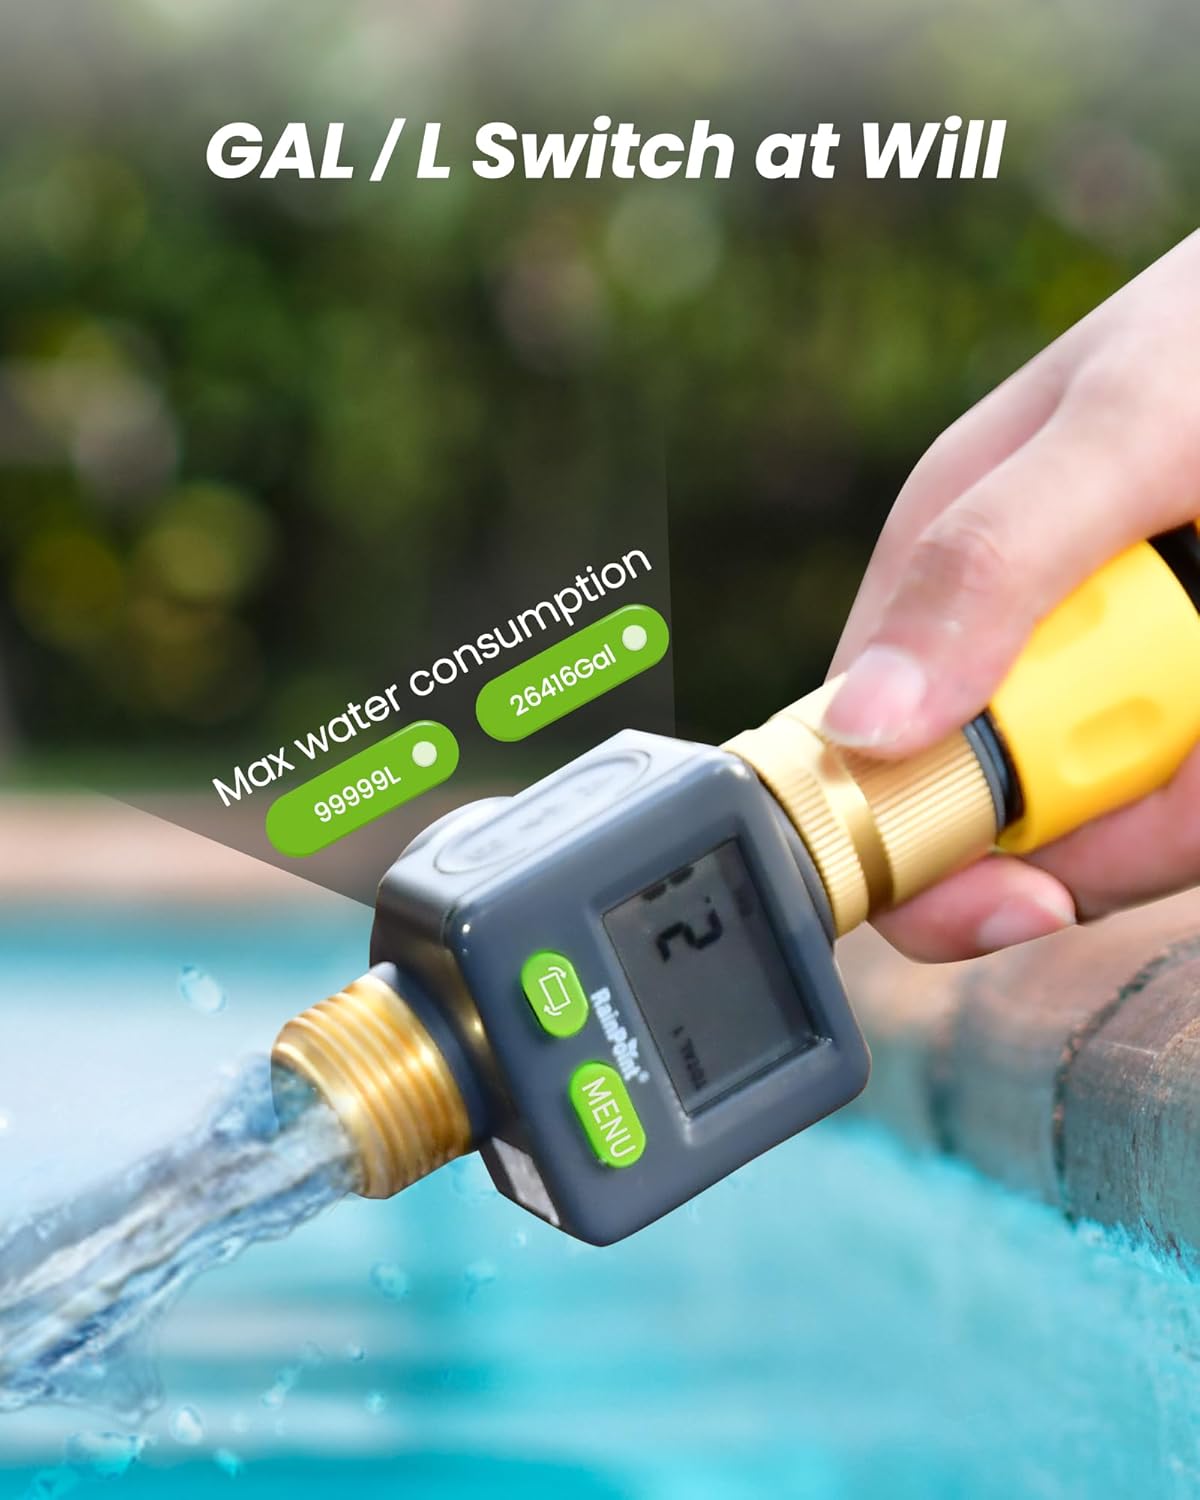
Figure 7: GAL / L Switch at Will. This image shows the meter actively measuring water flow and highlights its capability to switch between gallon and liter units for consumption tracking.
4.3 Measurement Modes
Press the 'MENU' button to cycle through the four available measurement modes:
- FLOW RATE: Displays the real-time water flow in Gallons per Minute (GAL/Min) or Liters per Minute (L/Min).
- LAST: Shows the total water consumption from the last watering session. This mode resets after 30 seconds of water stopping.
- TOTAL 1: Accumulates total water consumption. This mode can be manually reset by pressing and holding the Flip/Reset button.
- TOTAL 2: Accumulates total water consumption, independent of Total 1. This mode can also be manually reset by pressing and holding the Flip/Reset button.
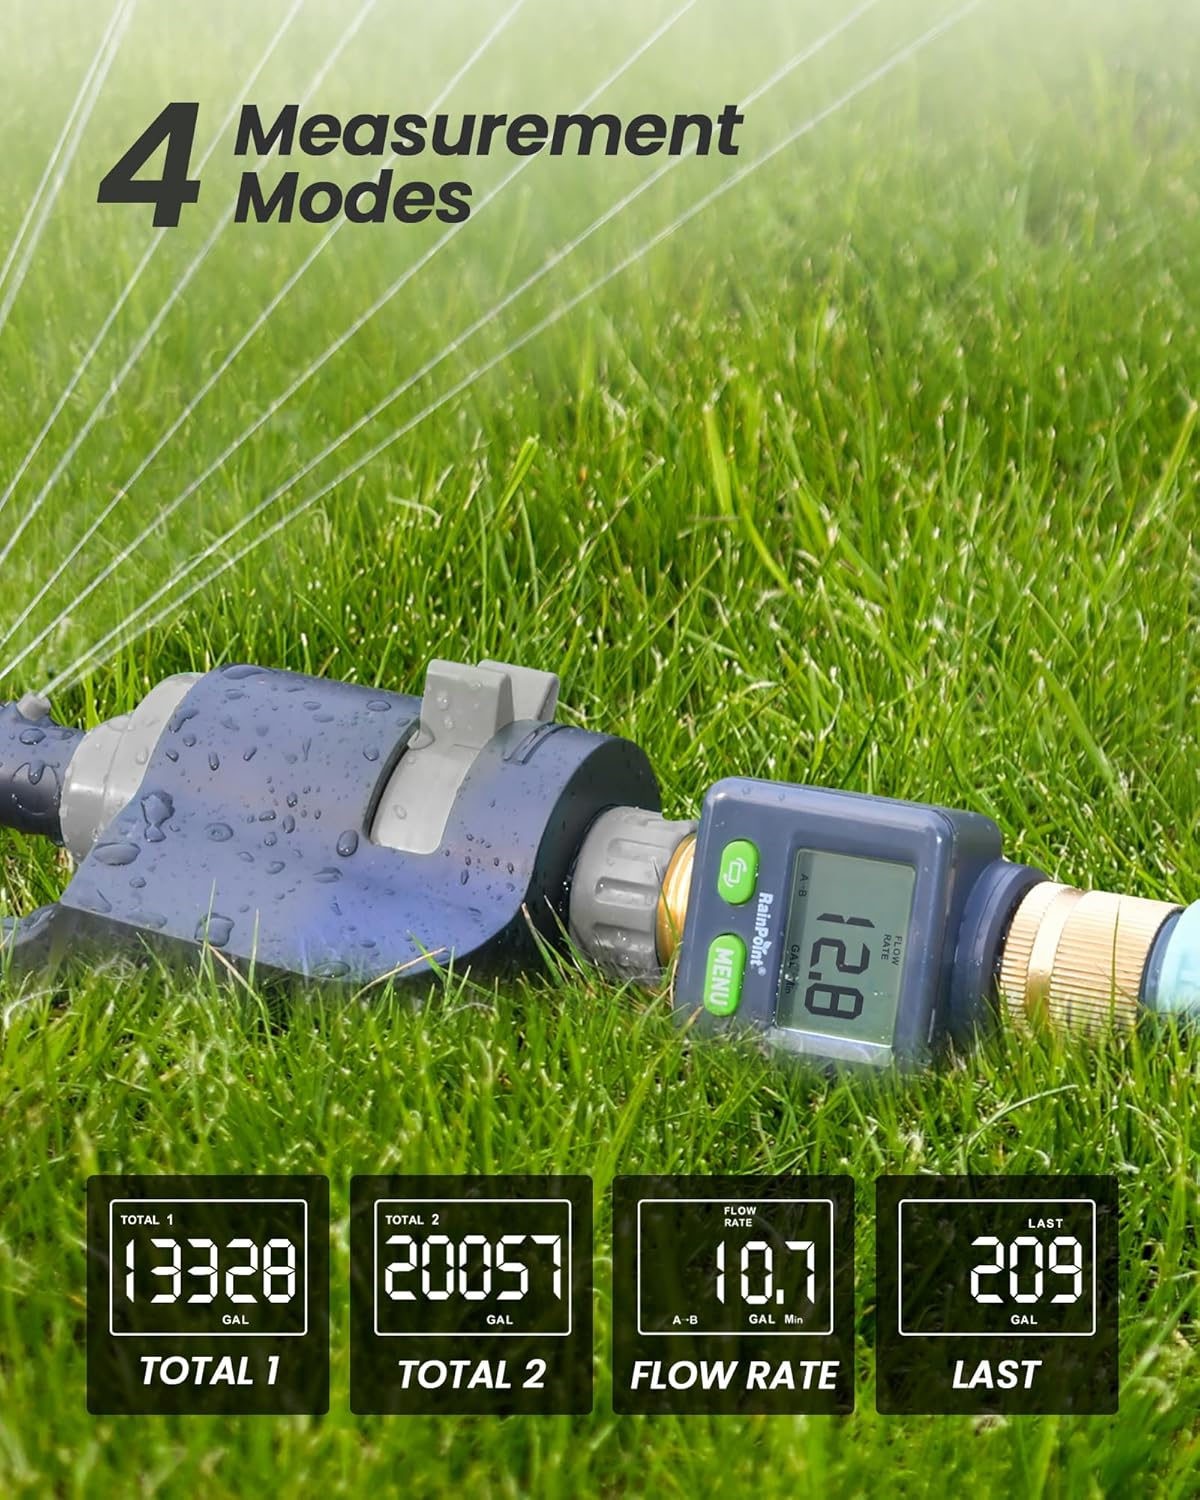
Figure 8: Four Measurement Modes. This image illustrates the four distinct measurement modes available on the meter: Total 1 (single water consumption), Total 2 (total water consumption), Flow Rate (real-time water flow), and Last (last water consumption).

Figure 9: Total 1 and Total 2 Modes. This image highlights the meter's ability to track two separate total water consumption values, useful for different measurement periods or applications.
4.4 Operational Demonstration
Video 1: RAINPOINT Screen-Flip Water Flow Meter. This video provides a comprehensive demonstration of the water flow meter's features, including battery installation, screen-flip functionality, unit switching, and cycling through the various measurement modes (Flow Rate, Last, Total 1, Total 2) while showing real-time water flow.
5. Maintenance
- Cleaning: Wipe the meter with a soft, damp cloth. Do not use abrasive cleaners or solvents.
- Battery Replacement: Replace the CR2032 battery when the display becomes dim or unresponsive. Follow the instructions in Section 3.1.
- Storage: When not in use for extended periods, remove the battery and store the meter in a dry, cool place away from direct sunlight and freezing temperatures.
- Leak Prevention: Regularly check the rubber rings and connections for wear and tear. Replace worn rubber rings and reapply sealing tape as needed to maintain a double leak-proof seal.
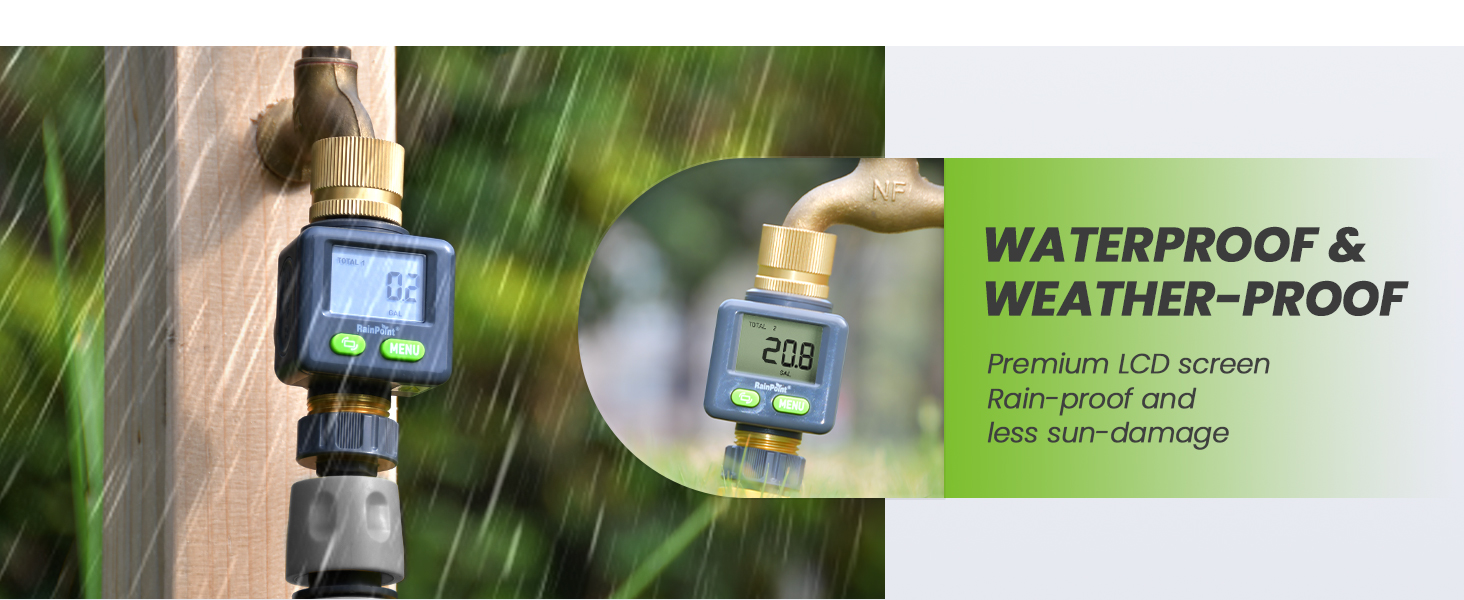
Figure 10: Waterproof & Weather-Proof Design. This image shows the water flow meter in a rainy outdoor setting, emphasizing its robust design for rain-proof and less sun-damage performance.
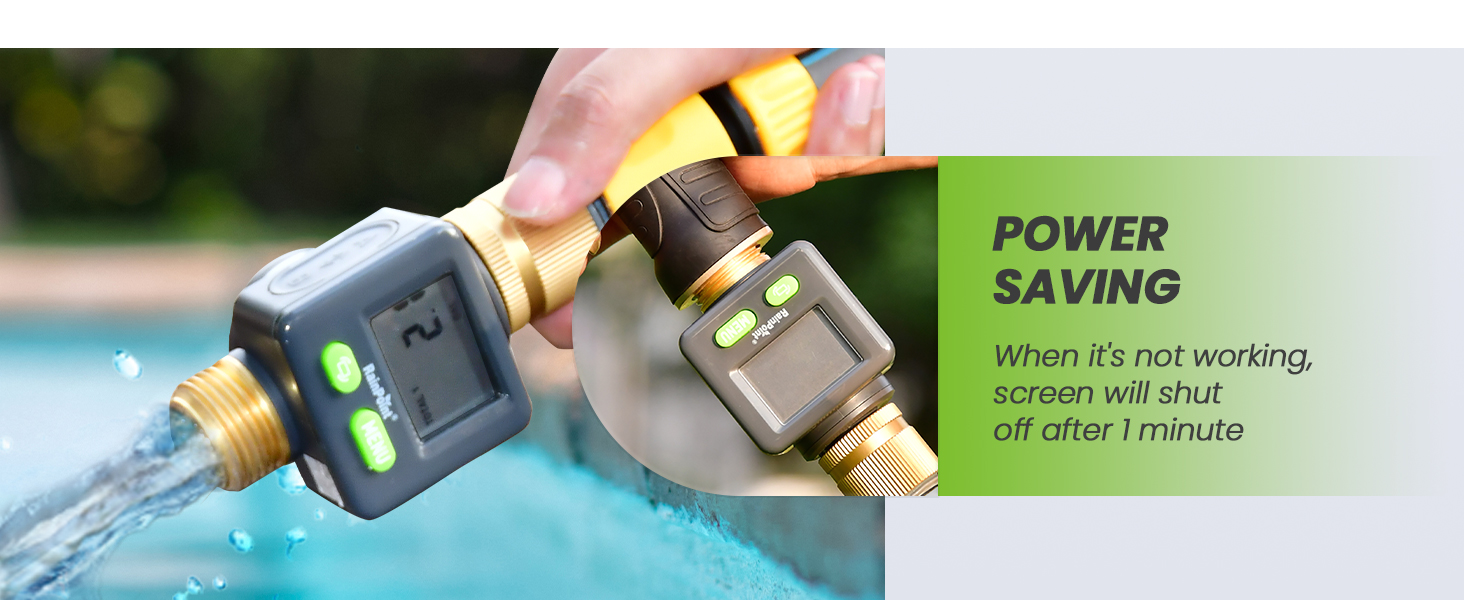
Figure 11: Power Saving Feature. This image illustrates the meter's power-saving function, where the screen automatically shuts off after 1 minute of inactivity to conserve battery life.
6. Troubleshooting
- No Display: Check if the CR2032 battery is correctly installed and has sufficient power. Ensure the protective plastic tab has been removed from the battery.
- Inaccurate Readings: Verify that the water flow direction is consistent with the setting direction (A-B) on the flow rate page for accurate measurement. Check for any leaks in the connections.
- Leaks: Ensure all connections are tightened properly. Reapply sealing tape if necessary. Check the rubber rings within the connections and battery cover for proper seating and damage.
- Screen Not Flipping: Ensure you are pressing the correct button (Flip/Reset button with circular arrow).
7. Specifications
| Attribute | Value |
|---|---|
| Brand | RAINPOINT |
| Model | B0DHH798RX |
| Product Dimensions | 2.5 x 3 x 4 inches |
| Item Weight | 7 ounces |
| Manufacturer | RAINPOINT |
| Color | Gray |
| Number of Settings | 4 (Flow Rate, Last, Total 1, Total 2) |
| Accuracy | ±5% |
| Inlet/Outlet Material | Pure Brass |
8. Warranty & Support
RAINPOINT products are manufactured to high-quality standards. This product comes with a standard manufacturer's warranty. For detailed warranty information, product support, or troubleshooting assistance not covered in this manual, please refer to the contact information provided with your product packaging or visit the official RAINPOINT website.


