1. Introduction
Thank you for purchasing the Greadio Portable CD Player Boombox, Model CD-X9B. This device offers multiple audio playback options including CD, Bluetooth, USB, AUX, and FM radio. This manual provides detailed instructions for setup, operation, maintenance, and troubleshooting to ensure optimal performance and longevity of your device. Please read this manual thoroughly before use and retain it for future reference.

Figure 1: Greadio CD-X9B Portable CD Player Boombox
2. Product Overview
2.1 Package Contents
- CD Player Boombox (Model CD-X9B) x 1
- AC Power Cord x 1
- AUX Cable x 1
- User Manual x 1

Figure 2: Included Accessories
2.2 Controls and Components
Familiarize yourself with the various buttons and ports on your boombox:

Figure 3: Front, Top, and Rear View of Controls
- Power ON/OFF / Function Selector: Turns the unit on/off and switches between modes (CD, Bluetooth, USB, AUX, FM).
- Mode/Program Button: Selects playback mode (e.g., repeat, random) or programs CD tracks.
- Previous Song / Fast Rewind Button: Skips to the previous track or fast rewinds during playback.
- Volume -: Decreases the volume level.
- Earphone Jack: 3.5mm output for headphones.
- USB Jack: For USB drive playback.
- AUX IN Jack: 3.5mm input for external audio devices.
- Play/Pause/Scan: Plays or pauses playback; initiates FM radio scan.
- Stop/Sleep: Stops playback; sets the sleep timer.
- Next Song / Fast Forward Button: Skips to the next track or fast forwards during playback.
- Volume +: Increases the volume level.
- Speaker: Integrated stereo speakers.
- LCD Display: Shows current mode, track number, time, and FM frequency.
- CD Disc Door: Opens to insert or remove CDs.
- Handle: For portable carrying.
- FM Antenna: Telescopic antenna for FM radio reception.
- AC Outlet: For connecting the AC power cord.
- Battery Compartment: Holds 6 C-size batteries (not included).
3. Setup
3.1 Power Supply
The Greadio CD-X9B boombox can be powered by either AC power or batteries.
- AC Power: Connect the provided AC power cord to the AC outlet on the back of the unit and then plug it into a standard wall outlet.
- Battery Power: For portable use, open the battery compartment on the bottom of the unit and insert 6 C-size batteries (not included), ensuring correct polarity.

Figure 4: Dual Power Supply Options
3.2 Initial Power On
Press the Power ON/OFF button to turn on the unit. The LCD display will illuminate.
4. Operating Instructions
4.1 CD Playback
The boombox supports CD, CD-R, and CD-RW formats.
- Press the Power ON/OFF / Function Selector button repeatedly until 'CD' appears on the LCD display.
- Open the CD Disc Door by gently lifting it.
- Place a CD onto the spindle with the label side facing up. Close the CD Disc Door.
- The unit will read the disc, and the total number of tracks will appear on the display.
- Press the Play/Pause button to start playback.
- Use the Previous Song / Fast Rewind and Next Song / Fast Forward buttons to navigate tracks. Hold these buttons to fast rewind or fast forward.
- Press the Mode/Program button to cycle through playback modes: Normal, Single Cycle (repeat current track), Full Cycle (repeat all tracks), and Random Play.
- Press the Stop/Sleep button to stop playback.
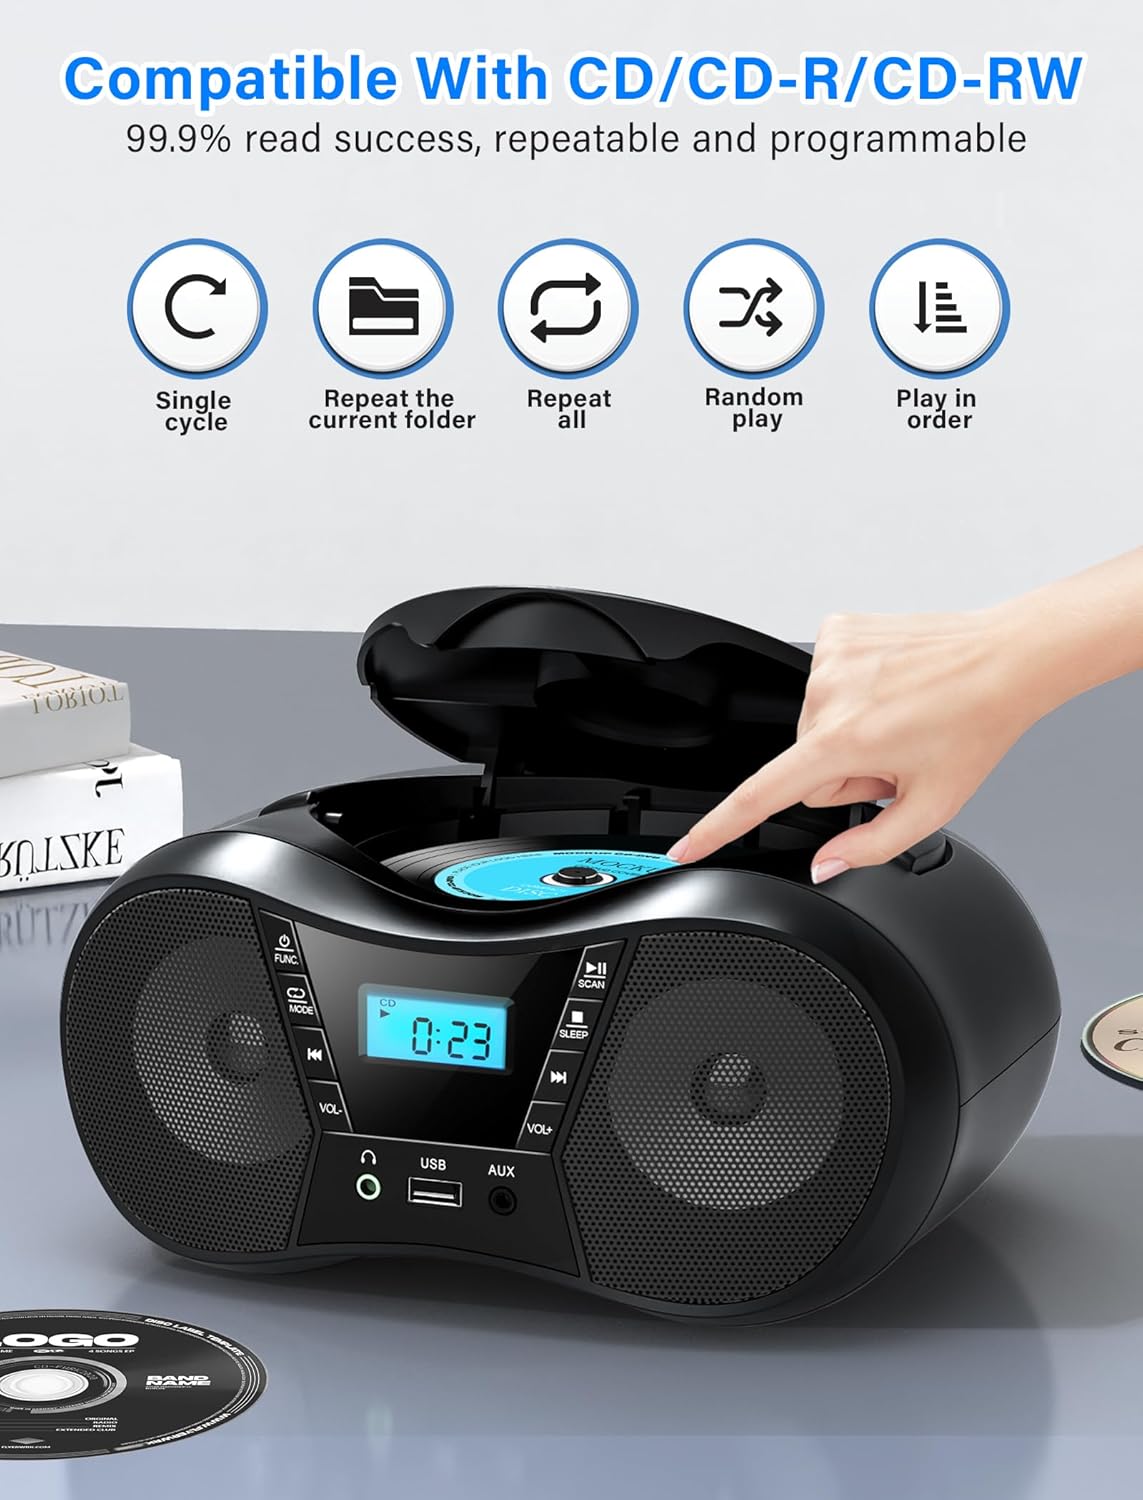
Figure 5: CD Playback Features
4.2 Bluetooth Operation
Connect your Bluetooth-enabled device to the boombox.
- Press the Power ON/OFF / Function Selector button repeatedly until 'BT' appears on the LCD display. The unit will enter pairing mode, indicated by a flashing 'BT'.
- Enable Bluetooth on your external device (smartphone, tablet, computer) and search for available devices.
- Select 'CD-X9B' from the list of devices. Once connected, 'BT' will stop flashing and remain solid.
- You can now play audio from your connected device through the boombox.
- The Bluetooth range is up to 26 feet (8 meters).
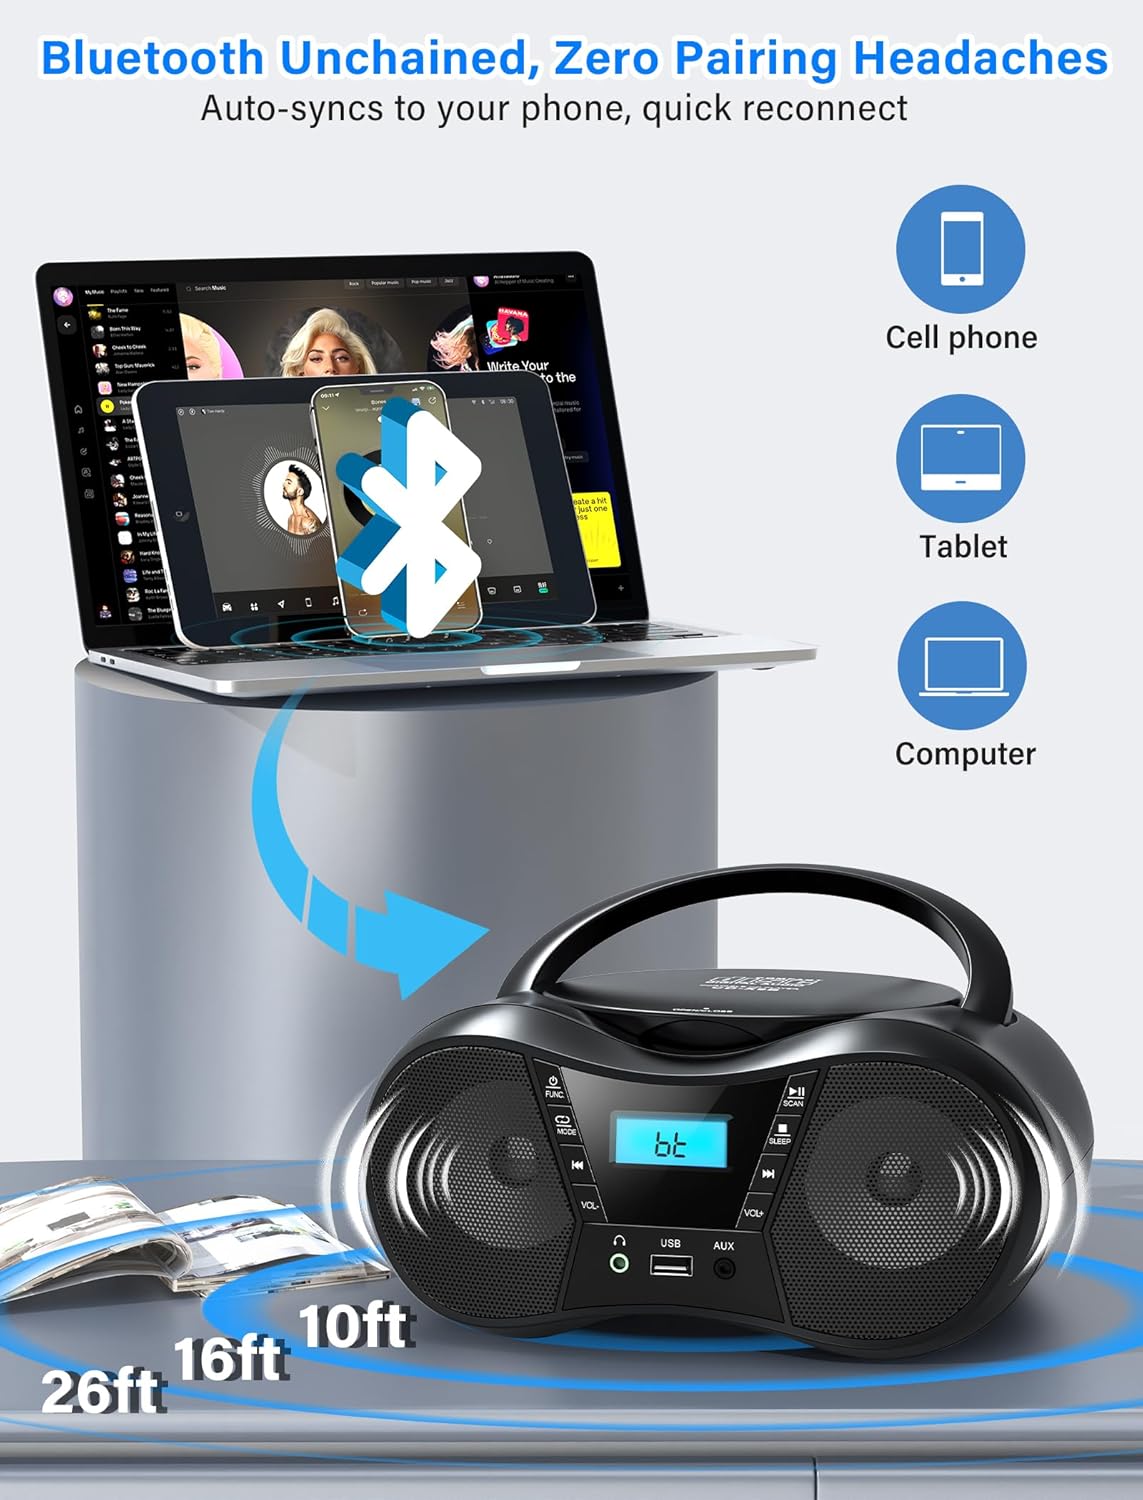
Figure 6: Bluetooth Connectivity
4.3 FM Radio
Listen to FM radio stations.
- Press the Power ON/OFF / Function Selector button repeatedly until 'FM' appears on the LCD display.
- Extend the FM Antenna fully and adjust its position for optimal reception.
- Press the Play/Pause/Scan button to automatically scan and save available FM stations.
- Use the Previous Song / Fast Rewind and Next Song / Fast Forward buttons to manually tune or select saved stations.
- The FM frequency range is 87.5 to 108 MHz.
4.4 USB Playback
Play audio files from a USB drive.
- Insert a USB drive into the USB Jack.
- Press the Power ON/OFF / Function Selector button repeatedly until 'USB' appears on the LCD display.
- The unit will automatically begin playing MP3 audio files from the USB drive.
- Use the Previous Song / Fast Rewind and Next Song / Fast Forward buttons to navigate tracks.
4.5 AUX Input
Connect external audio devices using the AUX cable.
- Connect one end of the provided AUX cable to the AUX IN Jack on the boombox.
- Connect the other end to the headphone jack or audio output of your external device (e.g., MP3 player, computer).
- Press the Power ON/OFF / Function Selector button repeatedly until 'AUX' appears on the LCD display.
- Play audio from your external device. The boombox will output the sound.

Figure 7: USB, AUX, and FM Modes
4.6 Volume Control
Adjust the volume using the Volume + and Volume - buttons.
4.7 Headphone Use
For private listening, plug 3.5mm headphones into the Earphone Jack.
4.8 Sleep Timer
The sleep timer allows the unit to automatically turn off after a set period.
- While the unit is on, press the Stop/Sleep button repeatedly to cycle through sleep timer options (90, 80, 70, 60, 50, 40, 30, 20, 10 minutes, or OFF).
- The selected time will appear on the display. The unit will automatically power off after the set duration.

Figure 8: Sleep Timer Function
5. Maintenance
5.1 Cleaning
- Wipe the exterior of the unit with a soft, dry cloth. Do not use abrasive cleaners or solvents.
- For the CD lens, use a specialized CD lens cleaner disc.
5.2 CD Care
- Handle CDs by their edges to avoid fingerprints on the playing surface.
- Store CDs in their cases when not in use to prevent scratches.
- Clean dirty CDs with a soft, lint-free cloth, wiping from the center outwards.
5.3 Battery Replacement
When using battery power, replace all 6 C-size batteries when the unit's performance degrades or the display dims. Ensure correct polarity when inserting new batteries.

Figure 9: Detailed Views of CD Compartment, Controls, and Battery Compartment
6. Troubleshooting
| Problem | Possible Cause | Solution |
|---|---|---|
| Unit does not power on. | No AC power or depleted batteries. | Ensure AC cord is securely plugged in or replace batteries. |
| CD does not play or skips. | CD is dirty, scratched, or inserted incorrectly. | Clean the CD, check for damage, or reinsert correctly. |
| Poor FM radio reception. | Antenna not extended or interference. | Fully extend and adjust the FM antenna. Reposition the unit near a window and away from electronic devices. |
| Bluetooth device cannot pair. | Boombox not in pairing mode or device out of range. | Ensure boombox is in 'BT' mode and flashing. Move device closer to the boombox (within 26 feet). |
| No sound from USB. | USB drive not inserted correctly or unsupported file format. | Ensure USB drive is fully inserted. Verify audio files are in MP3 format. |
| No sound from AUX. | AUX cable not connected or external device volume too low. | Check AUX cable connection. Increase volume on both the boombox and the external device. |
7. Specifications
- Model: CD-X9B
- Brand: Greadio
- Product Dimensions (L x W x H): 9.01 x 8.23 x 4.29 inches (22.89 x 20.90 x 10.89 cm)
- Item Weight: 2.1 pounds (0.95 kg)
- Connectivity Technology: Auxiliary, Bluetooth 5.1, USB
- Color: Black
- Speaker Type: Built-In Stereo Speakers
- CD Compatibility: CD, CD-R, CD-RW
- FM Frequency Range: 87.5 - 108 MHz
- Power Supply: AC 120V~60Hz or 6 x C-size batteries (not included)
- Bluetooth Range: Up to 26 feet (8 meters)
8. Warranty and Support
Greadio is committed to providing quality products and customer service.
- Hesitation Period: 15 Days
- Maintenance Period: 12 Months
- Service Support: Lifetime
For any questions or support needs, please contact Greadio customer service. Our service offices are based in Seattle and Berlin to provide comprehensive customer experience.


