1. Introduction
This manual provides comprehensive instructions for the installation, operation, and maintenance of your AINAVI 15-inch touchscreen car stereo radio. Please read this manual thoroughly before installation and use to ensure proper function and safety. This unit is designed for Toyota FJ Cruiser models manufactured between 2007 and 2014.
Package Contents
Verify that all items are present in the package:
- Car Head Unit with Frame for Toyota FJ Cruiser (1)
- AHD 1080P Rear View Camera (1)
- GPS Antenna (1)
- USB 4Pin Cable (1)
- USB 6Pin Cable (1)
- Microphone (1)
- Blue Frame Removal Tool (1)
- User Manual (1)
- Power Cable (1)

Figure 1: Included Components
2. Safety Information
Always prioritize safety during installation and operation. Incorrect installation can lead to damage to the unit, vehicle, or personal injury. If you are unsure about any step, consult a qualified professional.
- Disconnect the vehicle's battery before beginning installation to prevent electrical shorts.
- Ensure all wiring connections are secure and properly insulated.
- Do not obstruct airbags or other safety features during installation.
- Avoid distractions while driving. Operate the unit responsibly.
3. Setup and Installation
This section guides you through the process of replacing your factory radio with the AINAVI touchscreen unit. Refer to the provided installation video for visual assistance.
Installation Video
Video 1: Installation Guide for Toyota FJ Cruiser (2007-2014) Car Stereo
This video demonstrates the complete installation process, including disassembly, wiring, and camera setup. It is highly recommended to watch the video before starting the installation.
3.1. Disassembly of Factory Radio
- Using a screwdriver, remove the two bottom screws located on the lower part of the radio panel.
- Carefully remove the border frames of the panel on both sides.
- Remove the two screws on each side that secure the main panel.
- Gently pull the panel outwards to detach it.
- Disconnect all cables from the panel.
- Remove the four screws securing the factory radio.
- Carefully pull out the radio and unplug all remaining cables.

Figure 2: Before and After Installation Comparison
3.2. Wiring Connections
Proper wiring is crucial for the functionality of your new stereo. Refer to the wiring diagram and the installation video for detailed guidance.
- GPS Antenna: Connect the GPS antenna to the designated port on the head unit.
- Rearview Camera Video Input Cable: Connect this cable to the device. This cable is essential even if a backup camera is not currently installed, as it aids in Bluetooth and Wi-Fi quality.
- RCA Cable: This cable includes connections for a cooling fan, subwoofer output, and AUX output.
- USB Cables (4-pin and 6-pin): These are used to connect USB flash drives or other USB devices.
- External Protocol Cable: Connect this to the radio's 8-pin port.
- CANBUS Cable: Ensure the 20-pin CANBUS cable is properly connected to the car's radio panel. A faulty CANBUS connection can cause air conditioning and steering wheel controls to malfunction.
- AUX Input: To use the car's AUX input, connect the RCA audio cable. Otherwise, the AUX function will not work.
- Power Cable: Connect the main power cable to the head unit.
Air Conditioning Panel Wiring
When reassembling the air conditioning control panel, ensure the circuit board is securely fixed in its slot. Before inserting the cable into the new device's board, disconnect the connector latch, then press down firmly to securely connect the latch.
JBL Sound System Considerations
- Without JBL Radio: Use the three plugs for the rear door speaker, power and front door speaker, and steering wheel button control/AUX input cable.
- With JBL Radio: Use the two plugs for the JBL speaker power cable and steering wheel button control/AUX input cable.
3.3. Rearview Camera Installation
There are two methods for wiring the rearview camera:
- Method 1: Connect the red (positive) and black (negative) wires of the camera to the positive and negative poles of the OEM reverse light. The OEM reverse light typically has orange/red (positive) and white (negative) wires.
- Method 2: Plug the OBD cable into the 2-pin black connector on the CANBUS. The other end connects to the car's OBD port. When using Method 2, the red and black wires of the rearview camera do not require any connections.
It is recommended to arrange the wiring from the rear of the car to the front for a clean installation.
3.4. Final Connections
As the last step, insert the emergency warning light plug into the existing air conditioning panel.
4. Operating Instructions
Your AINAVI touchscreen stereo offers a range of features for an enhanced driving experience.
4.1. Touchscreen Interface and Display
The unit features a 15-inch QLED touchscreen with 1920*1080 resolution, offering better color accuracy, brightness, and higher contrast for an optimal visual experience.

Figure 3: HD 1080P Touch Screen Features
4.2. Wireless CarPlay and Android Auto
Enjoy seamless integration with your smartphone via Wireless CarPlay and Android Auto. The signal flow is stable, supporting 1080P video playback without interruption. Wired/wireless mirroring (Airplay + Android) allows for HD display of your phone's screen.

Figure 4: Smart Voice Control with CarPlay and Android Auto
4.3. GPS Navigation
The unit supports most satellite services with 5G WiFi for accurate navigation. Utilize Google Maps with 2D and 3D perspectives, various route options (driving, cycling, pedestrian), obstacle alerts, and voice guidance for intelligent navigation.

Figure 5: GPS Navigation Interface
4.4. Media Playback and Connectivity
- USB Connectivity: Use the 4-pin and 6-pin USB ports to connect USB flash drives for media playback.
- Bluetooth & WiFi: The unit features 5G WiFi for faster network speeds and Bluetooth for wireless audio streaming and hands-free calls.
- RCA Output: The USB to RCA output function allows for independent video playback on multiple screens, providing entertainment for rear-seat passengers.

Figure 6: WiFi and Bluetooth Connection

Figure 7: Full RCA Output for External Displays
4.5. Split Screen Function
The split-screen function allows you to run multiple applications simultaneously on the 15-inch display, such as navigation and media playback.

Figure 8: Split Screen Mode and Steering Wheel Control
4.6. Audio Settings (DSP, EQ)
The unit features a professional DSP (Digital Signal Processor) and 48-band EQ with voice point touch control. Adjust the sound position according to your seating and choose from 7 sound modes (Normal, Jazz, Pop, Classical, Heavy Metal, Vocal, Soft) and 6 surround sound patterns. Individual speaker volume control and bass boost are also available.

Figure 9: Built-in DSP and EQ Settings
4.7. Knob and Button Controls
The unit includes two large knobs for adjusting AC temperature and wind speed. Pressing these knobs allows switching between functions. A smaller knob is dedicated to volume control. Physical buttons are also available for AC functions.
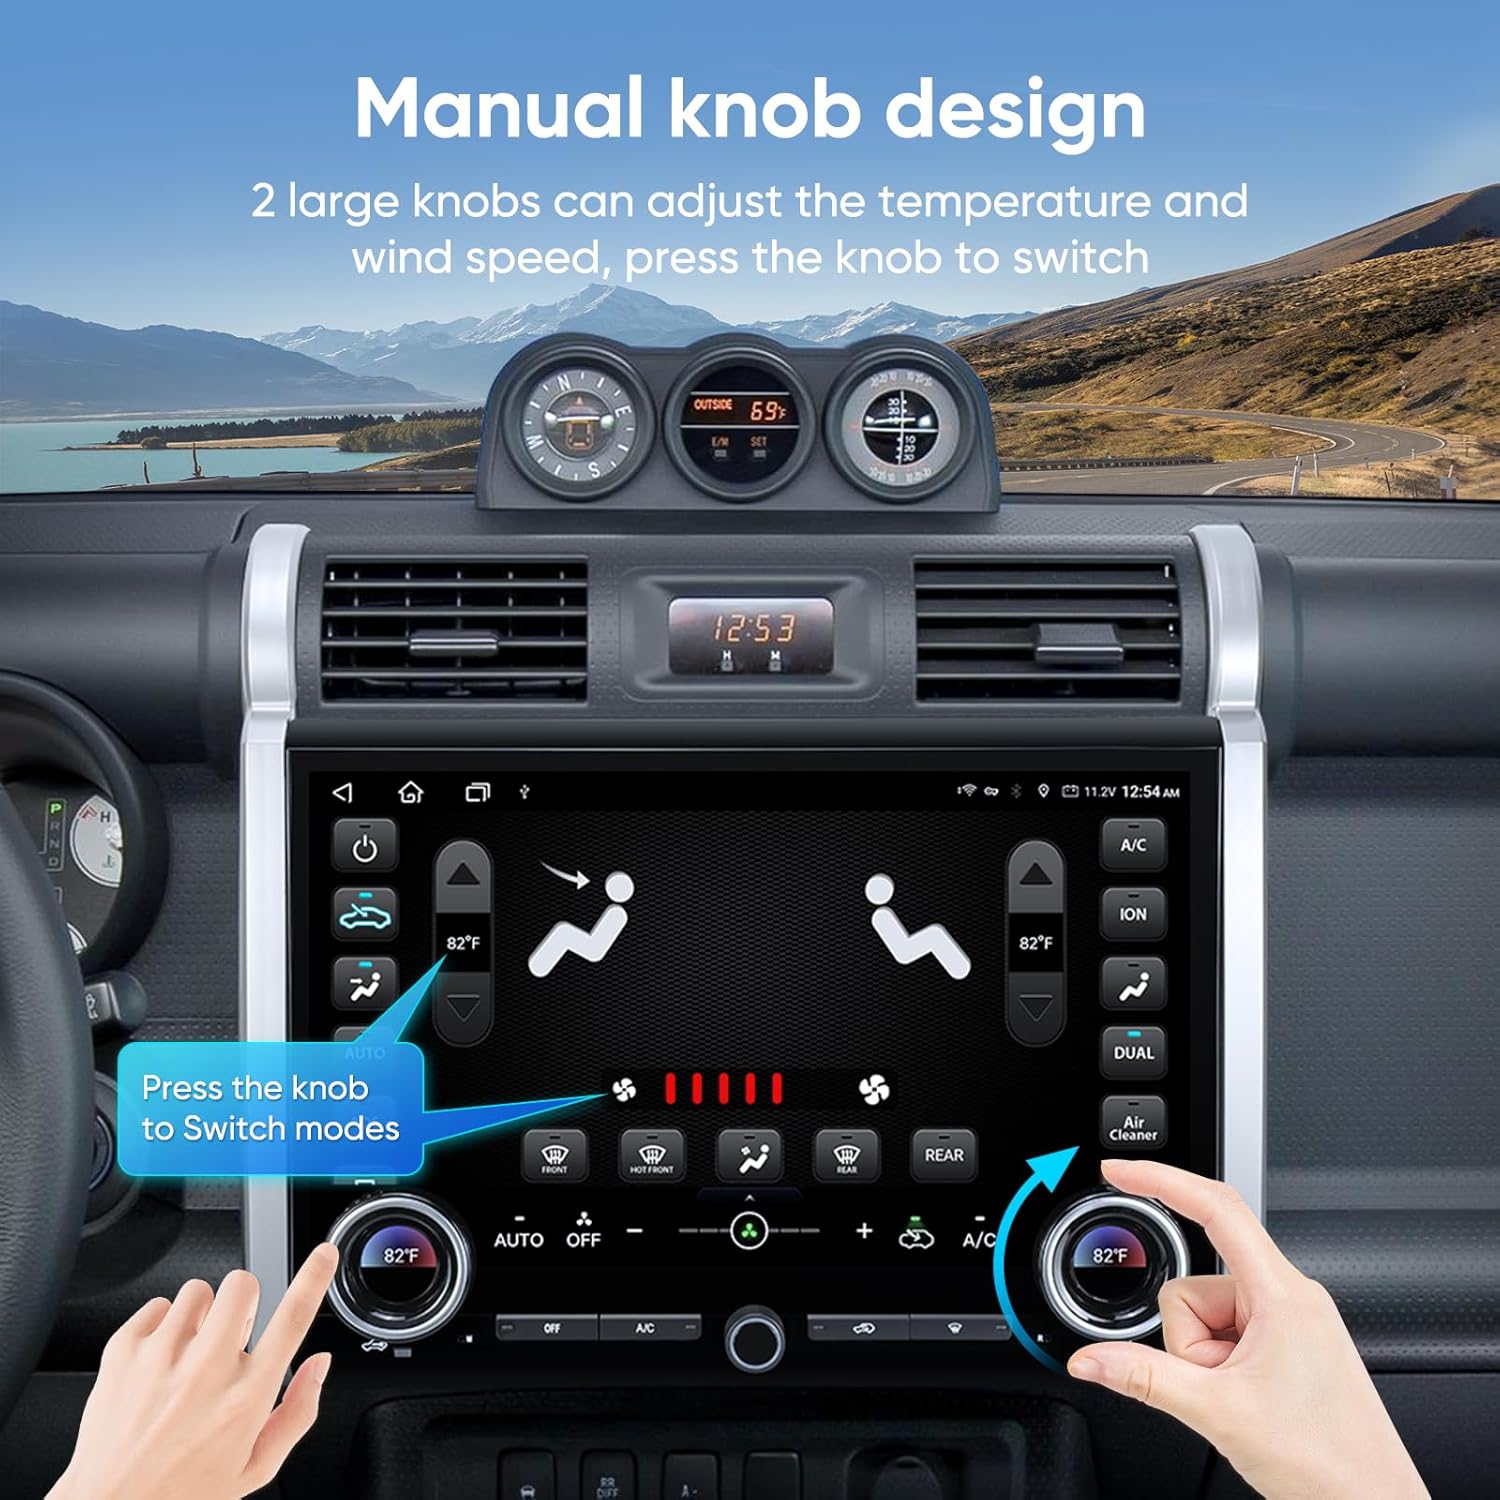
Figure 10: Manual Knob Design for Climate Control
5. Maintenance
To ensure the longevity and optimal performance of your AINAVI car stereo, follow these maintenance guidelines:
- Cleaning: Use a soft, dry cloth to clean the touchscreen and exterior surfaces. Avoid abrasive cleaners or solvents.
- Software Updates: Periodically check for software updates from AINAVI to ensure you have the latest features and bug fixes.
- Environmental Conditions: Avoid exposing the unit to extreme temperatures or direct sunlight for prolonged periods.
6. Troubleshooting
If you encounter issues with your AINAVI car stereo, refer to the following common problems and solutions:
- Screen Flickering: This can be caused by low voltage, a conflict with a third-party application, or a screen hardware issue. Check your vehicle's voltage, try uninstalling recently installed apps, or contact customer support if the issue persists.
- AC Controls Malfunction: Ensure the CANBUS cable is properly connected. A faulty CANBUS connection can affect air conditioning controls.
- Steering Wheel Controls Not Working: Verify the CANBUS cable connection. Incorrect wiring can prevent steering wheel controls from functioning.
- No Sound or Poor Sound Quality: Check all speaker wiring connections. Ensure the DSP and EQ settings are configured correctly.
- GPS Signal Issues: Ensure the GPS antenna is properly installed and has a clear line of sight to the sky.
- CarPlay/Android Auto Connection Problems: Verify your phone's settings and ensure Bluetooth and Wi-Fi are enabled. Check for any software updates for the head unit or your phone.
If you are unable to resolve an issue, please contact AINAVI customer support.
7. Specifications
| Feature | Specification |
|---|---|
| Item Weight | 7.32 pounds |
| Package Dimensions | 16.65 x 12.44 x 6.81 inches |
| Item Model Number | 6G+128G |
| Display Size | 15 Inches |
| Operating System | Android |
| Connectivity Technology | Bluetooth, USB, Wi-Fi, Wired, Wireless |
| Special Features | Android Auto, Built-In Bluetooth, CarPlay, Mirroring, Touchscreen, RDS, Split Screen Function, Panel light and Four Themes, 8-Core and USB(4Pin+6Pin), 48EQ (Sound Point Control) + Premium DSP, Highest Level QLED, Equalizer |
| Map Type | Europe, North America, South America, Worldwide |
| Audio Output Mode | Surround Stereo |
| Mounting Type | Dashboard Mount |
| Voice Command | Microphone, Touchscreen |
8. Warranty and Support
Your AINAVI car stereo comes with a 12-month manufacturer guarantee.
Customer Support
For technical assistance, installation support, or any other inquiries, please contact our professional technical support team:
- Phone: +1 (833) 858-5016
- Working Hours: 01:00 PM to 00:00 AM PST
- Email: info@ainavi.com
You can also seek help via your order center.

Figure 11: AINAVI Customer Support Information


