
Digitek DWM-116
Digitek DWM-116 2-in-1 Wireless Microphone User Manual
Comprehensive instructions for setting up, operating, and maintaining your Digitek DWM-116 2-in-1 Wireless Microphone system, compatible with iOS, Android, and DSLR cameras.
1. Introduction
The Digitek DWM-116 is a versatile 2-in-1 wireless microphone system designed for high-quality audio capture. It features dual-transmitter functionality, making it suitable for interviews, vlogging, and professional recording across various platforms. This manual provides essential information for the proper use and care of your device.
Key features include:
- Advanced 2.4GHz radio frequency for stable, interference-free transmission up to 40 meters.
- Magnetic collar clip for secure and convenient attachment.
- 360° sound capture with professional-grade noise cancellation.
- 6-hour battery life for both receiver and transmitters, supported by a portable charging case.
- Universal compatibility with iOS, Android devices, and DSLR cameras.
2. Package Contents
Verify that all items listed below are included in your package:
- 2 x Microphone Transmitters (TX)
- 1 x Receiver (RX)
- 1 x Charging Case
- 1 x Type-C to Lightning Connector
- 1 x USB to Type C Charging Cable
- 2 x Wind Wool (Windscreen)
- 1 x User Manual

Image: All components included in the Digitek DWM-116 wireless microphone system package.
3. Product Overview
The Digitek DWM-116 system consists of two compact transmitters (TX) and one receiver (RX), housed within a portable charging case. Each component is designed for ease of use and portability.

Image: The Digitek DWM-116 wireless microphone system, showcasing the charging case, two transmitters, and the receiver.
3.1. Transmitter (TX)
The transmitters are equipped with a built-in microphone and a magnetic collar clip for hands-free operation. They capture 360-degree audio and feature indicator lights for status updates.
3.2. Receiver (RX)
The receiver connects to your recording device (smartphone, DSLR, etc.) and receives audio signals from the transmitters. It also features indicator lights to show connection status.
4. Setup Instructions
4.1. Charging the System
Before first use, fully charge the charging case, transmitters, and receiver.
- Place both transmitters and the receiver into the charging case.
- Connect the USB to Type C charging cable to the charging case and a 5V/1A charging adapter.
- The charging case display will show the battery percentage. The transmitters and receiver will indicate charging status via their respective lights.
- A full charge for the charging case takes approximately 3.5 hours. The charging case has a 600mAh capacity.
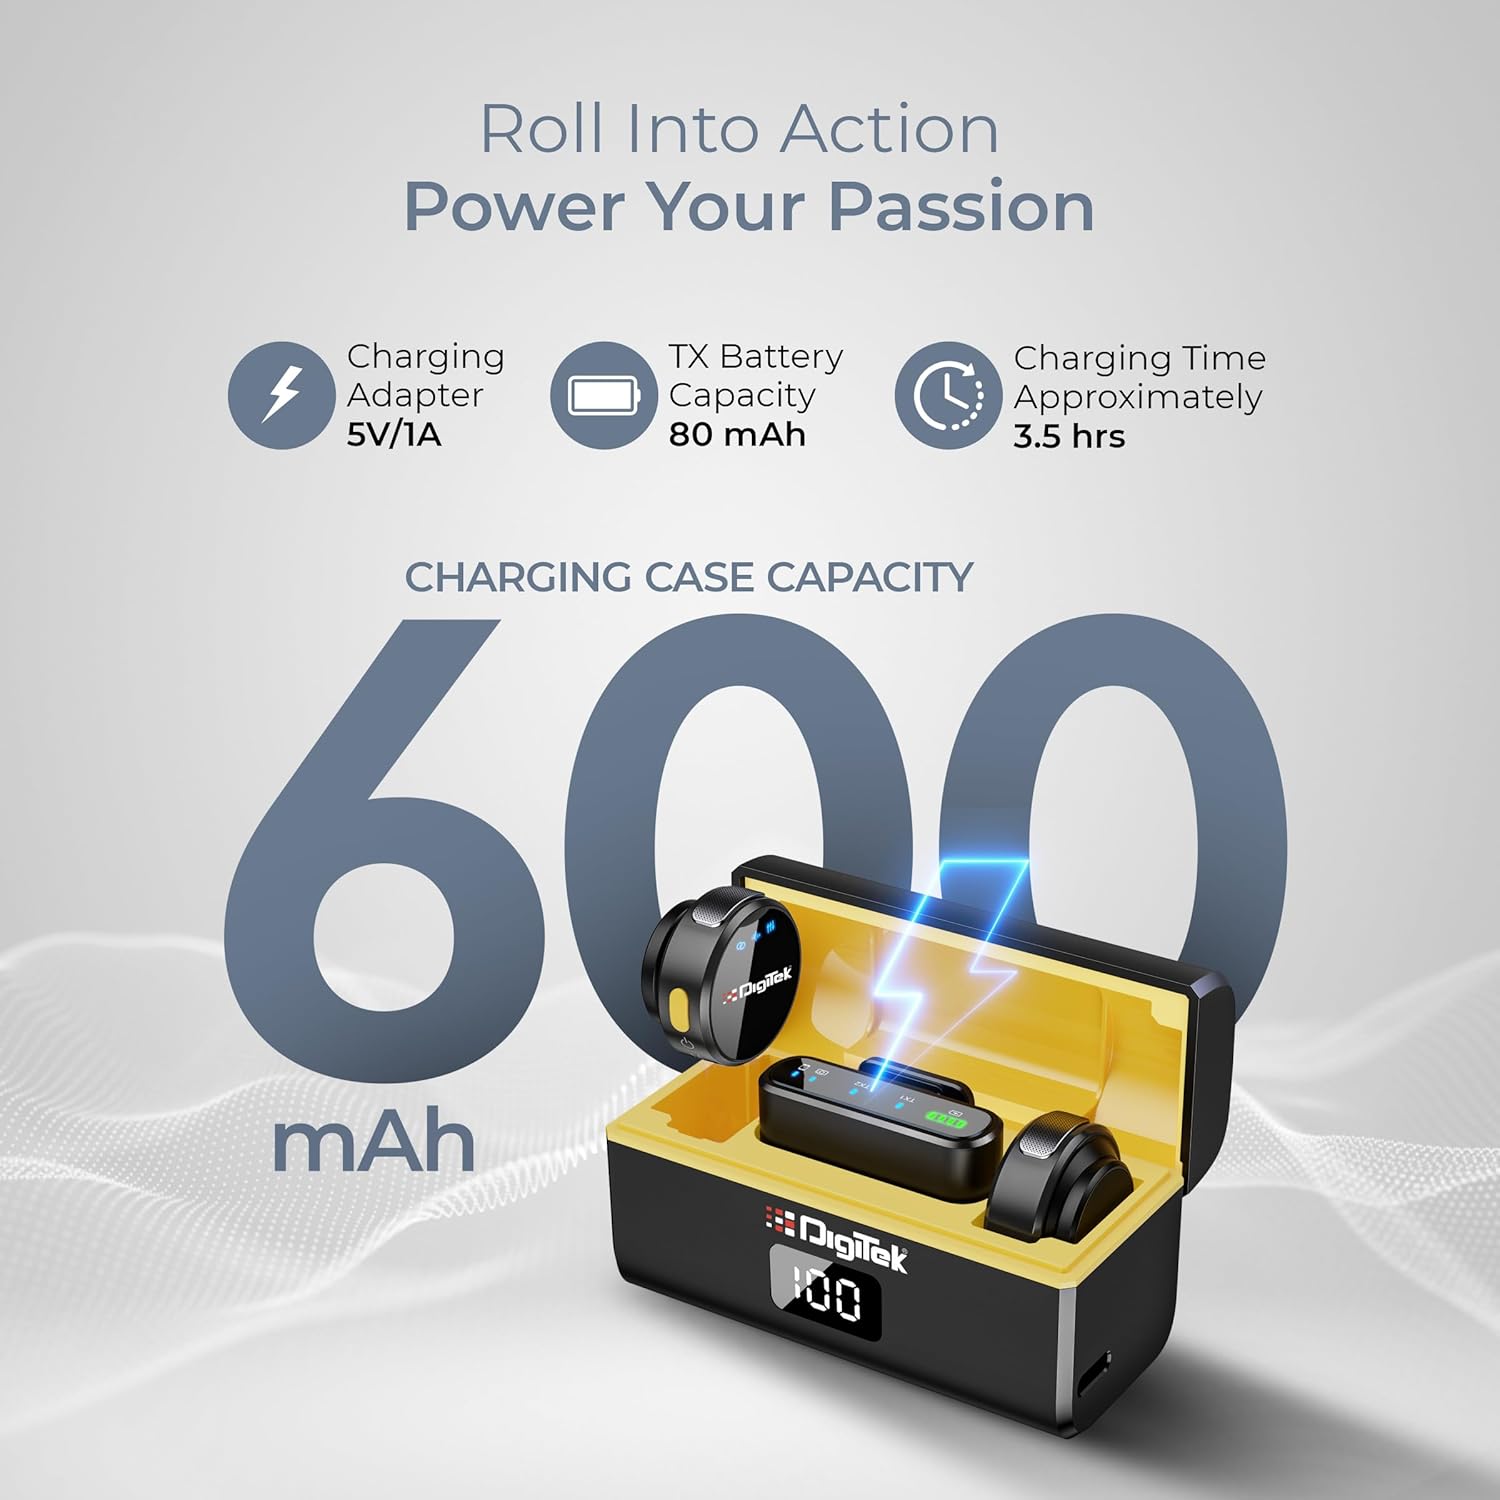
Image: Charging specifications and capacity of the Digitek DWM-116 system.
4.2. Connecting to Your Device
The DWM-116 offers broad compatibility with various devices.
- For USB-C Devices (Android/DSLR): Plug the receiver directly into your device's USB-C port.
- For Lightning Devices (iOS): Use the provided Type-C to Lightning connector. Attach the connector to the receiver, then plug the assembly into your iOS device's Lightning port.
- Ensure the connection is secure. The receiver's indicator light will confirm a successful connection.

Image: The Type-C to Lightning converter for broad device compatibility.
5. Operating Instructions
5.1. Powering On/Off and Pairing
- Power On: Take the transmitters and receiver out of the charging case. They will automatically power on.
- Automatic Pairing: The transmitters and receiver are designed to pair automatically upon powering on. A solid indicator light on both units typically signifies a successful connection.
- Power Off: Place the transmitters and receiver back into the charging case, or long-press the power button on each unit (if available) to manually power them off.
5.2. Recording Audio
- Once the receiver is connected to your device and the transmitters are paired, open your device's camera or audio recording application.
- Ensure the external microphone is selected as the audio input source in your device's settings, if applicable.
- Begin recording. The DWM-116 will capture audio wirelessly.
5.3. Noise Cancellation
The DWM-116 features professional-grade noise cancellation technology to filter out unwanted background noise.
- Refer to the transmitter's multifunction button for noise cancellation activation/deactivation. A short press may toggle this feature.
- Optimal performance is achieved in environments where background noise is present but not overwhelming.

Image: Visual representation of the DWM-116's noise cancellation capabilities and audio specifications.
5.4. Using the Magnetic Collar Clip
The innovative magnetic clip allows for easy and secure attachment of the transmitter to clothing.
- Separate the magnetic plate from the transmitter.
- Place the magnetic plate inside your clothing, behind the fabric where you want to attach the microphone.
- Align the transmitter on the outside of your clothing with the magnetic plate. The magnets will secure the transmitter in place.

Image: Demonstration of the magnetic collar clip for secure and hands-free microphone placement.
5.5. Indicator Lights
The indicator lights on the transmitters and receiver provide important status information:
- Solid Blue: Connected and ready for use.
- Flashing Blue: Searching for connection/pairing.
- Solid Red: Charging (on TX/RX when in case).
- No Light: Powered off or fully charged (when not in use).

Image: The indicator light on the DWM-116 transmitter, providing visual status feedback.
6. Specifications
| Feature | Detail |
|---|---|
| Model Number | DWM-116 |
| Connectivity Technology | Wireless (2.4GHz Radio Frequency) |
| Connector Type | Lightning, USB Type-C |
| Transmitter Battery Life | Approximately 6 hours |
| Receiver Battery Life | Approximately 6 hours |
| Charging Case Capacity | 600mAh |
| Charging Time | Approximately 3.5 hours (for charging case) |
| Control Distance | Up to 40 meters |
| Sound Capture | 360-degree |
| Noise Cancellation | Yes |
| Sensitivity | -35db |
| Signal to Noise Ratio | -65db |
| Product Dimensions | 12 x 12 x 6 cm |
| Item Weight | 400 g |
| Batteries | 4 Lithium Ion batteries (included) |
7. Maintenance
- Keep the microphone system clean and dry. Avoid exposure to moisture or extreme temperatures.
- Use a soft, dry cloth to clean the devices. Do not use harsh chemicals or abrasive materials.
- Store the transmitters and receiver in the charging case when not in use to protect them and ensure they remain charged.
- Handle the connectors and cables with care to prevent damage.
8. Troubleshooting
- No Sound/Poor Audio Quality:
- Ensure the receiver is securely connected to your recording device.
- Verify that both transmitters and the receiver are powered on and paired (solid indicator lights).
- Check your device's audio input settings to ensure the external microphone is selected.
- Confirm that the transmitters are within the 40-meter operating range of the receiver.
- Check battery levels of all components.
- If experiencing excessive background noise, ensure the noise cancellation feature is active.
- Device Not Connecting:
- Ensure the correct connector (Type-C or Lightning adapter) is used for your device.
- Try restarting both the microphone system (by placing back in case and taking out) and your recording device.
- Ensure your device's operating system is up to date.
- Short Battery Life:
- Ensure the charging case and individual units are fully charged before use.
- Verify that the charging cable and adapter are functioning correctly.
9. Warranty and Support
For warranty information, technical support, or customer service, please contact the manufacturer:
- Manufacturer: IMS Merchantiles Pvt. Ltd
- Toll Free Number: 1800-123-544-444
- Customer Care Email: support@digitek.net.in
Related documentsDWM-116


Ask a question about this manual
Ask about setup, troubleshooting, compatibility, parts, safety, or missing instructions. Manuals+ will review the question and use this page’s manual context to help answer it.