
Introduction
The iFixit FixHub Soldering Toolkit is a comprehensive solution designed for precision soldering tasks, whether at home or on the go. This portable kit provides all necessary tools and accessories for both soldering and desoldering, catering to professionals and hobbyists requiring high-quality, convenient equipment.
At its core is the innovative 100W Power Series Portable Soldering Station and Smart Soldering Iron combination, engineered to deliver up to 8 hours of continuous, benchtop-level soldering performance without requiring a direct wall power connection.
The iFixit FixHub Soldering Toolkit, neatly organized in its durable tool roll, ready for use.
Safety Information
Always prioritize safety when using soldering equipment. Soldering involves high temperatures and can produce fumes. Adhere to the following guidelines:
- Wear appropriate personal protective equipment, including safety glasses, to protect your eyes from splashes or fumes.
- Work in a well-ventilated area to avoid inhaling solder fumes. Consider using a fume extractor.
- Ensure the soldering iron is placed in a stable holder when not in use to prevent accidental burns or damage.
- Allow the soldering iron to cool completely before storing it.
- Keep all flammable materials away from the soldering area.
- Handle hot components with care using appropriate tools like tweezers.
- Keep out of reach of children.
What's Included
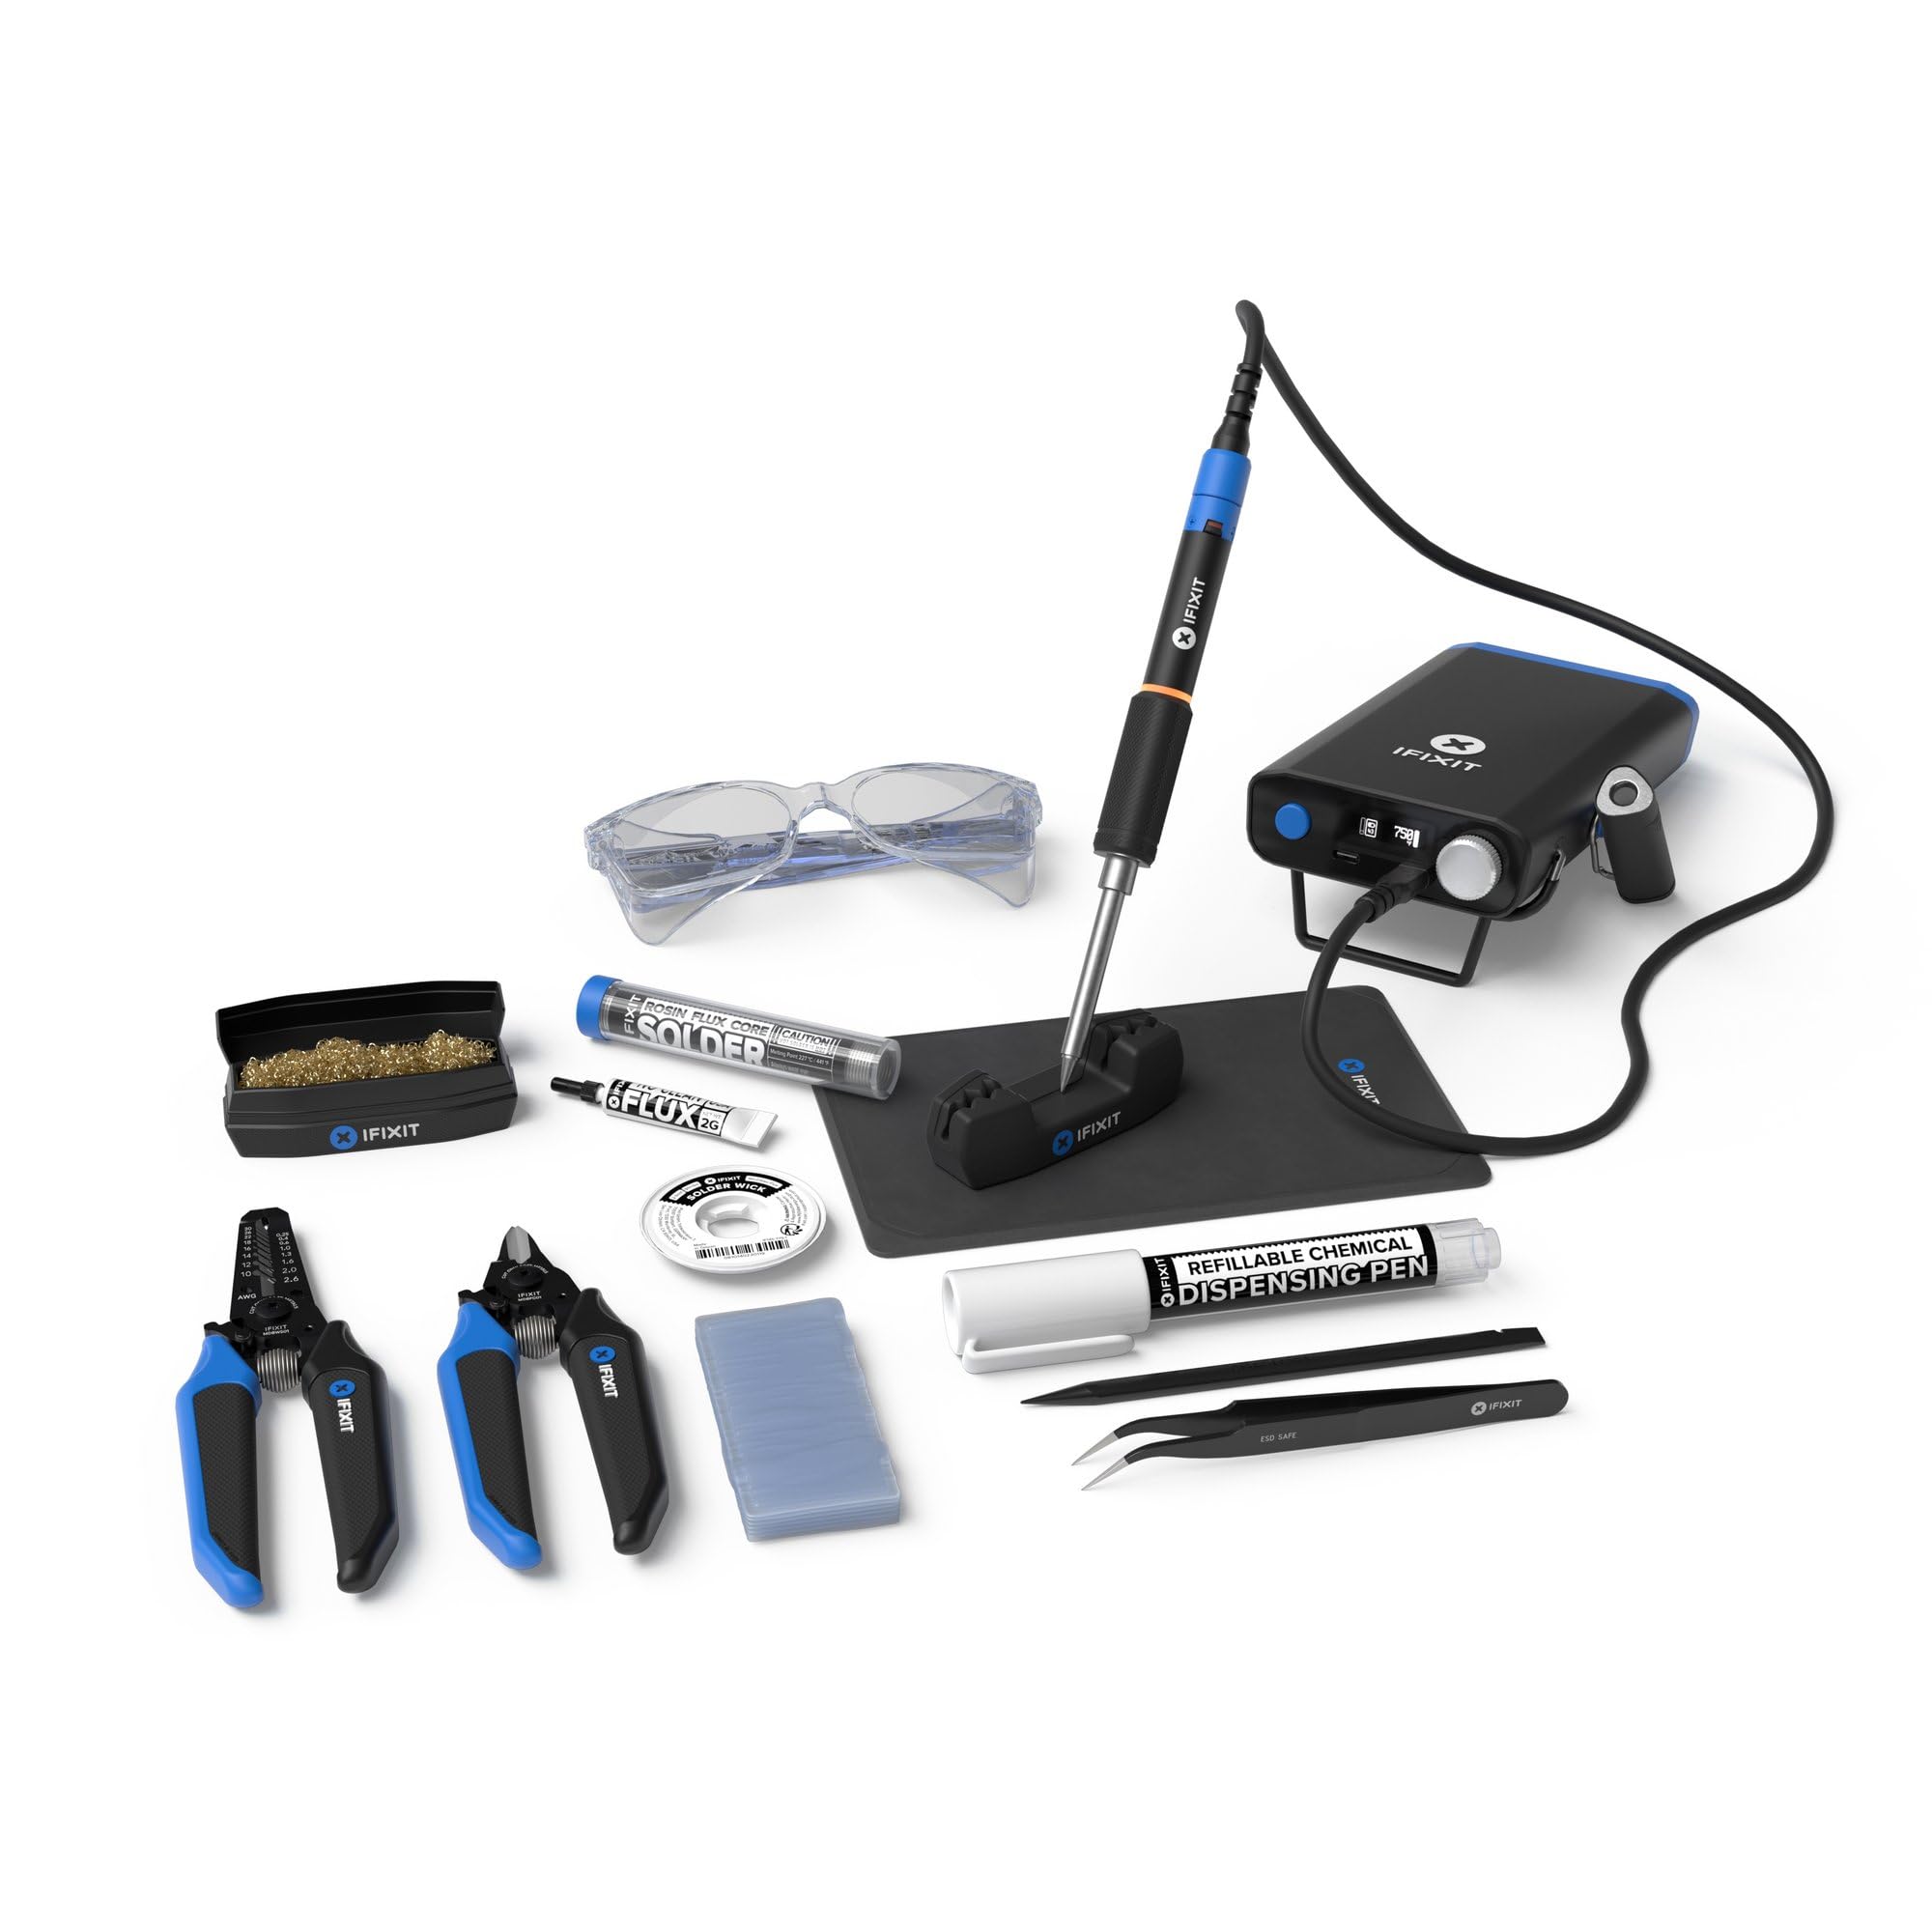
Your iFixit FixHub Soldering Toolkit comes with the following components:
- Power Series Portable Soldering Station
- Smart Soldering Iron
- Toolkit Roll
- USB-C Cable
- Desoldering Braid
- Flush Cutters
- Safety Glasses
- Soldering Splint
- Spudger
- Tip Cleaner
- Tweezers
- Wire Strippers
- Solder
- Flux
- Silicone Work Mat

An overview of the iFixit FixHub Soldering Toolkit's contents, including the Power Station, Smart Soldering Iron, and various accessories.
Setup
- Unpack the Toolkit: Carefully unroll the toolkit and identify all components.
- Charge the Power Station: Connect the Power Series Portable Soldering Station to a power source using the provided USB-C cable. Ensure it is fully charged before first use for optimal battery life.
- Prepare Your Work Area: Lay out the silicone work mat on a stable, heat-resistant surface. This mat protects your workspace and helps organize small components.
- Connect the Soldering Iron: Plug the Smart Soldering Iron into the designated port on the Power Station. Ensure a secure connection.
- Initial Firmware Update: As software is continually improved, your FixHub Power Series device may ship with an earlier firmware version. Please update to the latest firmware before first use by following the included step-by-step guide or by directly accessing the FixHub Web Console.

The iFixit FixHub Soldering Toolkit in action, highlighting its portability for repairs in various locations.
Operating Instructions
- Power On: Press and hold the power button on the Power Station until the digital display illuminates.
- Adjust Temperature: Use the control knob on the Power Station to set the desired temperature for your soldering task. The digital display will show the current temperature and target temperature. The Smart Soldering Iron features quick heat-up, reaching operating temperature rapidly.
- Tin the Iron Tip: Before first use and periodically during operation, tin the soldering iron tip by applying a small amount of solder to the heated tip. This helps with heat transfer and prevents oxidation.
- Apply Flux: For better solder flow and cleaner joints, apply a small amount of no-clean flux to the components or pads you intend to solder.
- Soldering: Bring the heated iron tip into contact with both the component lead and the solder pad simultaneously. Feed solder onto the joint, allowing it to flow evenly. Remove the solder, then remove the iron. Allow the joint to cool without disturbance.
- Desoldering: For desoldering, use the desoldering braid. Place the braid over the solder joint and press the hot iron tip onto the braid. The braid will wick away the molten solder.
- Power Off: When finished, press and hold the power button to turn off the Power Station. Allow the iron to cool completely before storing.

The iFixit FixHub Power Station and Smart Soldering Iron demonstrating its rapid heating capability and digital display.
Maintenance
- Tip Cleaning: Regularly clean the soldering iron tip using the included tip cleaner or a damp sponge. A clean tip ensures efficient heat transfer and prevents oxidation.
- Storage: After use, ensure all components are cool. Roll up the toolkit neatly and secure it with the buckle. Store in a dry, safe place.
- Battery Care: For optimal battery longevity, avoid fully discharging the Power Station frequently. Recharge as needed.
- Firmware Updates: Periodically check the iFixit website or the FixHub Web Console for available firmware updates to ensure your device operates with the latest features and improvements.

The compact and portable iFixit FixHub Soldering Toolkit, secured for transport.
Troubleshooting
- Iron Not Heating: Ensure the Smart Soldering Iron is securely connected to the Power Station. Check if the Power Station is charged and powered on. Verify the temperature setting.
- Poor Solder Joints: This can be caused by an unclean iron tip, insufficient heat, or improper application of solder/flux. Clean the tip, increase temperature if necessary, and ensure proper technique.
- Power Station Not Charging: Check the USB-C cable and power adapter for damage. Ensure the cable is fully inserted into both the Power Station and the power source.
- Device Not Responding: Try powering off and on the Power Station. If issues persist, consult the iFixit support resources.
Specifications
| Feature | Specification |
|---|---|
| Brand | iFixit |
| Model Number | IF145-781-1 |
| Wattage | 100 watts |
| Display Type | Digital |
| Number of Channels | 2 |
| UPC | 810140230102 |
| ASIN | B0DH7FMKH1 |
Warranty
The iFixit FixHub Soldering Toolkit comes with a One Year Guarantee from the manufacturer, covering defects in materials and workmanship under normal use.
Furthermore, iFixit stands behind the quality of its tools. All iFixit tools are Backed for Life. If any tool breaks, iFixit will replace it for as long as you own it. For detailed warranty claims and information, please refer to the official iFixit website.
Support
For additional assistance, resources, and community support, please visit the official iFixit website. You can find:
- Guides: Step-by-step repair guides for various electronics.
- Parts: Information on replacement parts for your devices.
- Tools: Details on other iFixit tools and their uses.
- Community: Forums and discussions with other repair enthusiasts.
Visit www.ifixit.com for comprehensive support.

A user performing soldering with the iFixit FixHub toolkit, illustrating the comprehensive support resources available.

