
OMMO OM-LL16
OMMO Laser Level 4D 16 Lines User Manual
Model: OM-LL16 | Brand: OMMO
1. Introduction
Thank you for choosing the OMMO Laser Level 4D 16 Lines. This advanced self-leveling laser level is designed to provide precise and efficient alignment for various construction, renovation, and DIY projects. Featuring a smart touch panel, long-lasting rechargeable battery, and remote control, it offers unparalleled convenience and accuracy for both indoor and outdoor applications.

Overview of the OMMO 4x360 Laser Level and its main features.
2. Safety Information
Please read and understand all safety information before operating this product. Failure to follow these instructions may result in laser radiation exposure, electric shock, fire, or serious injury.
- Laser Radiation: This product is a Class II laser product. Do not stare directly into the laser beam. Avoid direct eye exposure.
- Power Source: Use only the specified rechargeable battery and charging cable. Do not attempt to open or modify the battery.
- Environment: Do not operate the device in explosive atmospheres, such as in the presence of flammable liquids, gases, or dust.
- Maintenance: Refer all servicing to qualified service personnel. Do not attempt to repair the device yourself.
- Children: Keep the device out of reach of children.
3. Package Contents
Verify that all items listed below are included in your package:
- 1 x OMMO Laser Level (OM-LL16)
- 1 x Carrying Bag
- 1 x L-Shaped Magnetic Bracket
- 1 x 3600mAh Lithium Battery
- 1 x Remote Controller
- 1 x Type-C Charging Cable
- 1 x 1/4"-20 Mount Thread Adapter
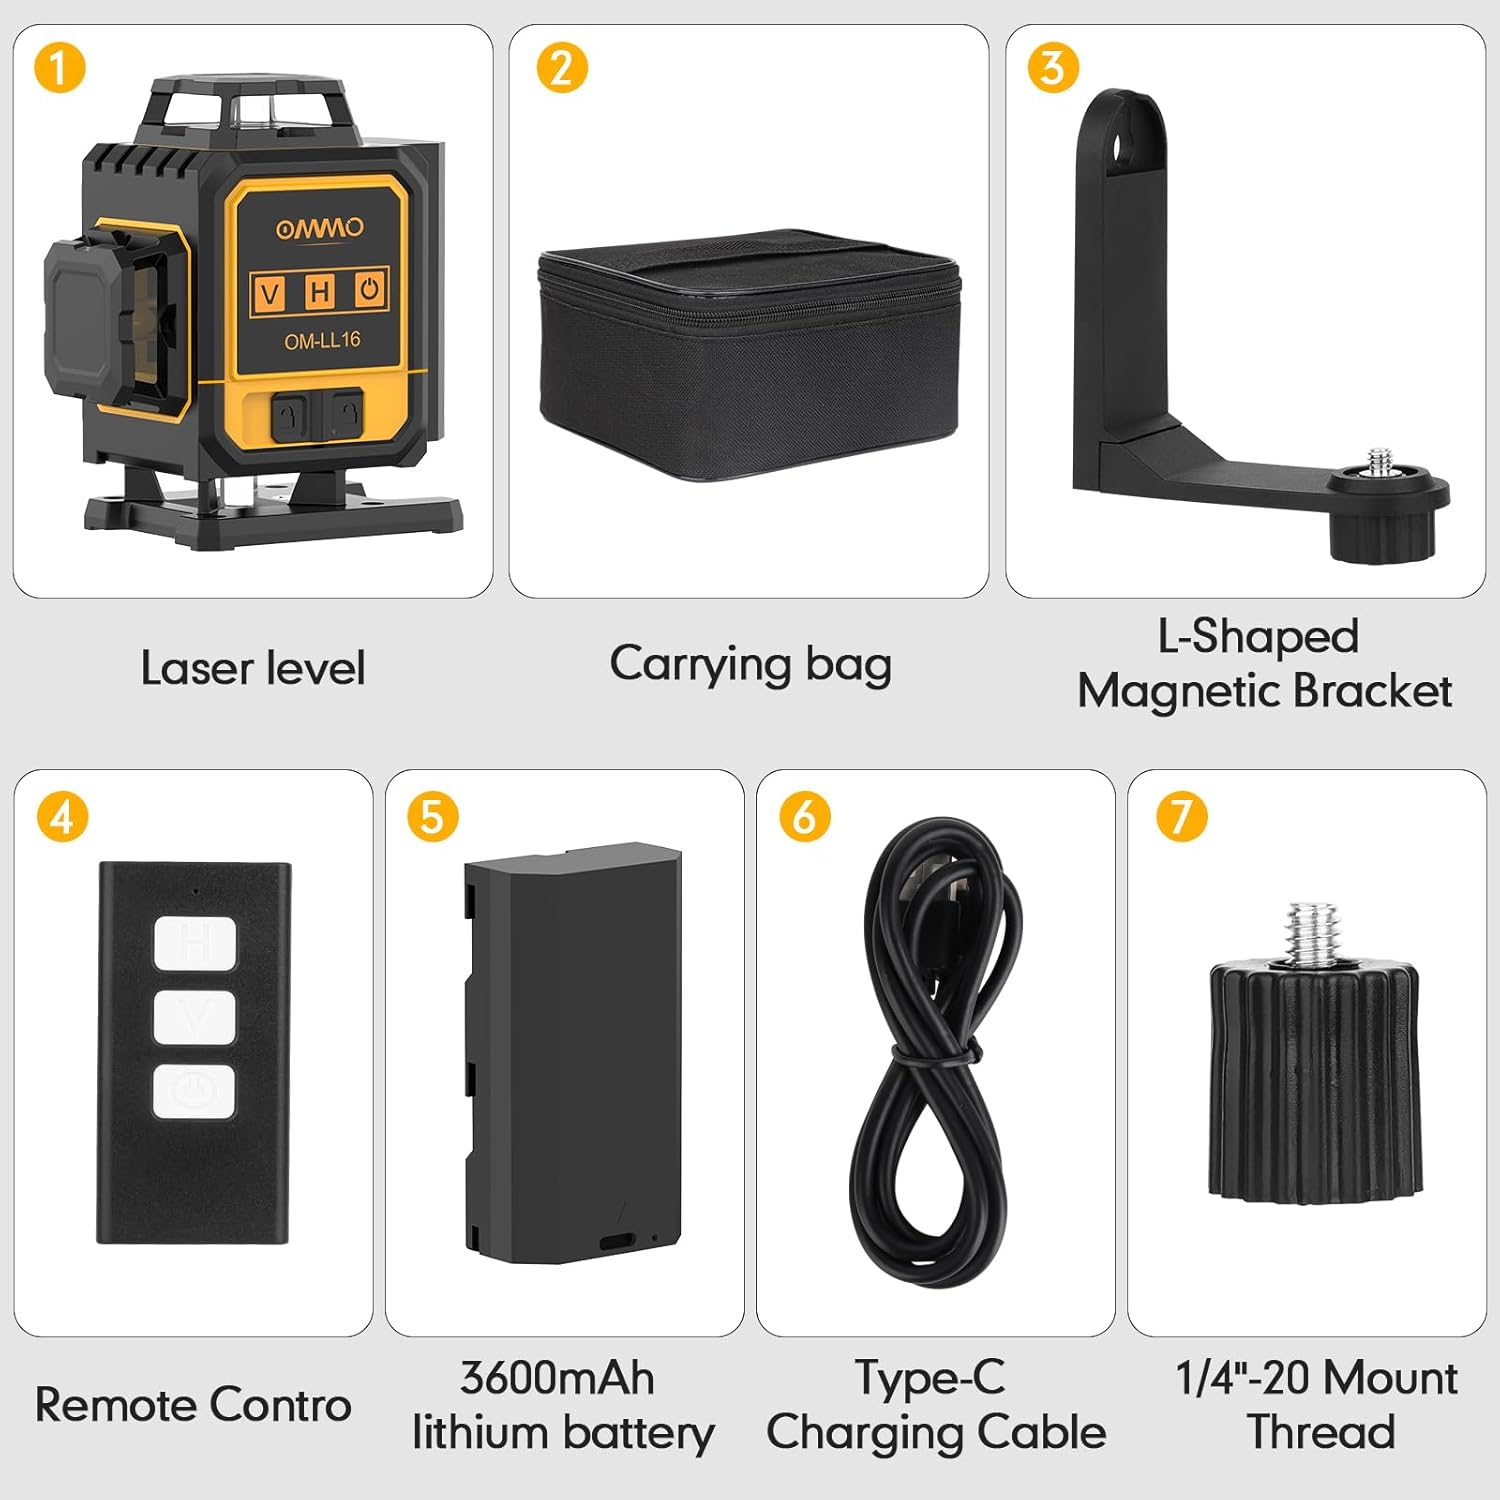
All components included in the OMMO Laser Level package.
4. Product Overview
Familiarize yourself with the main components and controls of your OMMO Laser Level.

The OMMO Laser Level and its accessories.

Smart Touch Panel for easy operation.
Laser Line Configuration
The OMMO Laser Level projects 4 x 360° laser lines, providing comprehensive coverage for various leveling tasks.

Illustration of 4D 16-line laser projection capabilities.
5. Specifications
| Feature | Specification |
|---|---|
| Model Number | OM-LL16 |
| Laser Class | Class II, <1mW |
| Laser Lines | 2 x 360° Horizontal, 2 x 360° Vertical (16 Lines) |
| Leveling/Compensation Range | ±3° |
| Battery Capacity | 3600mAh Lithium Ion |
| Working Time | Up to 5 hours (continuous use) |
| Charging Time | Approx. 3-4 hours |
| Remote Control Range | Up to 160FT (approx. 48 meters) |
| IP Rating | IP54 (Dustproof & Waterproof) |
| Mount Thread | 1/4"-20 |
| Item Weight | 1.38 Pounds |
| Dimensions | 7.72 x 7.24 x 3.78 inches (Package) |

Battery specifications and charging details.

IP54 Dustproof and Waterproof rating.
6. Setup
Battery Installation and Charging
- Locate the battery compartment on the laser level.
- Insert the 3600mAh lithium battery, ensuring correct polarity.
- Close the battery compartment securely.
- To charge, connect the Type-C charging cable to the laser level's charging port and a suitable USB power adapter (not included). The charging indicator will show charging status.
Mounting Options
The OMMO Laser Level offers versatile mounting options:
- Tripod Mounting: Use the 1/4"-20 mount thread at the bottom of the unit to attach it to a standard tripod.
- Magnetic Bracket: Attach the L-shaped magnetic bracket to the laser level using the screw hole, then secure it to metal surfaces.

Mounting options using the magnetic bracket and tripod thread.
7. Operating Modes
Self-Leveling Mode
This mode automatically levels the laser lines within a ±3° range.
- Push the side switch to the unlocked position (unlocked icon).
- The laser level will automatically self-level. If the tilt exceeds 3°, an audible alarm will sound, and the laser lines will flash.
- Place the laser level on a flat, stable surface until the alarm stops and the lines become steady.
Manual Mode (Tilt Mode)
This mode allows you to project laser lines at any desired angle.
- Ensure the side switch is in the locked position (locked icon).
- Touch the power on/off icon on the touch panel to activate manual mode.
- The laser lines will project without self-leveling, allowing for angled projections without an alarm.

Visual comparison of Self-leveling and Manual modes.
Brightness Adjustment
The laser level features three adjustable brightness levels for optimal visibility in different lighting conditions. Use the power/brightness adjustment icon on the touch panel to cycle through the brightness settings.
8. Remote Control Operation
The included remote control allows for convenient operation from a distance, minimizing accidental movement of the laser level once positioned.
- Vertical Line (V): Press the 'V' button to toggle vertical laser lines.
- Horizontal Line (H): Press the 'H' button to toggle horizontal laser lines.
- Power/Brightness Adjustment: Press the power icon to turn the unit on/off or adjust brightness levels.

Remote control functions for the laser level.
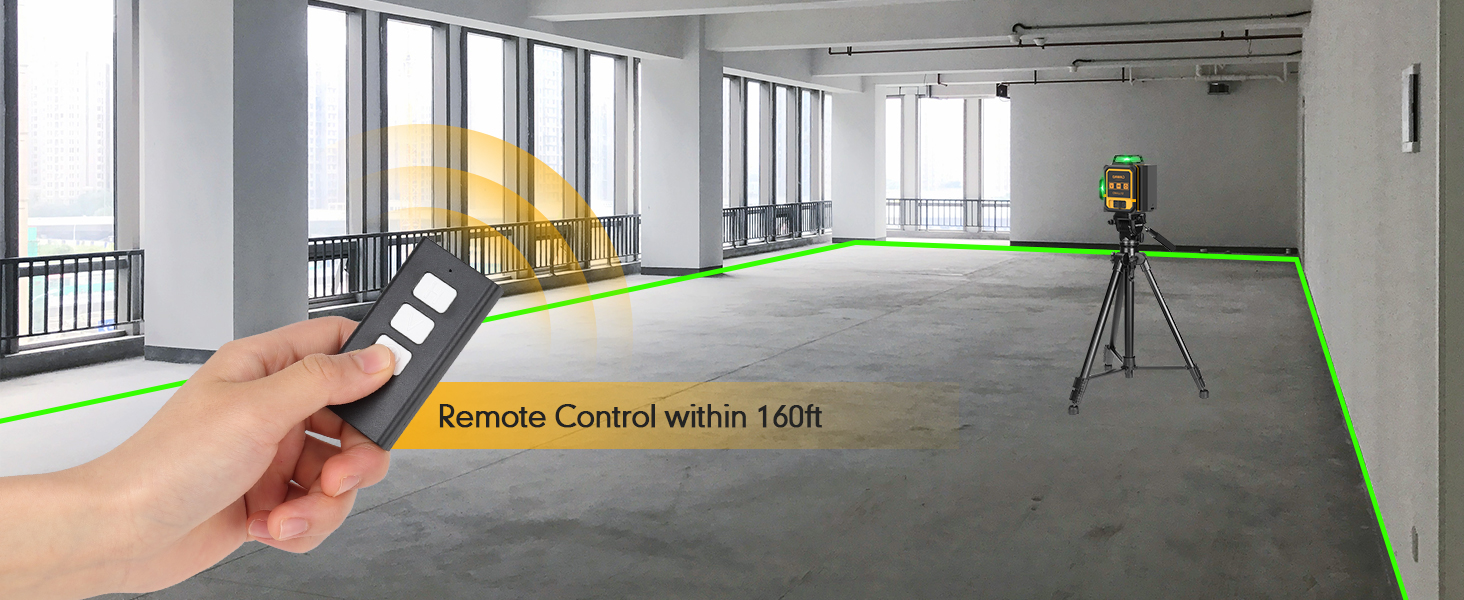
Remote control effective range up to 160 feet.
9. Applications
The OMMO Laser Level is suitable for a wide range of applications, including but not limited to:
- Tile installation (floor and wall)
- Cabinet and shelf alignment
- Picture hanging and decor alignment
- Drywall installation
- Electrical conduit and outlet installation
- Staircase layout
- Outdoor grading and landscaping (with appropriate laser detector, not included)
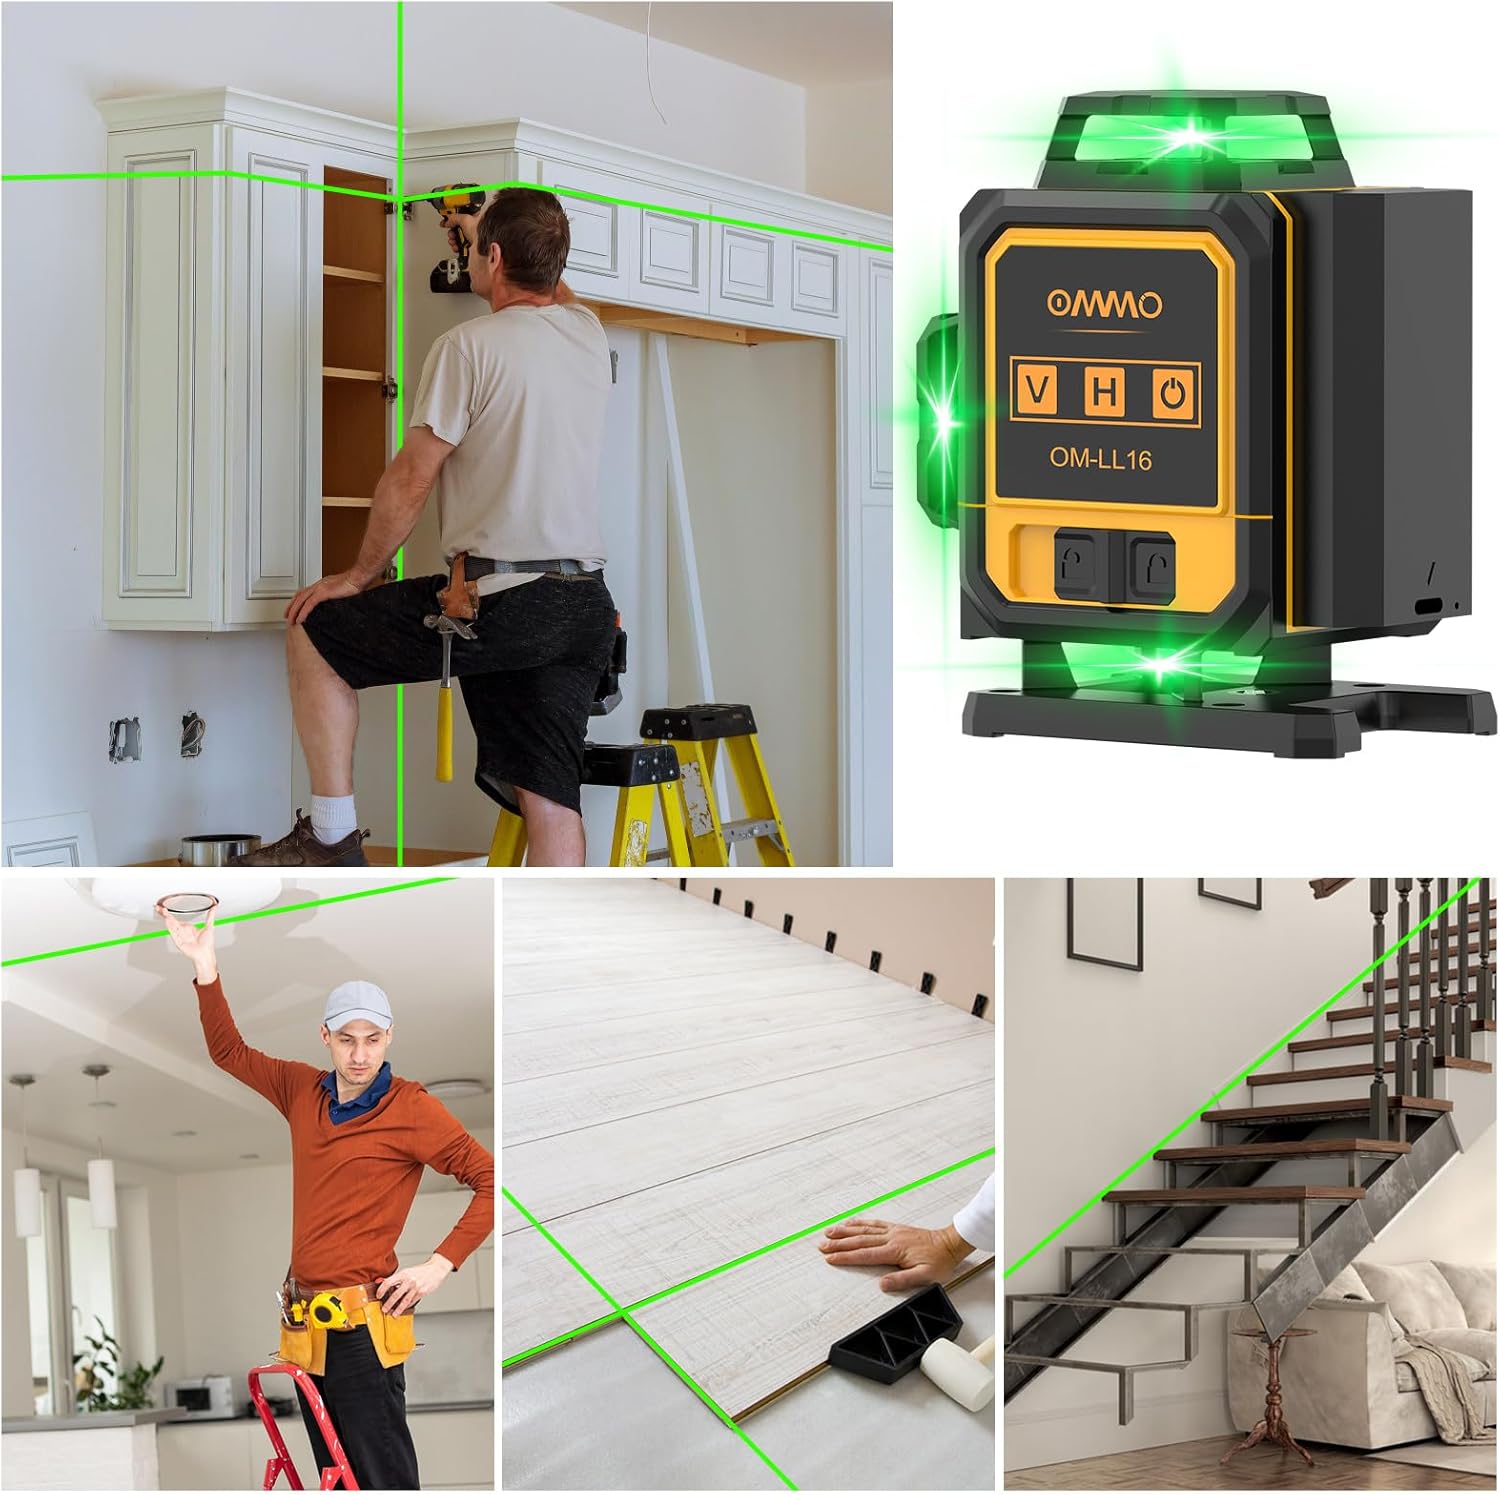
Examples of the laser level in use for various home improvement tasks.
10. Maintenance
Proper maintenance ensures the longevity and accuracy of your laser level.
- Cleaning: Wipe the device with a soft, damp cloth. Do not use abrasive cleaners or solvents. Keep the laser windows clean for optimal performance.
- Storage: Store the laser level in its carrying bag in a cool, dry place, away from direct sunlight and extreme temperatures. Remove the battery if storing for extended periods.
- Calibration: While the device is factory calibrated, regular checks for accuracy are recommended, especially after impacts or prolonged use. Refer to professional calibration services if significant deviations are observed.
11. Troubleshooting
| Problem | Possible Cause | Solution |
|---|---|---|
| Laser lines are flashing and beeping in self-leveling mode. | The device is tilted beyond its ±3° self-leveling range. | Place the laser level on a flatter, more stable surface. |
| Laser does not turn on. | Battery is low or not installed correctly. | Charge the battery or ensure it is properly inserted. |
| Laser lines are dim or not visible. | High ambient light or brightness setting is too low. | Adjust brightness using the touch panel/remote. Use in lower light conditions or with a laser detector for outdoor use. |
| Remote control not working. | Remote battery is dead or out of range. | Replace remote battery. Ensure you are within the 160ft operating range. |
| Laser lines are not accurate. | Device may have been dropped or requires calibration. | Perform a basic accuracy check. If issues persist, contact customer support for calibration. |
12. Warranty & Support
OMMO provides a standard warranty for this product. For detailed warranty terms, technical support, or service inquiries, please refer to the contact information provided on the OMMO official website or your purchase documentation. Please have your model number (OM-LL16) and purchase date ready when contacting support.
For further assistance, visit the OMMO Store on Amazon.
Ask a question about this manual
Ask about setup, troubleshooting, compatibility, parts, safety, or missing instructions. Manuals+ will review the question and use this page’s manual context to help answer it.