
1. Introduction
This manual provides detailed instructions for the installation, operation, maintenance, and troubleshooting of the ACTIVLIFE carburetor replacement part. This carburetor is specifically designed for Craftsman Sears 8hp 25-inch snowblowers, model c950-52677. Proper installation and maintenance are crucial for ensuring the optimal performance and longevity of your snowblower's engine.
Please read this manual thoroughly before attempting any installation or maintenance procedures. Keep this manual for future reference.
2. Safety Information
Always prioritize safety when working with power equipment and fuel systems. Failure to follow safety instructions can result in serious injury or property damage.
- Disconnect Spark Plug: Before performing any service or maintenance, always disconnect the spark plug wire to prevent accidental engine starting.
- Fuel Handling: Gasoline is highly flammable. Handle fuel in a well-ventilated area, away from open flames, sparks, or other ignition sources. Store gasoline in approved containers.
- Eye Protection: Wear appropriate eye protection to shield against fuel splashes or debris.
- Ventilation: Ensure adequate ventilation when working in enclosed spaces to avoid inhaling fuel fumes.
- Hot Surfaces: Engine components can become very hot. Allow the engine to cool before servicing.
- Refer to Snowblower Manual: Always consult your snowblower's original owner's manual for specific safety guidelines and procedures related to your equipment.
3. Package Contents
Verify that all components listed below are present and undamaged before beginning installation.
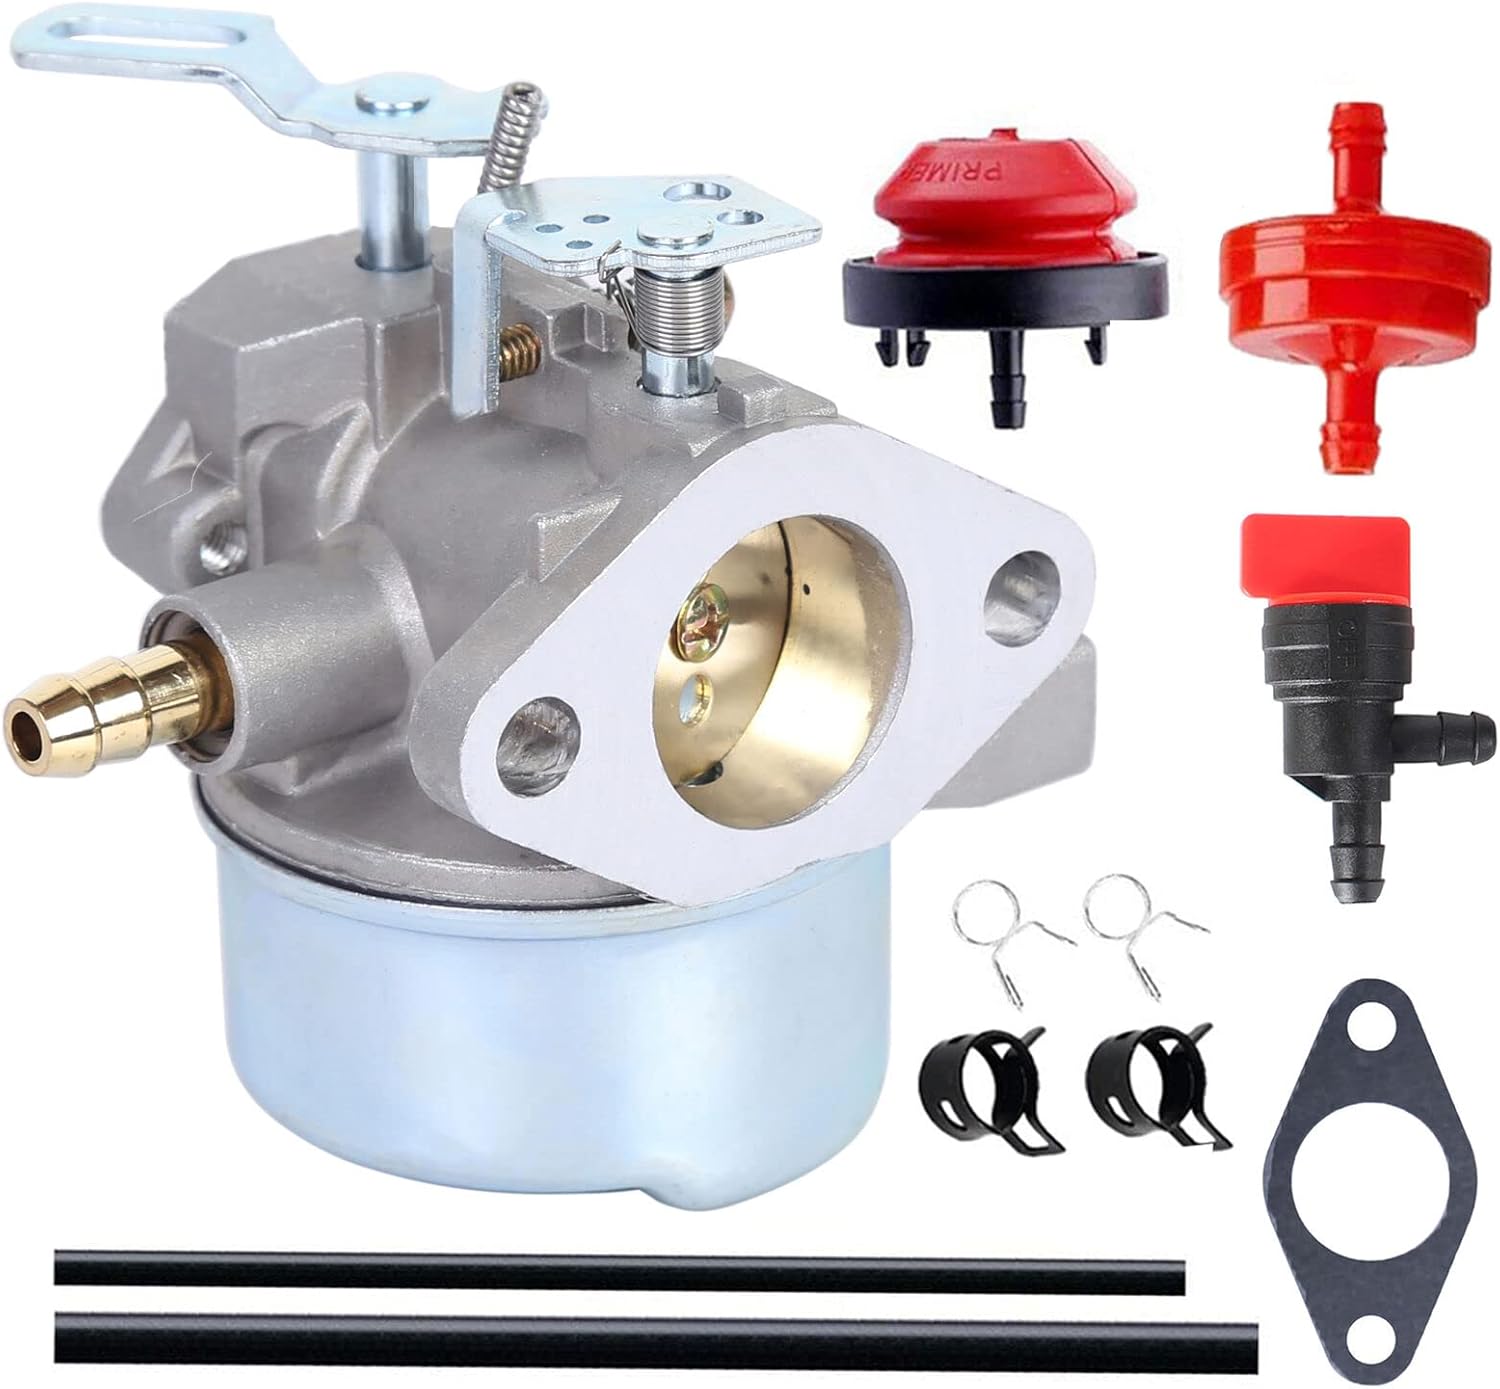
Image 3.1: Complete ACTIVLIFE Carburetor Kit. This image displays the main carburetor unit, a red primer bulb, a red fuel filter, a black fuel shut-off valve, two black fuel lines, two small metal clamps, and a black gasket.
- 1 x ACTIVLIFE Carburetor Assembly
- 1 x Primer Bulb (Red)
- 1 x Fuel Filter (Red)
- 1 x Fuel Shut-off Valve (Black with Red Lever)
- 2 x Fuel Lines (Black)
- 2 x Hose Clamps
- 1 x Gasket
4. Setup and Installation
This section outlines the general steps for replacing your snowblower's carburetor. Specific procedures may vary slightly depending on your snowblower's exact configuration. Always refer to your snowblower's service manual for detailed instructions.
4.1. Tools Required (Typical)
- Socket wrench set
- Screwdriver set
- Pliers
- Fuel line clamp or plug
- Clean rags
- Container for draining fuel
4.2. Pre-Installation Steps
- Park the snowblower on a level surface and ensure the engine is cool.
- Disconnect the spark plug wire to prevent accidental starting.
- Turn the fuel shut-off valve (if present) to the OFF position.
- Drain the fuel tank into an approved container.
- Remove any engine covers or air filter assemblies that obstruct access to the carburetor.
4.3. Carburetor Removal
- Carefully disconnect the fuel line(s) from the old carburetor. Be prepared for residual fuel leakage.
- Note the routing and connection points of all linkages (throttle, choke) and springs connected to the carburetor. Taking photos can be helpful.
- Disconnect all linkages and springs.
- Unbolt the old carburetor from the engine manifold. Remove the old gasket.
4.4. Carburetor Installation
- Ensure the mounting surface on the engine is clean and free of old gasket material.
- Place the new gasket provided with the ACTIVLIFE carburetor onto the mounting studs.
- Mount the new ACTIVLIFE carburetor onto the engine studs, ensuring it seats properly against the gasket.
- Secure the carburetor with the mounting nuts, tightening them evenly. Do not overtighten.
- Reconnect all throttle and choke linkages and springs to their original positions. Refer to your photos if needed.
- Install the new fuel filter and fuel shut-off valve into the fuel line as appropriate.
- Connect the new fuel lines to the carburetor and fuel tank, securing them with the provided clamps.
- Install the new primer bulb if replacing the old one.
- Reinstall any removed engine covers or air filter assemblies.
5. Operating Checks
After installation, perform the following checks before starting the snowblower.
- Refill the fuel tank with fresh, appropriate fuel.
- Turn the fuel shut-off valve to the ON position.
- Check for any fuel leaks around the carburetor and fuel lines. Address any leaks immediately.
- Reconnect the spark plug wire.
- Follow your snowblower's standard starting procedure. The engine should start smoothly and run consistently.
- Observe engine idle and throttle response. Adjust idle speed if necessary, referring to your snowblower's manual.
6. Maintenance
Regular maintenance of your carburetor and fuel system will ensure reliable operation of your snowblower.
- Fuel Quality: Always use fresh, clean gasoline. Stale or contaminated fuel is a common cause of carburetor issues. Consider using a fuel stabilizer, especially during storage.
- Fuel Filter: Inspect and replace the fuel filter annually or more frequently if operating in dusty conditions or if fuel flow is restricted.
- Carburetor Cleaning: If the engine experiences rough idling, stalling, or difficulty starting, the carburetor may require cleaning. This typically involves disassembling the carburetor and cleaning jets and passages with carburetor cleaner. This procedure should only be performed by individuals familiar with small engine repair.
- Storage: Before long-term storage, either run the engine until it runs out of fuel or drain the fuel tank and carburetor bowl to prevent fuel degradation and gumming.
7. Troubleshooting
This section addresses common issues that may arise with your carburetor. For complex problems, consult a qualified service technician.
7.1. Engine Will Not Start
- No Fuel: Check fuel tank level and ensure the fuel shut-off valve is open.
- Clogged Fuel Filter: Inspect and replace the fuel filter if it appears dirty or restricted.
- Stale Fuel: Drain old fuel and refill with fresh gasoline.
- Primer Bulb: Ensure the primer bulb is functioning and priming the carburetor correctly.
- Spark Plug: Check the spark plug for fouling or damage.
7.2. Engine Runs Rough or Stalls
- Dirty Carburetor: Internal passages or jets may be clogged. Carburetor cleaning may be required.
- Air Filter: A dirty air filter can restrict airflow. Clean or replace as needed.
- Fuel Quality: Ensure fresh, clean fuel is being used.
7.3. Fuel Leaks
- Loose Connections: Check all fuel line connections and clamps for tightness.
- Damaged Fuel Lines/Gasket: Inspect fuel lines and the carburetor gasket for cracks or damage. Replace as necessary.
- Float Bowl: A stuck float or damaged needle valve inside the carburetor can cause overflow. This requires carburetor disassembly and inspection.
8. Specifications
- Product Type: Carburetor Replacement Kit
- Brand: ACTIVLIFE
- Compatibility: Craftsman Sears 8hp 25-inch Snowblowers
- Compatible Model Number: c950-52677
9. Warranty and Support
For information regarding warranty coverage or technical support for your ACTIVLIFE carburetor, please refer to your purchase documentation or contact the seller directly. Keep your proof of purchase for any warranty claims.