Introduction
This manual provides detailed instructions for assembling the TAMIYA 1/24 Porsche 911 GT3 RS (992) plastic model kit. This kit is designed for enthusiasts to recreate the iconic high-performance sports car with precision and detail.
The Porsche 911 GT3 RS, released in 2022, is a high-performance road car emphasizing circuit driving. It features advanced aerodynamics, including hood and fender vents, rectifier fins on the roof, and a large rear wing with a variable DRS (Drag Reduction System). Extensive use of Carbon Fiber Reinforced Polymer (CFRP) contributes to its lightweight design. The rear-mounted 4-liter horizontal 6-cylinder engine, incorporating racing technologies, produces 525 horsepower.
This video provides a general overview of the TAMIYA 1/24 Porsche 911 GT3 RS (992) model kit, showcasing the box and some of its key features.
Important Safety Precautions
Please read and understand all instructions before beginning assembly.
- Keep small parts out of reach of young children to prevent choking hazards.
- Use sharp tools (hobby knives, nippers) with extreme care. Always cut away from your body.
- Work in a well-ventilated area when using adhesives and paints.
- Wear appropriate personal protective equipment, such as safety glasses and gloves, when necessary.
- Dispose of waste materials responsibly.
Package Contents
Your TAMIYA 1/24 Porsche 911 GT3 RS (992) model kit includes:
- Plastic Bausatz (Plastic Model Kit Parts)
- Decal Sheet
- Masking Sticker Sheet
- Instruction Manual
The kit includes detailed decal sheets for carbon fiber patterns, dashboard, mesh seat, door upholstery, and other markings, along with masking stickers for precise painting.
Tools and Materials Required (Sold Separately)
The following items are necessary for assembly and painting and are not included in this kit:
- Plastic nippers or sprue cutters
- Hobby knife or craft blade
- Plastic cement/glue
- Fine-grit sandpaper or sanding sticks
- Model paints (acrylic, enamel, or lacquer as desired)
- Paintbrushes or airbrush
- Tweezers
- Cotton swabs
- Clear coat/topcoat (optional)
Assembly Instructions
Follow the numbered steps in the included instruction booklet carefully. Test fit all parts before applying adhesive.
1. Chassis Assembly
Begin by assembling the chassis components. Ensure all parts are securely attached.

This image displays the intricate underside of the model, highlighting the chassis structure, exhaust system, and suspension details. Pay close attention to the fit of these components during assembly.
2. Interior Assembly
Assemble the interior components, including the dashboard, seats, and roll cage. Decals are provided for dashboard details and mesh seat patterns.

A close-up of the model's interior, featuring the racing-style seats, detailed dashboard, and integrated roll cage. Decals are used to enhance the realism of the dashboard and seat textures.
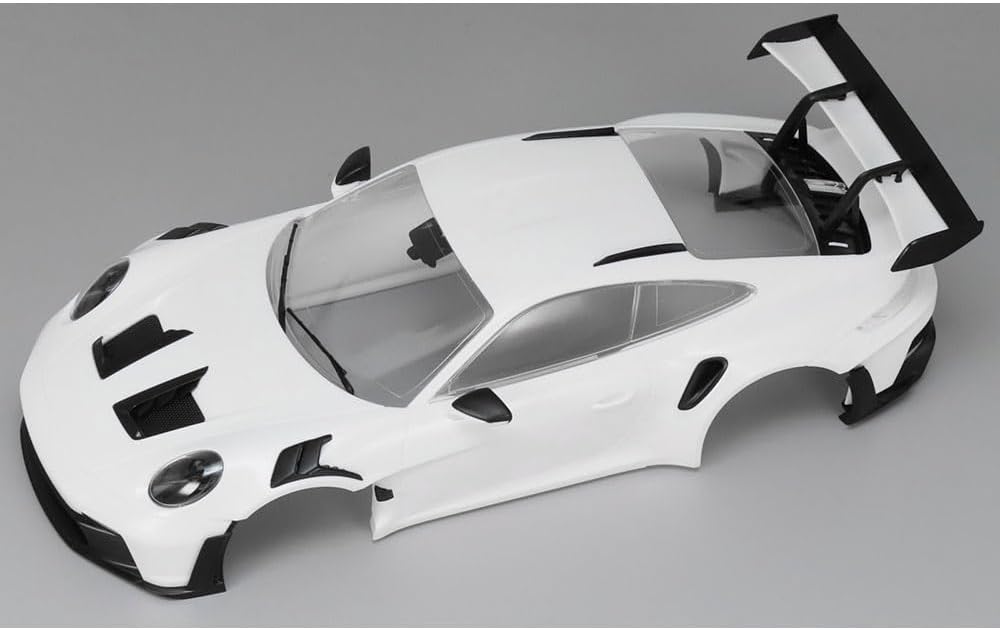
3. Body Shell Preparation
Prepare the main body shell by removing any mold lines and sanding smooth. This is crucial for a flawless paint finish.

The primary body shell component, ready for preparation and painting. Note the molded details for air vents and window openings, which contribute to the car's distinctive appearance.
4. Wheel and Brake Assembly
Assemble the wheels, tires, and brake calipers. The kit includes separate brake calipers and discs for enhanced realism.

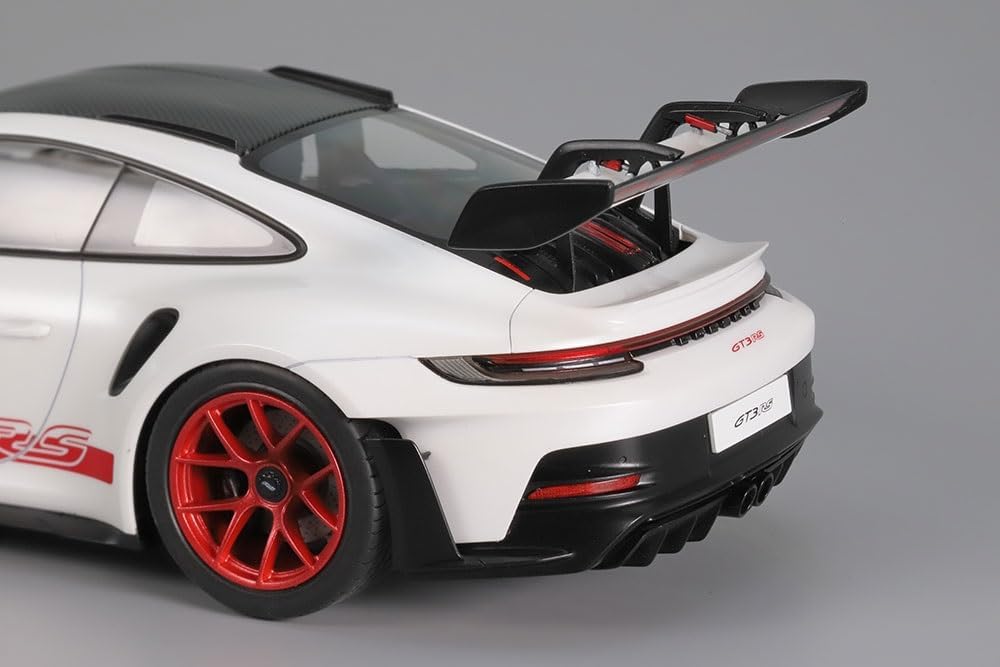
This image showcases the detailed red wheel and the separate brake caliper and disc components, emphasizing the precision engineering of the model kit.
5. Final Body Details and Decals
Attach exterior details such as mirrors, lights, and the large rear wing. Apply decals carefully according to the instruction sheet for carbon fiber accents and branding.

A fully assembled and painted model of the Porsche 911 GT3 RS (992), showcasing its aggressive styling, large rear wing, and distinctive red wheels. This view highlights the overall aesthetic and detailed finish.

The side profile of the finished model, illustrating the sleek lines, side skirts, and the 'GT3 RS' decal along the lower body.

A direct front view of the model, emphasizing the distinctive headlights, front splitter, and the carbon fiber pattern on the hood and front fenders.

This angle provides a clear view of the prominent rear wing, taillight design, and the rear diffuser, all contributing to the car's high-performance appearance.
The rear of the model, showcasing the central exhaust outlet, detailed diffuser, and the 'PORSCHE' lettering across the rear light bar.
Painting Guide
For best results, apply paint in thin, even coats. Refer to the color guide in your instruction manual for recommended paint colors.
- Prime parts before painting to ensure good adhesion and a uniform finish.
- Use masking tape or the provided masking stickers for sharp lines between different colors.
- Allow each coat of paint to dry thoroughly before applying the next.
- A clear topcoat can protect the paint and decals and provide a glossy or matte finish.
Maintenance
To maintain the appearance of your completed model:
- Keep the model in a dust-free environment, ideally in a display case.
- Clean gently with a soft, dry brush or a slightly damp cloth if necessary. Avoid harsh chemicals.
- Protect from direct sunlight to prevent fading of paint and decals.
Troubleshooting
Parts Not Fitting
Ensure you are using the correct parts for each step. Carefully trim any excess plastic (flash) from the parts. Light sanding may be required for a perfect fit.
Decal Application Problems
Ensure the surface is clean and smooth. Use decal setting solutions to help decals conform to irregular surfaces and eliminate air bubbles.
Paint Imperfections
If paint appears uneven or textured, ensure proper surface preparation and apply paint in thin coats. Humidity and temperature can affect paint drying and finish.
Product Specifications
| Feature | Detail |
|---|---|
| Brand | TAMIYA |
| Model Name | TAM24370 |
| Scale | 1/24 |
| Material | Plastic |
| Assembled Dimensions (L x W x H) | 7.5 x 3.3 x 2.2 inches (190 x 85 x 56 mm) |
| Item Weight | 15.4 ounces |
| Recommended Age | 14 years and up |
| Special Feature | Premium Materials and High Detail |
Warranty Information and Customer Support
For any questions regarding this TAMIYA product, please contact your local TAMIYA distributor or retailer. Please retain your proof of purchase for any warranty claims.
TAMIYA is committed to providing high-quality model kits. If you encounter any issues with missing or defective parts, please refer to the contact information provided in the kit packaging or on the official TAMIYA website.


