1. Introduction
Thank you for purchasing the Amewi ADAC H145 6-Channel Brushless RC Helicopter. This highly detailed scale replica offers an exceptional flying experience with advanced features designed for both beginners and experienced pilots. This manual provides essential information for the safe operation, setup, and maintenance of your helicopter. Please read it thoroughly before first use.
The ADAC H145 model features a 5-blade main rotor and a Fenestron tail rotor, mirroring the real-life ADAC rescue helicopter. Equipped with brushless motors for both main and tail drives, it ensures stable flight performance. Integrated barometric and ground sensors assist with altitude hold, allowing pilots to focus on flight maneuvers. Automatic take-off and landing functions, along with three adjustable servo plate levels (beginner to professional), enhance usability.
2. Safety Warnings
WARNING: Not suitable for children under 16 years. Contains small parts that could be swallowed.
- Always operate the helicopter in an open area, away from people, animals, buildings, and power lines.
- Keep hands, face, and loose clothing away from rotating parts.
- Do not fly near water or in adverse weather conditions (strong winds, rain).
- Ensure the battery is fully charged and securely installed before each flight.
- Never leave charging batteries unattended. Use only the provided charging cable.
- In case of emergency, use the emergency stop button on the remote control to immediately cut power to the motors.
- Store the helicopter and remote control in a cool, dry place, away from direct sunlight.
3. Package Contents
Verify that all items listed below are present in your package:
- Amewi ADAC H145 RC Helicopter
- 6-Channel 2.4 GHz Remote Control
- Li-Ion 2S 7.4V 1200mAh 20C Battery (with integrated USB-C charging port)
- USB Charging Cable
- Tool Set
- Spare Parts (e.g., rotor blades)
- Instruction Manual (DE/EN)
Required Accessories (Not Included):
- 4 x AA Mignon 1.5V batteries for the remote control

4. Product Overview
The Amewi ADAC H145 is a highly detailed scale model of the ADAC rescue helicopter D-HYAR. Its design incorporates numerous realistic features for an authentic appearance and stable flight characteristics.
4.1 Helicopter Components
- 5-Blade Main Rotor: Provides stable lift and precise control.
- Fenestron Tail Rotor: Enhances stability and control, replicating the full-scale helicopter.
- Brushless Motors: High-efficiency motors for both main and tail drives ensure powerful and reliable performance.
- ADAC Scale Paint Scheme: Authentic yellow livery with ADAC D-HYAR markings.
- LED Lighting: Position lights on the side wings for enhanced visibility.
- High-Strength ABS Fuselage: Durable and lightweight construction.
- Stable and Flexible Landing Gear: Designed for smooth landings.
- Aluminum Rotor Head: Ensures durability and precision.


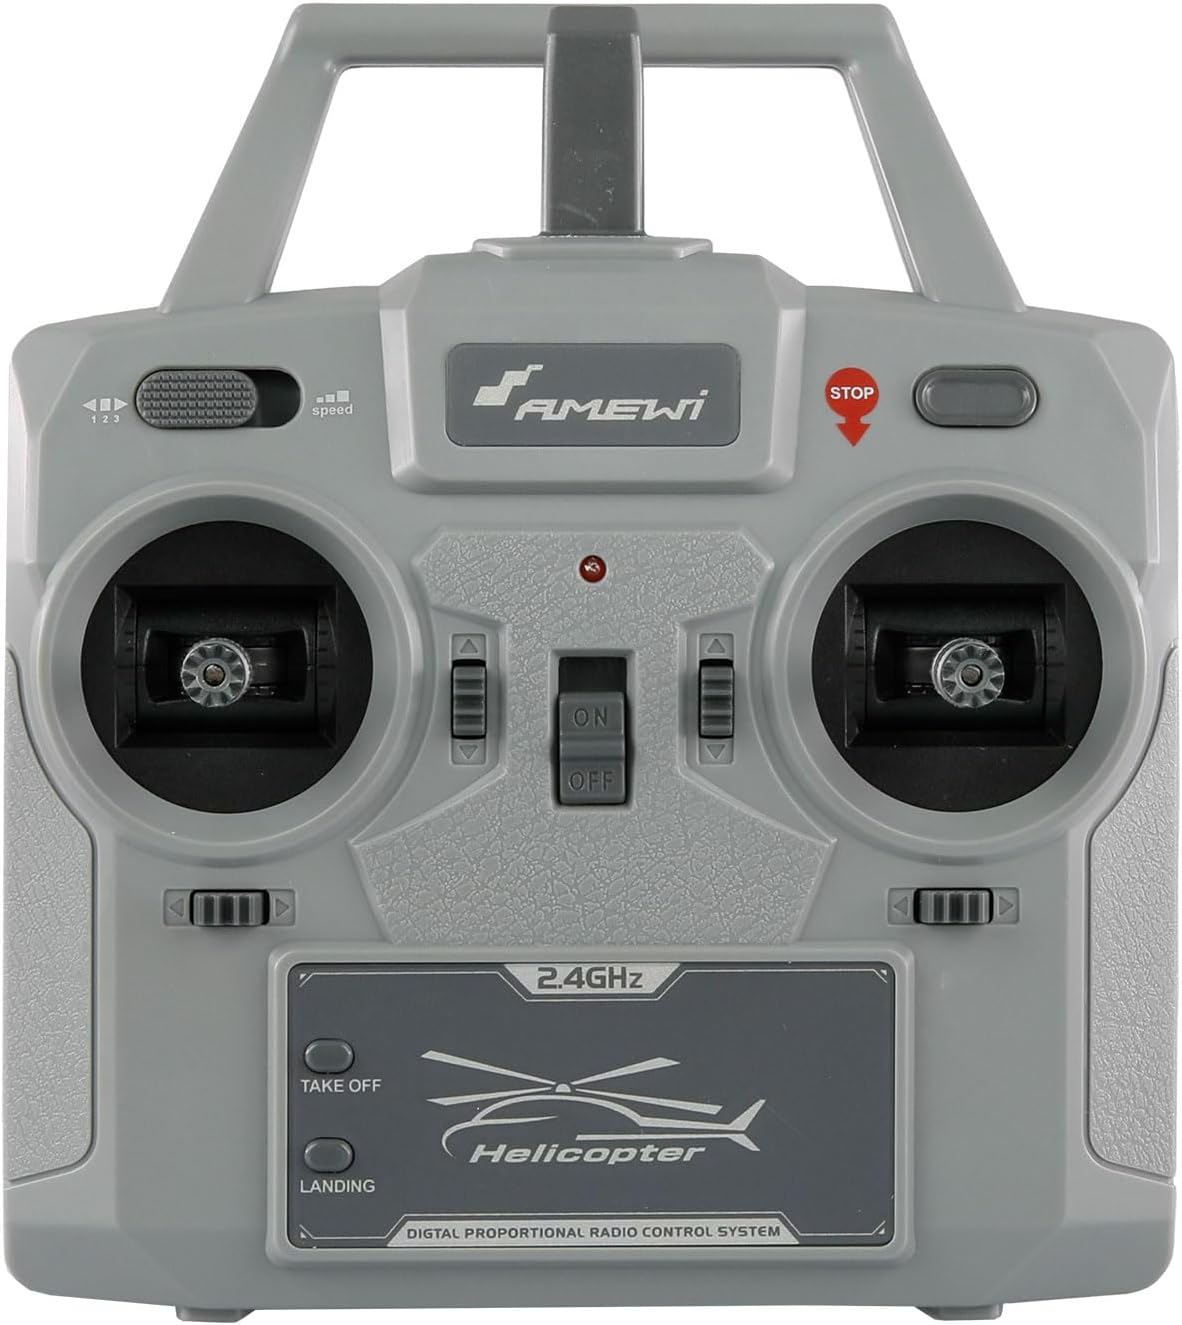
4.2 Remote Control
The 2.4 GHz remote control features aluminum sticks and offers extensive adjustment options, including Mode 1/Mode 2 switching, dual rates, automatic take-off/landing, and an emergency stop function. It provides a reliable control range of 60-80 meters.
4.3 Battery
The helicopter is powered by a Li-Ion 2S 7.4V 1200mAh 20C hard case battery. It features an integrated USB-C charging port for convenient charging and a safety lock mechanism for secure installation.

5. Setup
5.1 Remote Control Battery Installation
- Open the battery compartment on the back of the remote control.
- Insert 4 x AA Mignon 1.5V batteries, ensuring correct polarity (+/-).
- Close the battery compartment securely.
5.2 Helicopter Battery Charging
- Locate the USB-C charging port on the helicopter's Li-Ion battery.
- Connect the provided USB charging cable to the battery and a suitable USB power source (e.g., computer USB port, USB wall adapter).
- The charging indicator (if present on the cable or battery) will show the charging status. Charging typically takes 90-120 minutes.
- Disconnect the battery once fully charged. Do not overcharge.
5.3 Battery Installation in Helicopter
- Ensure the helicopter's power switch is OFF.
- Carefully insert the charged battery into the helicopter's battery compartment, ensuring the safety lock engages.
- Ensure the battery is firmly secured and does not obstruct any moving parts.
6. Operating Instructions
6.1 Pre-Flight Checks
- Ensure both the helicopter and remote control batteries are fully charged.
- Inspect rotor blades for any damage or cracks.
- Verify all connections are secure.
- Choose a safe, open flying area.
6.2 Binding the Remote Control
The helicopter and remote control are typically pre-bound from the factory. If re-binding is necessary:
- Turn on the remote control.
- Connect the helicopter battery and place the helicopter on a flat surface.
- The helicopter's indicator light will flash. Move the throttle stick (left stick) fully up, then fully down.
- The indicator light will become solid, indicating successful binding.
6.3 Automatic Take-off and Landing
- Automatic Take-off: After binding, press the "TAKE OFF" button on the remote control. The helicopter will automatically ascend to a stable hovering altitude.
- Automatic Landing: During flight, press the "LANDING" button. The helicopter will slowly descend and land automatically.
6.4 Flight Controls (Mode 2 - Default)
The remote control can be switched between Mode 1 and Mode 2. Mode 2 is typically the default.
- Left Stick (Throttle/Rudder):
- Up/Down: Controls altitude (throttle).
- Left/Right: Controls yaw (helicopter rotation).
- Right Stick (Aileron/Elevator):
- Up/Down: Controls pitch (forward/backward movement).
- Left/Right: Controls roll (sideways movement).
- Emergency Stop Button: Located on the remote control, immediately cuts power to the motors in an emergency.
- Dual Rate: Adjusts the sensitivity of the controls. Use lower rates for beginners and higher rates for more experienced pilots.
- Flight Levels: The servo plate channels can be adjusted to three levels (beginner, intermediate, professional) for varying control responsiveness. Refer to the detailed manual for specific adjustment procedures.
6.5 Flight Stabilization
The integrated stabilization system, including barometric and ground sensors, provides excellent flight stability, similar to coaxial helicopters. Automatic gyro calibration ensures consistent flight behavior. This makes the model suitable for beginners while still offering engaging flight for experienced users.
7. Maintenance
- Cleaning: Wipe the helicopter with a soft, dry cloth after each use. Avoid water or cleaning agents.
- Rotor Blades: Regularly inspect main and tail rotor blades for damage. Replace any cracked or bent blades immediately to ensure safe flight.
- Battery Care:
- Do not fully discharge the battery.
- Store the battery at approximately 50% charge if not used for extended periods.
- Avoid exposing the battery to extreme temperatures.
- Motor Inspection: Periodically check brushless motors for debris or signs of wear.
8. Troubleshooting
| Problem | Possible Cause | Solution |
|---|---|---|
| Helicopter does not respond to remote control. |
|
|
| Helicopter does not take off or lacks power. |
|
|
| Unstable flight or drifting. |
|
|
9. Specifications
| Feature | Detail |
|---|---|
| Fuselage Length | 335 mm |
| Fuselage Width | 55 mm |
| Fuselage Height | 115 mm |
| Rotor Diameter | 320 mm |
| Main Material | ABS Plastic |
| Ready-to-Fly Weight | 238 g |
| Main Drive Motor | Brushless 1807 |
| Fenestron Motor | Brushless 1103 |
| Remote Control | 6-Channel, 2.4 GHz, Mode 1+2 |
| Control Range | 60-80 m |
| Servos | 3 x Mini Digital |
| Battery | Li-Ion 2S 7.4V 1200mAh 20C Hard Case (100 x 34 x 19 mm, 61 g) |
| Flight Time | 12-14 min |
| Charging Time | 90-120 min (via USB cable) |
| Recommended Age | 16 years and up |
10. Warranty and Support
For warranty information and technical support, please refer to the documentation included with your product or visit the official Amewi website.
Official Amewi Website: amewi.com
Please retain your proof of purchase for any warranty claims.


