
1. Introduction
The SENSTREE Digital Temperature Humidity Controller (Model THT103-ZJ) is a versatile 3-in-1 device designed for precise environmental control. It integrates temperature, humidity, and timer functions into a single unit, making it ideal for various applications such as mushroom cultivation, reptile habitats, greenhouse management, and more. This manual provides detailed instructions for setup, operation, and maintenance to ensure optimal performance and longevity of your controller.
The controller features three independent outlets: Outlet 1 for temperature control (heating/cooling), Outlet 2 for humidity control (humidification/dehumidification), and Outlet 3 for timer functions. Its user-friendly interface allows for easy programming, and settings are retained even after a power outage.
2. Product Overview
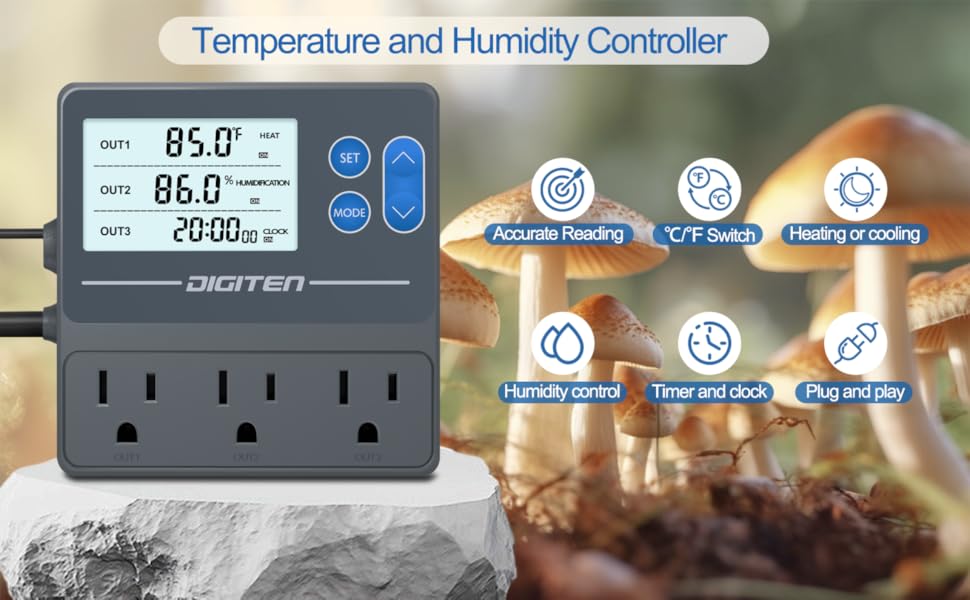
Image: The SENSTREE Digital Temperature Humidity Controller displaying its main features and three control modes.
The SENSTREE THT103-ZJ controller offers comprehensive environmental management:
- Outlet 1 (Temperature Control): Manages heating or cooling devices to maintain a set temperature range. Ideal for controlling space heaters, heating pads, fans, or coolers.
- Outlet 2 (Humidity Control): Manages humidifiers or dehumidifiers to maintain a desired humidity level. Suitable for grow tents, greenhouses, basements, or reptile enclosures.
- Outlet 3 (Timer Function): Controls devices based on a set schedule, perfect for lighting (e.g., UVA/UVB lights) or other timed equipment.
- Power Failure Memory: All programmed settings are saved automatically and restored upon power return.
- Easy Programming: Plug-and-play design with intuitive controls for quick setup and adjustment.
3. Setup

Image: Components of the SENSTREE controller package, including the main unit, sensor, and mounting accessories.
- Unpack: Carefully remove all components from the packaging. Verify that you have the controller unit, temperature/humidity sensor, and any included mounting accessories (suction cup, screws).
- Power Connection: Plug the controller's main power cord into a standard 120V AC power outlet.
- Sensor Connection: Connect the temperature/humidity sensor cable to the designated port on the controller. Ensure the connection is secure.
- Device Placement: Position the sensor probe in the environment you wish to monitor, ensuring it is not directly exposed to heating/cooling elements or water, which could affect readings. The controller unit can be hung using the integrated hanging design on the back.
- Connect Appliances: Plug your heating/cooling device into Outlet 1, your humidification/dehumidification device into Outlet 2, and your timed device into Outlet 3. Ensure devices do not exceed the rated current of 15A total.

Image: The back of the controller unit highlighting the hanging design for easy installation.
4. Operating Instructions
The controller features a clear LCD display and intuitive buttons for easy programming. The display shows current temperature (OUT1), current humidity (OUT2), and current time (OUT3).
4.1. General Button Functions
- SET Button: Used to enter setting mode for each outlet and confirm selections.
- MODE Button: Used to switch between different operating modes (e.g., Heat/Cool, Humidify/Dehumidify, Clock/Timer).
- UP/DOWN Buttons: Used to adjust numerical values during setting.
4.2. Switching Temperature Units (°C/°F)
To switch between Celsius (°C) and Fahrenheit (°F), press and hold the UP and DOWN buttons simultaneously for 3 seconds.
4.3. Setting Temperature (Outlet 1)
- Press the SET button to select OUT1.
- Long press the SET button for 3 seconds until the LCD screen displays "SET TO".
- Use the UP/DOWN buttons to adjust your target temperature.
- Press the MODE button to switch between HEATING (heat icon) or COOLING (snowflake icon) mode.
- Long press the SET button to save settings and exit.
4.4. Setting Humidity (Outlet 2)
- Press the SET button to select OUT2.
- Long press the SET button for 3 seconds until the LCD screen displays "SET TO".
- Use the UP/DOWN buttons to adjust your target humidity percentage.
- Press the MODE button to switch between HUMIDIFICATION (water drop icon) or DEHUMIDIFICATION (fan icon) mode.
- Long press the SET button to save settings and exit.
4.5. Setting Timer (Outlet 3)
- Press the SET button to select OUT3.
- Long press the SET button for 3 seconds until the hour display flashes.
- Use the UP/DOWN buttons to set the desired ON time (hour and minute).
- Press the MODE button to switch to OFF time setting.
- Use the UP/DOWN buttons to set the desired OFF time (hour and minute).
- Long press the SET button to save settings and exit.
5. Specifications
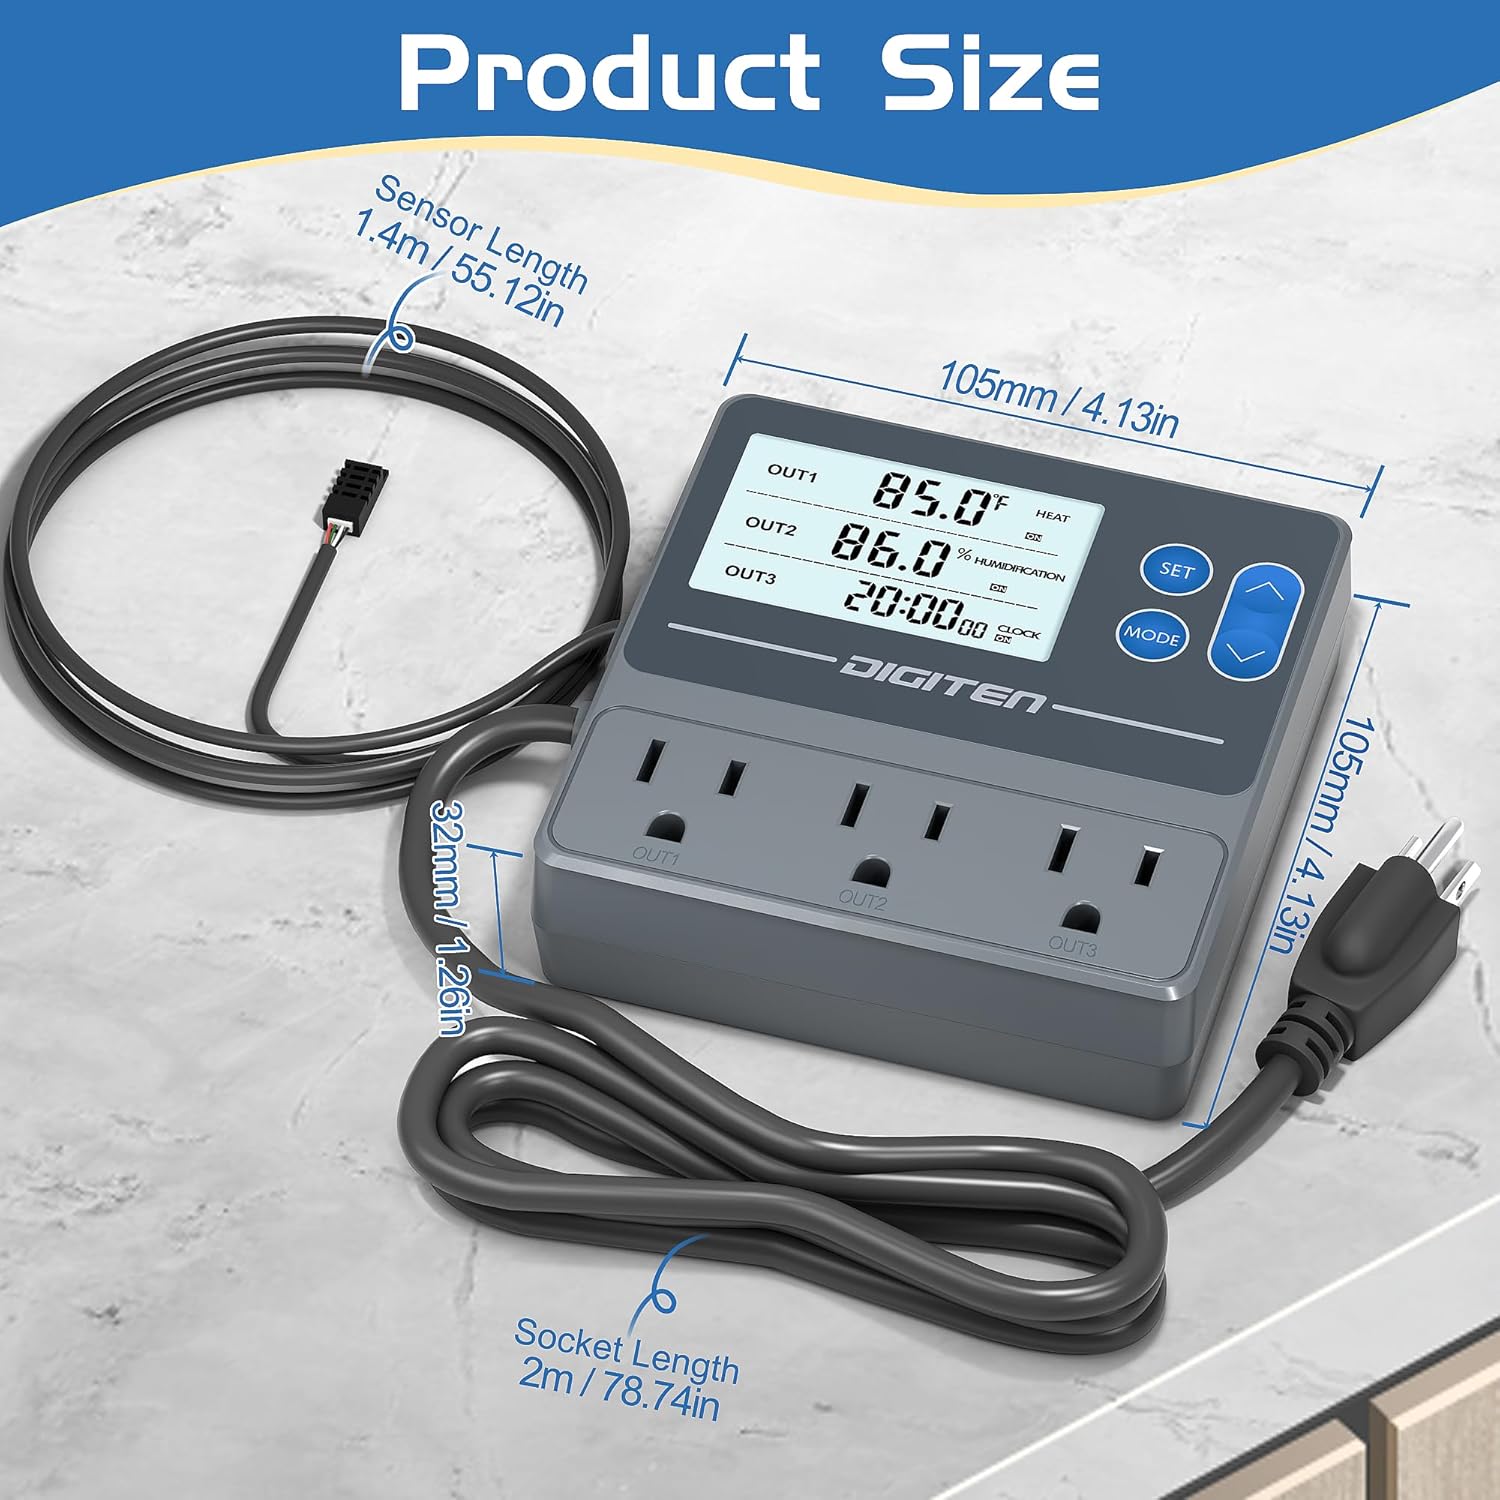
Image: Detailed dimensions of the controller unit and sensor probe.
| Feature | Detail |
|---|---|
| Model Number | THT103-ZJ |
| Power Supply | 100-240VAC |
| Rated Current | 15A max |
| Temperature Control Range | 14°F - 248°F (-10°C - 120°C) |
| Temperature Accuracy | ±0.7°F |
| Humidity Control Range | 5-99% RH |
| Humidity Accuracy | ±3% RH |
| Sensor Length | 1.4m / 55.12in |
| Socket Length | 2m / 78.74in |
| Package Dimensions | 6.57 x 6.26 x 2.05 inches |
| Item Weight | 14.1 ounces |
6. Troubleshooting
- Overload Error: If an overload error occurs (e.g., when connecting a high-wattage space heater), ensure the total current draw of all connected devices does not exceed 15A. Consider using lower wattage devices or distributing loads across multiple circuits if possible.
- Inaccurate Readings: Ensure the sensor probe is clean and free from debris. Verify it is placed in a location that accurately reflects the environment's temperature and humidity, away from direct heat/cold sources or strong airflow.
- Settings Not Saving: After adjusting any settings, always long press the SET button to confirm and save the changes before exiting the setting mode.
- Alarm Triggered: If an alarm sounds, check the current temperature and humidity against your set high/low alarm thresholds. Adjust settings or environmental conditions as needed.
7. Maintenance
- Cleaning: Regularly wipe the controller unit and sensor probe with a soft, dry cloth. Avoid using abrasive cleaners or solvents.
- Sensor Care: Keep the sensor probe free from dust, dirt, and moisture buildup to ensure accurate readings.
- Storage: When not in use, store the controller in a cool, dry place away from direct sunlight and extreme temperatures.
8. Warranty and Support
For warranty information, technical support, or service inquiries, please contact SENSTREE customer service directly. Refer to the product packaging or the official SENSTREE website for the most up-to-date contact details and warranty terms.