
1. Product Overview
The Pixio PS1D Wave Dual Monitor Arm Stand is designed to enhance your workspace by providing an ergonomic and organized setup for two monitors. It features a gas spring system for smooth adjustments, integrated cable management, and versatile mounting options.
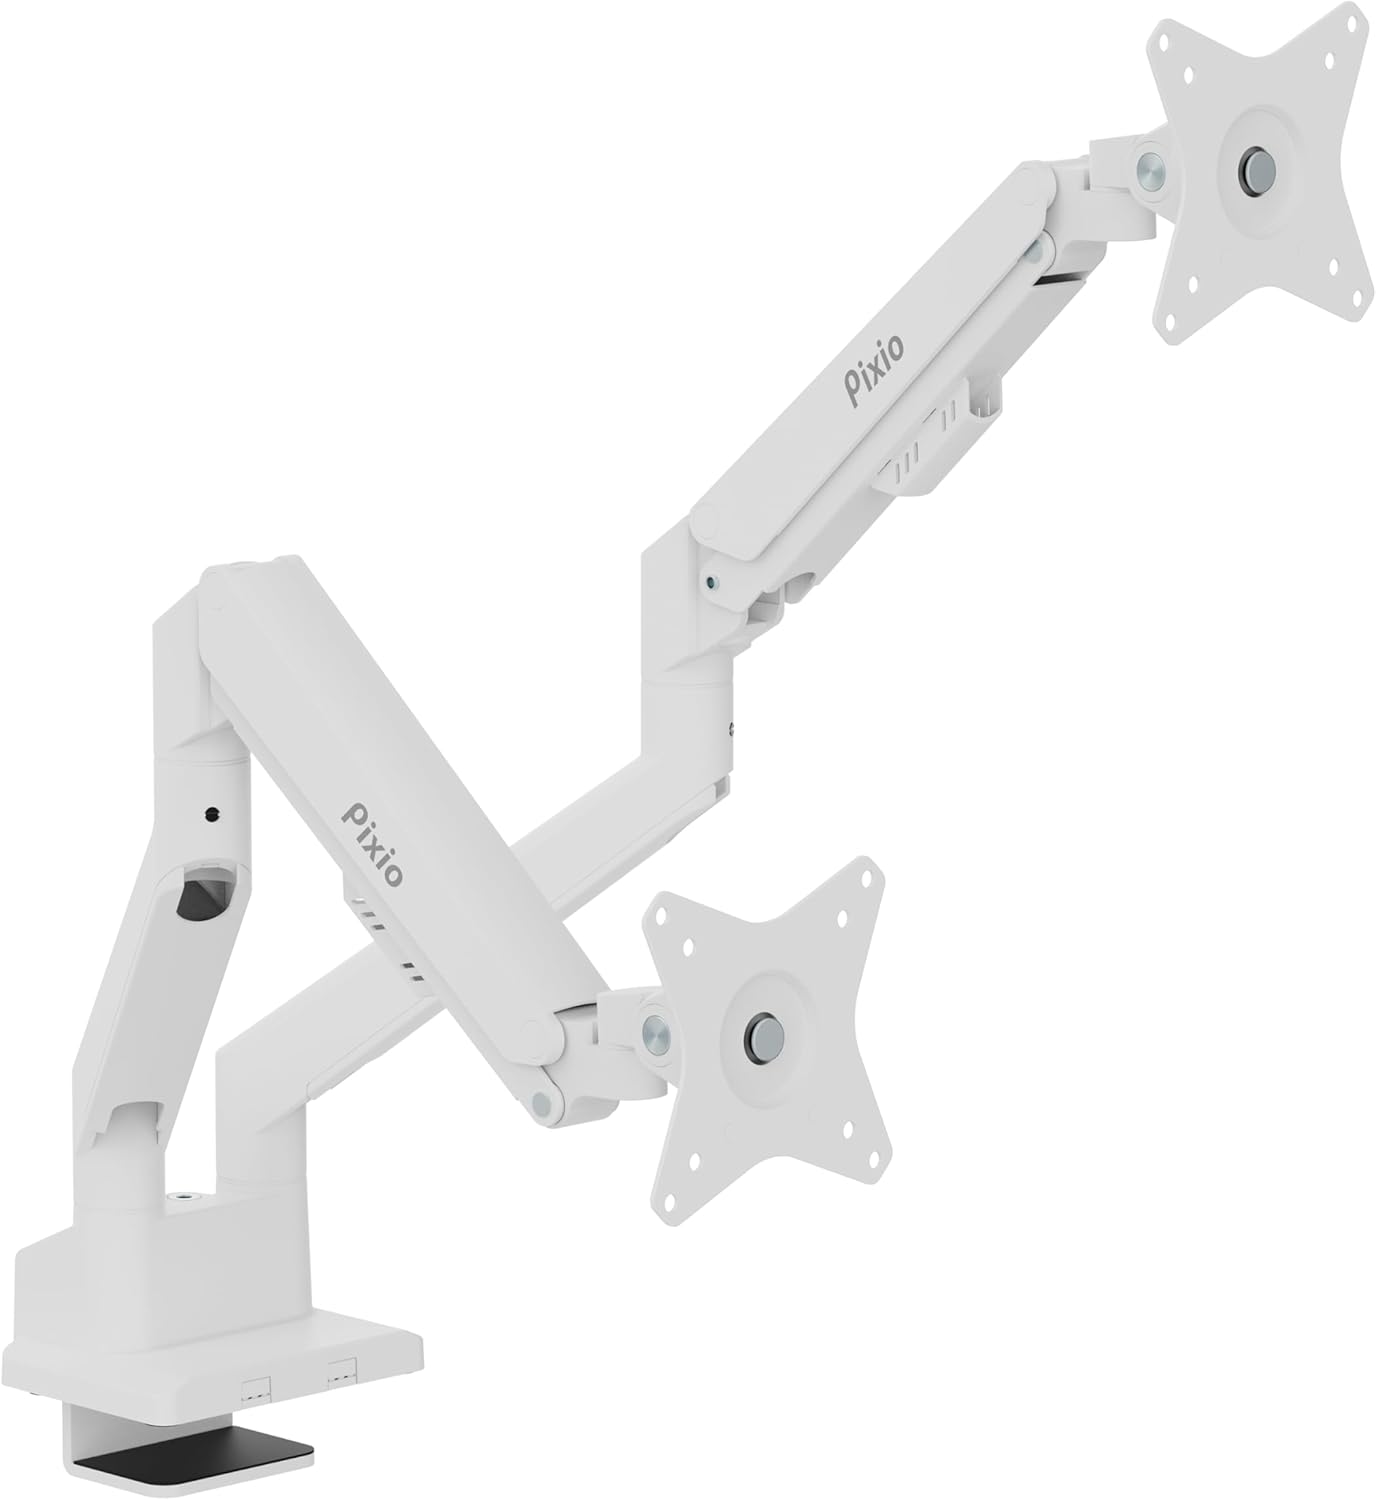
Image: The Pixio PS1D Wave Dual Monitor Arm Stand, showcasing its dual arms and desk clamp in a clean white finish.

Image: A visual representation of two monitors mounted on the PS1D Wave stand, demonstrating how it elevates and organizes the desk space.
Key Features:
- Supports two monitors up to 32 inches each.
- Load capacity of 2.2 to 19.8 lbs per arm.
- VESA compatibility: 75x75mm and 100x100mm.
- Smooth height, tilt, swivel, and pivot adjustments.
- Integrated cable management system.
2. Setup and Installation
2.1 Unpacking and Component Check
Carefully remove all components from the packaging. Verify that all parts are present according to the included parts list in your product box.
2.2 Mounting Options
The PS1D Wave offers two primary mounting methods: C-Clamp and Grommet Mount. Both methods allow for installation entirely from above the desk surface.

Image: Detailed view of the C-Clamp and Grommet mounting options, illustrating how the stand attaches to a desk. The C-Clamp supports desk thickness from 0.39" to 1.8", and the Grommet mount supports 0.39" to 1.6".
C-Clamp Installation:
- Attach the C-clamp base to the bottom of the main pole.
- Position the clamp on the edge of your desk.
- Tighten the screw until the stand is securely fastened to the desk. Ensure the desk thickness is between 0.39 inches and 1.8 inches.
Grommet Mount Installation:
- Insert the grommet bolt through the desk's grommet hole.
- Attach the grommet base to the main pole.
- Secure the stand from underneath the desk using the provided nut. Ensure the desk thickness is between 0.39 inches and 1.6 inches.
2.3 Attaching Monitors
The monitor arm supports VESA mounting patterns of 75x75mm and 100x100mm.

Image: Close-up of the detachable VESA plate, highlighting its compatibility with 75x75mm and 100x100mm VESA patterns, simplifying monitor attachment and removal.
- Attach the VESA plate to the back of your monitor using the appropriate screws.
- Slide the monitor with the attached VESA plate onto the arm's mounting head until it clicks into place.
- Repeat for the second monitor.

Image: Two monitors attached to the stand, illustrating the supported screen size of 17"-32" and load capacity of 2.2-19.8 lbs per arm.
3. Operating and Adjustments
The PS1D Wave monitor arm features a built-in spring tension mechanism for smooth and precise adjustments.

Image: A close-up view of the arm's tension adjustment point, showing an Allen key being used to modify the spring tension for different monitor weights.
3.1 Tension Adjustment
Adjust the tension of the gas spring to match the weight of your monitors. This ensures the monitors stay in place after adjustment.
- To increase tension (for heavier monitors), turn the adjustment screw clockwise.
- To reduce tension (for lighter monitors), turn the adjustment screw counter-clockwise.

Image: A diagram showing the tension adjustment points on the monitor arm, indicating which direction to turn for increasing or decreasing tension based on monitor weight.
3.2 Monitor Positioning
The arm allows for a wide range of motion to achieve your ideal viewing position:
- Height Adjustment: Move the arm up or down along the pole.
- Tilt: Adjust the monitor screen vertically (+45° to -45°).
- Swivel: Rotate the monitor horizontally (±90° at the VESA plate, ±180° at the arm joint).
- Rotation: Rotate the monitor from landscape to portrait orientation (±90°).

Image: A comprehensive diagram illustrating the various adjustment capabilities of the monitor arm, including tilt, swivel, and rotation angles.
3.3 Cable Management
Utilize the integrated cable management clips to keep your desk tidy and cables organized.

Image: A close-up view of the monitor arm's integrated cable clips, designed to neatly route and conceal monitor cables.
Simply open the clips on the underside of the arms, route your monitor and power cables through them, and close the clips to secure the cables. This helps prevent clutter and protects cables from damage.
Video: An official Pixio video demonstrating the features and adjustability of the PS1D Wave Dual Monitor Arm, including setup, VESA compatibility, spring mechanism, cable management, and various positioning options.
4. Maintenance
To ensure the longevity and optimal performance of your Pixio PS1D Wave Dual Monitor Arm Stand, follow these simple maintenance guidelines:
- Cleaning: Use a soft, dry cloth to wipe down the surface of the monitor arm. For stubborn marks, a slightly damp cloth with mild soap can be used, followed by drying thoroughly. Avoid abrasive cleaners or solvents.
- Periodic Checks: Periodically check all screws and connections to ensure they remain tight and secure. Re-tighten if necessary.
- Gas Spring Adjustment: If your monitors feel too loose or too stiff, re-adjust the gas spring tension as described in Section 3.1.
5. Troubleshooting
If you encounter any issues with your Pixio PS1D Wave Dual Monitor Arm Stand, refer to the following common troubleshooting tips:
5.1 Monitor Does Not Stay in Position (Sags/Rises)
This is typically due to incorrect gas spring tension for the weight of your monitor.
- Solution: Adjust the gas spring tension. If the monitor sags, increase tension (turn clockwise). If it rises too easily, decrease tension (turn counter-clockwise). Refer to Section 3.1 for detailed instructions.
5.2 Stand Feels Unstable
An unstable stand can be caused by loose mounting or an unsuitable desk surface.
- Solution: Ensure the C-Clamp or Grommet mount is securely tightened to the desk. Verify that your desk surface is sturdy enough to support the weight of the stand and monitors.
5.3 Difficulty Attaching VESA Plate
Ensure you are using the correct VESA screw size and that the monitor's VESA holes are not obstructed.
- Solution: Double-check your monitor's VESA pattern (75x75mm or 100x100mm) and use the corresponding screws. Ensure no cables or obstructions are preventing the plate from sitting flush.
If you continue to experience issues, please contact Pixio customer support.
6. Specifications
| Specification | Detail |
|---|---|
| Brand | Pixio |
| Model Number | PSW1DWH |
| Item Weight | 11.11 pounds |
| Product Dimensions | 38.2 x 4.5 x 22.2 inches |
| Color | White |
| Material | Metal |
| Mounting Type | Tabletop Mount (C-Clamp, Grommet) |
| Movement Type | Articulating |
| Maximum Compatible Screen Size | 32 Inches |
| Minimum Compatible Screen Size | 17 Inches |
| Load Capacity (per arm) | Up to 19.8 lbs |
| VESA Compatibility | 75x75mm, 100x100mm |
| Maximum Tilt Angle | 45 Degrees |
| UPC | 810166730075 |
7. Warranty and Support
7.1 Product Warranty
For detailed information regarding the product warranty, please refer to the warranty card included with your purchase or visit the official Pixio website. Warranty terms and conditions may vary by region and retailer.
7.2 Customer Support
If you require further assistance, have questions about installation, operation, or troubleshooting that are not covered in this manual, please contact Pixio customer support:
- Website: Visit the official Pixio website for support resources, FAQs, and contact information.
- Email: Refer to your product packaging or the Pixio website for customer service email addresses.
- Phone: Check the Pixio website for available phone support numbers.
Please have your product model number (PSW1DWH) and purchase information ready when contacting support.