
1. Introduction
This SUNAPEX 10A MPPT Solar Charge Controller is designed for use with 12V solar panels that do not have an integrated controller. It is specifically engineered to efficiently charge 12V batteries, including lead-acid, wet cell, gel cell, enhanced flooded, maintenance-free, calcium, AGM, and lithium LiFePO₄ types. This controller is not compatible with solar panels that have built-in controllers and must not be used with 24V or 36V battery packs.
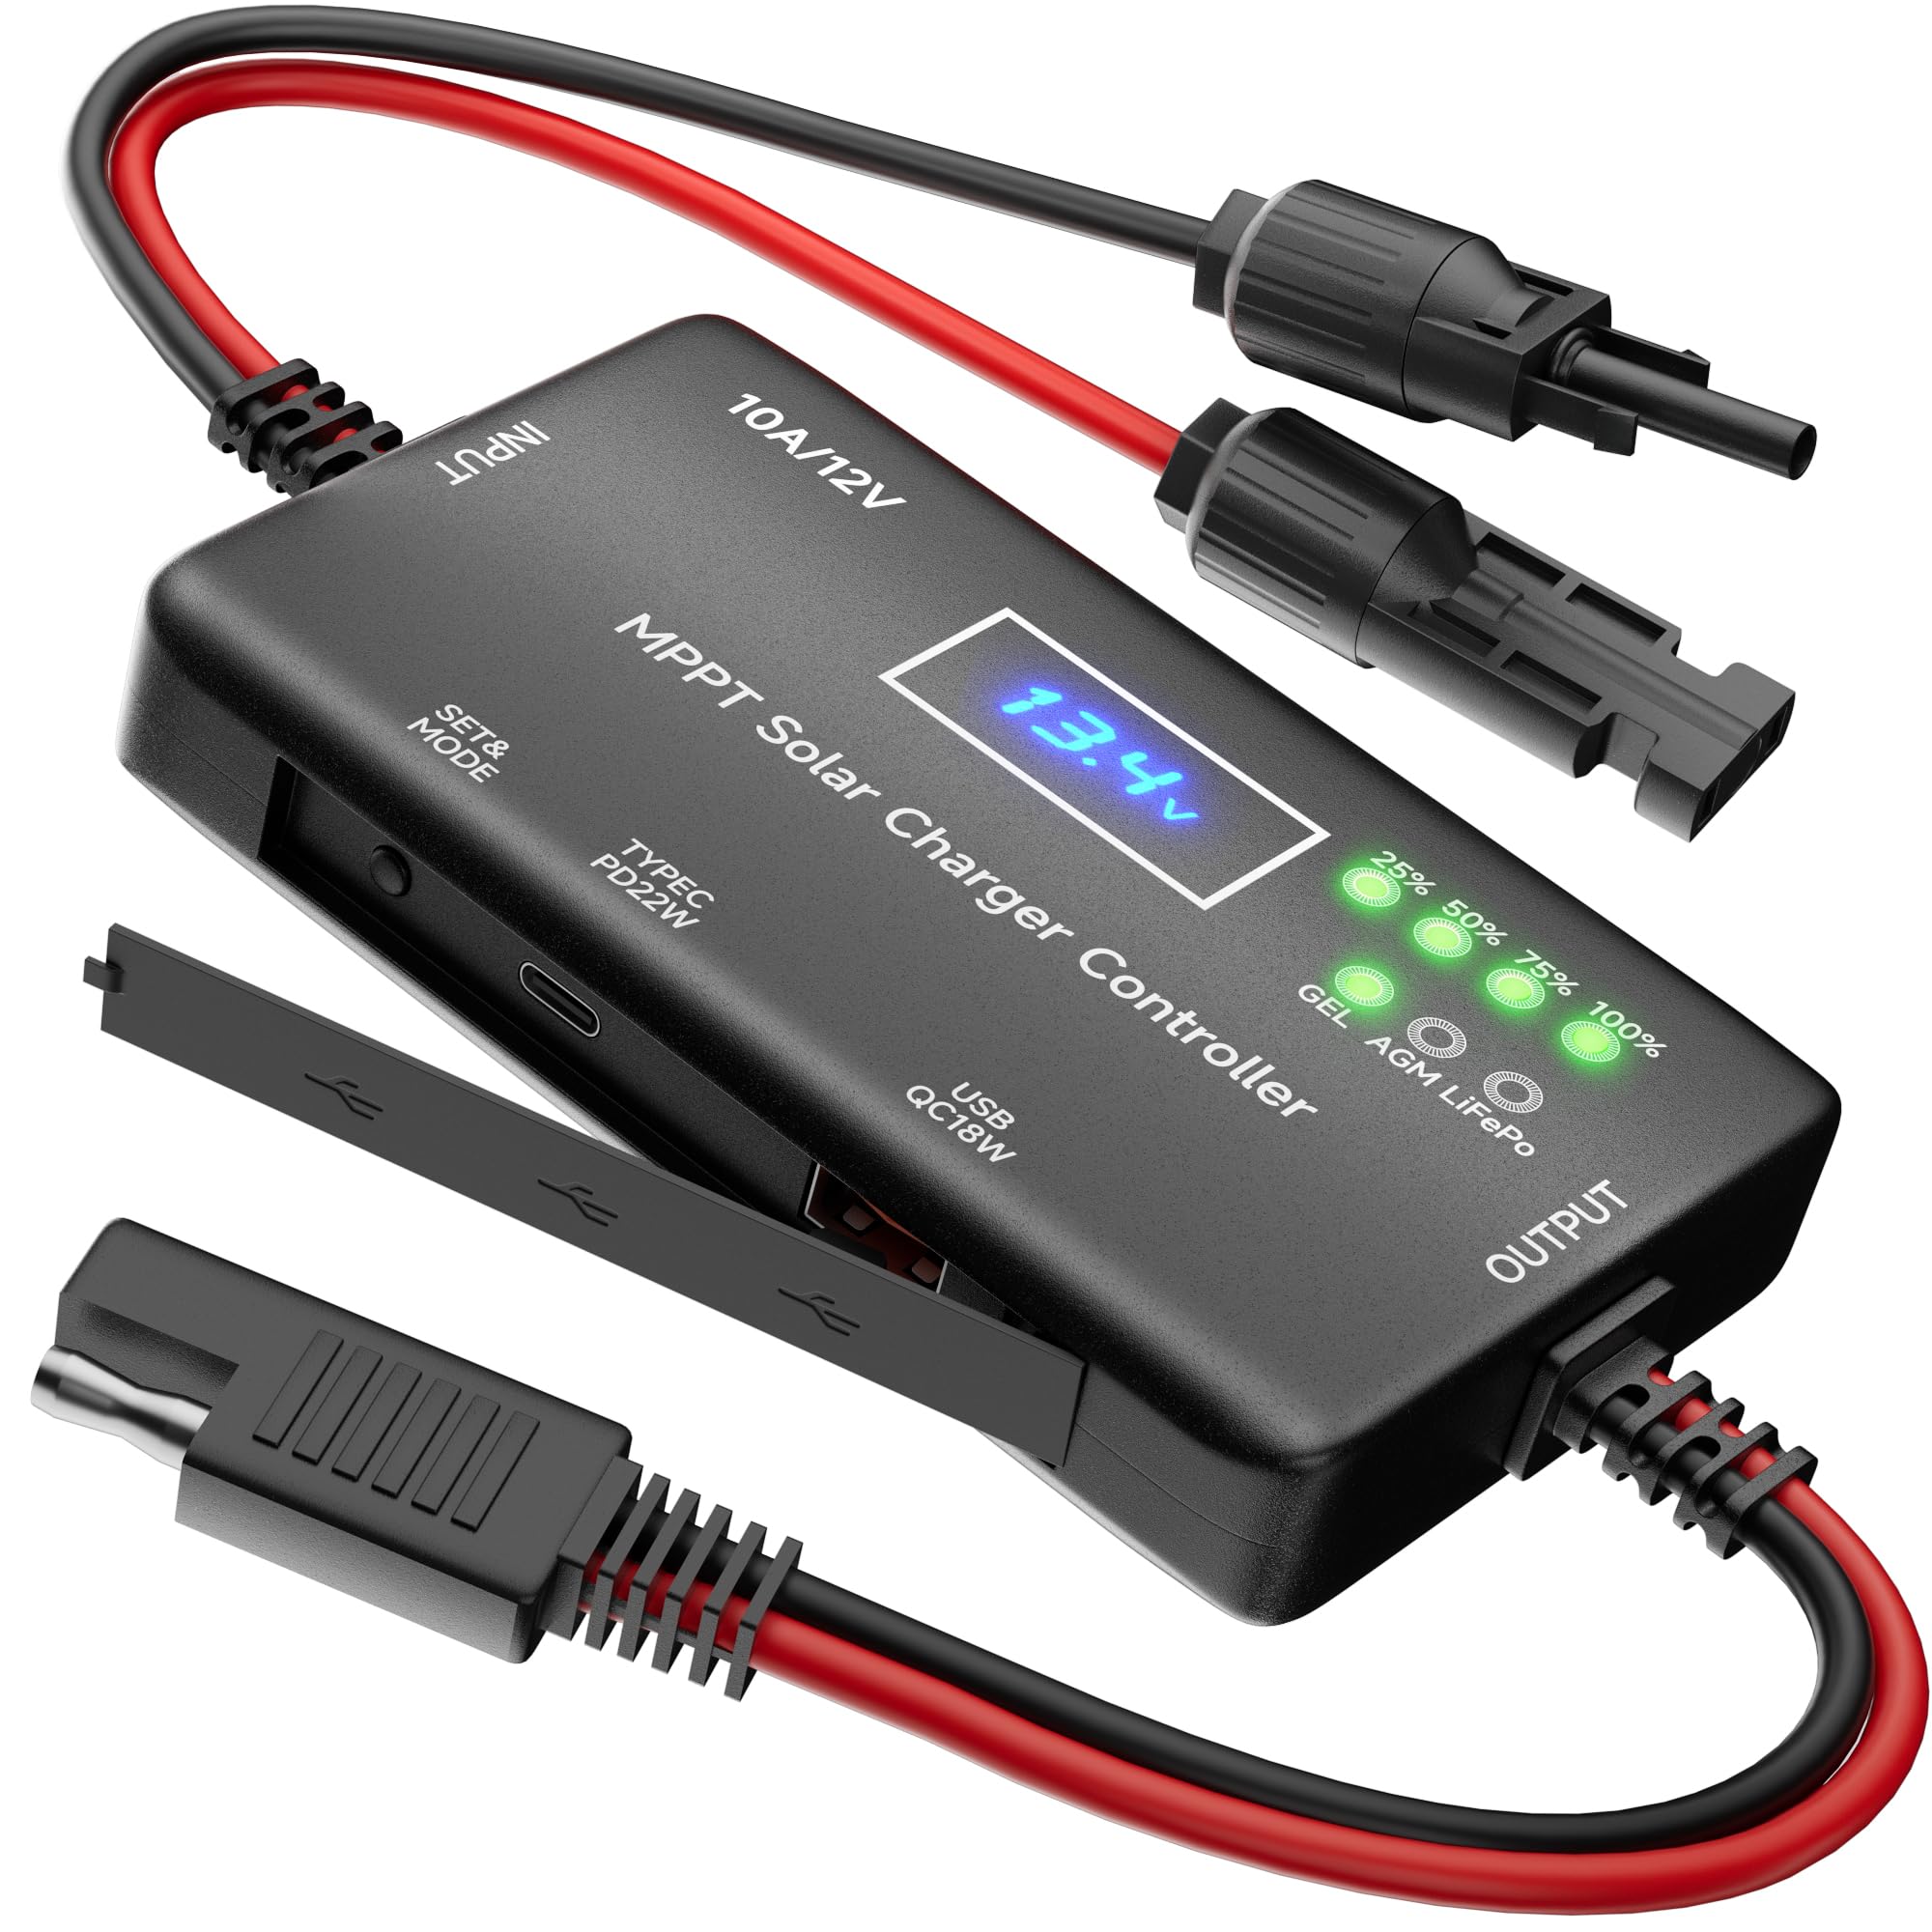
Image: The SUNAPEX 10A MPPT Solar Charge Controller, a compact black device with a digital display and LED indicators.
2. Safety Information
The controller incorporates comprehensive safety measures to ensure safe and efficient battery charging. These safeguards include:
- Overcharge Protection
- Overvoltage Protection
- Reverse Current Protection
- Reverse Polarity Protection
- Short Circuit Protection
- Over-temperature Protection
Important Safety Note:
- Always connect the solar controller to the battery first, then connect the solar panel.
- Ensure positive and negative poles match during connection.
- Do not use with 24V or 36V battery packs.

Image: Visual representation of the 6-point safety system, highlighting overcharge, over-temperature, over-voltage, reverse current, reverse polarity, and short circuit protection.
3. Product Features
- Zero Battery Drain: Unlike some MPPT controllers, this unit consumes zero battery power when the sun is not shining, thanks to built-in diodes that prevent reverse current flow.
- High Efficiency: The MPPT technology ensures maximum power point tracking for efficient energy conversion from your solar panel.
- Real-Time Monitoring: An integrated LCD screen and LED indicators provide immediate feedback on solar panel and battery status.
- Multiple Device Charging: Equipped with Type-C (PD22W) and USB (QC18W) output ports, allowing direct charging of electronic devices from either the solar panel or the battery.

Image: Diagram illustrating the 'Zero Battery Drain' feature, showing the controller connected to a battery with no power consumption when inactive.
4. Setup Instructions
Follow these steps for proper connection of your solar charge controller:
- Position the Solar Panel: Place your solar panel in direct sunlight for optimal performance.
- Connect to Battery First: Connect the controller's output cables to your 12V battery. Ensure correct polarity (red to positive, black to negative).
- Connect Solar Panel: Connect the solar panel's output to the controller's input. The controller features female and male connectors for a quick and secure 'Plug & Play' connection.
- Select Battery Type: Once all connections are made, select the appropriate battery type on the controller (refer to Section 5 for details).

Image: A four-step visual guide demonstrating how to connect the solar panel, controller, and battery.
5. Operating Instructions
5.1 Battery Type Selection
After connecting the solar panel, controller, and battery, select the correct battery mode:
- Press and hold the SET & MODE button for approximately 3 seconds. The GEL light will start flashing.
- Press the SET & MODE button once to switch to AGM.
- Press the SET & MODE button again to switch to LiFePO₄.
Tip:
After selecting your desired battery type, release the button. The selection is successful when the corresponding LED remains solid.

Image: A three-panel image showing the process of pressing the SET & MODE button to cycle through GEL, AGM, and LiFePO₄ battery type selections.
5.2 Real-Time Monitoring
The LCD screen displays the battery voltage by default. To view the charging current, press the SET & MODE switch once. The current will be shown for 5 seconds, after which the display will revert to showing the battery voltage. LED indicators show the battery's charge level (25%, 50%, 75%, 100%).

Image: Close-up of the controller's LCD screen displaying voltage and LED indicators showing battery charge levels.
5.3 Multiple Device Charging
The controller includes a Type-C (PD22W) and a USB (QC18W) output port. These ports can be used to power or charge electronic devices directly, utilizing power from either the connected solar panel or the battery.

Image: Close-up view of the Type-C and USB output ports on the side of the controller, with icons of devices they can charge.
6. Battery Compatibility
This controller is compatible with a wide range of 12V battery types, making it versatile for various applications. Supported battery types include:
- Gel Cell Batteries
- Wet Cell Batteries
- Enhanced Flooded Batteries
- Maintenance-Free Batteries
- Calcium Batteries
- AGM Batteries
- Lithium LiFePO₄ Batteries
Note: Always select the correct battery mode on the controller before charging to prevent damage to your battery.

Image: A graphic illustrating the three main battery modes (GEL, AGM, LiFePO₄) and the specific battery types supported under each mode.
7. Specifications
| Specification | Value |
|---|---|
| Brand | SUNAPEX |
| Model | 10A MPPT |
| Voltage | 12 Volts |
| Product Dimensions (L x W x H) | 4.1" x 2" x 0.8" |
| Material | Plastic |
| Included Components | MPPT Charge Controller |
| Display Type | LED |
| Item Weight | 0.17 Kilograms |
8. Maintenance
The SUNAPEX 10A MPPT Solar Charge Controller is designed for minimal maintenance. To ensure optimal performance and longevity:
- Keep the controller clean and free from dust and debris.
- Ensure all connections are secure and free from corrosion.
- Avoid exposing the controller to extreme temperatures or direct moisture for extended periods. The controller is designed to operate within a temperature range of -35°C (-31°F) to +80°C (+176°F).

Image: Graphic illustrating the internal protection temperature range of the controller, from -35°C to +80°C.
9. Troubleshooting
If you encounter issues with your SUNAPEX 10A MPPT Solar Charge Controller, consider the following basic troubleshooting steps:
- No Display/Power: Check all cable connections to ensure they are secure. Verify that the battery has sufficient charge to power the controller.
- No Charging: Ensure the solar panel is receiving adequate sunlight. Check all connections between the solar panel, controller, and battery. Confirm the correct battery type is selected on the controller.
- Incorrect Readings: Double-check all connections for proper polarity. Ensure the battery type setting matches your battery.
- Overheating: Ensure the controller is in a well-ventilated area and not covered.
For persistent issues, please refer to the Warranty & Support section for contact information.
10. Warranty & Support
SUNAPEX offers a one-year warranty for this product and provides lifetime technical support. For any questions regarding the product, technical assistance, or after-sales service, please contact us. Our customer support is available 24/7.
Contact information can typically be found on the product packaging or the official SUNAPEX website.