
RYOBI PCL201K1
RYOBI ONE+ 18V Cordless 3/8 in. Drill/Driver Kit
Model: PCL201K1
Product Overview
The RYOBI ONE+ 18V Cordless 3/8 in. Drill/Driver Kit (PCL201K1) is a versatile power tool designed for drilling and driving applications. This kit includes the drill/driver, a 1.5 Ah Lithium-Ion battery, and a charger, providing a complete solution for various tasks around the home or workshop.
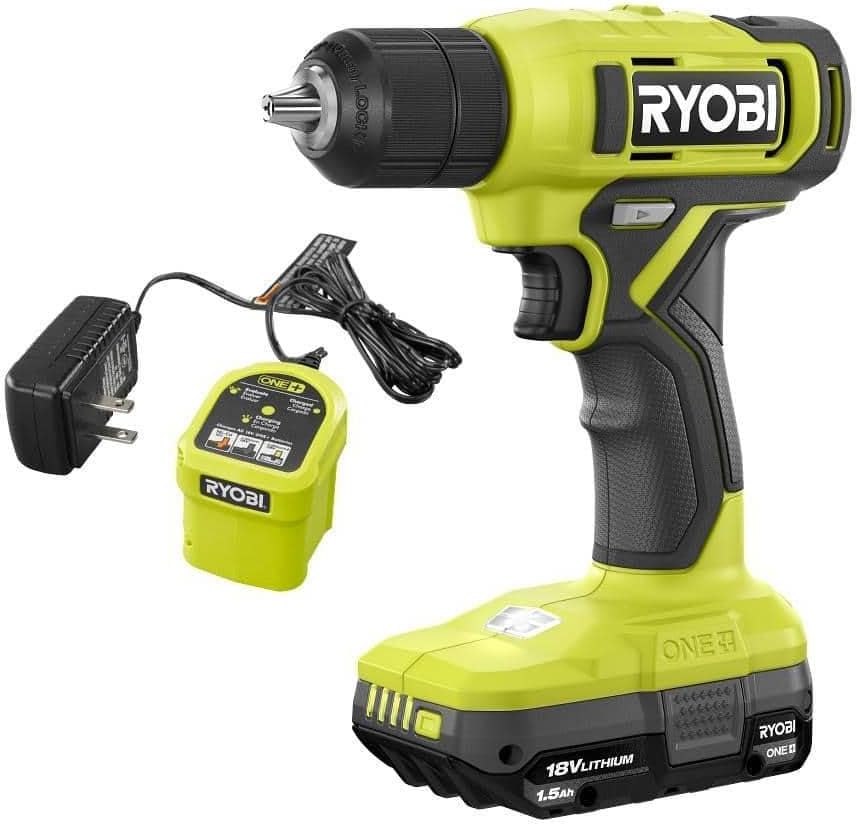
Image: The RYOBI ONE+ 18V Cordless 3/8 inch Drill/Driver, shown with its accompanying 1.5 Ah Lithium-Ion battery and charger. The drill features a bright green and black design, with the chuck visible at the front and the battery attached at the base of the handle. The charger and power adapter are positioned to the left of the drill.
Safety Information
Always read and understand all safety warnings and instructions before operating this tool. Failure to follow the warnings and instructions may result in electric shock, fire, and/or serious injury.
- Wear eye protection.
- Do not operate power tools in explosive atmospheres.
- Keep children and bystanders away while operating a power tool.
- Use the correct tool for your application.
- Store idle tools out of reach of children.
Setup
Charging the Battery
The 1.5 Ah Lithium-Ion battery (included) must be fully charged before first use. Use only the RYOBI charger provided with this kit.
- Connect the charger to a standard 120V AC outlet.
- Slide the battery pack onto the charger until it clicks into place.
- The charging indicator light on the charger will illuminate, indicating charging status. Refer to the charger's manual for specific light patterns.
- Once fully charged, remove the battery from the charger.
Installing/Removing the Battery Pack
- To Install: Align the ribs on the battery pack with the grooves in the drill's battery port. Slide the battery pack into the drill until it latches securely.
- To Remove: Press the latch button on the battery pack and pull the battery pack out of the drill.
Installing Drill Bits/Accessories
- Ensure the drill is off and the battery pack is removed.
- Grasp the rear portion of the chuck with one hand and rotate the front portion counter-clockwise until the chuck jaws are open wider than the bit you intend to use.
- Insert the drill bit or accessory into the chuck. Ensure it is centered.
- Rotate the front portion of the chuck clockwise to tighten the jaws securely around the bit. Hand-tighten firmly.
Operating Instructions
Variable Speed Trigger
The drill/driver features a variable speed trigger. Pressing the trigger further increases the speed. Release the trigger to stop the tool.
Forward/Reverse Selector
The forward/reverse selector is located above the trigger. Push it to the left for forward rotation (drilling/driving screws in) and to the right for reverse rotation (removing screws). Center position locks the trigger for safety.
Torque Adjustment Collar
The torque adjustment collar allows you to select the desired torque setting for driving screws. Higher numbers indicate higher torque. The drill setting is for drilling applications.
Drilling
- Select the appropriate drill bit for the material.
- Set the torque collar to the drill symbol.
- Hold the drill firmly and position the bit on the workpiece.
- Start drilling at a low speed and gradually increase as the bit engages the material.
- Maintain steady pressure and keep the drill straight.
Driving Screws
- Select the appropriate driver bit.
- Set the torque collar to a suitable setting for the screw size and material. Start with a lower setting and increase if needed to prevent stripping.
- Position the driver bit firmly into the screw head.
- Apply steady, even pressure and slowly press the trigger to start driving the screw.
Maintenance
General Maintenance
- Keep the tool clean and free of dust and debris. Use a soft, damp cloth for cleaning. Do not use solvents.
- Regularly inspect the ventilation openings for blockages.
- Check the chuck for wear and ensure it grips bits securely.
Battery Care
- Store batteries in a cool, dry place away from direct sunlight and extreme temperatures.
- Do not store batteries in a discharged state for extended periods. Charge them periodically if not in use.
- Do not expose batteries to water or excessive heat.
Troubleshooting
| Problem | Possible Cause | Solution |
|---|---|---|
| Drill does not start. | Battery not installed correctly or discharged. | Ensure battery is fully seated. Charge battery. |
| Loss of power during operation. | Battery is low or tool is overloaded. | Recharge battery. Reduce pressure or use a larger drill bit/different torque setting. |
| Chuck not holding bit securely. | Chuck jaws are worn or not tightened properly. | Ensure bit is inserted correctly and chuck is hand-tightened firmly. If problem persists, chuck may need replacement. |
Specifications
- Model: PCL201K1
- Brand: RYOBI
- Power Source: Battery Powered
- Voltage: 18 Volts
- Amperage: 1.5 Amps
- Drill Type: Combination Drill
- Chuck Size: 3/8 inch
- Battery Type: Lithium Ion (1.5 Ah)
- Included Components: 1.5 Ah Battery, Charger, Drill Attachment
- Item Weight: 3.52 pounds
- Package Dimensions: 12.21 x 8.12 x 5.2 inches
Warranty and Support
This RYOBI ONE+ 18V Cordless 3/8 in. Drill/Driver Kit (PCL201K1) comes with a 90 days limited warranty. Please retain your proof of purchase for warranty claims.
For technical support, replacement parts, or warranty service, please contact RYOBI customer service. Refer to the official RYOBI website or product packaging for the most current contact information.
Note: As this product is listed as "Renewed," warranty terms may differ from new products. Please verify specific warranty details with the seller or manufacturer.
Related documentsPCL201K1


Ask a question about this manual
Ask about setup, troubleshooting, compatibility, parts, safety, or missing instructions. Manuals+ will review the question and use this page’s manual context to help answer it.