
1. Introduction
This manual provides detailed instructions for the installation, operation, maintenance, and troubleshooting of your maXpeedingrods 24-Level Adjustable Damper Coilovers Suspension Kit. Designed specifically for the Ford Mustang models from 2005 to 2014, these coilovers offer enhanced handling and ride customization. Please read this manual thoroughly before installation and use to ensure proper function and safety.
2. Safety Information
WARNING: Professional installation is highly recommended. Improper installation can lead to serious injury or vehicle damage.
- Always use appropriate safety gear, including eye protection and gloves, during installation.
- Ensure the vehicle is securely supported on jack stands or a lift before beginning any work. Never rely solely on a jack.
- Disconnect the battery before working on any electrical components.
- Do not modify the coilovers or any related suspension components.
- Ensure all bolts and nuts are torqued to manufacturer specifications. Refer to your vehicle's service manual for specific torque values.
- After installation, perform a wheel alignment to ensure proper vehicle handling and tire wear.
3. Package Contents
Verify that all components are present and undamaged before proceeding with installation.
- 2 x Front Coilover Assemblies
- 2 x Rear Coilover Assemblies
- 2 x Spanner Wrenches for Height Adjustment
- 1 x Hex Key for Damper Adjustment
- Instruction Manual
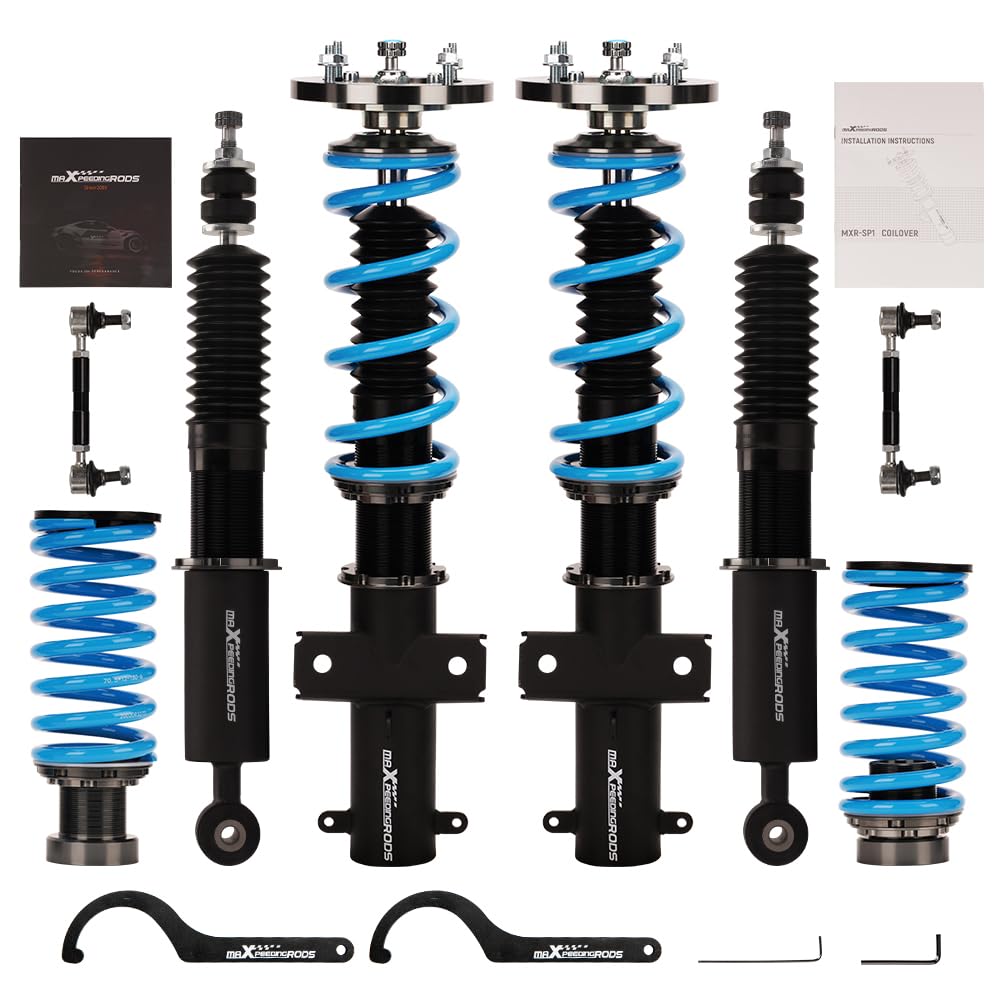
Figure 3.1: Overview of the complete maXpeedingrods Coilover Kit, including front and rear assemblies, adjustment tools, and manual.
4. Setup & Installation
4.1 Pre-Installation Checks
- Ensure the vehicle is on a flat, stable surface.
- Gather all necessary tools (sockets, wrenches, torque wrench, spring compressor if needed, etc.).
- Review your vehicle's specific service manual for suspension removal and installation procedures.
4.2 Installation Steps (General Guide)
- Loosen lug nuts on the wheels.
- Raise the vehicle and secure it with jack stands. Remove the wheels.
- Locate and remove the OEM suspension components (struts/shocks and springs). This typically involves disconnecting brake lines, ABS sensors, sway bar links, and upper/lower mounting bolts.
- Install the new maXpeedingrods coilover assemblies. Ensure proper orientation of the top hats and lower mounts.
- Secure all mounting bolts and nuts. Torque to vehicle manufacturer specifications.
- Reconnect any disconnected lines or sensors.
- Repeat for all four corners of the vehicle.
- Reinstall wheels and lower the vehicle.
- Perform a test drive at low speeds to check for any abnormal noises or handling.
- Immediately after installation, have a professional wheel alignment performed.
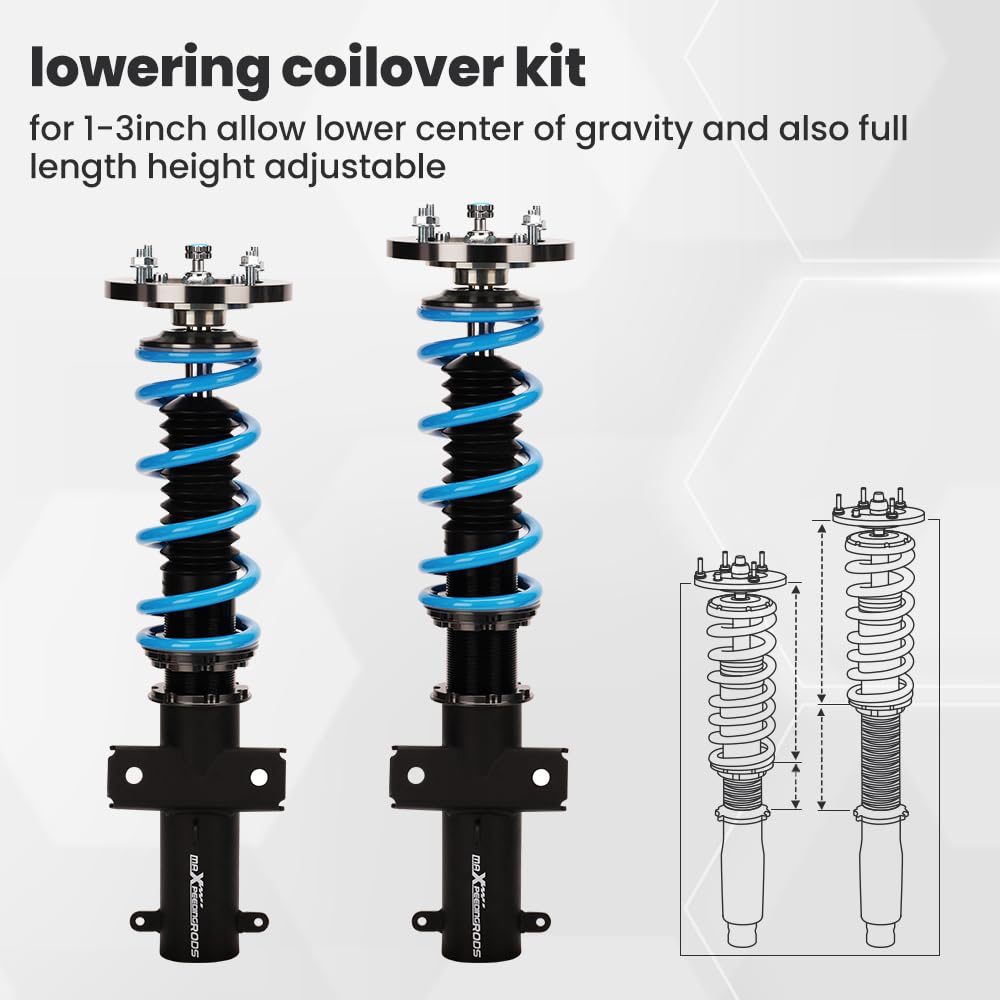
Figure 4.1: The coilover kit allows for 1-3 inches of height adjustment, enabling a lower center of gravity and full-length height customization.

Figure 4.2: Camber plate top mounts are designed to eliminate the need for a separate camber kit, simplifying alignment adjustments.
Video 4.1: Official maXpeedingrods video demonstrating the T6 Upgrade Coilovers, including installation highlights and performance in various driving conditions.
5. Operating & Adjustment
5.1 Damper Adjustment (24 Levels)
The coilovers feature 24 levels of adjustable damping force, allowing you to fine-tune your ride comfort and performance. The adjustment knob is located at the top of the coilover shaft. To adjust, remove the cap and use the provided hex key or turn by hand.
- Level 0-8: Suggested for street use, providing a more comfortable ride.
- Level 9-16: Suggested for mountain roads or spirited driving, offering a balance of comfort and control.
- Level 17-24: Suggested for race tracks, providing maximum stiffness and performance.

Figure 5.1: The adjuster knob clearly indicates the rotation direction for softening or hardening the damper settings. Adjustment can be done with a spanner or by hand after removing the cap.
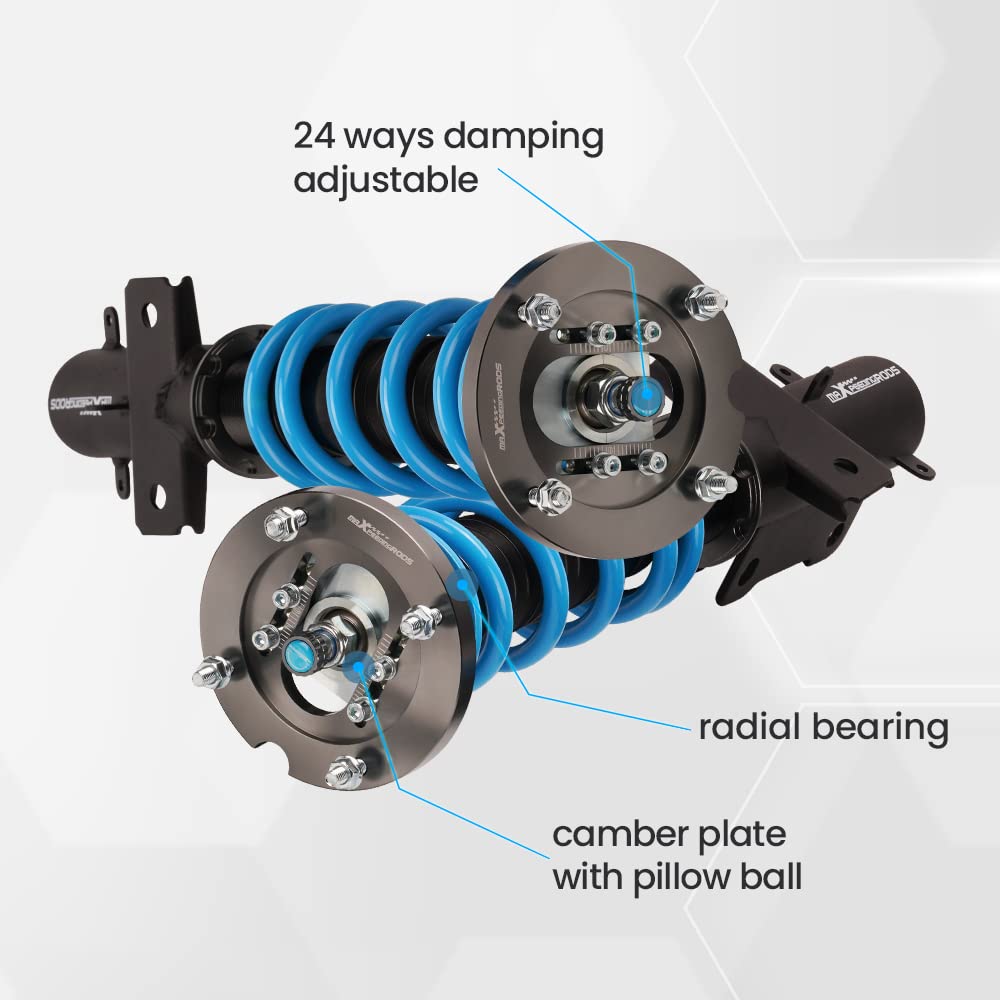
Figure 5.2: Internal view highlighting the 24-way damping adjustable mechanism, radial bearing, and camber plate with pillow ball for precise control.
5.2 Height Adjustment
The coilovers allow for adjustable ride height, typically ranging from 1 to 3 inches of lowering. To adjust the height, use the provided spanner wrenches to loosen the locking rings and turn the lower mount or spring perch to achieve the desired height. Ensure both sides of the vehicle are adjusted equally to maintain balance.
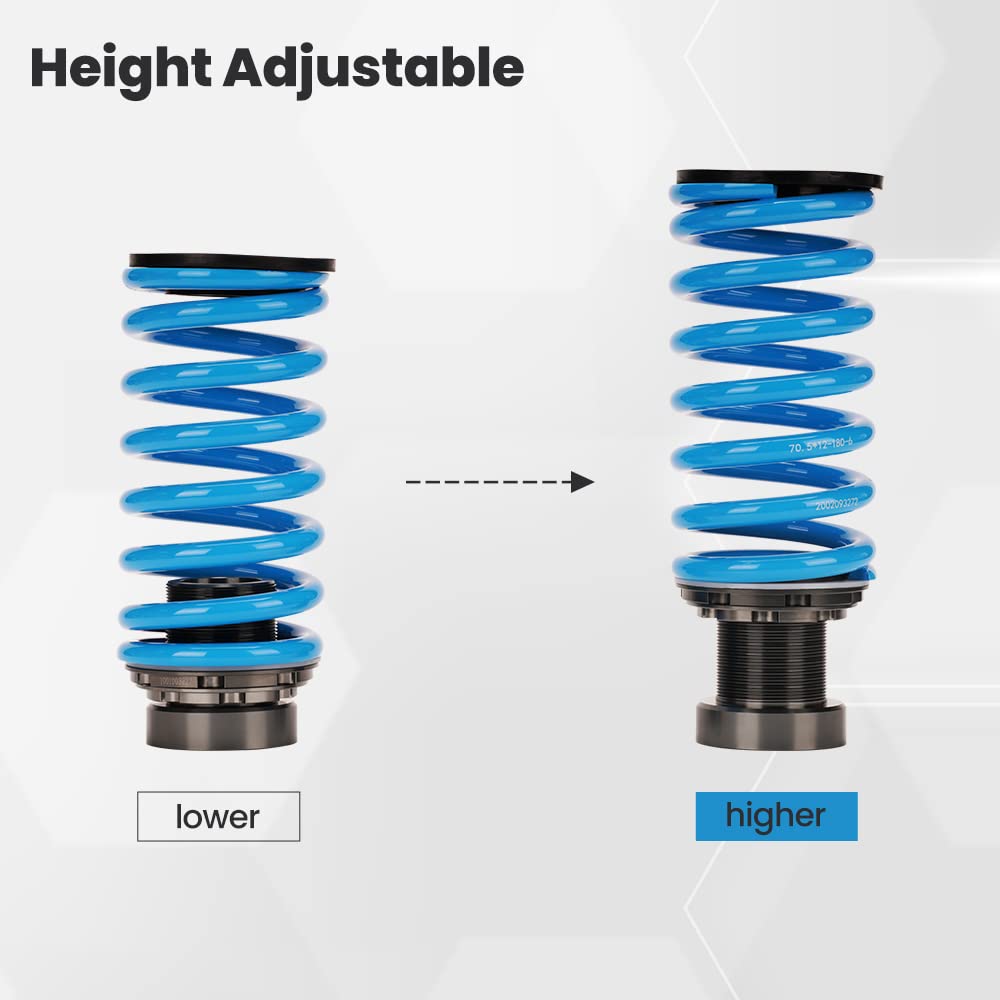
Figure 5.3: Visual representation of how the coilover height can be adjusted to achieve a lower or higher stance.
6. Maintenance
- Regularly inspect coilovers for any signs of damage, leaks, or corrosion.
- Keep the coilover threads clean and free of debris. Applying a thin layer of anti-seize grease to the threads can prevent seizing.
- Check all mounting bolts and nuts periodically to ensure they remain properly torqued.
- Clean the coilovers with mild soap and water, avoiding harsh chemicals that could damage finishes or seals.
- If driving in harsh conditions (e.g., salted roads, off-road), inspect and clean more frequently.
7. Troubleshooting
| Problem | Possible Cause | Solution |
|---|---|---|
| Abnormal noises (clunking, squeaking) | Loose mounting bolts, worn bushings, improper installation. | Check and re-torque all bolts. Inspect bushings for wear. Re-evaluate installation steps. |
| Uneven ride height | Incorrect height adjustment, spring pre-load imbalance. | Re-measure and adjust coilover height on both sides. Ensure spring pre-load is consistent. |
| Poor handling or excessive bounce | Incorrect damper settings, improper alignment, damaged damper. | Adjust damper settings. Get a professional wheel alignment. Inspect coilovers for damage. |
| Rubber boots too small (as per customer review) | Manufacturing tolerance or specific vehicle fitment. | Carefully shave or trim the rubber boots to fit, if necessary, ensuring no damage to the boot integrity. |
8. Specifications
| Feature | Detail |
|---|---|
| Application | Ford Mustang 2005-2014 |
| Damper Adjustment | 24 Levels (Rebound Force) |
| Front Spring Rate | 8 kg/mm (448 lbs/in) |
| Rear Spring Rate | 6 kg/mm (336 lbs/in) |
| Spring Pre-load Setting | 7-10 mm |
| Height Adjustment Range | 1-3 inches lowering |
| Material (Perches/Locking Rings) | 6061-T6 Billet Aluminum |
| Item Weight | 64.3 pounds |
| Product Dimensions | 27.99 x 20.16 x 8.31 inches |
| Manufacturer Part Number | RW85ZB |
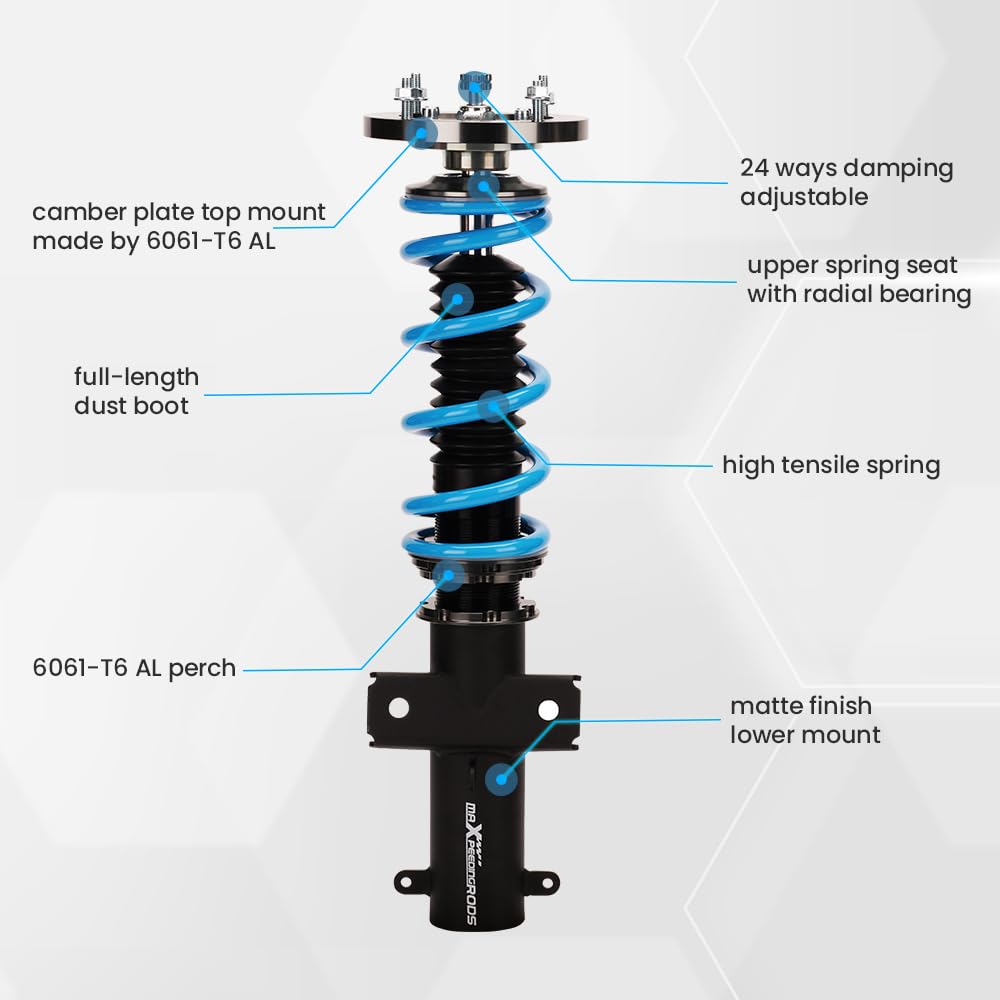
Figure 8.1: Detailed view of coilover components, including the 24-way damping adjustable mechanism, upper spring seat with radial bearing, full-length dust boot, high tensile spring, 6061-T6 AL perch, and matte finish lower mount.

Figure 8.2: Illustration of quality control processes including 100% Dyno Bench for damping tests, 100% spring stress tests (over 600,000 times), and improved packaging design for product protection.

Figure 8.3: Visual guide to the 24 rebound force levels, suggesting optimal settings for street use (0-8), mountain anfractuosities (9-16), and race tracks (17-24).
9. Warranty & Support
maXpeedingrods offers a 30-day easy return policy for this product. For any technical assistance, warranty claims, or customer support inquiries, please contact maXpeedingrods directly through their official channels or the platform where the product was purchased. Please have your purchase details and product model number (RW85ZB) ready when contacting support.