
1. Introduction
This manual provides detailed instructions for the installation, operation, and maintenance of the FORYON XC609MF 3-Axis CNC Lathe Controller. This advanced 32-bit controller is designed to provide precise and reliable control for various CNC machines, particularly lathes and turning centers.
The XC609MF controller integrates a human-computer interface for intuitive code analysis and an FPGA for underlying algorithms and control pulse generation. This architecture ensures both reliable control and ease of use, making it suitable for a wide range of applications including lathes, CNC routers, pick-and-place machines, and milling machines.

Figure 1.1: Front view of the FORYON XC609MF 3-Axis CNC Lathe Controller, showing the display screen and control panel layout.
1.1 Key Features
- High Precision: Utilizes advanced digital control technology for accurate positioning and speed control, ensuring consistent machining dimensions.
- User-Friendly Interface: Features a humanized interface design, often with a touch screen or keyboard input, for easy parameter setting and program input.
- Versatile Applications: Compatible with various CNC machine types, including lathes, routers, and milling machines.
- Reliable Control: FPGA-based control pulse generation ensures stable and dependable operation.
2. Setup and Installation
Proper installation is crucial for the optimal performance and longevity of your CNC controller. Please follow these guidelines carefully.
2.1 Unpacking and Inspection
- Carefully remove the controller from its packaging.
- Inspect the unit for any signs of physical damage that may have occurred during shipping. Report any damage to your supplier immediately.
- Verify that all components listed in the packing list are present.
2.2 Mounting the Controller
The controller should be mounted in a secure, vibration-free environment, away from direct sunlight, excessive dust, moisture, and extreme temperatures. Ensure adequate ventilation around the unit.
2.3 Electrical Connections
All electrical connections should be performed by a qualified technician. Ensure the power supply is disconnected before making any connections.
- Power Supply: Connect the controller to a stable 24V DC power source. Refer to the wiring diagram provided with your specific model for correct polarity.
- Motor Drivers: Connect the controller's axis output signals (pulse/direction) to the corresponding motor drivers for each axis (X, Y, Z).
- Limit Switches: Connect all necessary limit switches (e.g., home, overtravel) to the designated input terminals on the controller.
- Emergency Stop: Wire the emergency stop button to the controller's E-stop input. This is a critical safety feature.
- Spindle Control: Connect spindle control signals (e.g., PWM, analog voltage) if your machine requires spindle speed control.
- Input/Output (I/O): Connect any additional I/O devices such as coolant pumps, tool changers, or work lights as required.
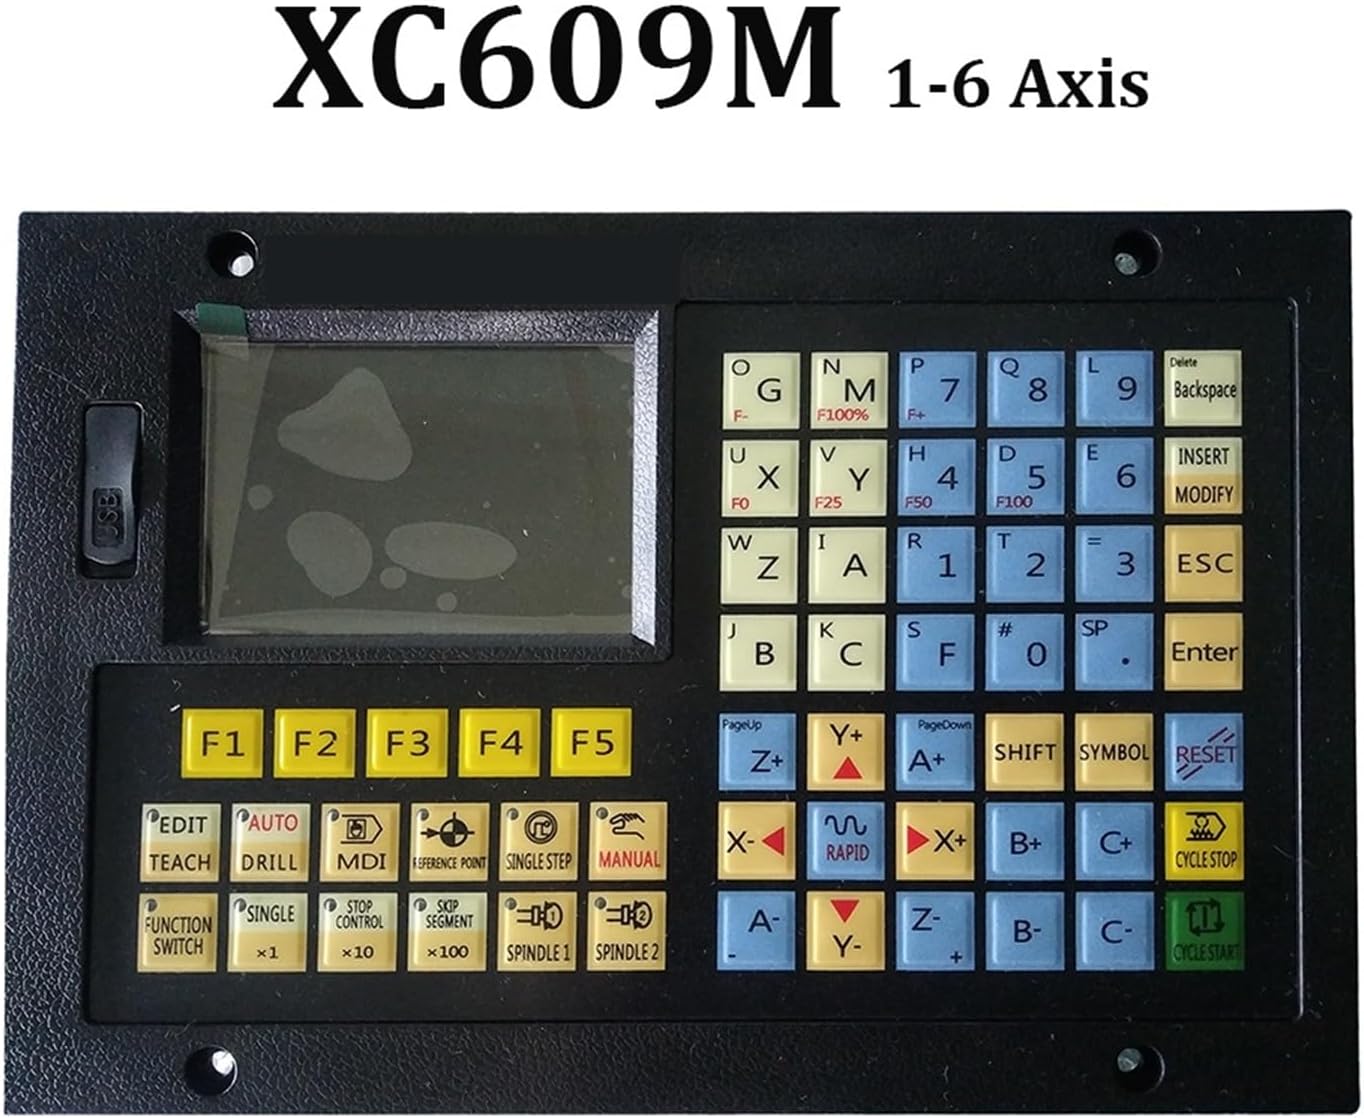
Figure 2.1: The XC609M series controller, indicating its compatibility with 1 to 6 axes configurations. This manual focuses on the 3-axis XC609MF variant.
3. Operating Instructions
This section outlines the basic operational procedures for the FORYON XC609MF controller.
3.1 Powering On and Initializing
- Ensure all electrical connections are secure and correct.
- Turn on the main power supply to the controller. The display screen should illuminate.
- The controller will perform a self-test. Wait for the system to boot up completely.
- If prompted, perform a machine homing sequence to establish the machine's absolute coordinate system. This typically involves pressing the 'REFERENCE POINT' or 'HOME' button.
3.2 Control Panel Overview
The control panel features a display, alphanumeric keypad, function keys, and axis control buttons.

Figure 3.1: The XC609M controller panel, featuring both Chinese and English labels for various functions, including the alphanumeric keypad and dedicated function buttons.
Keypad Functions:
- Alphanumeric Keys (0-9, A-Z): Used for entering numerical values, G-code, M-code, and text.
- F-, F+, F0, F25, F50, F100: Feed rate adjustment and override.
- G, M: G-code and M-code input.
- INSERT, MODIFY, DELETE, BACKSPACE: Program editing functions.
- ESC, ENTER: Navigation and confirmation.
Function Keys:
- F1-F5: Programmable function keys, often used for common operations or macros.
- EDIT: Enter program editing mode.
- AUTO: Start automatic program execution.
- DRILL: Initiate drilling cycles.
- MDI (Manual Data Input): Enter single G-code commands manually.
- REFERENCE POINT: Initiate homing sequence.
- SINGLE STEP: Execute program line by line.
- MANUAL: Enter manual jog mode.
- FUNCTION SWITCH: Toggle between different operational modes or settings.
- SPINDLE 1, SPINDLE 2: Spindle control functions.
- CYCLE STOP, CYCLE START: Control program execution.
Axis Control Keys:
- X+, X-, Y+, Y-, Z+, Z-: Manual jogging of respective axes.
- RAPID: Engage rapid traverse for faster jogging.
- SHIFT, SYMBOL, RESET: Auxiliary functions.
3.3 Programming and Execution
- Program Creation/Loading: Use the 'EDIT' mode to create new G-code programs or load existing ones from internal memory or a USB device.
- Tool Setting: Define tool offsets and geometry in the controller's tool library.
- Workpiece Zero Setting: Set the workpiece origin (G54, G55, etc.) using manual jogging and the 'OFFSET' or 'WORK ZERO' functions.
- Program Simulation (if available): Run a dry run of the program without actual machine movement to check for errors.
- Execution: Switch to 'AUTO' mode and press 'CYCLE START' to begin machining. Monitor the process closely.
4. Maintenance
Regular maintenance ensures the longevity and reliable operation of your FORYON XC609MF controller.
4.1 Cleaning
- Keep the controller's display and keypad clean using a soft, dry cloth.
- Avoid using harsh chemicals or abrasive cleaners, which can damage the surface.
- Ensure ventilation openings are free from dust and debris to prevent overheating.
4.2 Environmental Considerations
- Operate the controller within its specified temperature and humidity ranges.
- Protect the unit from excessive vibrations and electromagnetic interference.
4.3 Software and Data Management
- Regularly back up important programs and configuration files to an external storage device.
- Check for firmware updates from the manufacturer's website to ensure optimal performance and access to new features.
5. Troubleshooting
This section provides solutions to common issues you might encounter with your FORYON XC609MF controller. For problems not listed here, please contact technical support.
5.1 Common Issues and Solutions
- Controller Does Not Power On:
- Check the power supply connection and ensure it is providing the correct 24V DC.
- Verify that the power switch is in the 'ON' position.
- Inspect the power cable for damage.
- Machine Does Not Move / Axis Error:
- Check for active emergency stop conditions or limit switch triggers. Reset if necessary.
- Ensure motor drivers are powered and correctly connected to the controller.
- Verify that the machine has been homed (referenced).
- Check G-code program for errors or incorrect commands.
- Inaccurate Machining / Poor Surface Finish:
- Verify tool offsets and workpiece zero settings.
- Check for mechanical issues in the machine (e.g., loose couplings, worn bearings, backlash).
- Ensure motor tuning parameters (e.g., steps per unit, acceleration) are correctly configured in the controller.
- Display Issues / Unresponsive Keypad:
- Restart the controller.
- Check for loose internal connections (if you are qualified to open the unit).
- Ensure the environment is free from strong electromagnetic interference.
6. Specifications
Technical specifications for the FORYON XC609MF 3-Axis CNC Lathe Controller.
| Feature | Specification |
|---|---|
| Model Number | XC609MF |
| Application | Lathe and Turning Center |
| Instruction Unit | 0.001mm |
| Max Feed Rate | 12000mm/minute |
| Power Supply | 24V DC |
| Storage Capacity | 128MB |
| Display Language | Chinese and English |
| Item Weight | 6.61 pounds (3000 Grams) |
| Package Dimensions | 1.18 x 0.79 x 0.39 inches |
Note: Specifications are subject to change without prior notice.

Figure 6.1: An example of the XC609T-2 Axis controller variant, primarily featuring Chinese button labels. This illustrates the diversity within the XC609 series.
7. Warranty and Support
FORYON products are manufactured to high-quality standards. For specific warranty terms and conditions, please refer to the documentation included with your purchase or visit the official FORYON website.
7.1 Technical Support
If you encounter issues that cannot be resolved using the troubleshooting guide, or require further assistance, please contact FORYON technical support. Have your product model number (XC609MF) and purchase information ready when contacting support.
For the most up-to-date contact information, please visit the official FORYON website: www.foryon.com (Note: This is a placeholder URL. Please refer to your product packaging or official documentation for the correct support website.)