Introduction
Thank you for choosing the AlfaBot S2-AAA Cordless Electric Mop. This manual provides essential information for the safe and efficient operation, maintenance, and troubleshooting of your new floor cleaner. Please read all instructions carefully before use and retain this manual for future reference.
Important Safety Information:
- Always ensure the device is fully charged before first use.
- Do not immerse the main unit in water.
- Use only recommended cleaning solutions diluted with water.
- Keep out of reach of children and pets.
Package Contents
Verify that all items are present in the package:
- 1 x Electric Mop Body
- 1 x Mop Handle
- 1 x Extendable Aluminum Pipe
- 1 x Charger
- 1 x Measuring Cup (Water Cup)
- Multiple Sets of Cleaning Mop Pads
- 1 x User Manual (This document)
- 1 x Quick Start Guide

The package includes the main electric mop body, a handle, an extendable aluminum pipe for adjustable height, a charger for the battery, a measuring cup for liquids, and several sets of cleaning mop pads for different cleaning tasks. A user manual and quick start guide are also provided.
Specifications
| Feature | Detail |
|---|---|
| Brand | AlfaBot |
| Model Name | Cordless Electric Mop (S2-AAA) |
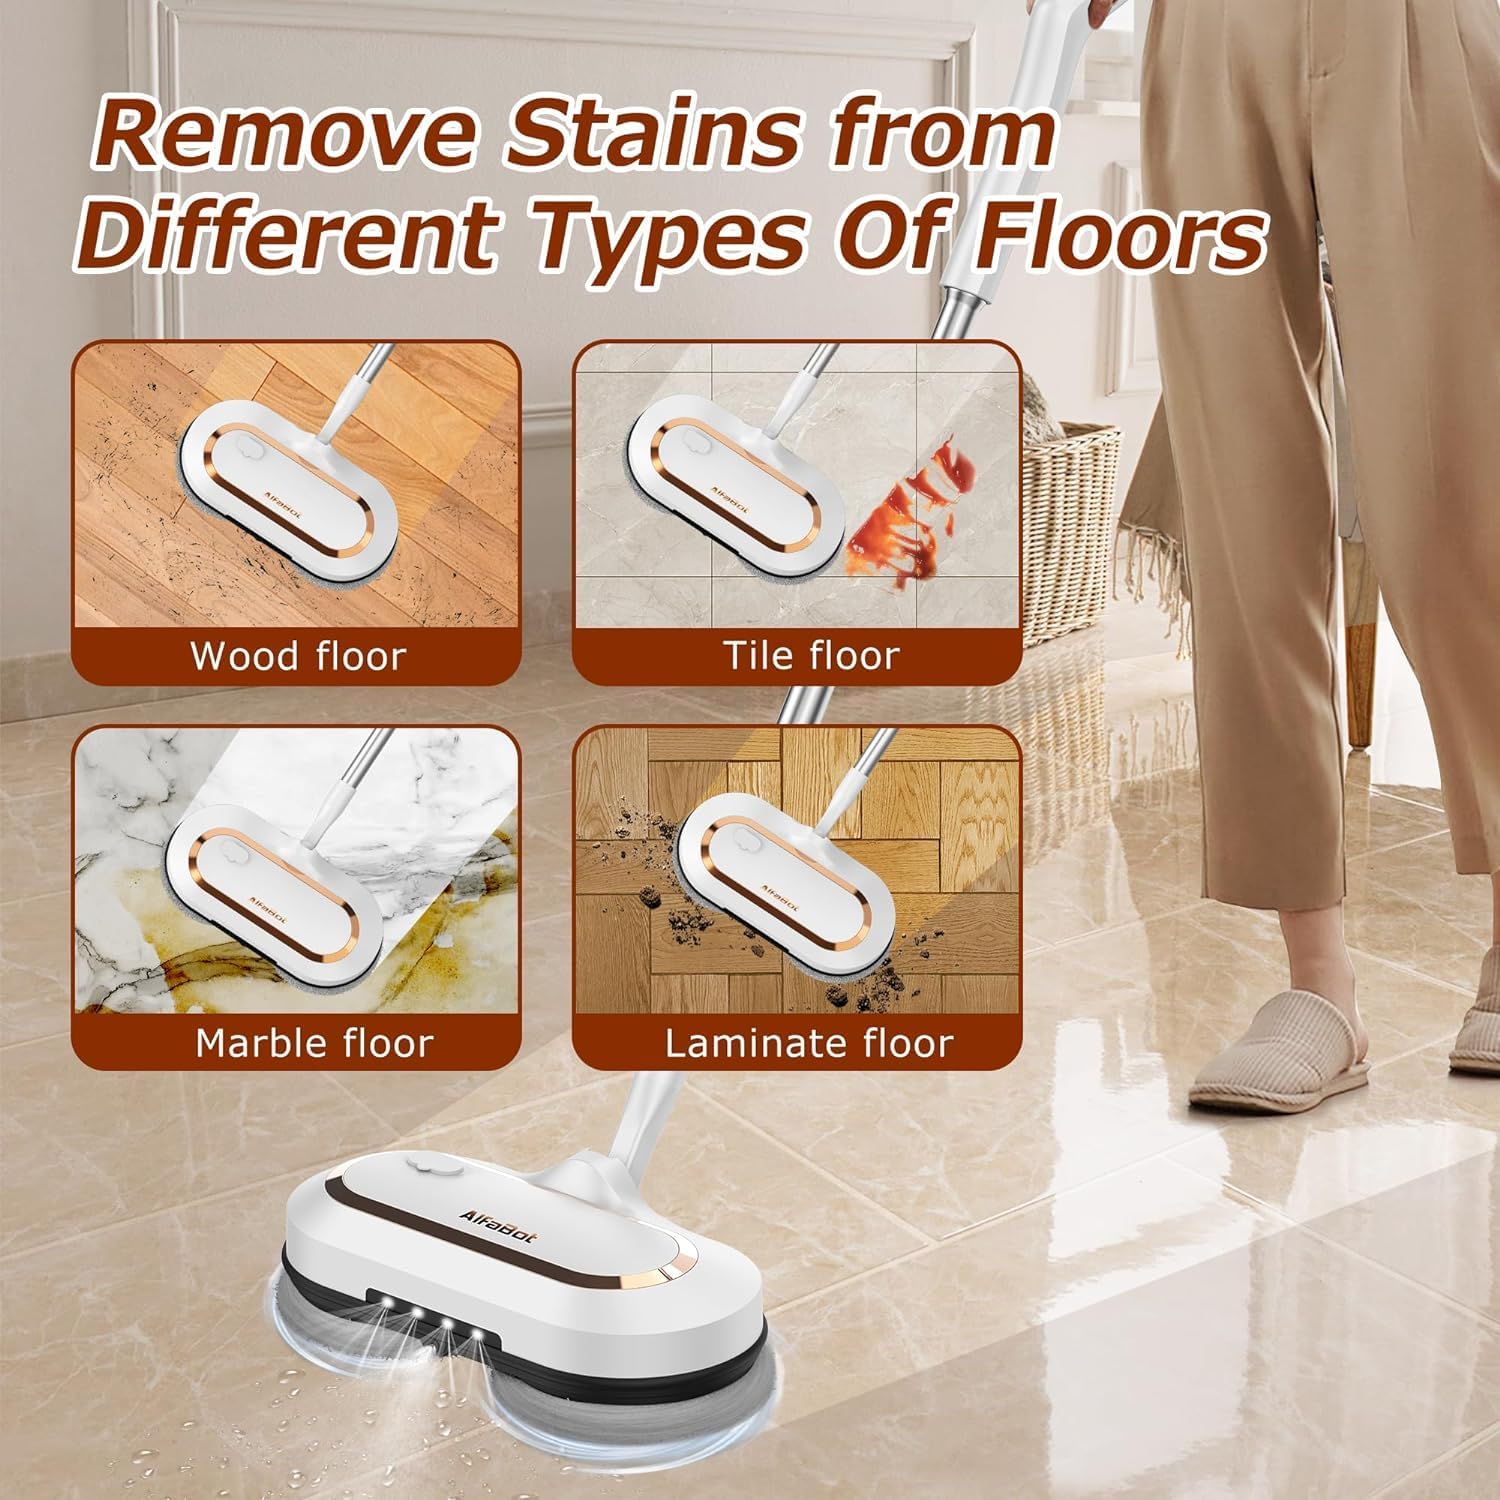
| Special Feature | Cordless & Light Weight, LED Headlight, Water Sprayer, Self-Propelled |
| Surface Recommendation | Floor (Multi-Surface) |
| Motor Speed | Up to 200r/minute |
| Battery Capacity | 2600mAh |
| Running Time | Up to 60 minutes (dry mopping), 40 minutes (wet mopping) |
| Charging Time | 2-5 hours |
| Water Tank Volume | 400 Milliliters (13.6oz) |
| Product Dimensions | 7 x 3 x 48 inches |
| Color | White |
Setup
1. Assembly
- Connect the extendable aluminum pipe to the mop head attachment. Ensure it clicks securely into place.
- Attach the mop handle to the top of the extendable pipe. Align the connection points and push until it locks.
- Securely attach the desired cleaning mop pads to the bottom of the mop head using the Velcro fasteners.
2. Charging the Battery
Before first use, fully charge the mop's battery. The detachable battery pack can be charged separately or while installed in the mop body. Connect the charger to the charging port on the battery pack and plug it into a standard wall outlet. The battery indicator lights will show charging status. A full charge typically takes 2-5 hours.

The battery provides up to 60 minutes of runtime for dry mopping or 40 minutes for wet mopping on a single charge.
3. Filling the Water Tank
Locate the water tank cap on the mop head. Open the cap and use the provided measuring cup and funnel to fill the 400ml (13.6oz) water tank with clean water or a diluted cleaning solution. Close the cap securely after filling.

The large 400ml water tank allows for extended cleaning sessions without frequent refills. The one-click water spray ensures even distribution of cleaning solution.
Operating Instructions
1. Power On/Off
To turn the mop on or off, press the power button located on the handle. The LED headlight will illuminate when the mop is active.
2. Water Spray Function
Press the spray button on the handle to activate the water spray. This allows for controlled application of cleaning solution directly onto the floor surface.
3. LED Headlight
The integrated LED headlight automatically illuminates to help identify dirt and stains in dimly lit areas, such as under furniture or in corners.
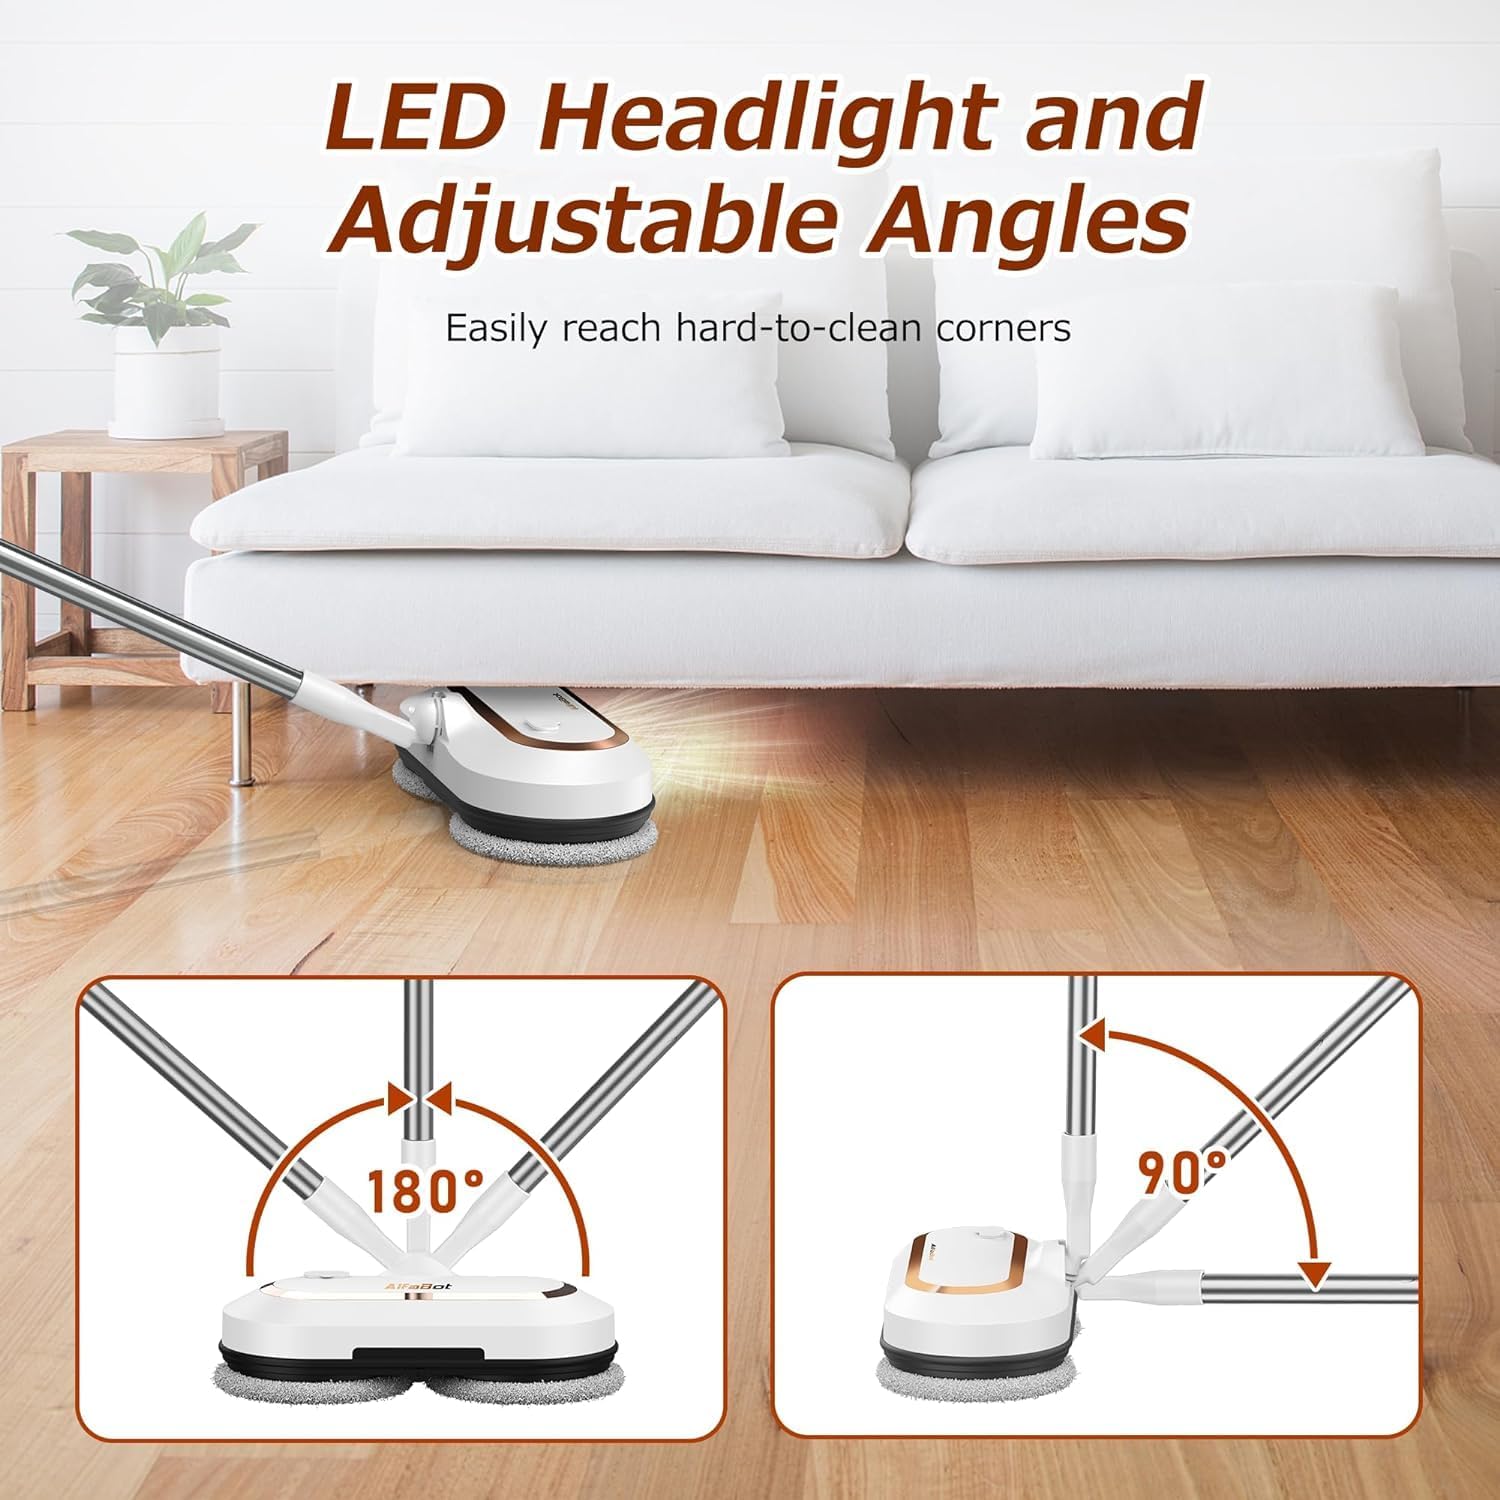
The mop's handle pivots 180° horizontally and 90° vertically, combined with the self-propelled dual-motor design, makes cleaning effortless and efficient across various floor types.
Maintenance
1. Cleaning Mop Pads
The cleaning mop pads are reusable and machine washable. After each use, detach the pads from the mop head and wash them with mild detergent. Allow them to air dry completely before reattaching or storing.
2. Water Tank Care
Regularly empty and rinse the water tank to prevent residue buildup. If using cleaning solutions, ensure to rinse the tank thoroughly with clean water after each use.
3. Device Storage
Store the mop in a dry, cool place. The self-standing design allows for convenient storage without leaning against walls. Ensure the battery is charged periodically if the device is stored for extended periods.
Troubleshooting
| Issue | Possible Cause | Solution |
|---|---|---|
| Mop does not turn on | Battery is depleted or not properly inserted. | Charge the battery fully. Ensure the battery pack is securely inserted. |
| Water spray not working | Water tank is empty or nozzle is clogged. | Refill the water tank. Check and clear any obstructions from the spray nozzle. |
| Reduced cleaning performance | Mop pads are dirty or worn out. | Replace or clean the mop pads. Ensure pads are securely attached. |
| Mop stops unexpectedly | Overload protection activated or battery low. | Reduce pressure on the mop. Recharge the battery. |
Warranty and Support
AlfaBot products are designed for durability and performance. For specific warranty details and customer support, please refer to the warranty card included in your package or visit the official AlfaBot website. If you encounter any issues not covered in this manual, please contact AlfaBot customer service for assistance.


