
Dapper Supply DP-WBFS1201
Dapper Supply DP-WBFS1201 Battery Powered Walk-Behind Floor Scrubber User Manual
Model: DP-WBFS1201
1. Introduction
This manual provides essential instructions for the safe operation, maintenance, and troubleshooting of your Dapper Supply DP-WBFS1201 Battery Powered Walk-Behind Floor and Carpet Scrubber, Buffer, and Polisher Machine. Please read this manual thoroughly before operating the machine to ensure proper use and to prevent injury or damage.

Image 1.1: The Dapper Supply DP-WBFS1201 floor scrubber shown with a hard brush, soft brush, and three scouring pads (white, red, black).
2. Safety Information
Always observe the following safety precautions to reduce the risk of injury or damage to the machine:
- Read all instructions before operating the machine.
- Ensure the machine is turned off and unplugged from the charger before performing any maintenance or adjustments.
- Do not operate the machine in hazardous environments or near flammable liquids or gases.
- Wear appropriate personal protective equipment (PPE) such as safety glasses and non-slip footwear.
- Keep children and unauthorized personnel away from the operating area.
- Do not use the machine on excessively sloped surfaces.
- Only use Dapper Supply approved replacement parts and accessories.
- The machine operates on 24 Volts (2 x 12V batteries). Ensure proper battery handling and charging procedures are followed.
3. Package Contents
Verify that all items are present in the package:
- Dapper Supply DP-WBFS1201 Floor Scrubber Machine
- Hard Brush (Multi-surface)
- Soft Brush (For carpets)
- 3 Scouring Pads (White, Red, Black)
- 2 x 12V Lead Acid Batteries (pre-installed or included separately)
- Battery Charger (if applicable, not explicitly listed but implied for battery-powered)
- User Manual

Image 3.1: The included hard brush, soft brush, and three scouring pads (white, red, black) for various cleaning tasks.
4. Setup
- Unpacking: Carefully remove the machine and all accessories from the packaging. Inspect for any shipping damage.
- Handle Adjustment: Adjust the handle to a comfortable operating height. The adjustable handle allows operators to tailor the height to their preference.

Image 4.1: Detail of the handle adjustment levers, typically yellow, located at the base of the handle column.
- Battery Installation/Charging: Ensure the two 12V lead-acid batteries are correctly installed and fully charged before first use. Refer to the battery charging instructions for details.

Image 4.2: View of the battery compartment, showing the two 12V batteries connected within the machine.
- Brush/Pad Installation:
- Select the appropriate brush or pad for your cleaning task.
- White Pad: For light abrasive scrubbing and routine cleaning.
- Red Pad: For medium abrasive scrubbing, suitable for tougher dirt and stains.
- Black Pad: For heavy-duty tasks, stripping, sanding, and stubborn grime.
- Hard Brush: For multi-surface floor cleaning.
- Soft Brush: Specifically designed for carpet cleaning.
- Attach the chosen brush or pad securely to the machine's brush head. Ensure it is centered and locked into place.
- Select the appropriate brush or pad for your cleaning task.
- Fill Solution Tank: Open the solution tank cap and fill with the appropriate cleaning solution and water mixture. The machine has a 6.5-gallon solution tank. Do not overfill.
5. Operating Instructions
- Pre-Operation Check:
- Verify batteries are charged.
- Ensure solution tank is filled.
- Confirm brush/pad is correctly installed.
- Check that the recovery tank is empty.
- Starting the Machine: The machine features an intuitive 1-button start-up control. Press the power button to activate the machine.
- Engaging Cleaning:
- Lower the brush head to the floor.
- Engage the brush motor. The brush speed is 200 RPM.
- Activate the water control valve to dispense cleaning solution. The automatic cleaning system eliminates the need for manual water flow management.
- Lower the squeegee to the floor to ensure proper water recovery. The squeegee width is 21.5 inches.
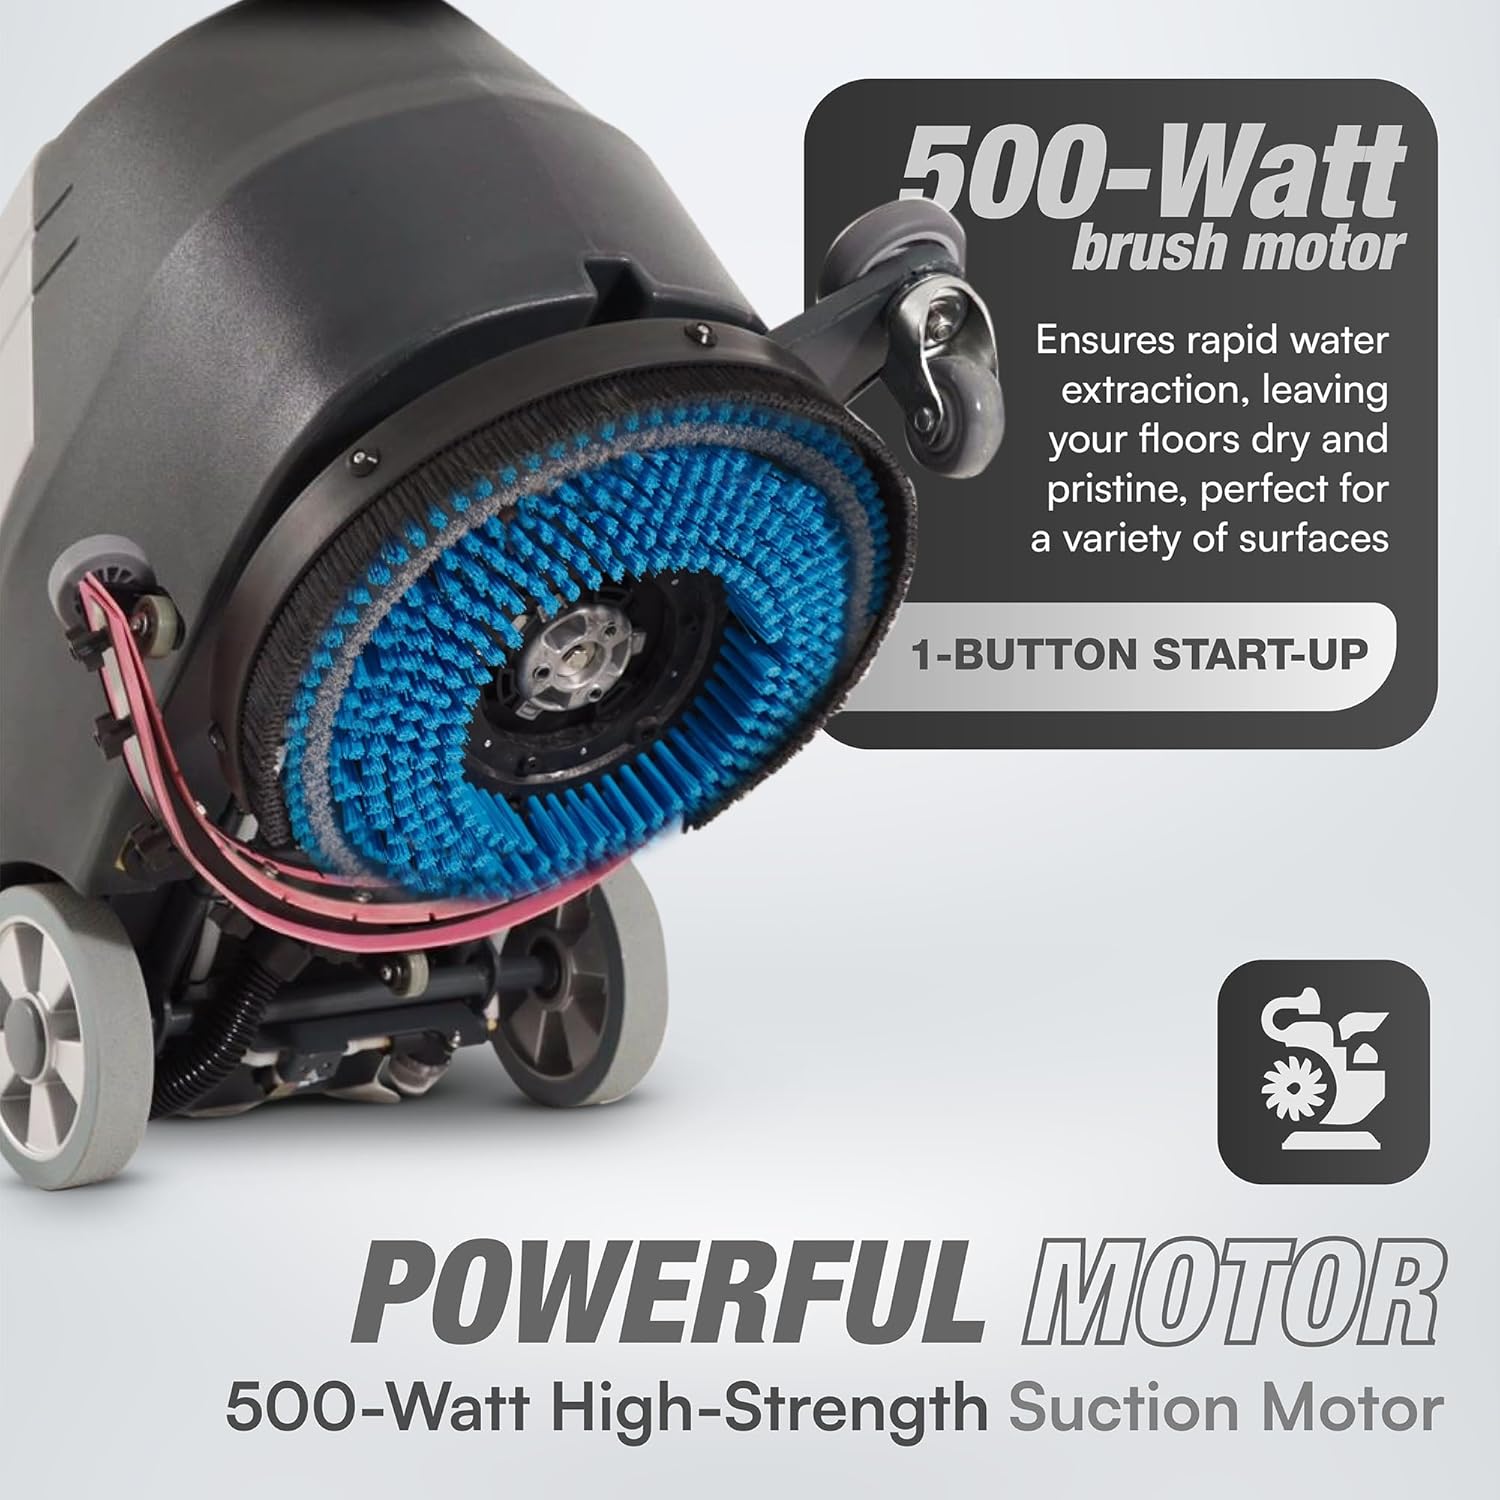
Image 5.1: The brush head in operation, highlighting the 500-Watt brush motor and the 1-button start-up control panel.
- Operation: Guide the machine across the floor at a steady pace. The 500-Watt high-strength suction motor ensures rapid water extraction, leaving floors dry.
- Stopping the Machine: Disengage the brush motor and water flow. Raise the brush head and squeegee. Press the power button to turn off the machine.
6. Maintenance
Regular maintenance ensures optimal performance and extends the life of your machine.
- Emptying and Cleaning Tanks:
- After each use, empty the recovery tank (8-gallon capacity) and rinse it thoroughly with clean water.
- Drain any remaining solution from the solution tank and rinse.
- Clean the filters and screens to prevent blockages.

Image 6.1: Rear view of the machine, illustrating the recovery tank hose and drain points for easy emptying and cleaning.
- Brush/Pad Care:
- Remove and clean the brush or pad after each use.
- Inspect brushes for wear and replace when bristles are significantly worn.
- Pads should be replaced when their abrasive properties diminish.
- Squeegee Maintenance:
- Inspect the squeegee blades for wear or damage. Replace if necessary to ensure effective water pickup.
- Clean the squeegee assembly to remove any debris.
- Battery Care:
- Recharge batteries after each use. A full charge takes approximately 7.5 hours and provides a 2.5-hour runtime.
- Store the machine with fully charged batteries to prolong battery life.
- Periodically check battery terminals for corrosion and clean if necessary.
- General Cleaning: Wipe down the exterior of the machine with a damp cloth. Do not use harsh chemicals or abrasive cleaners.
7. Troubleshooting
| Problem | Possible Cause | Solution |
|---|---|---|
| Machine does not start | Low or discharged battery; Power switch off; Loose battery connection. | Charge batteries; Ensure power switch is ON; Check battery connections. |
| Poor scrubbing performance | Worn brush/pad; Incorrect brush/pad for surface; Insufficient cleaning solution. | Replace brush/pad; Use correct brush/pad; Refill solution tank. |
| Water not being recovered | Worn or damaged squeegee blades; Recovery tank full; Suction hose clogged. | Replace squeegee blades; Empty recovery tank; Clear suction hose. |
| Machine leaves streaks | Dirty squeegee blades; Improper cleaning solution; Uneven squeegee pressure. | Clean squeegee blades; Use recommended cleaning solution; Adjust squeegee. |
If problems persist after attempting these solutions, please contact Dapper Supply customer support.
8. Specifications
| Feature | Detail |
|---|---|
| Model Number | DP-WBFS1201 |
| Power Source | Battery Powered (2 x 12V Lead Acid Batteries included) |
| Voltage | 24 Volts |
| Brush Motor Power | 500 Watts |
| Suction Motor Power | 500 Watts |
| Brush Speed | 200 RPM |
| Brush Width | 16 inches |
| Squeegee Width | 21.5 inches |
| Solution Tank Capacity | 6.5 gallons |
| Recovery Tank Capacity | 8 gallons |
| Runtime | 2.5 hours (approx.) |
| Charging Time | 7.5 hours (approx.) |
| Cleaning Efficiency | 18,836 sq. ft. per hour |
| Item Weight | 180 pounds |
| Product Dimensions (L x W x H) | 38 x 22 x 45 inches |
| Material | Metal |
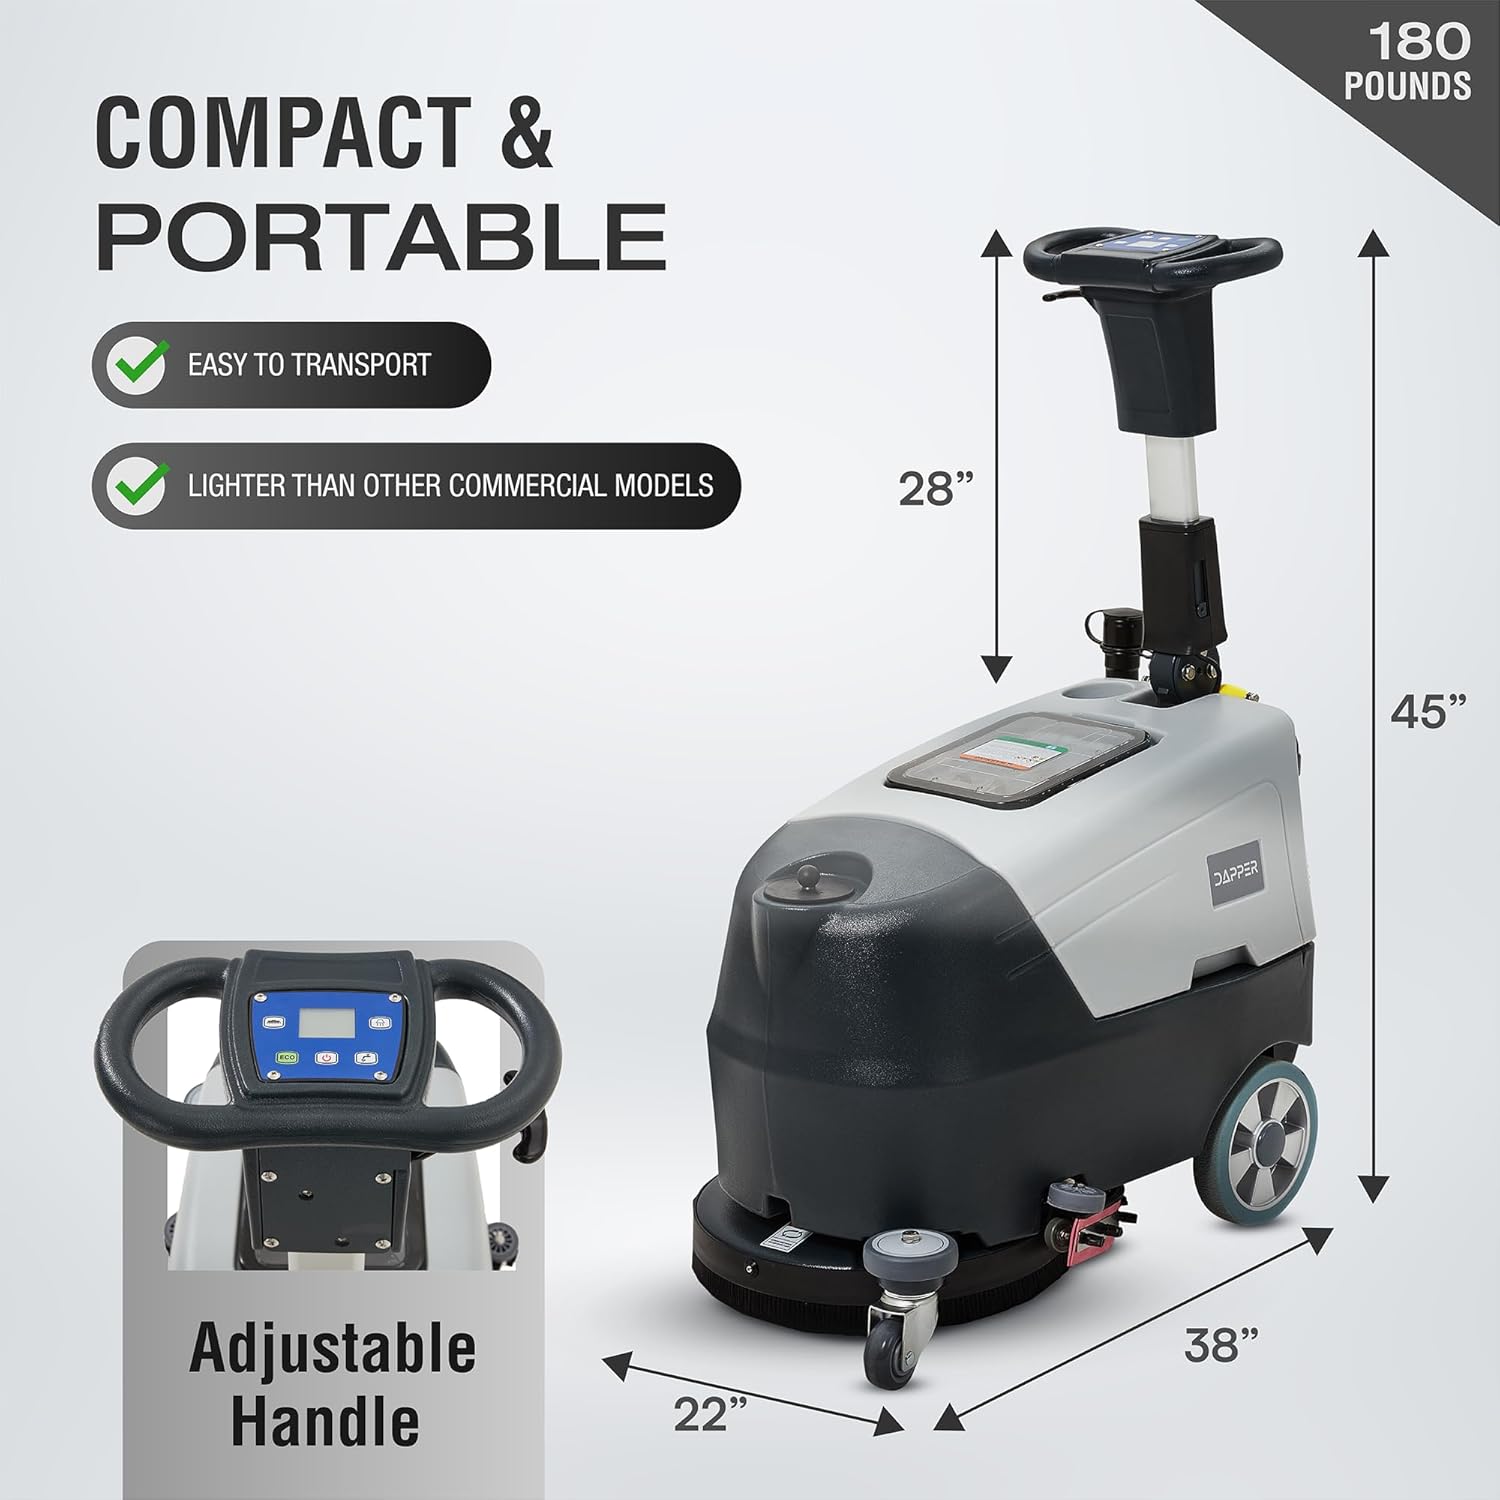
Image 8.1: The machine's dimensions, illustrating its compact and portable design.
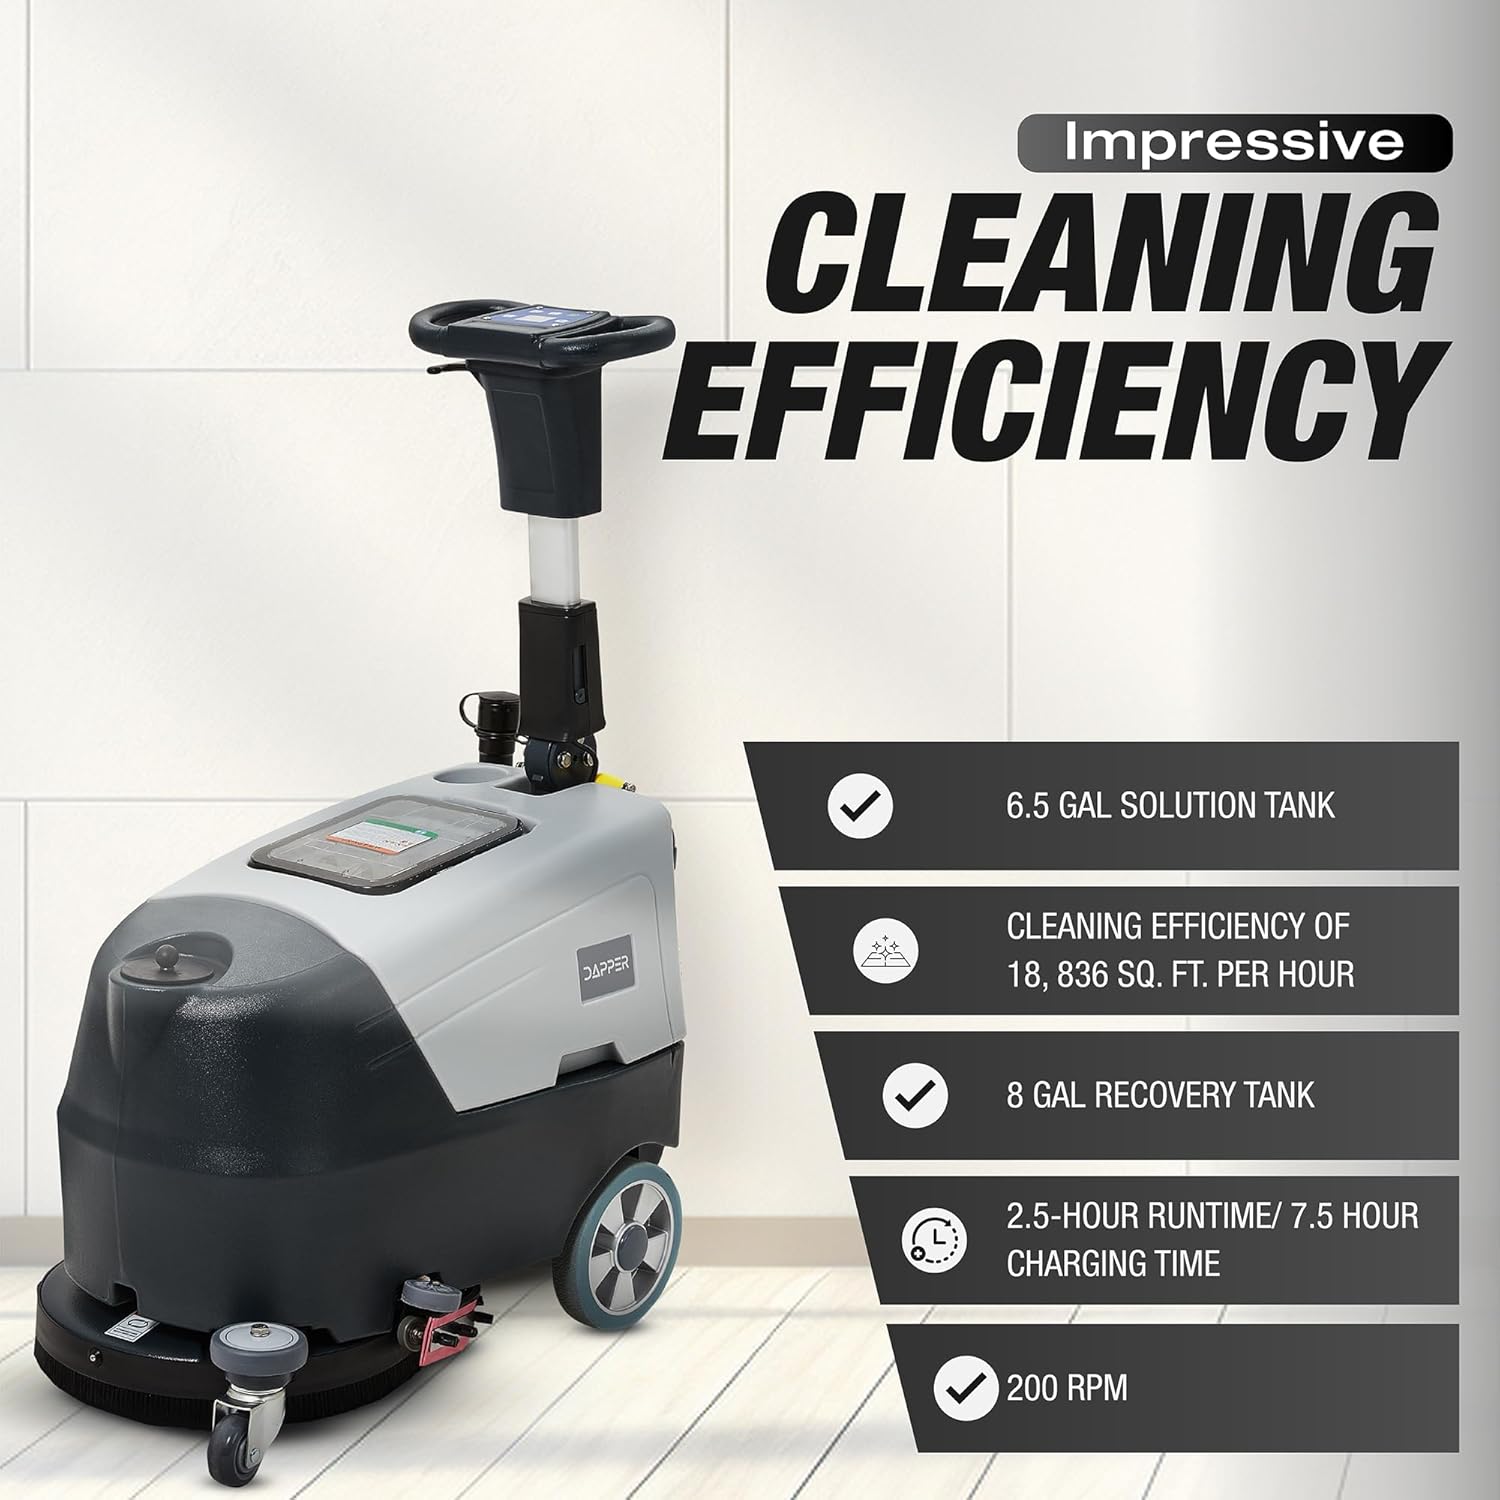
Image 8.2: Key performance specifications including solution tank, recovery tank, cleaning efficiency, runtime, and brush speed.
9. Warranty and Support
The Dapper Supply DP-WBFS1201 is backed by a one-year warranty, providing peace of mind and assurance of quality.
- Warranty Coverage: Refer to your purchase documentation for specific warranty terms and conditions.
- Customer Support: For technical assistance, troubleshooting, or to inquire about replacement parts, please contact Dapper Supply customer service.
- Contact Information: Visit the official Dapper Supply website or refer to your product packaging for the most current contact details.
Related documentsDP-WBFS1201

Ask a question about this manual
Ask about setup, troubleshooting, compatibility, parts, safety, or missing instructions. Manuals+ will review the question and use this page’s manual context to help answer it.