1. Safety Information
Please read all instructions carefully before installation and use. Retain this manual for future reference.
- Ensure the power is disconnected at the circuit breaker before installation or maintenance.
- Installation must be performed by a qualified electrician in accordance with local electrical codes.
- Mount the fan to a ceiling joist or support structure capable of supporting the fan's weight (approximately 12.07 lbs).
- Keep hands and objects clear of the fan blades during operation.
- Do not operate the fan with damaged blades or housing.
2. Package Contents
Verify all components are present before beginning installation:
- Ceiling Fan Motor Assembly (with rattan housing)
- Solid Wood Fan Blades (3x)
- LED Light Kit
- Remote Control
- Mounting Hardware (screws, anchors, wire connectors)
- User Manual
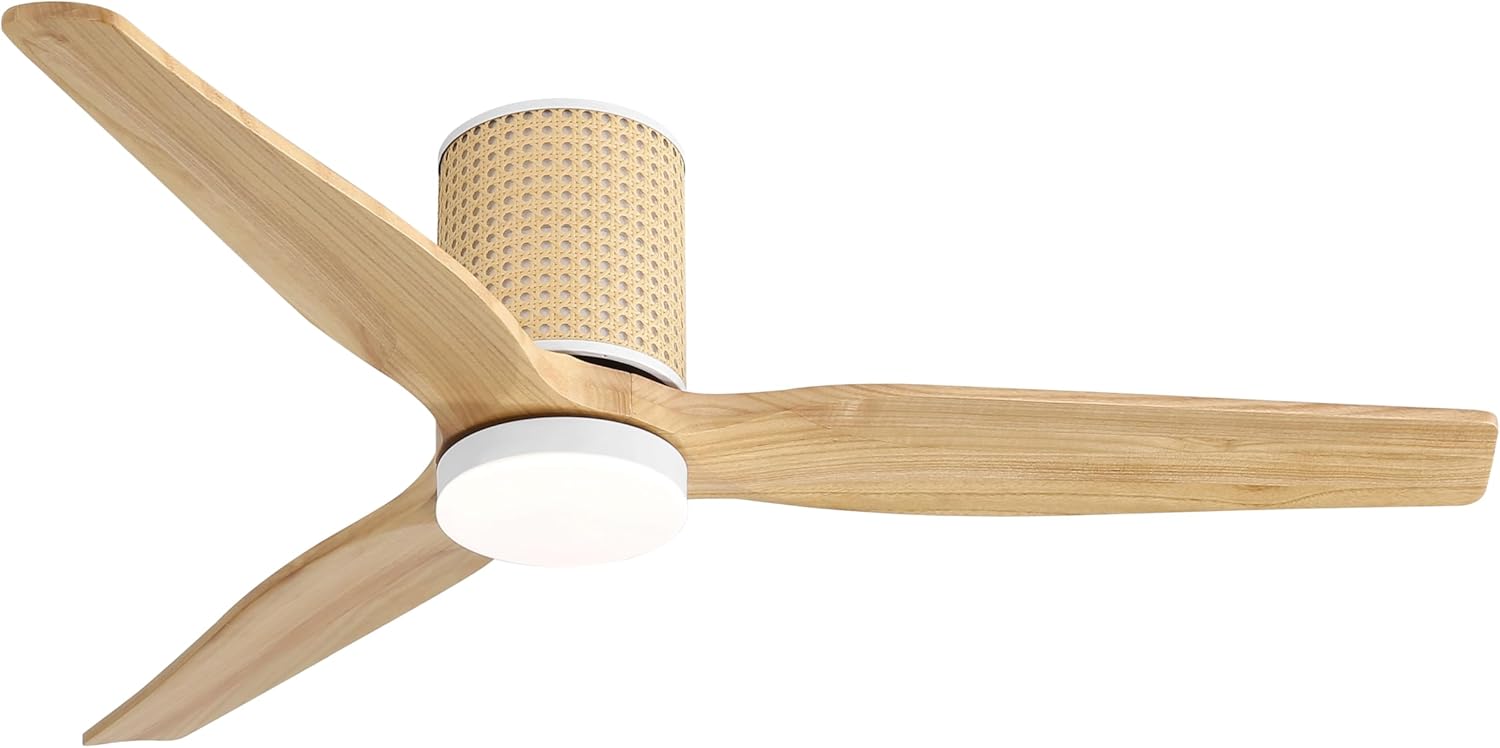
Image: The LEDLUX 52-inch Low Profile Ceiling Fan with Light, featuring solid wood blades and a rattan-patterned motor housing.
3. Setup and Installation
Follow these steps for proper installation. For a visual guide, please refer to the installation video below.
- Prepare the Mounting Location: Ensure the electrical box is securely mounted to a ceiling joist and can support the fan's weight.
- Attach the Mounting Bracket: Secure the mounting bracket to the electrical box using the provided screws.
- Assemble Fan Blades: Attach the three solid wood fan blades to the motor assembly using the provided screws. Ensure they are securely fastened.
- Wiring Connections: Carefully connect the fan's electrical wires to the household wiring according to the wiring diagram in the detailed manual. Use the provided wire connectors.
- Mount the Fan Body: Lift the fan assembly and attach it to the mounting bracket. Secure all screws.
- Install the LED Light Kit: Connect the LED light kit wires to the fan's light wires. Secure the light kit to the bottom of the fan assembly.
- Restore Power: Once installation is complete, restore power at the circuit breaker.
Video: A step-by-step guide demonstrating the installation process of the LEDLUX 52-inch Ceiling Fan.

Image: Diagram illustrating the fan's dimensions (52" diameter, 11.2" height) and the remote control with its various functions.
4. Operating Instructions
The LEDLUX ceiling fan is operated using the included remote control. Ensure the remote has working batteries.
- Power ON/OFF: Press the 'ALL OFF' button to turn off both the fan and light. Press any speed button (1-6) to turn on the fan, or 'LIGHT ON/OFF' to turn on the light.
- Fan Speed Control: Select from 6 fan speeds using buttons '1' through '6'.
- Light Control: Press 'LIGHT ON/OFF' to toggle the light.
- Color Temperature Adjustment: While the light is on, repeatedly press the 'LIGHT ON/OFF' button to cycle through 3000K (Warm White), 4000K (Neutral White), and 6000K (Cool White).
- Reversible Function (Summer/Winter Mode):
- Summer Mode (F - Forward): Press 'F' for counter-clockwise rotation, pushing air downwards to create a cooling effect.
- Winter Mode (R - Reverse): Press 'R' for clockwise rotation, drawing air upwards to circulate warm air.
- Timer Function: Set the fan to turn off automatically after 1 hour ('1H') or 4 hours ('4H').
Video: Overview of the LEDLUX 52-inch Flush Mount Ceiling Fan with Light, showcasing its features and operation.

Image: Visual representation of the fan's reversible function, demonstrating counter-clockwise rotation for summer cooling and clockwise rotation for winter air circulation.

Image: The fan's LED light displaying three adjustable color temperatures: 3000K (warm), 4000K (neutral), and 6000K (cool).

Image: A quiet DC motor ceiling fan operating in a bedroom, highlighting its low noise level for undisturbed sleep.
5. Maintenance
Regular maintenance ensures optimal performance and longevity of your ceiling fan.
- Cleaning: Use a soft, damp cloth to clean the fan blades and motor housing. Do not use abrasive cleaners or solvents.
- Light Cover: Gently remove and clean the light cover as needed. Ensure it is dry before reattaching.
- Screw Tightness: Periodically check all screws on the fan blades and mounting bracket to ensure they are tight. Loose screws can cause wobbling or noise.
- Blade Balance: If the fan wobbles, check for any bent blades or unevenly tightened screws. A balancing kit (not included) may be used if necessary.
6. Troubleshooting
If you encounter issues with your fan, refer to the following common problems and solutions:
| Problem | Possible Cause | Solution |
|---|---|---|
| Fan does not start | No power; Loose wiring; Remote control issue | Check circuit breaker; Verify wiring connections; Replace remote batteries or re-pair remote. |
| Light does not work | Loose wiring; LED module failure | Check light kit wiring; Contact support for LED module replacement. |
| Fan wobbles | Loose blades; Uneven blades; Improper mounting | Tighten all blade screws; Check blade alignment; Ensure mounting bracket is secure. |
| Remote not responding | Dead batteries; Remote not paired | Replace batteries; Follow pairing instructions in the full manual. |
If problems persist after attempting these solutions, please contact customer support.
7. Specifications
- Brand: LEDLUX
- Model Name: SYCF5201
- Product Dimensions: 52"D x 11"W x 52"H
- Motor Type: DC Motor
- Fan Blades: Solid Wood
- Light Power: 18W
- Wind Speeds: 6-Speed
- Color Temperatures: 3000K / 4000K / 6000K
- Control Method: Remote
- Indoor/Outdoor Usage: Indoor, Covered Outdoor
- Item Weight: 12.07 pounds

Image: Detailed view of the remote control and a summary of the product's technical specifications.
8. Warranty and Support
LEDLUX stands behind the quality of its products.
- Whole Fan Warranty: 3 Years
- Motor Warranty: 10 Years
- Replaceable Parts: The remote control and LED light are replaceable.
For warranty claims, technical assistance, or replacement parts, please contact LEDLUX customer support through the retailer's platform or the contact information provided with your purchase.

Image: Graphic detailing LEDLUX's after-sales support, including 3-year whole fan warranty, 10-year motor warranty, and replaceable components.


