
1. Introduction
This manual provides detailed instructions for the proper installation, operation, and maintenance of your UUQ 6-24x50 AO Rifle Scope. This scope is designed for precision targeting and features a dynamic magnification range, advanced anti-reflective optics, and dual reticle illumination. Please read this manual thoroughly before use to ensure optimal performance and safety.

Image 1.1: The UUQ 6-24x50 AO Rifle Scope mounted on a rifle.
2. What's in the Box
Verify that all components are present upon opening the package:
- 1x UUQ 6-24x50 Illuminated Rifle Scope
- 2x 11mm Dovetail Mounts
- 1x CR2032 Battery
- 2x Lens Covers
- 1x Cleaning Cloth
- 1x Allen Wrench
- 1x Instruction Manual (this document)
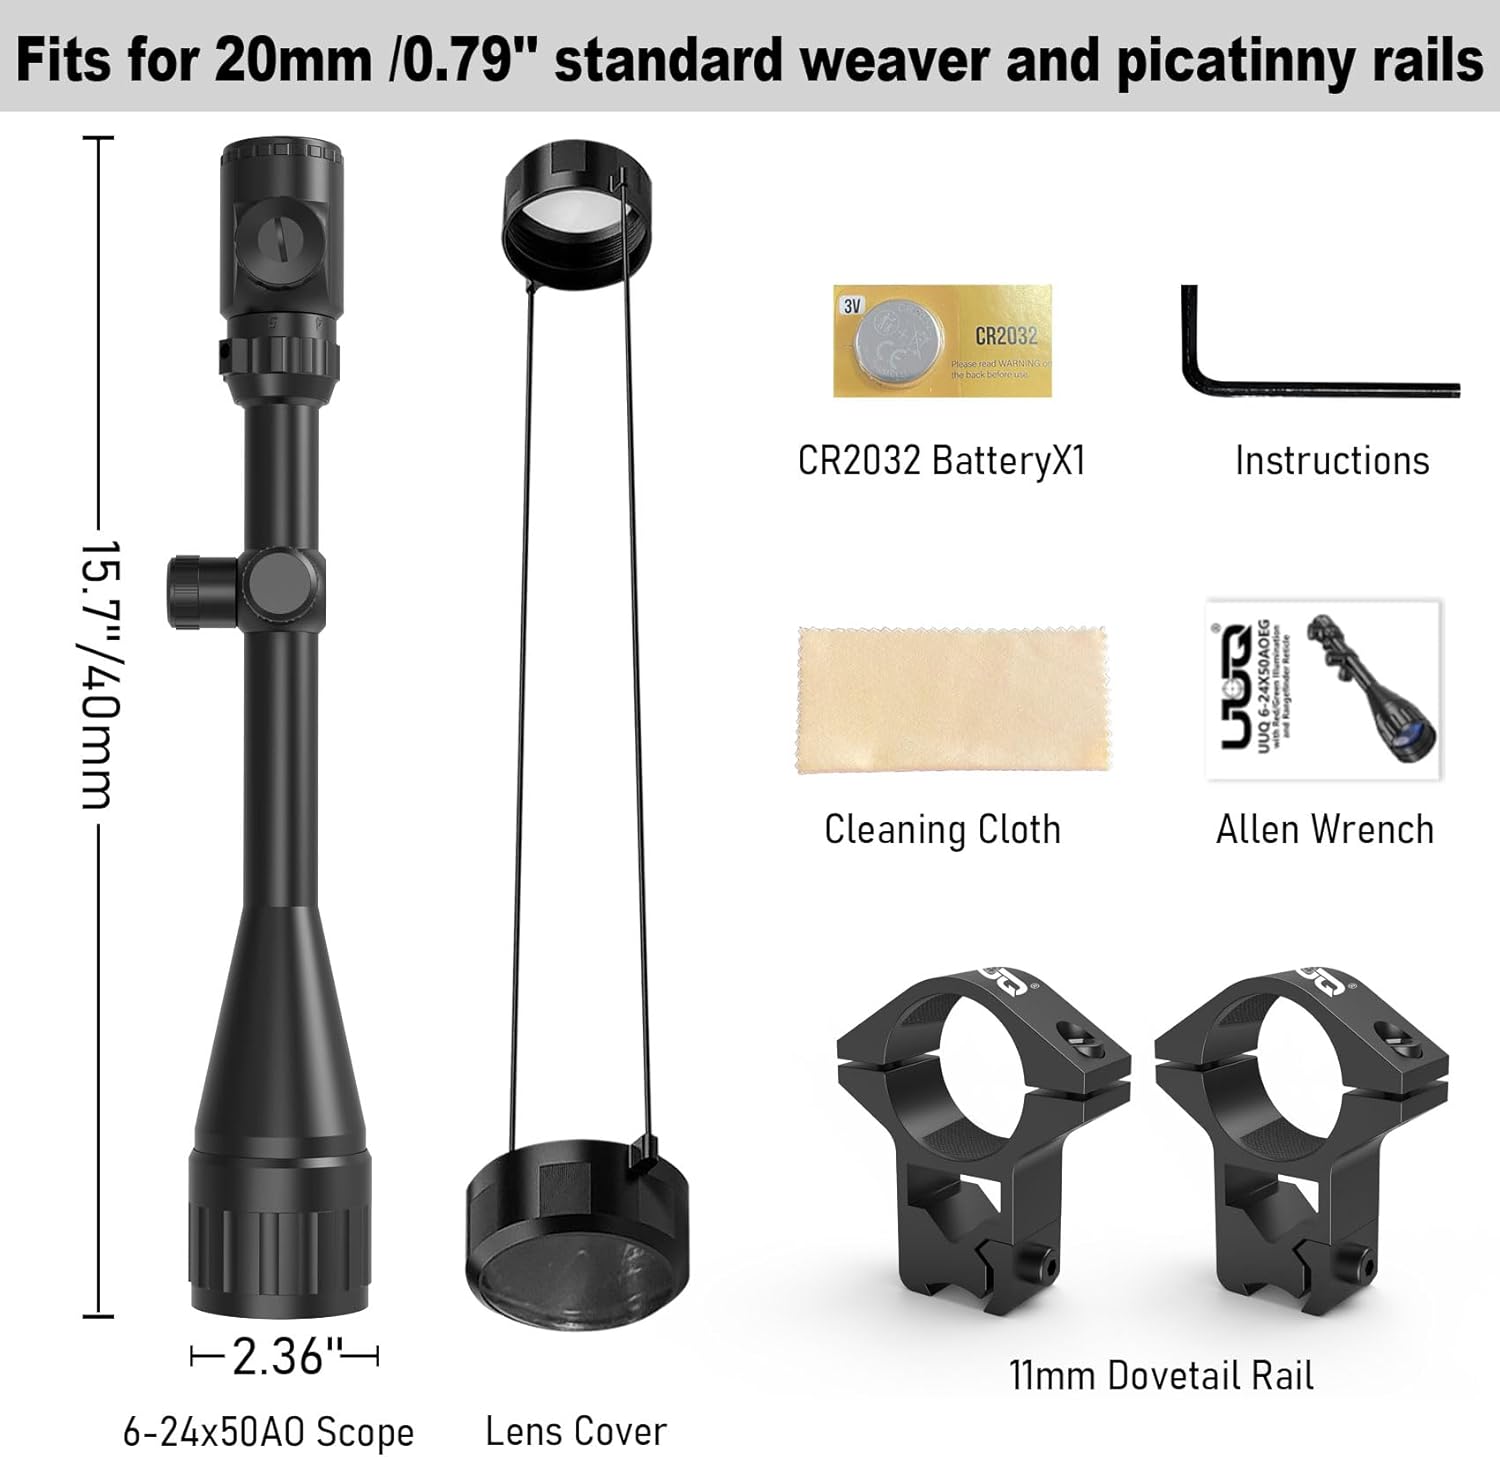
Image 2.1: All included components of the UUQ 6-24x50 AO Rifle Scope package.
3. Product Features
- Dynamic Magnification Range: 6-24x zoom system with a 50mm objective lens. Offers a 28ft field of view at 100 yards and 1/8" click adjustments for precise targeting.
- Advanced Anti-Reflective Optics: Multi-coated blue/green lens technology reduces light scattering and reflections, providing bright, sharp images with edge-to-edge clarity.
- Dual-Illumination & Parallax Control: Red/Green reticle illumination with 5 adjustable brightness levels. Adjustable Objective (AO) eliminates parallax errors through front-bell adjustments.
- Reinforced Structural Integrity: Constructed from aircraft-grade aluminum alloy, nitrogen-purged, and O-ring-sealed for shock resistance, waterproof, and fog-proof performance.
- Universal Compatibility: Includes 1-inch mounting rings for 11mm dovetail rails.
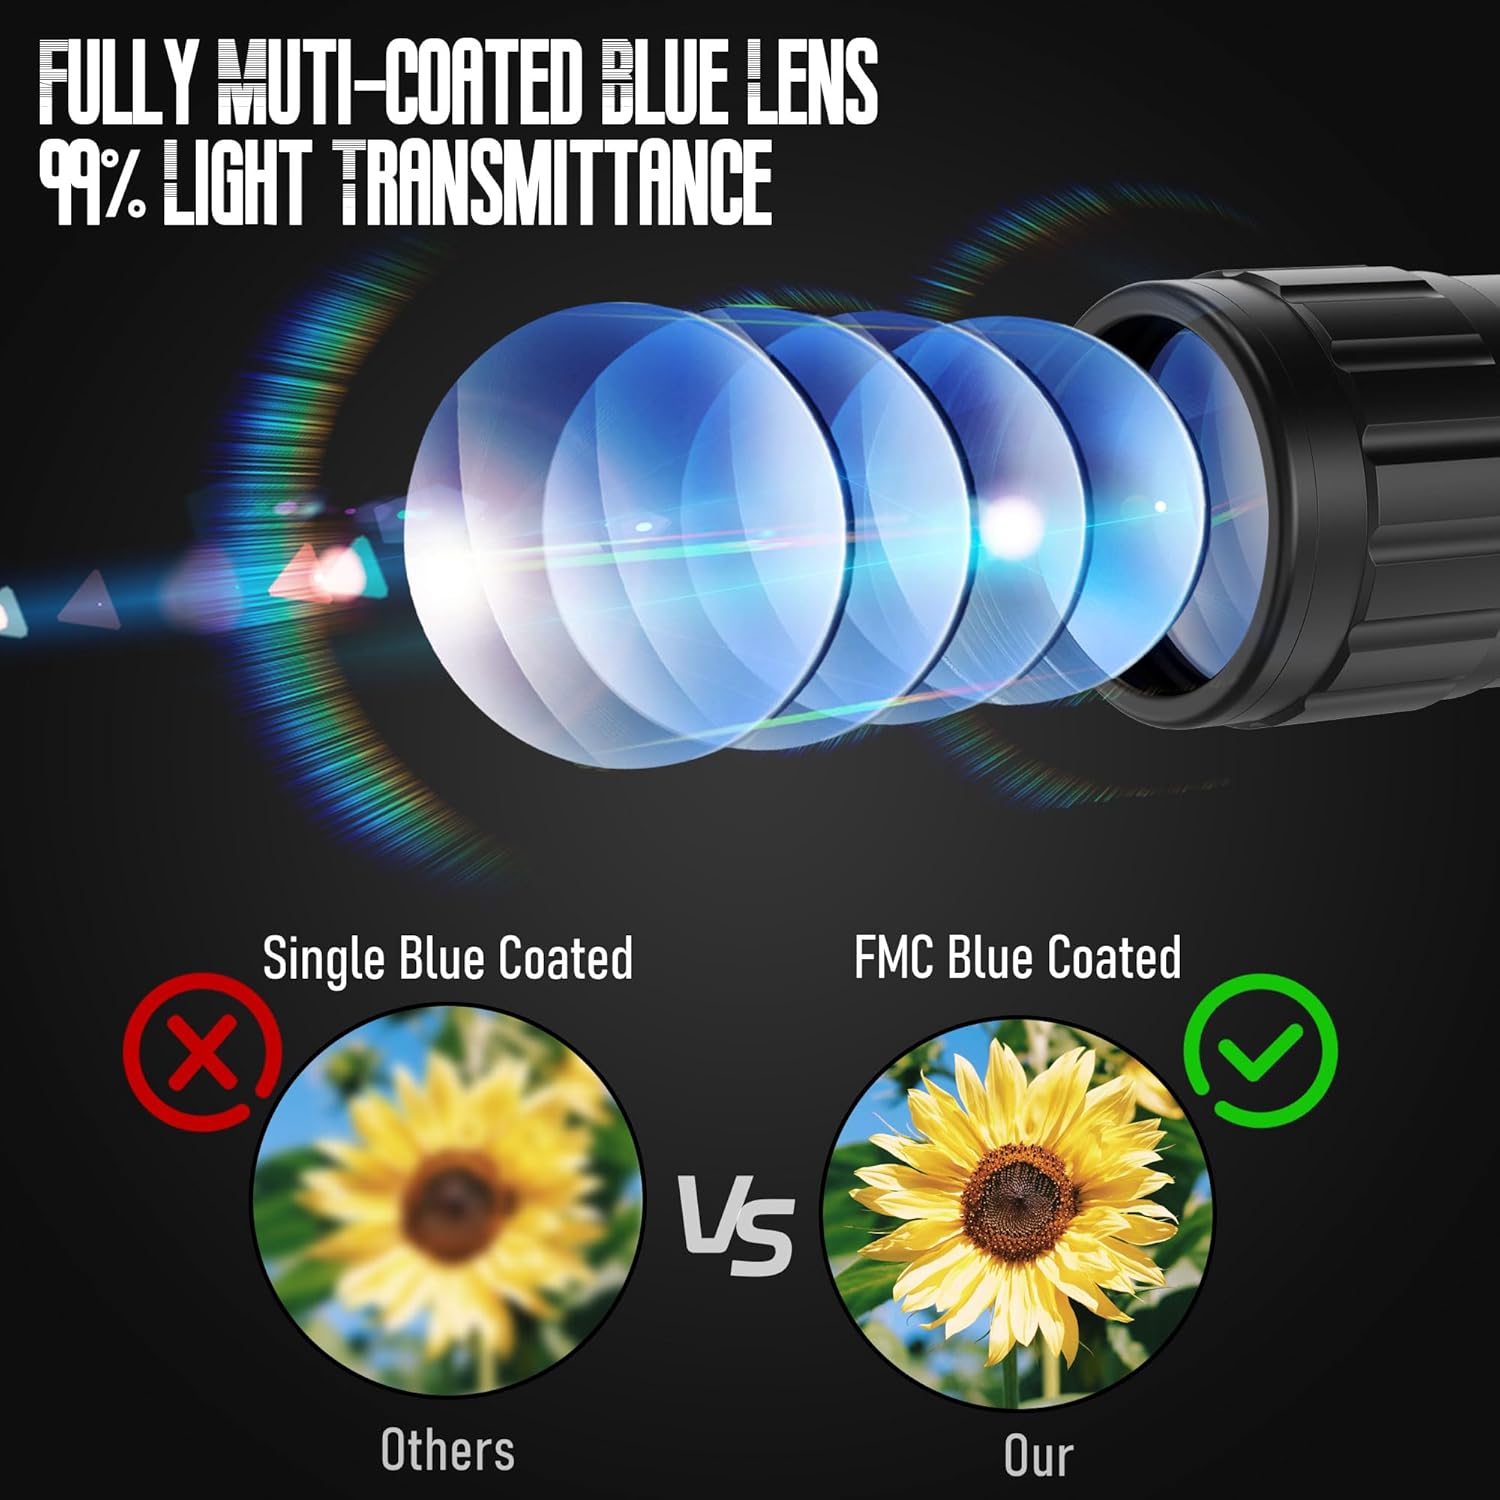
Image 3.1: Illustration of the fully multi-coated blue lens, demonstrating improved light transmission and clarity.

Image 3.2: Detailed view of the scope's components and adjustment points.
4. Setup Instructions
4.1 Mounting the Scope
The UUQ 6-24x50 AO Rifle Scope comes with 11mm dovetail mounts. Ensure your rifle has an 11mm dovetail rail for proper installation. If your rifle has a 20mm Picatinny/Weaver rail, you will need compatible 20mm mounts (sold separately).
- Loosen the screws on the 11mm dovetail mounts using the provided Allen wrench.
- Place the mounts onto the 11mm dovetail rail of your rifle, ensuring they are spaced appropriately to securely hold the scope.
- Place the rifle scope into the lower halves of the mounts.
- Attach the upper halves of the mounts and lightly tighten the screws.
- Adjust the scope's position for proper eye relief and reticle alignment.
- Once positioned correctly, tighten all screws evenly and firmly to secure the scope. Do not overtighten.

Image 4.1: The included 11mm Dovetail Mounts.

Image 4.2: Correct mounting for 11mm Dovetail Rails.
4.2 Installing the Battery
The reticle illumination requires one CR2032 battery. The battery compartment is typically located on the illumination control knob.
- Unscrew the battery cap on the illumination control knob.
- Insert the CR2032 battery with the positive (+) side facing up.
- Replace the battery cap and tighten it securely to ensure a waterproof seal.
4.3 Focusing the Eyepiece
To achieve a clear reticle image:
- Point the scope at a plain, bright background (e.g., a clear sky).
- Look through the scope and rotate the eyepiece adjustment ring (located at the rear of the scope) until the reticle appears sharp and clear.
- Once set, this adjustment typically does not need to be changed.
5. Operating Instructions
5.1 Magnification Adjustment
The scope features a variable magnification from 6x to 24x. Rotate the magnification ring (located near the eyepiece) to adjust the desired power. The numbers on the ring indicate the current magnification level.

Image 5.1: Visual representation of 6x and 24x magnification.
5.2 Parallax Adjustment (AO)
Parallax is the apparent movement of the reticle in relation to the target when the shooter's eye moves off-center. The Adjustable Objective (AO) ring, located at the front of the scope, allows you to eliminate parallax at various distances.
- Estimate the distance to your target.
- Rotate the AO ring until the number corresponding to your target distance aligns with the index mark.
- Check for parallax by moving your head slightly while looking through the scope. If the reticle appears to move relative to the target, fine-tune the AO adjustment until the reticle remains stationary.

Image 5.2: Parallax adjustment mechanism and its effect on target clarity.

Image 5.3: The impact of AO adjustment on aiming accuracy.
5.3 Reticle Illumination
The scope features a dual-illuminated reticle (Red and Green) with 5 brightness levels for each color. This enhances visibility in various lighting conditions.
- Rotate the illumination control knob (located on the left side of the scope) to turn on the reticle.
- Select 'R' for Red illumination or 'G' for Green illumination.
- Adjust the brightness level from 1 (lowest) to 5 (highest) by rotating the knob further.
- Turn the knob to 'OFF' positions between brightness settings to conserve battery life.

Image 5.4: Dual illuminated reticle (Red and Green) with brightness settings.
5.4 Windage and Elevation Adjustments
The windage and elevation turrets are used to zero the scope. Each click adjustment moves the point of impact by 1/8 inch at 100 yards.
- Remove the protective caps from the windage (side) and elevation (top) turrets.
- Elevation Adjustment: Rotate the top turret. Turning it clockwise moves the point of impact down; counter-clockwise moves it up.
- Windage Adjustment: Rotate the side turret. Turning it clockwise moves the point of impact right; counter-clockwise moves it left.
- After zeroing, replace the protective caps.

Image 5.5: Resettable and lockable turrets for windage and elevation adjustments.
6. Maintenance
6.1 Cleaning the Lenses
Use the provided cleaning cloth or a soft, lint-free cloth to gently wipe the lenses. For stubborn dirt or smudges, use a lens cleaning solution specifically designed for optics. Avoid using harsh chemicals or abrasive materials that could damage the lens coatings.
6.2 General Care and Storage
- Always use the lens covers when the scope is not in use to protect the lenses from dust and scratches.
- Store the scope in a cool, dry place, away from direct sunlight and extreme temperatures.
- Avoid dropping or subjecting the scope to severe impacts, as this can affect its internal components and zero.
- Periodically check all mounting screws and retighten if necessary to maintain zero.

Image 6.1: Optional sunshade attachment for glare reduction.
7. Troubleshooting
| Problem | Possible Cause | Solution |
|---|---|---|
| Blurred Image | Eyepiece not focused; Parallax not adjusted; Dirty lenses. | Adjust eyepiece focus; Adjust AO for target distance; Clean lenses. |
| Reticle Not Illuminating | Battery drained or incorrectly installed; Illumination knob set to OFF. | Replace CR2032 battery, ensuring correct polarity; Rotate illumination knob to a numbered setting. |
| Cannot Hold Zero | Mounting screws loose; Mounts incompatible with rail; Damaged scope. | Check and tighten all mounting screws; Ensure mounts are correct for your rail type (11mm Dovetail); Contact customer support if damage is suspected. |
| Fogging Inside Lens | Extreme temperature changes; Seal compromise. | Allow scope to acclimate to temperature; If persistent, contact customer support (may indicate a seal issue). |
8. Specifications
| Feature | Detail |
|---|---|
| Brand | UUQ |
| Model Number | 6-24X50 |
| Magnification | 6x - 24x |
| Objective Lens Diameter | 50 mm |
| Lens Color | Blue |
| Reticle Type | Red/Green Illuminated |
| Field of View | 28 feet at 100 yards |
| Click Adjustment Value | 1/8 inch at 100 yards |
| Parallax Adjustment | Adjustable Objective (AO) from 10 yards to infinity |
| Mounting Type | 11mm Dovetail Mount (included) |
| Material | Aircraft-grade Aluminum Alloy |
| Environmental Protection | Nitrogen-purged, O-ring-sealed (Waterproof, Fog-proof, Shock-resistant) |
| Product Dimensions (L x W x H) | 15.75"L x 2.67"W x 3"H |
| Item Weight | 0.6 kg |
| Compatible Devices | Rifle, Shotgun (with appropriate mounting) |
9. Warranty and Support
9.1 Warranty Information
The UUQ 6-24x50 AO Rifle Scope comes with a 1-year manufacturer's warranty. This warranty covers defects in materials and workmanship under normal use. It does not cover damage caused by misuse, unauthorized modifications, or improper installation.
9.2 Customer Support
For technical assistance, warranty claims, or any questions regarding your UUQ product, please contact UUQ's dedicated customer service team. Refer to the contact information provided with your purchase or visit the official UUQ website for support details.
You can also visit the UUQ Store on Amazon for more information and product offerings.