
1. Introduction
This manual provides detailed instructions for the installation, operation, and maintenance of your darkFlash DS900 ATX Mid-Tower PC Case. The DS900 is designed to accommodate ATX, M-ATX, and ITX motherboards, featuring a panoramic dual tempered glass design for an unobstructed view of internal components. It includes advanced cooling support and convenient I/O options.
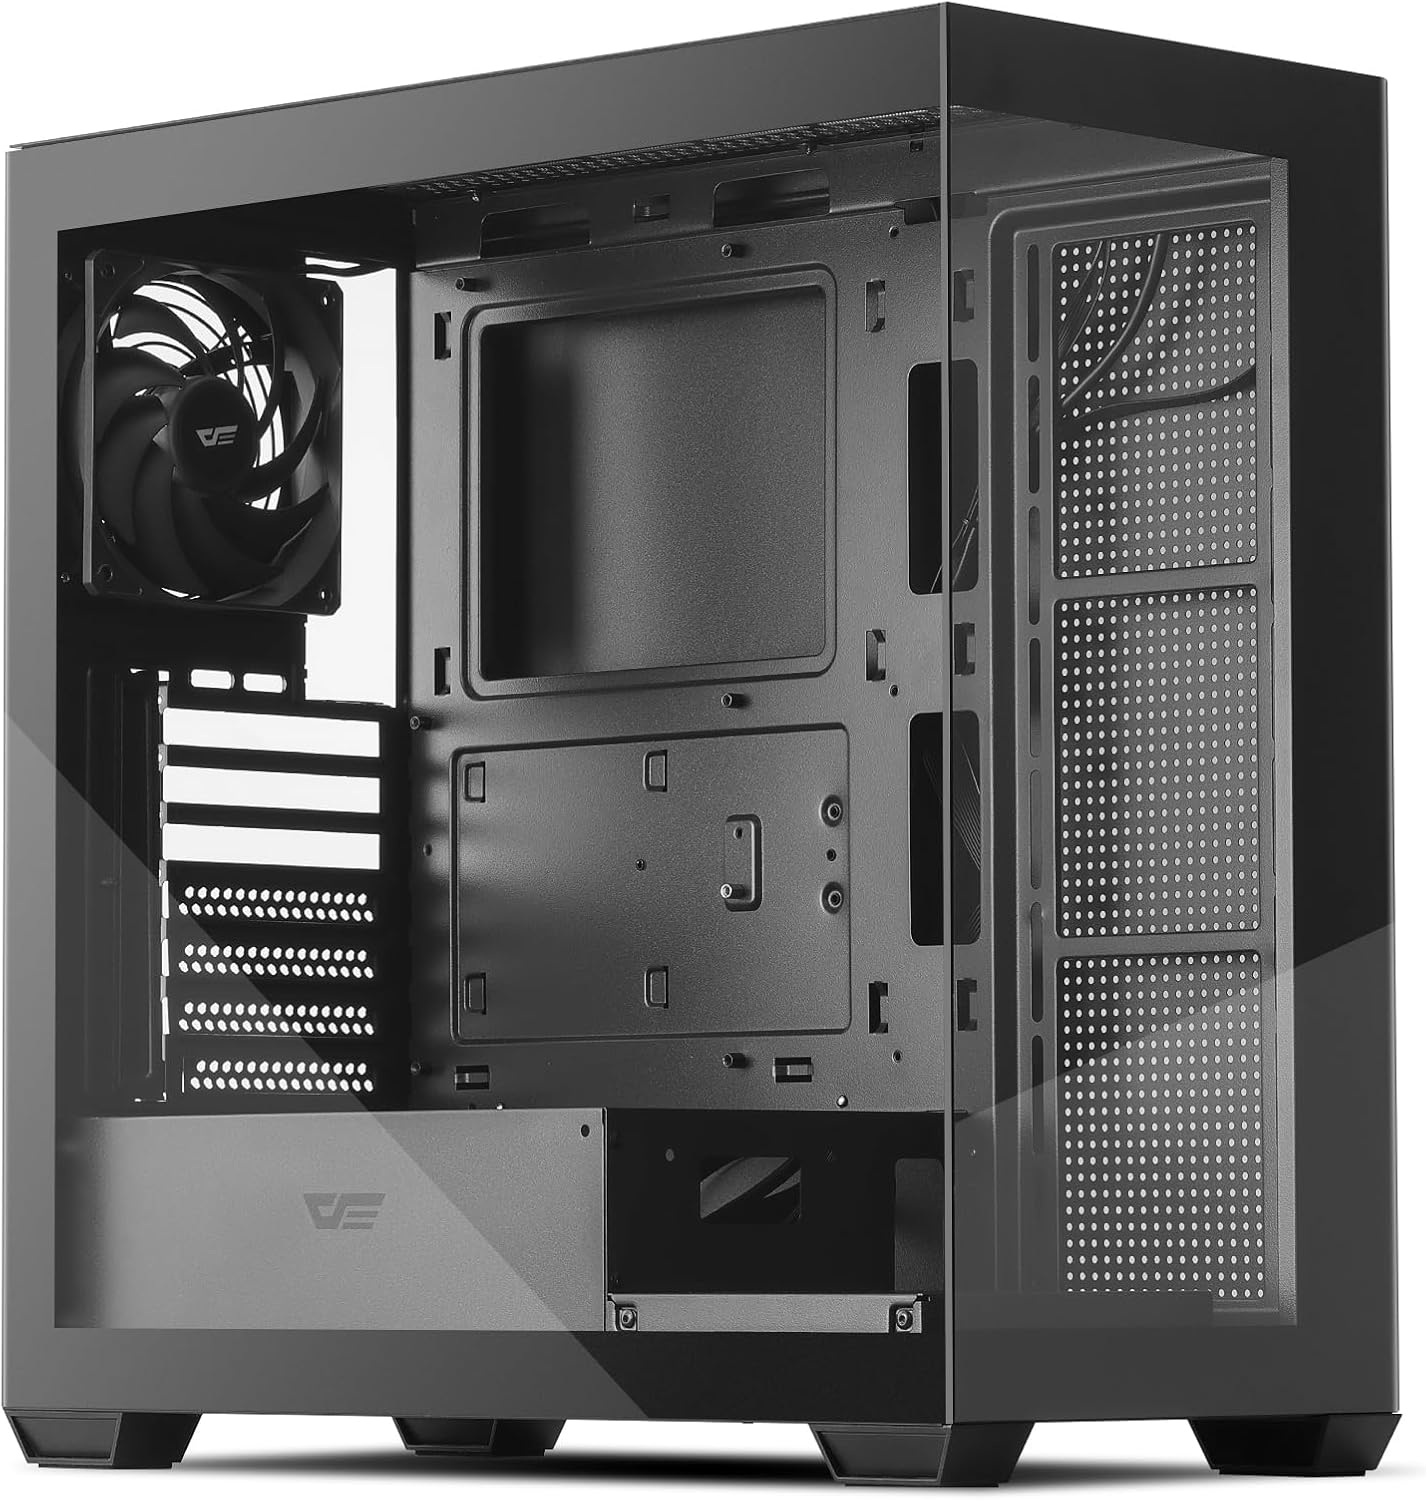
Figure 1: darkFlash DS900 ATX Mid-Tower PC Case
2. Key Features
- Panoramic Dual Tempered Glass: Offers a 270° unobstructed view of your PC hardware and lighting.
- High-Speed I/O Panel: Equipped with USB 3.0, USB 2.0, and Type-C ports for versatile connectivity.
- Advanced Cooling Support: Supports up to 10 fans and a 360mm water cooling radiator for efficient heat dissipation. Includes one pre-installed non-LED PWM fan.
- Optimized Airflow: Designed with multiple airflow channels to maintain optimal component temperatures.
- Magnetic Dust Filters: Features magnetic dust filters on the top and bottom for easy cleaning and component protection.
- User-Friendly Design: Facilitates easy installation and cable management with tool-free access to panels.
- Motherboard Compatibility: Supports ATX, M-ATX, and ITX motherboard form factors.
3. Specifications
| Feature | Specification |
|---|---|
| Case Type | Mid Tower |
| Motherboard Compatibility | ATX, M-ATX, ITX |
| Material | Metal, Tempered Glass |
| Dimensions (LxWxH) | 8.6 x 17.8 x 17 inches (218 x 452 x 432 mm) |
| Item Weight | 14 pounds (6.35 kg) |
| Max GPU Length | 425mm |
| Max CPU Cooler Height | 170mm |
| Radiator Support | Up to 360mm |
| Fan Support | Up to 10 fans (1x 120mm PWM fan pre-installed) |
| Drive Bays | 2x 3.5" HDD, 2x 2.5" SSD |
| Expansion Slots | 7 |
| Front I/O Ports | 1x USB 3.0, 1x USB 2.0, 1x Type-C, HD Audio, Mic, Power, Reset, LED Control |
4. Setup and Installation
4.1 Unpacking
Carefully remove the PC case from its packaging. Inspect for any damage during transit. Keep all packaging materials for future transport or warranty claims.
4.2 Panel Removal
The darkFlash DS900 features tool-free disassembly on three sides for easy access to components. The tempered glass side panel and the metal side panel are secured with thumb screws at the rear. The top panel can also be removed for fan or radiator installation.

Figure 2: Panel Removal and Upgraded Design
4.3 Motherboard Installation
- Ensure the correct standoffs are installed for your motherboard form factor (ATX, M-ATX, ITX).
- Align your motherboard with the standoffs and gently place it into position.
- Secure the motherboard with the provided screws.
4.4 Drive Installation
The case supports 2x 3.5" HDDs and 2x 2.5" SSDs. Refer to the included manual for specific mounting locations and procedures for each drive type.
4.5 Cooling System Installation
The DS900 supports extensive cooling configurations, including up to a 360mm radiator and up to 10 fans. One 120mm non-LED PWM fan is pre-installed at the rear.

Figure 3: Cooling Support Layout
Radiators can be mounted at the top or side. Fans can be installed at the front, top, rear, and bottom. Ensure proper airflow direction for optimal cooling performance.

Figure 4: High-Airflow Performance
4.6 Cable Management
The case is designed with ample space behind the motherboard tray and cable routing cutouts to facilitate clean cable management. Utilize the included zip ties to secure cables and maintain an organized interior.
4.7 Front I/O Connections
Connect the front I/O panel cables to the corresponding headers on your motherboard. The I/O panel includes:
- Power Button
- Reset Button
- LED Control Button
- USB 3.0 Port
- USB 2.0 Port
- Type-C Port
- HD Audio Jack
- Microphone Jack
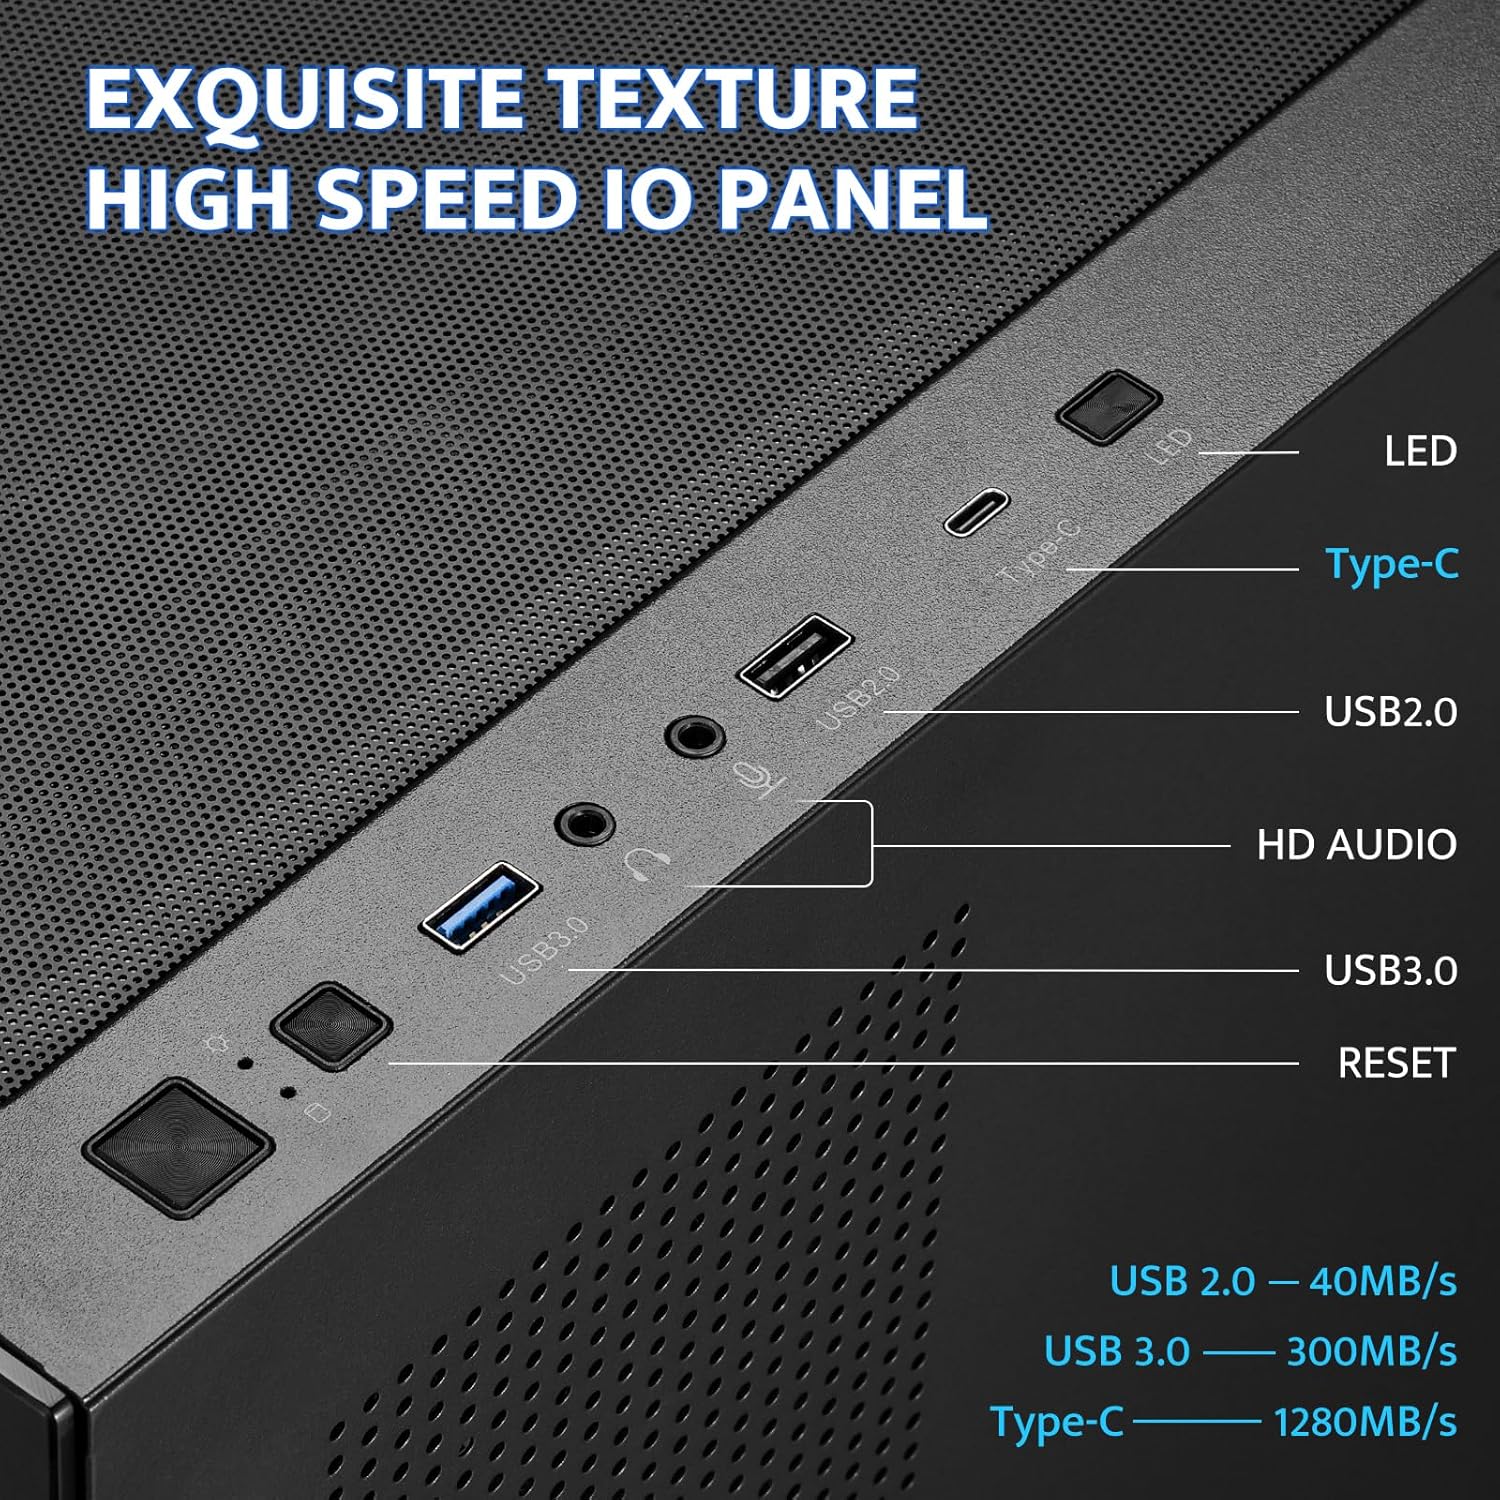
Figure 5: Front I/O Panel
5. Operating Instructions
Once all components are installed and connected, ensure all panels are securely reattached. Connect your power supply to a wall outlet and turn on the PC using the power button on the front I/O panel. Use the LED control button to cycle through any available lighting modes for compatible fans or accessories.
6. Maintenance
Regular maintenance helps ensure optimal performance and longevity of your PC components. The darkFlash DS900 features magnetic dust filters for easy cleaning.
6.1 Cleaning Dust Filters
- Gently pull the magnetic dust filters located on the top and bottom of the case to remove them.
- Clean the filters using compressed air, a soft brush, or by rinsing with water (ensure they are completely dry before reattaching).
- Reattach the magnetic filters to their respective positions.

Figure 6: Magnetic Dust Filter
6.2 Cleaning Tempered Glass Panels
Use a microfiber cloth and a non-abrasive glass cleaner to clean the tempered glass panels. Avoid harsh chemicals that may damage the glass or coatings.
7. Troubleshooting
If you encounter issues with your PC build, consider the following general troubleshooting steps:
- No Power: Double-check all power connections from the power supply to the motherboard, CPU, and graphics card. Ensure the power button cable is correctly connected to the motherboard header.
- Fans Not Spinning/Lights Off: Verify fan and LED connections to the motherboard or fan controller. Check motherboard BIOS settings for fan control.
- Display Issues: Ensure your graphics card is properly seated in its PCIe slot and all power cables are connected. Verify monitor cables are securely attached to the graphics card.
- Overheating: Confirm all fans are spinning in the correct direction for optimal airflow. Ensure CPU cooler and GPU fans are functioning. Check for proper thermal paste application on the CPU.
- Loose Connections: Re-seat all components (RAM, GPU, storage drives) and re-check all cable connections.
For specific component-related issues, refer to the instruction manuals provided with those components.
8. Warranty and Support
For warranty information and technical support, please refer to the official darkFlash website or contact their customer service. Keep your proof of purchase for any warranty claims.


