1. Introduction
Thank you for choosing the SEAOURA LED Aquarium Light. This product is designed to provide optimal lighting conditions for your freshwater aquarium, promoting healthy plant growth and enhancing the vibrant colors of your aquatic life. Featuring a 24/7 custom timer, power-off memory, full spectrum LEDs, and an adjustable mount, this light offers advanced control and convenience for your aquatic environment.

Image 1.1: The SEAOURA LED Aquarium Light with its integrated controller, illuminating a vibrant freshwater tank.
2. Important Safety Information
Please read all safety instructions carefully before use to prevent injury or damage.
- Always disconnect the power supply before performing any maintenance or cleaning on the light or aquarium.
- This product is designed for indoor use only. Do not expose the power adapter or controller to water.
- The light body is IP68 waterproof, meaning it can be submerged, but the controller and power adapter are not. Ensure they remain dry.
- Do not operate the light if any part is damaged, especially the power cord or plug.
- Keep out of reach of children.
- Ensure proper ventilation around the light to prevent overheating.
3. Package Contents
Verify that all components are present in the package:
- SEAOURA LED Aquarium Light Fixture
- Integrated Controller with Digital Display
- Adjustable Mounting Brackets (2 pcs)
- Power Adapter
- CR1220 Battery (pre-installed in controller for memory function)
4. Product Specifications
| Feature | Specification |
|---|---|
| Model Number | SR-657 |
| Power | 14W |
| LED Quantity | 84 Pcs (56 White, 4 Red, 4 Green, 8 Blue, 12 RGB) |
| Color Temperature | White 12600K |
| Lumen | 893 |
| Lux | 4882 |
| PAR | 81 |
| CRI | 92 |
| Input Voltage | AC 100-240V |
| Product Dimensions | 26.42 x 9.91 x 0.76 cm |
| Item Weight | 0.5 Kilograms |
| Cable Length | 7.2 ft |
| Waterproof Rating | IP68 (Light Body Only) |
| Applicable Tank Size | 12'' to 18'' (30-45CM) |

Image 4.1: Breakdown of LED types, color options, and brightness levels.

Image 4.2: Illustration of the light's ultra-slim profile and high light transmittance.
5. Setup Instructions
- Attach Mounting Brackets: Slide the adjustable mounting brackets onto each end of the LED light fixture. Ensure they are securely fitted.
- Position on Aquarium: Place the light fixture on top of your aquarium, adjusting the brackets to fit the tank's width (12'' to 18''). The taller stand design ensures even light distribution.
- Connect Controller: Ensure the controller cable is securely plugged into the light fixture.
- Connect Power: Plug the power adapter into a suitable electrical outlet. The light will power on and the digital display on the controller will activate.

Image 5.1: Adjustable mount dimensions and application on an aquarium.
6. Operating Instructions
6.1 Controller Overview
The controller features a digital display and several buttons for setting modes, colors, and brightness:
- SET Button: Enters/exits setting mode, confirms selections.
- L1-L5 Buttons: Selects different lighting stages or modes.
- Color Button (Rainbow Icon): Cycles through color options.
- 24/7 Button: Activates the 24/7 natural mode.
- Up/Down Arrows: Adjusts time, brightness, or other parameters.
6.2 Setting Local Time
It is crucial to set the correct local time for the timer functions to operate accurately. The built-in CR1220 battery ensures the time is kept even during power outages.

Image 6.1: The CR1220 battery ensures time memory function even when power is disconnected.
- Press the SET button until the hour digits on the display flash.
- Use the Up/Down Arrows to adjust the hour.
- Press SET again to move to the minute digits and adjust using the Up/Down Arrows.
- Press SET one more time to confirm and exit time setting.
6.3 Lighting Modes
The light offers three primary operating modes:
6.3.1 24/7 Natural Mode
This mode simulates a natural daily light cycle, including sunrise, daylight, sunset, and moonlight, with a 15-minute brightness gradient between stages to avoid startling fish.
- Press the 24/7 button to activate this mode.
- The light will automatically follow the programmed 24/7 cycle based on the local time you set.

Image 6.2: Illustration of 24/7 Natural Mode and Custom Timer Modes.
6.3.2 Day Mode (Custom Timer)
Allows you to set a custom start and end time for a full spectrum daylight period with adjustable brightness.
- Press the L1 button.
- Press SET to enter setting mode for Day mode.
- Adjust the start hour and minute using Up/Down Arrows and SET.
- Adjust the end hour and minute using Up/Down Arrows and SET.
- Adjust brightness (20 levels) using Up/Down Arrows.
- Press SET to confirm and exit.
6.3.3 Night Mode (Custom Timer)
Allows you to set a custom start and end time for a night light period with adjustable color and brightness.
- Press the L4 button.
- Press SET to enter setting mode for Night mode.
- Adjust the start hour and minute using Up/Down Arrows and SET.
- Adjust the end hour and minute using Up/Down Arrows and SET.
- Adjust color (9 options) using the Color Button.
- Adjust brightness (20 levels) using Up/Down Arrows.
- Press SET to confirm and exit.
6.4 Color and Brightness Adjustment
The light offers 9 color options and 20 levels of dimmable brightness. These can be adjusted in Day and Night modes, and the 24/7 mode has pre-set gradients.

Image 6.3: Features like high PAR full spectrum, local time scheduling, and smart gradual changes.
7. Maintenance
Regular maintenance ensures the longevity and optimal performance of your aquarium light.
- Cleaning the Light Body: The light body is IP68 waterproof and can be easily wiped clean. Disconnect power before cleaning. Use a soft, damp cloth to gently wipe the surface. Do not use abrasive cleaners or solvents.
- Controller and Power Adapter: Keep the controller and power adapter dry at all times. Wipe with a dry cloth if necessary.
- Check Connections: Periodically check all cable connections to ensure they are secure and free from damage.
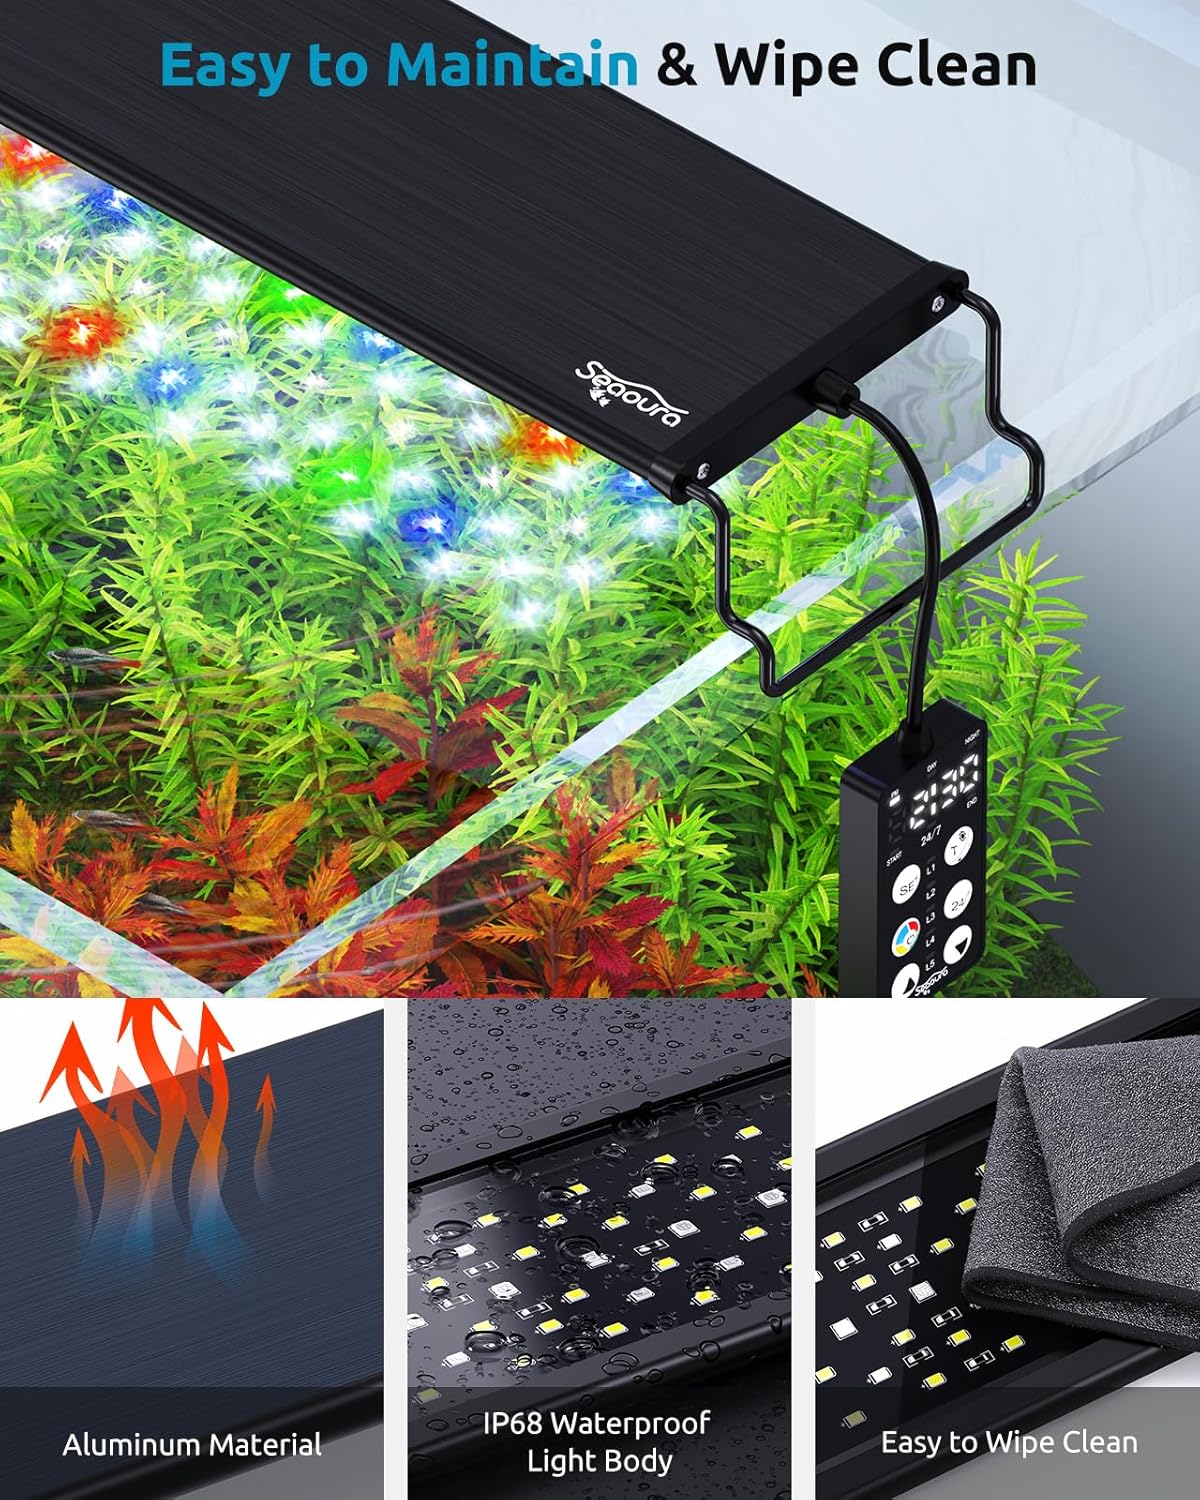
Image 7.1: The light's IP68 waterproof body and aluminum material facilitate easy maintenance.
8. Troubleshooting
If you encounter issues with your SEAOURA LED Aquarium Light, refer to the following common problems and solutions:
| Problem | Possible Cause | Solution |
|---|---|---|
| Light does not turn on. | No power, loose connection, faulty adapter. | Check if the power adapter is securely plugged into the outlet and the light. Try a different outlet. Ensure the controller cable is firmly connected. |
| Timer function is inaccurate. | Incorrect local time setting, low CR1220 battery. | Re-set the local time on the controller (refer to Section 6.2). The CR1220 battery is included and pre-installed for memory function; if issues persist after prolonged use, consider replacing it. |
| Light flickers or dims unexpectedly. | Unstable power supply, loose connection, internal fault. | Ensure the power connection is stable. Check for any visible damage to the cables. If the issue persists, contact customer support. |
| Excessive algae growth. | Light intensity too high or duration too long for tank conditions. | Reduce the brightness level or shorten the lighting duration. Adjust the timer settings in Day or Night mode as needed. |
9. Warranty Information
SEAOURA products are manufactured to high-quality standards. Specific warranty terms and conditions may vary by region and retailer. Please refer to the warranty card included with your purchase or visit the official SEAOURA website for detailed warranty information.
10. Customer Support
For any questions, technical assistance, or support regarding your SEAOURA LED Aquarium Light, please contact SEAOURA customer service through the retailer where you purchased the product or visit the official SEAOURA brand store online.
Visit the SEAOURA Store: SEAOURA Official Store


