TAMIYA 24045

TAMIYA 24045 1/24 Honda Ballad Sports Infinite CR-X PRO Plastic Model Instruction Manual

Sports Car Series No.45

Introduction

Thank you for purchasing the TAMIYA 1/24 Sports Car Series No.45 Honda Ballad Sports Infinite CR-X PRO plastic model kit. This kit allows you to build a detailed replica of the iconic Honda CR-X, known for its tuning potential. This manual provides essential information and step-by-step instructions for the assembly, painting, and finishing of your model. Please read all instructions carefully before beginning assembly.

TAMIYA 24045 Honda Ballad Sports Infinite CR-X PRO Plastic Model Kit Box Art

Image: The product box art for the TAMIYA 24045 1/24 Honda Ballad Sports Infinite CR-X PRO plastic model kit, showing the completed model car.

Safety Information

This product is a plastic model kit and not a toy. It contains small parts and requires the use of sharp tools, adhesives, and paints. Adult supervision is recommended for younger builders.

  • Ventilation: Always work in a well-ventilated area when using adhesives and paints.
  • Sharp Tools: Exercise caution when using hobby knives, nippers, and other sharp tools. Keep them out of reach of children.
  • Adhesives and Paints: Follow the manufacturer's safety instructions for all adhesives and paints. Avoid contact with skin and eyes. Do not ingest.
  • Small Parts: This kit contains small parts that can be a choking hazard. Keep them away from small children.
  • Disposal: Dispose of waste materials, paint, and adhesive residues according to local regulations.

Package Contents

Before starting, verify that all parts are present and undamaged. The kit typically includes:

  • Plastic sprues with vehicle components
  • Rubber tires
  • Clear parts for windows and lights
  • Metal axles (if applicable)
  • Decal sheet (slide marks)
  • Instruction manual (this document)

Note: Adhesives, tools, and paints are not included and must be purchased separately.

Tools and Materials Required

To successfully assemble and finish your model, you will need the following:

  • Plastic Cement: For bonding plastic parts.
  • Hobby Nippers/Side Cutters: For cleanly removing parts from sprues.
  • Hobby Knife: For trimming excess plastic and fine detailing.
  • Sandpaper/Sanding Sticks: Various grits for smoothing parts.
  • Paints: Acrylic or enamel paints suitable for plastic models (refer to color guide in the kit).
  • Paint Brushes: Various sizes for detailed painting.
  • Masking Tape: For precise painting.
  • Tweezers: For handling small parts and decals.
  • Water and Soft Cloth: For decal application.
  • Clear Coat (Optional): For protecting paint and decals.

Assembly Instructions

Follow the numerical steps provided in the kit's diagrammatic instructions. The following outlines general procedures.

1. Chassis and Undercarriage

  1. Carefully remove all chassis components from their sprues using nippers.
  2. Assemble the main chassis frame.
  3. Attach the exhaust pipe and other foot area components to the underside of the chassis. These are reproduced as separate parts for enhanced detail.
  4. Assemble and attach the suspension components and axles.
Underside view of the assembled TAMIYA CR-X PRO model chassis

Image: An inverted view of the assembled model, showcasing the detailed chassis, exhaust system, and suspension components.

2. Interior

  1. Assemble the seats, dashboard, and door panels. The interior features a three-dimensional feel.
  2. Choose and attach one of the two types of steering wheels provided in the kit.
  3. Paint interior components according to the color guide before assembly for best results.
  4. Apply the signature seat fabric slide marks to the seats as instructed.
Detailed interior view of the TAMIYA CR-X PRO model

Image: A close-up view of the model's interior, highlighting the detailed seats with fabric patterns and the dashboard.

3. Body and Exterior

  1. Assemble the main body shell. Ensure all seams are clean and smooth.
  2. Attach clear parts for windows and headlights. Use clear cement for these parts to avoid fogging.
  3. Assemble and attach exterior details such as mirrors, bumpers, and spoilers. The model features an impressive figure resembling a silhouette formula.
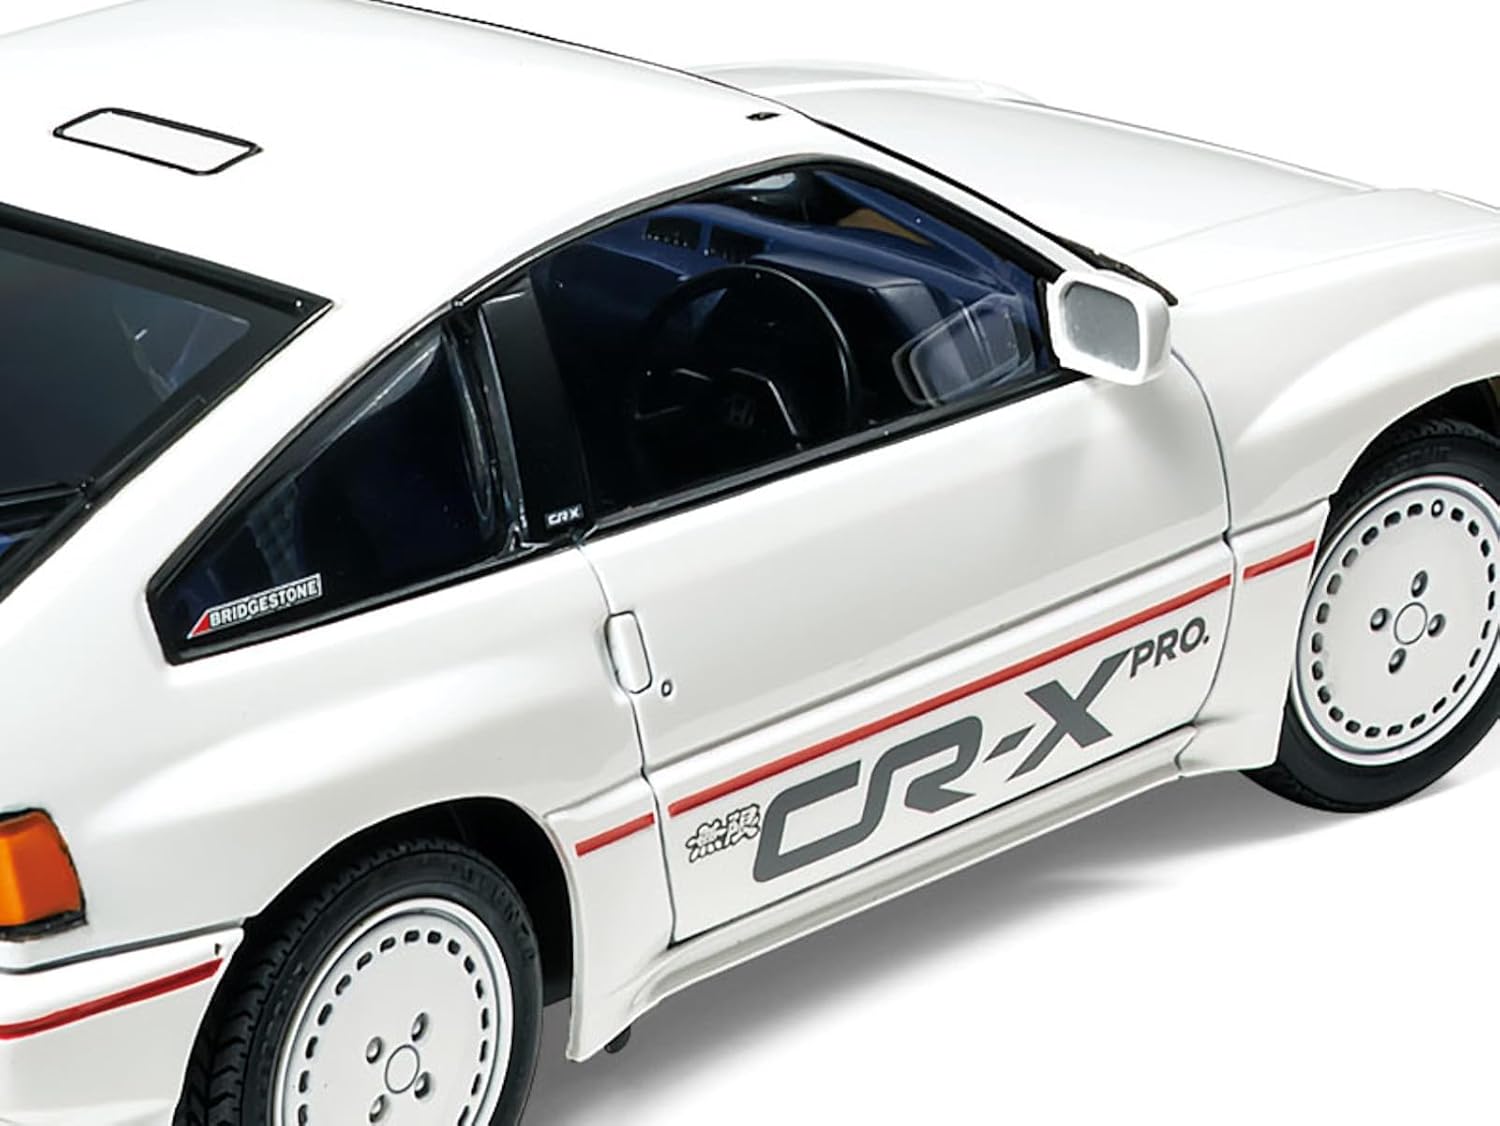
Side view of the assembled TAMIYA CR-X PRO model

Image: A side view of the completed model, showing the body lines, wheels, and exterior details.

4. Wheels and Tires

  1. Mount the rubber tires onto the plastic wheel rims.
  2. Attach the assembled wheels to the axles on the chassis.
Rear view of the assembled TAMIYA CR-X PRO model

Image: A rear three-quarter view of the completed model, highlighting the rear wheels, taillights, and 'CR-X PRO' badging.

Painting Guidelines

Painting is an essential step to achieve a realistic finish for your model. Refer to the color guide provided in your kit for specific paint recommendations.

  • Preparation: Clean all parts thoroughly to remove mold release agents and dust. A light sanding can improve paint adhesion.
  • Priming: Apply a thin coat of primer before painting to ensure even color and better adhesion.
  • Thin Coats: Apply multiple thin coats of paint rather than one thick coat to avoid obscuring details and to prevent paint runs.
  • Drying Time: Allow adequate drying time between coats and before handling painted parts.
  • Masking: Use masking tape to protect areas you do not wish to paint, especially for window frames and two-tone schemes.

Decal Application (Slide Marks)

The kit includes a sheet of slide marks for vehicle stripes, window frames, and signature seat fabric. These decals add fine details to your model.

  1. Preparation: Ensure the surface where the decal will be applied is clean, smooth, and has a glossy finish (a clear gloss coat can be applied if painting with matte colors).
  2. Cutting: Carefully cut out each decal as close to the edge of the design as possible.
  3. Soaking: Dip the decal in lukewarm water for about 10-20 seconds until it can slide freely on its backing paper.
  4. Placement: Gently slide the decal from the backing paper onto the desired position on the model. Use tweezers for precise placement.
  5. Positioning: Use a wet brush or cotton swab to carefully adjust the decal's position.
  6. Removing Water/Air: Gently press down on the decal with a soft cloth or cotton swab to remove excess water and air bubbles. Work from the center outwards.
  7. Drying: Allow the decal to dry completely. Avoid touching it until fully dry.
  8. Setting Solution (Optional): For irregular surfaces, a decal setting solution can help the decal conform better.
  9. Sealing (Optional): Once dry, a clear coat can be applied over the decals to protect them and blend them into the model's surface.
TAMIYA CR-X PRO model decal sheet

Image: The decal sheet included with the kit, showing various stripes, logos, and seat fabric patterns for application.

Maintenance

Once assembled, your plastic model requires minimal maintenance to preserve its appearance.

  • Cleaning: Dust your model regularly with a soft, dry brush or a microfiber cloth. Avoid using harsh chemicals or abrasive materials.
  • Display: Display your model in a cool, dry place away from direct sunlight, which can cause paint fading and plastic degradation.
  • Handling: Handle the model by its base or sturdy parts to avoid damaging delicate components.

Troubleshooting

Here are solutions to common issues encountered during model assembly:

  • Parts Not Fitting: Ensure you have the correct parts for the step. Check for excess plastic (flash) on the parts and trim it with a hobby knife. Lightly sand mating surfaces if necessary.
  • Decals Not Adhering: Ensure the surface is glossy and clean. Use decal setting solution for better adhesion on curved or textured surfaces.
  • Paint Issues: If paint is uneven or clumpy, it may be too thick or applied in too few coats. Strip the paint (using appropriate thinner) and reapply in thin, even layers.
  • Broken Parts: Small broken plastic parts can often be re-attached using plastic cement. For structural breaks, consider reinforcing with a small piece of plasticard or metal rod.

Specifications

BrandTAMIYA
Model Number24045
Scale1/24
Product TypePlastic Model Kit
MaterialPlastic
Assembled LengthApprox. 6.1 inches (154 mm)
FeaturesDetailed Slide Marks, Silhouette Formula Figure, Highly Detailed Interior, Two types of steering wheels

Warranty and Support

TAMIYA products are manufactured to high-quality standards. If you encounter any issues with missing or defective parts, please contact the retailer where you purchased the kit or TAMIYA customer support directly. Please retain your proof of purchase.

For further assistance or inquiries, please visit the official TAMIYA website or contact their customer service department.

© 2024 TAMIYA. All rights reserved.

Ask a question about this manual

Ask about setup, troubleshooting, compatibility, parts, safety, or missing instructions. Manuals+ will review the question and use this page’s manual context to help answer it.

After a successful submission, we securely hash the supplied account or form email before sending it to Microsoft Advertising for conversion attribution. Privacy details.