Introduction
Thank you for choosing the Qaba Ride on Bubble Car. This 6V electric motorcycle is designed to provide a fun and engaging experience for toddlers, featuring a stable three-wheel design, LED headlight, and interactive bubble and music functions. This manual provides essential information for assembly, operation, maintenance, and troubleshooting to ensure safe and enjoyable use of the product.

Image: The Qaba Ride on Bubble Car in red, featuring its distinctive design and bubbles emanating from the rear, highlighting its unique feature.
Safety Information
No Warning Applicable.
Always ensure the child is supervised during operation. Do not use near stairs, swimming pools, or on public roads. Ensure the child wears appropriate safety gear, such as a helmet, when riding. Regularly inspect the product for any damage or loose parts before each use.
Package Contents
Please verify that all components are present before beginning assembly:
- Main Motorcycle Body
- Headlight Assembly
- Wheels (Front and Rear)
- Mudguard
- Charger (not explicitly listed in whats_in_the_box, but implied for electric vehicle)
- Instruction Manual (this document)
- Assembly Hardware (screws, nuts, etc.)

Image: A package box indicating that the product comes in one package, ensuring all components are contained within.
Setup and Assembly
Assembly is required for this product. While straightforward, some users may find it challenging. It is recommended to have a clear workspace and follow the steps carefully.
- Unpack Components: Carefully remove all parts from the packaging and lay them out. Check against the package contents list.
- Install Wheels: Attach the front and rear wheels securely according to the diagrams provided in the separate assembly guide (if applicable). Ensure all fasteners are tightened.
- Attach Headlight and Mudguard: Secure the headlight assembly and front mudguard to the main body.
- Connect Battery: Locate the battery compartment, typically under the seat. Connect the battery terminals as indicated. Ensure a secure connection.
- Initial Charge: Before first use, fully charge the battery for the recommended duration (typically 8-12 hours). Refer to the charging instructions.
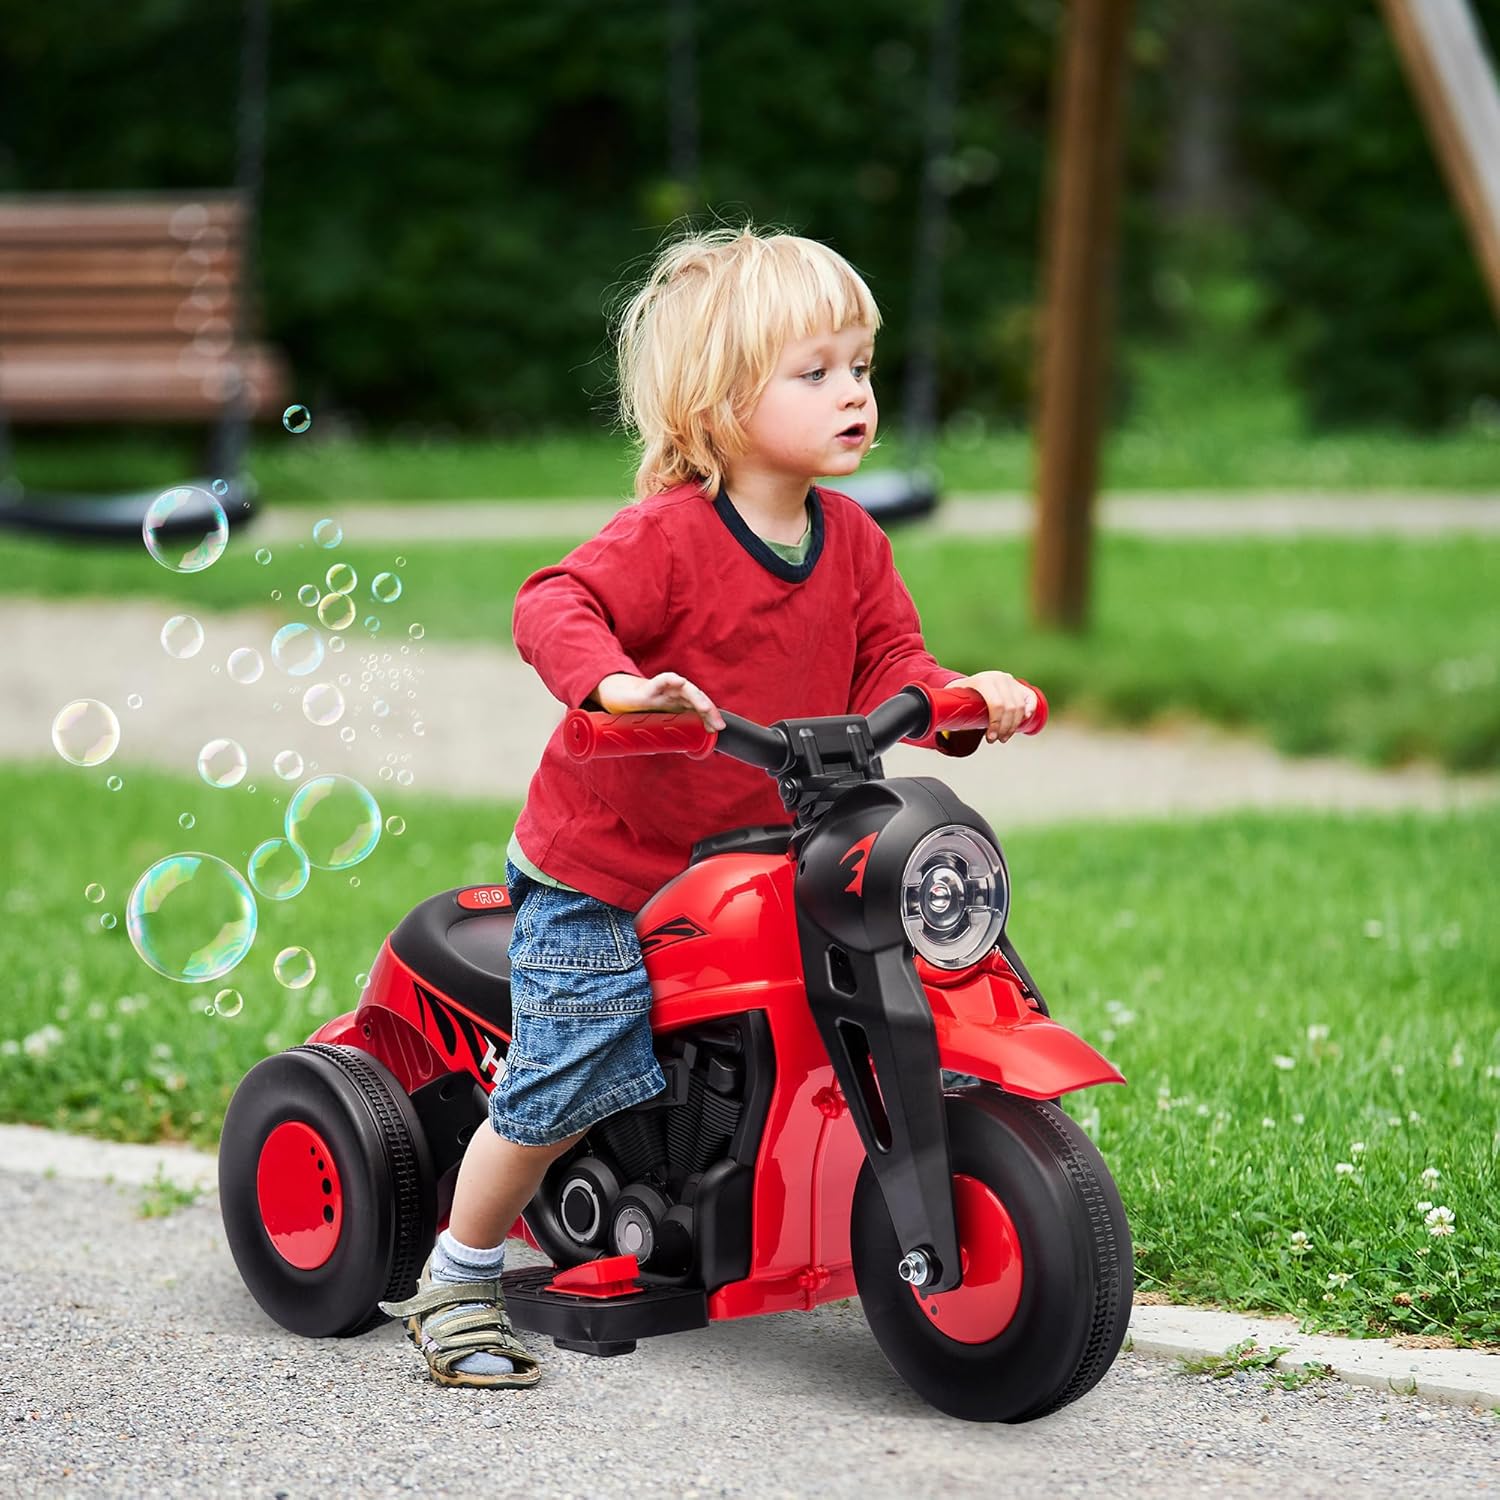
Image: A child enjoying the Qaba Ride on Bubble Car outdoors, demonstrating the product in use after assembly.
Operating Instructions
Familiarize yourself with the controls before allowing a child to operate the vehicle.
- Power On/Off: Locate the main power switch, usually near the dashboard or seat. Turn it to the 'ON' position to activate the vehicle.
- Forward/Reverse: The motorcycle features a switch for forward and reverse motion. This switch is typically located on the "fuel tank" area. Push it forward for forward motion and backward for reverse. Ensure the vehicle is stopped before changing direction.
- Foot Pedal Accelerator: To move the motorcycle, the child must press down on the foot pedal located on the right footrest. Releasing the pedal will bring the vehicle to a stop.
- LED Headlight: The headlight automatically illuminates when the vehicle is powered on, providing visibility and enhancing the realistic riding experience.
- Music Function: Press the designated music button (if present) to play pre-loaded tunes.
- Bubble Function: To activate the bubble feature, ensure the bubble solution reservoir is filled. The bubble machine is located at the rear of the motorcycle. Press the bubble button (if separate) or it may activate automatically with music.

Image: A child enjoying the interactive features of the motorcycle, including the bubble machine and music function.

Image: A detailed view of the motorcycle's unique features, including the bubble mechanism, control buttons, and foot pedal.

Image: A close-up of the textured foot pedal, which serves as the accelerator for the ride-on toy.
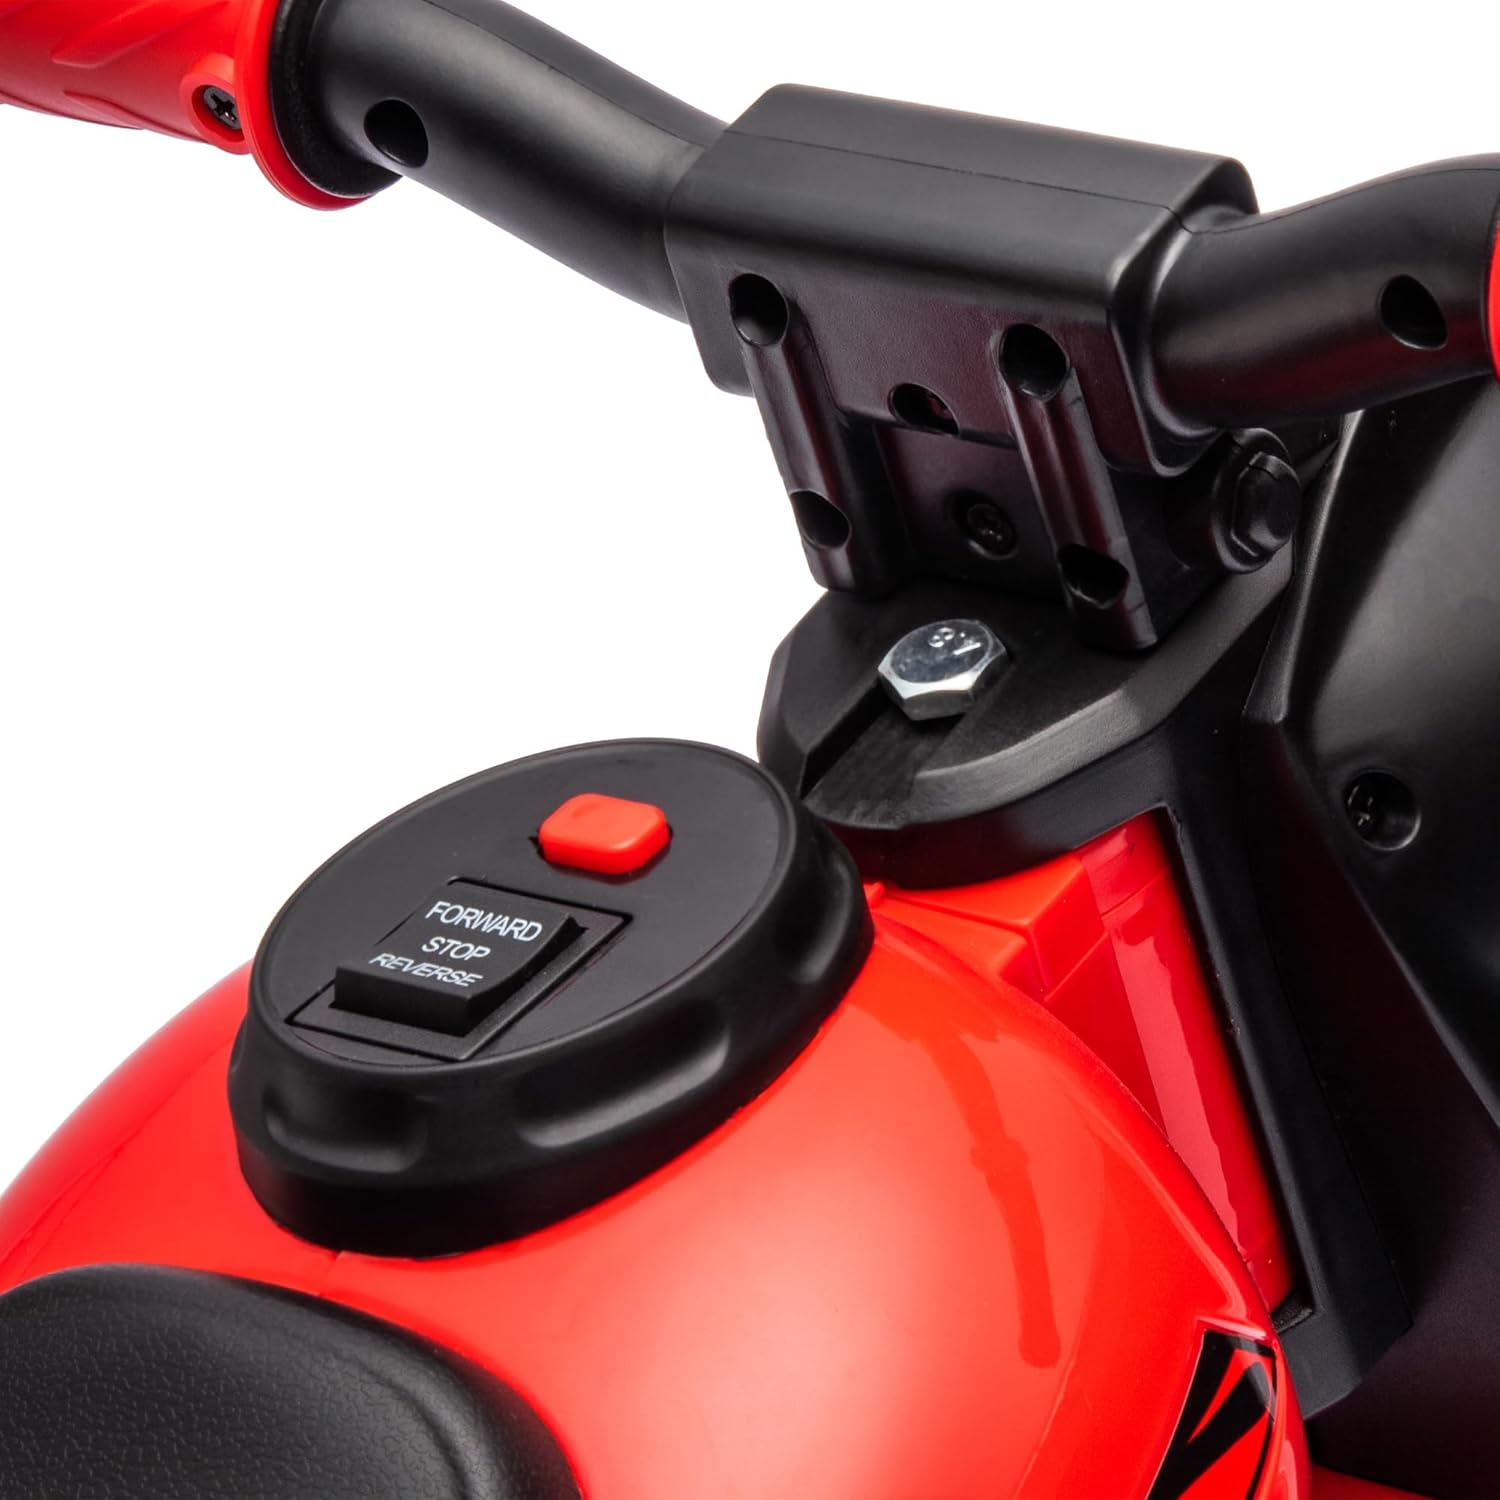
Image: A close-up of the control panel showing the switch for selecting forward, stop, or reverse motion.
Maintenance
- Battery Care:
- Charge the battery fully after each use.
- Do not overcharge the battery (unplug once fully charged).
- If storing for extended periods, charge the battery every 30 days to maintain its life.
- Only use the charger provided with the product.
- Cleaning: Wipe the vehicle with a damp cloth. Do not use harsh chemicals or abrasive cleaners. Avoid spraying water directly onto electrical components.
- Storage: Store the vehicle in a dry, cool place away from direct sunlight and moisture.
- Inspection: Periodically check all screws, nuts, and connections to ensure they are tight and secure. Inspect wheels and tires for wear.
Troubleshooting
| Problem | Possible Cause | Solution |
|---|---|---|
| Vehicle does not move or has low power. | Battery is low or dead; battery connection is loose; charger is defective. | Charge the battery fully. Check battery connections. Test charger with another device if possible, or contact support for a replacement. |
| Bubbles are not being produced. | Bubble solution reservoir is empty; bubble mechanism is clogged; bubble button not pressed. | Refill the bubble solution. Clean the bubble nozzle. Ensure the bubble function is activated. |
| Music is too loud or not playing. | Volume setting; music function not activated; speaker issue. | Check for volume controls. Ensure music function is activated. If problem persists, contact support. |
| Difficulty with assembly. | Instructions unclear; missing parts; specific component alignment. | Review the assembly guide carefully. Contact customer support for detailed assistance or to request missing parts. |
Specifications
- Overall Dimensions: 31.5" L x 14.2" W x 17.1" H
- Item Weight: 10.4 pounds
- Weight Capacity: 66 lbs
- Speed: 1.6-1.9 mph
- Battery: 6V (1 Nonstandard Battery included)
- Recommended Age: 18 months - 5 years
- Safety Certifications: ASTM F963, CPSIA
- Features: Bubble machine, music, LED headlight, forward & reverse, three-wheel design.

Image: Technical drawing illustrating the key dimensions of the ride-on motorcycle.

Image: Visual representation of the product's key specifications, including speed, weight capacity, suitable age range, and battery type.
Warranty and Support
For warranty information or technical support, please contact the manufacturer, Aosom LLC, or the seller, Aosom Direct. Keep your purchase receipt as proof of purchase for any warranty claims.
You can typically find contact information on the seller's page or the manufacturer's official website. For issues related to defective items or assembly challenges, direct communication with the seller is recommended.


